08-14-2016, 01:55 PM
|
#21 (permalink)
|
|
EcoModding Lurker
Join Date: Aug 2016
Location: Texas
Posts: 86
Thanks: 0
Thanked 225 Times in 56 Posts
|
Quote:
Originally Posted by gumby79

Went from~18.xx(290pmi) to 23.xxmpg(10,000mi) 60-65 with an average of 22.5. (1000usg 22,500mi) this 22.5 includes the 2900mi naked. Have had 5-6 100mi runs over Continental Divide @ 28. and 1 @28.95mpg @cruise set to 55mph. As compaired to 23.01 best naked. Plans are in motion to smoke test me and Aeroheads caps at DARCO in Ogden Ut sept9,16 I will be posting on that later. As well as a baby template. Im about 3000 mi behind on my fuellog right now.
Looks good so far . I will suggest a Kam back on tbe trailing edge .be tiped in 12.5° tord the center (down ontop 'in on both sides) of the last bow probably 6-8" in length . Make the edge a single smooth raidi ...sounds like you have some plains in this direction. With the rain over hang. .
To address the mishap on the cab just add a Corection pice with some Dalles or Woodruff keys.the 2nd bow may need some persuasion as well ,buyt might get lucky and only 1 . Or roll with it the small step will cost a small % reduction in mpg gain
. Gumby Stay Flexible
Dreem big chisel down to reality.
|
Damn! That is a lot. Was that just from the cap or were there other contributing factors as well?
I appreciate the the suggestions. Feature creep is a dangerous thing so I think I'll probably just stick with what I have planned. It won't be ideal, but I will get it done way faster this way. Then after I test this one and find all of the flaws, I can re-evaluate the design and make a new one implementing some of the ideas flowing in. I am really curious what data you get from your upcoming wind tunnel test.
|
|
|

|
 Today Today
|
|
|
|
 Other popular topics in this forum...
|
|
|
|
|
08-14-2016, 02:05 PM
|
#22 (permalink)
|
|
EcoModding Lurker
Join Date: Aug 2016
Location: Texas
Posts: 86
Thanks: 0
Thanked 225 Times in 56 Posts
|
Quote:
Originally Posted by freebeard
What is the difference in length along the curve on the first and last rib? How does that compare with the number of strips required?
Will you lay them from the sides up or center out?
|
The length at the front rib is 90" and the rear is 75". Each strip should span about 0.75", so I should need a minimum of 120 strips. 20 of those strips will be partials.
I am planning on going middle-out on the strip layout. If I have learned anything from the show "Silicon Valley" that is the most efficient way of doing things. I think it will be easier to construct this way as I will have better access to the final strips, which will be the hardest. Also, I designed in a groove on the bed rail pieces for the strips to fit into. This way, I won't have to be uber precise on my cuts to get a really clean seam. |
|
|
|
|
The Following 2 Users Say Thank You to Macskyver For This Useful Post:
|
|
|
08-14-2016, 07:18 PM
|
#23 (permalink)
|
|
MPGuino Supporter
Join Date: Oct 2010
Location: Hungary
Posts: 1,807
iNXS - '10 Opel Zafira 111 Anniversary Suzi - '02 Suzuki Swift GL
Thanks: 828
Thanked 708 Times in 456 Posts
|
Quote:
Originally Posted by Macskyver
Thanks. Are you thinking the spoiler would extend rearward behind the shell or sit on top of it? If it is to the rear, maybe I could make it into a cargo pod that mounts to the rear bumper or slides in the receiver hitch.
|
The spoiler should extend behind the aeroshell, kind of like what ccrider did for his Tacoma -> http://ecomodder.com/forum/showthrea...p-11271-6.html

Here's my current aerocap, as of a couple of years ago. I've been meaning to attach a spoiler on it, as well as make an articulated hinge for it.

|
|
|
|
|
The Following 2 Users Say Thank You to t vago For This Useful Post:
|
|
|
08-15-2016, 12:22 AM
|
#24 (permalink)
|
|
EcoModding Lurker
Join Date: Aug 2016
Location: Texas
Posts: 86
Thanks: 0
Thanked 225 Times in 56 Posts
|
Ok. I see what you are saying now. I think the eaves I have planned should do the trick. It should be similar to the picture of the red truck.
|
|
|
|
|
08-15-2016, 01:05 AM
|
#25 (permalink)
|
|
EcoModding Lurker
Join Date: Aug 2016
Location: Texas
Posts: 86
Thanks: 0
Thanked 225 Times in 56 Posts
|
Today I finished up prepping the cedar strips. The little router table I made worked beautifully. I added a couple aluminum tabs to guide the strips so the bead and coves were consistent.

After finishing up the strips, I picked the nicest ones and laid them out and played around with patterns between the light and dark.

Then I set down a layer of plastic in the bed of the truck and then the frame.

After some glueing and nailing, this is where I ended up.


 |
|
|
|
|
The Following 5 Users Say Thank You to Macskyver For This Useful Post:
|
|
|
08-15-2016, 08:35 AM
|
#26 (permalink)
|
|
Thalmaturge
Join Date: Mar 2011
Location: The edge of nowhere
Posts: 1,156
Thanks: 763
Thanked 637 Times in 424 Posts
|
Oh, that's going to be pretty!
I hope you're not going to paint over that when you're done, are you? Because a nice sanding/glassing/resin job would look beautiful.
 |
|
|
|
|
The Following User Says Thank You to samwichse For This Useful Post:
|
|
|
08-15-2016, 08:54 AM
|
#27 (permalink)
|
|
Master EcoModder
Join Date: Apr 2012
Location: Evensville, TN
Posts: 676
Thanks: 237
Thanked 580 Times in 322 Posts
|
Looking good!
As for the shell, you could probably add a flexible air dam on the front of your truck under the steel bumper and get some of your front end aerodynamics back. I put a conveyor belt air dam on the front end of my 2005 Tacoma, which I use offroad quite a bit, and haven't had an issue. If you hit something, it just pops right back into place. Here is a link to my build thread in case you hadn't seen it.
http://ecomodder.com/forum/showthrea...tml#post438755
Looking at your bumper, If you didn't want to commit to a air dam all the way across, you could do two smaller conveyor belt tire spats mounted to your steel bumper to push the air around your tires, which would also help diminish tire noise and front/rear lift at highway speeds. |
|
|
|
|
08-15-2016, 12:18 PM
|
#28 (permalink)
|
|
EcoModding Lurker
Join Date: Aug 2016
Location: Texas
Posts: 86
Thanks: 0
Thanked 225 Times in 56 Posts
|
Quote:
Originally Posted by samwichse
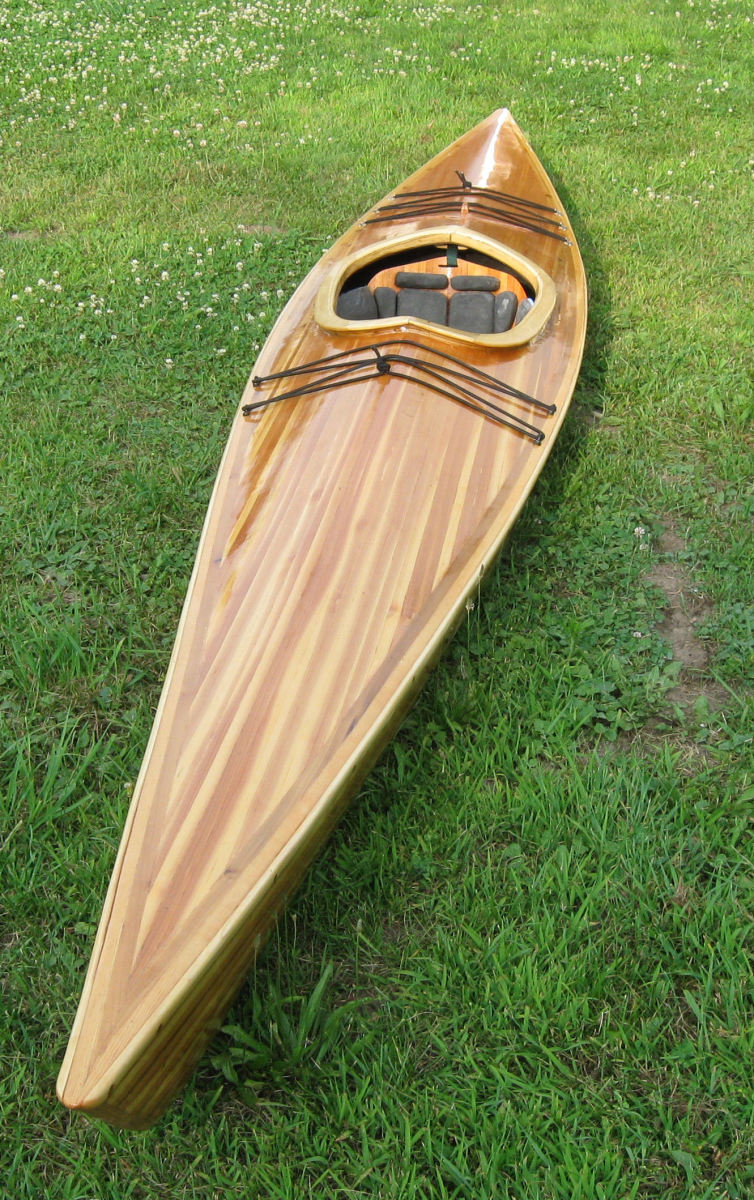
Oh, that's going to be pretty!
I hope you're not going to paint over that when you're done, are you? Because a nice sanding/glassing/resin job would look beautiful.
|
Thanks. Yeah, my plan is definitely to make it look like the typical cedar strip canoe/kayak. Of course, I have never done this or fiberglass before, so if I screw up too bad somewhere a long the line, I may have to paint it. I really hope it doesn't come to that though. |
|
|
|
|
The Following User Says Thank You to Macskyver For This Useful Post:
|
|
|
08-15-2016, 12:42 PM
|
#29 (permalink)
|
|
EcoModding Lurker
Join Date: Aug 2016
Location: Texas
Posts: 86
Thanks: 0
Thanked 225 Times in 56 Posts
|
Quote:
Originally Posted by aardvarcus
Looking good!
As for the shell, you could probably add a flexible air dam on the front of your truck under the steel bumper and get some of your front end aerodynamics back. I put a conveyor belt air dam on the front end of my 2005 Tacoma, which I use offroad quite a bit, and haven't had an issue. If you hit something, it just pops right back into place. Here is a link to my build thread in case you hadn't seen it.
http://ecomodder.com/forum/showthrea...tml#post438755
Looking at your bumper, If you didn't want to commit to a air dam all the way across, you could do two smaller conveyor belt tire spats mounted to your steel bumper to push the air around your tires, which would also help diminish tire noise and front/rear lift at highway speeds. |
Thanks. I like that idea of a flexible air dam, maybe easily removable as well since most off-roading occurs at speeds where aerodynamics is not a concern. Depending on how well the aeroshell works out and depending of if I get itch for more aeromods, I may just rebuild the front bumper with aero in mind.
I like your Tacoma. It looks like you provided lots of good information. I'll have to spend some time reading through your posts. |
|
|
|
|
08-16-2016, 02:23 AM
|
#30 (permalink)
|
|
EcoModding Lurker
Join Date: Aug 2016
Location: Texas
Posts: 86
Thanks: 0
Thanked 225 Times in 56 Posts
|
|
|
|
|
|
The Following 2 Users Say Thank You to Macskyver For This Useful Post:
|
|
|