04-18-2011, 06:21 PM
|
#1 (permalink)
|
|
Fhqwhgads
Join Date: Jul 2010
Location: STL Metro
Posts: 94
Thanks: 28
Thanked 7 Times in 5 Posts
|
Acquired Pontiac Vibe Roof caps. Now what?
Well, I've been watching Tango Charlie's Pontiac Vibe build thread for quite awhile. So far I've only gotten as far as a Red Green style grille block. But I was looking at the possibility of removing the roof racks and replacing them with caps, available in a Duraflex material. The pricetag and the warning of "professional installation required" initially spooked me. Little ROI from any aero gains.
But guess what? My brothers and Dad overheard me talking about it. Then, a box shows up at my door around my birthday. It's the roof caps. Sweet!
What's not sweet is the painting/install quotes...
So I guess I have a few questions:
Could/should I install these myself without painting them?
Has anyone worked with this material before?
Would it be worth the professional installation (bros and Dad would pitch in)?
If I tried it myself, I'd have to drill holes to fit the piece on the Vibe. I would also have to hope that the dry fit. Thanks!
__________________
When we try to pick out anything by itself, we find it hitched to everything else in the universe. John Muir
"Price is what the person pays. Cost is what society pays, here, now, elsewhere and into the future." Natural Capitalism
|
|
|

|
 Today Today
|
|
|
|
 Other popular topics in this forum...
|
|
|
|
|
04-19-2011, 08:45 AM
|
#2 (permalink)
|
|
EcoModding Lurker
Join Date: Nov 2010
Location: stl
Posts: 17
Thanks: 0
Thanked 1 Time in 1 Post
|
So they don't install in the same holes that attached the roof rack?
I would install them first to make sure they fit okay. Then remove them and have them painted.
I don't see why a diy'er couldn't do it.
|
|
|
|
|
04-19-2011, 01:58 PM
|
#3 (permalink)
|
|
Pokémoderator
Join Date: Dec 2007
Location: Southern California
Posts: 5,864
Thanks: 439
Thanked 530 Times in 356 Posts
|
TheMarkofPolo -
That's pretty neat that they make those. It's nice when you find (unintended) aero mods that can save you a DIY. The roof-rack is such an integrated design of the Vibe that removing them has been a PITA for others.
CarloSW2
|
|
|
|
|
04-19-2011, 11:14 PM
|
#4 (permalink)
|
|
Fhqwhgads
Join Date: Jul 2010
Location: STL Metro
Posts: 94
Thanks: 28
Thanked 7 Times in 5 Posts
|
Ah, I should clarify. The holes in the new roof caps are not pre-drilled. Once drilled through, they are supposed to work with the holes used for the roof rack.
I think this removal how-to makes me want to try to install it myself, but:
a) the Duraflex material would need to be dry-fitted-hopefully no mild warping
b) Body color would be sexier, but would the black primer on it suffice?
c) I don't have a drill or a dremel. Even if i got the racks off, I couldn't put the caps on.
d) no installation guide from the manufacturer. Just a generic "guide" to bumpers, hoods, etc.
Both quotes for removal/paint/install are high to me, though I've never had to do custom body work beyond collision repairs. If I go ahead and remove the roof rack, that might save on shop time and money. Would the gaping holes leak? I wonder.
__________________
When we try to pick out anything by itself, we find it hitched to everything else in the universe. John Muir
"Price is what the person pays. Cost is what society pays, here, now, elsewhere and into the future." Natural Capitalism
|
|
|
|
|
04-20-2011, 12:13 AM
|
#5 (permalink)
|
|
Deadly Efficient
Join Date: Jun 2008
Location: Goshen, Indiana
Posts: 1,234
Thanks: 134
Thanked 176 Times in 91 Posts
|
Never pass up a chance to buy yourself a tool. Go get yourself a drill and a drill bit index. A good one.
Don't be intimidated with drilling holes in the new caps. Start with a smaller hole to verify alignment before stepping up to the full size bit.
Here's what I would do; I would test fit the pieces to my satisfaction, then take them off and have the body shop paint them for me. Then I would install them. I wouldn't leave it in primer. That's not a very durable finish. I would at least hit it with some rattle-can paint, if I couldn't afford the body shop route.
The gaping holes won't leak. They're not sealed by the plastic caps as it is.
Do it yourself. You can do it. The satisfaction derived is well worth it. 
p.s. How can I get on your dad's birthday gift list?! I wanna pair, too! 
__________________
-Terry
|
|
|
|
|
05-06-2011, 08:25 PM
|
#6 (permalink)
|
|
Fhqwhgads
Join Date: Jul 2010
Location: STL Metro
Posts: 94
Thanks: 28
Thanked 7 Times in 5 Posts
|
OK, so I'm working on removing the roof rails myself. My Dad and bros still want me to take it to a body shop for a good paint job (most of the cost). Installation will not be much more. I think this counts as Birthday and Christmas present now!
Any more tips on removing the roof rails?
I've got the plastic covers and the torx screws removed. I can't seem to pull the rail away from the white plastic clips (see the how-to listed before). Can't seem to get leverage with the mallet either.
It might be helpful to see a close-up of the clips.
Well, I'll try this again tomorrow. No sense in spending a Saturday working on the thesis. If I can get the dang thing off I will try to post pics.
__________________
When we try to pick out anything by itself, we find it hitched to everything else in the universe. John Muir
"Price is what the person pays. Cost is what society pays, here, now, elsewhere and into the future." Natural Capitalism
|
|
|
|
|
05-06-2011, 10:56 PM
|
#7 (permalink)
|
|
Pokémoderator
Join Date: Dec 2007
Location: Southern California
Posts: 5,864
Thanks: 439
Thanked 530 Times in 356 Posts
|
TheMarkofPolo -
I know that others have had a hard time removing the Vibe roof racks. In addition to TC, search for threads started by trikkonceptz. He used to have a Vibe.
EDIT: That how-to is detail-fantastic.
CarloSW2
|
|
|
|
|
05-11-2011, 02:20 PM
|
#8 (permalink)
|
|
Fhqwhgads
Join Date: Jul 2010
Location: STL Metro
Posts: 94
Thanks: 28
Thanked 7 Times in 5 Posts
|
OK, had a more pleasant experience removing the caps this time.
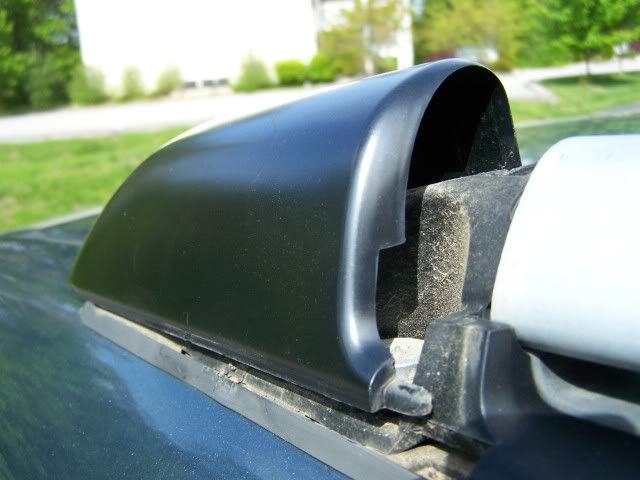
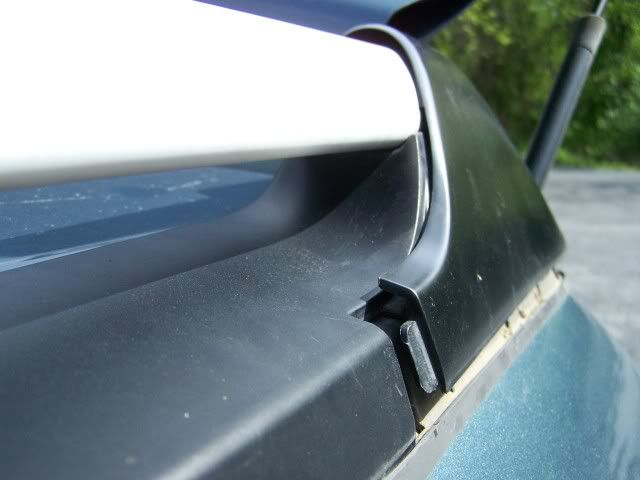
First, pop off the plastic caps. Note the tabs that help keep them in place. Once the tabs are loosened, simply lift up with a screwdriver to pop the plastic cap from the rail assembly.
Next, using a Torx T30 screwdriver, remove all eight screws holding in the rail.
Finally, remove the rails from the plastic clips. This is where I had trouble getting leverage earlier. I recommend two people to make this easy. So, I had my fiance lift up on the back end of the rail. I lifted the front up slightly so that I could bonk it towards the rear with the rubber mallet. Place a cloth near the hit zone so you don't accidentally give it that stylish 'hail damage' look.
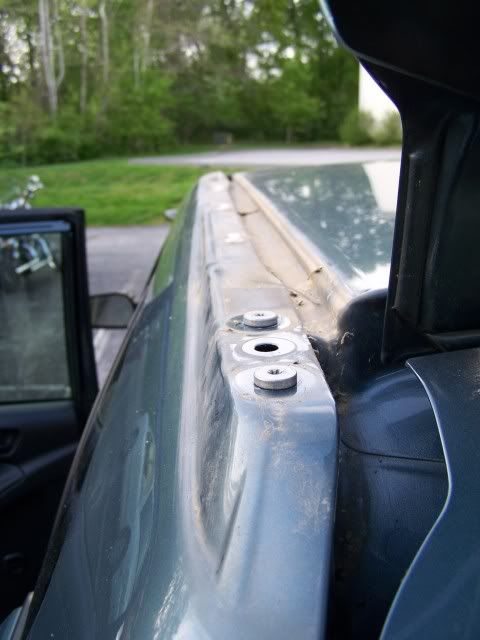
It looks naked!
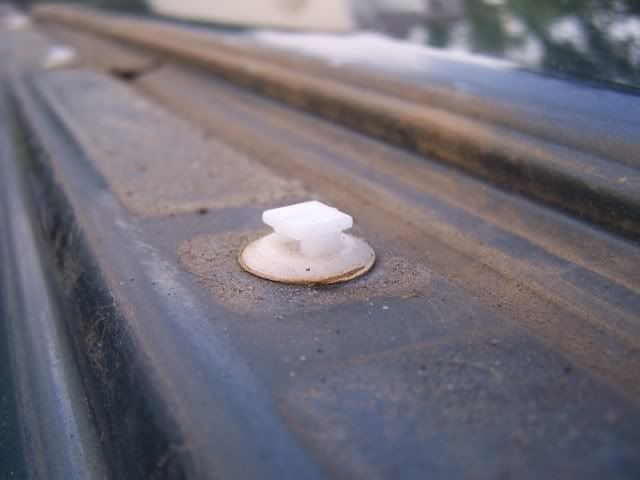
Strong plastic clips. Remove them per the previously linked how-to.
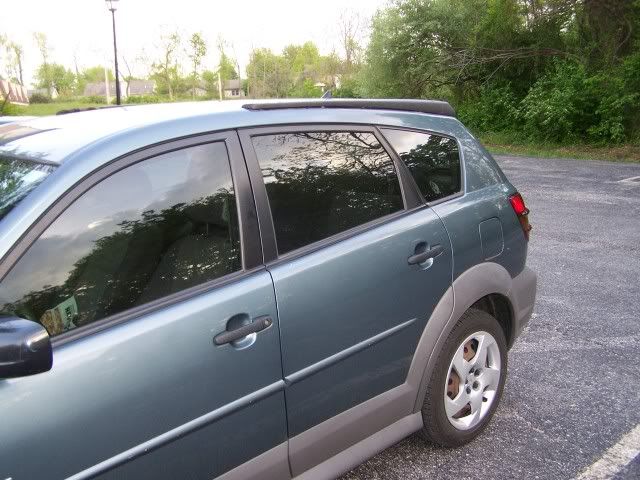
OK, now, dry fit looks pretty good. Dad is coming to visit soon so I'll just borrow his drill to install.
Black looks OK on it. Any opinions on painting it black or body color?
__________________
When we try to pick out anything by itself, we find it hitched to everything else in the universe. John Muir
"Price is what the person pays. Cost is what society pays, here, now, elsewhere and into the future." Natural Capitalism
|
|
|
|
|
05-11-2011, 04:34 PM
|
#9 (permalink)
|
|
Rat Racer
Join Date: May 2011
Location: Route 16
Posts: 4,150
Thanks: 1,784
Thanked 1,922 Times in 1,246 Posts
|
Leave it black. It matches the rest of the trim.
__________________

Quote:
Originally Posted by sheepdog44

Transmission type Efficiency
Manual neutral engine off.100% @∞MPG <----- Fun Fact.
Manual 1:1 gear ratio .......98%
CVT belt ............................88%
Automatic .........................86%
|
|
|
|
|
|
05-13-2011, 02:58 PM
|
#10 (permalink)
|
|
Deadly Efficient
Join Date: Jun 2008
Location: Goshen, Indiana
Posts: 1,234
Thanks: 134
Thanked 176 Times in 91 Posts
|
I like the black, as well. But I'm afraid you may be disappointed in the durability of the primer coat that it came in. I would suggest getting some actual paint on it, if at all possible.
Man, I gotta give my Vibe a railectomy this summer!
__________________
-Terry
|
|
|
|
|