Go Back   EcoModder Forum > EcoModding > Fossil Fuel Free
Register Now
 Register Now
 

Reply  Post New Thread
 
Submit Tools LinkBack Thread Tools
Old 04-09-2009, 11:08 AM   #61 (permalink)
Joe
 
Join Date: Feb 2009
Location: phx
Posts: 260
Thanks: 0
Thanked 48 Times in 38 Posts
Quote:
Originally Posted by lectruck View Post
Is there any update on the Chargers progress, now that Ben is trying out the Cougar Controller in could come in handy?
Sorry! I haven't had much time to update progress here. There has been some, but I've been hampered with little time to work on it. Also, I couldn't find an STK500 anywhere! Mouser had a new shipment at the end of April, so I figure I have some time to get this power-section working; Anyway, here's a quick synopsis of progress since my last post.

Apparently the input leads are the source of stray inductance. When I shortened the leads from the blue input caps to the mosfet/diode, the ringing went away and the voltage spike was limited to about 10V.

I then tried charging my EV pack and could only get to about 5A before the mosfet temp rose to 100C (just using a cheap IR thermometer).

I picked up a larger heatsink for $5 at the local surplus shop and got some weird clicking noises from the inductors. Turns out I had to electrically isolate the mosfet from the heatsink in addition to the diode. I had hoped to eliminate a source of thermal resistance...

With the larger heatsink I was able to get up to 15A and the mosfet rose to about 90C for a 65C rise above ambient. I blew up my mosfet driver though, or the gate resistor was too small. My driver was rated to 9A, but one Paul used was rated up to 14 so I ordered a few of those.

I'd like to get up to at least 20A, maybe 25A, and still have the temperature rise be about 60C above ambient. That way, the mosfet temp will stay around 100C on these hot summer days out here in AZ.

I'm sure I can do a better job of thermally attaching the components and figure out a fan arrangement to force more convection. Another option would be paralleling two mosfets to reduce the current through the device. I'm estimating about 57W of total heat generation with 1 mosfet and 44W with 2.

If you had a lower pack voltage and wanted to run strictly off 120V outlets, you could go with the 200V mosfet that Paul used which has lower on-resistance. However, with 240AC rectifying above 300VDC, you'd be close to 200V limit without a high voltage pack.

I could go with a fancier heatsink if i really needed to. I saw some computer CPU heatsink tests showing a fancy $40 heatpump type heatsink move 125W of heat while keeping the CPU to a cool 16C rise above ambient.

So, there's some things to try before the micro comes in at the end of the month. Hopefully it's ready to go by then and I can get right to the task of implementing the microcontroller.

Anyway, there's lotsa options, so I'll keep trying some things

  Reply With Quote
Alt Today
Popular topics

Other popular topics in this forum...

   
Old 05-19-2009, 05:13 PM   #62 (permalink)
EcoModding Lurker
 
Join Date: Mar 2009
Location: Seattle, WA
Posts: 57
Thanks: 0
Thanked 2 Times in 2 Posts
whats wrong with this idea?

So whats wrong with his idea (see below)? Is it totally bogus that no one noticed it? or too good to be true? The only issue with this is its not smart... What if we can make it smart? What if, if we can add another simple device ($12) that will switch it off when it reached it desired voltage....?

Well I use this simple device to connect to my solar panels and battery and does its job beautifully.

ghurd - Hurd Solar Renewable Energy | Dump Controllers

its a dump controller. it knows when to dump the extra power when the battery is fully charge... I just tweaked it in such a way that it dumps the extra power to a relay switch, thus turning off the source power. Then if it detects that the desired voltage is low, then it will turn itself on again.

What say you?


Quote:
Originally Posted by rmay635703 View Post
I believe the most important thing to make a diy on is the CHARGE CONTROLLER

It is easy to make a dumb charger out of most anything, I even made a higher tech version of this thing to desulphate/controlled overcharge bad batteries

3 Dollar Battery Charger


Cheers
Ryan
  Reply With Quote
Old 05-19-2009, 05:19 PM   #63 (permalink)
dcb
needs more cowbell
 
dcb's Avatar
 
Join Date: Feb 2008
Location: ÿ
Posts: 5,038

pimp mobile - '81 suzuki gs 250 t
90 day: 96.29 mpg (US)

schnitzel - '01 Volkswagen Golf TDI
90 day: 53.56 mpg (US)
Thanks: 158
Thanked 269 Times in 212 Posts
Note, you do not need an stk500 to program atmegas. You can program them with a simple parallel isp interface or a usbtinyisp. Or you can get them with arduino bootloaders on them that make them look like an sk500.
__________________
WINDMILLS DO NOT WORK THAT WAY!!!
  Reply With Quote
Old 05-19-2009, 07:43 PM   #64 (permalink)
home of the odd vehicles
 
rmay635703's Avatar
 
Join Date: Jun 2008
Location: Somewhere in WI
Posts: 3,882

Silver - '10 Chevy Cobalt XFE
Thanks: 500
Thanked 865 Times in 652 Posts
Quote:
Originally Posted by ev59rag View Post
So whats wrong with his idea (see below)? Is it totally bogus that no one noticed it? or too good to be true? The only issue with this is its not smart... What if we can make it smart? What if, if we can add another simple device ($12) that will switch it off when it reached it desired voltage....?

its a dump controller. it knows when to dump the extra power when the battery is fully charge... I just tweaked it in such a way that it dumps the extra power to a relay switch, thus turning off the source power. Then if it detects that the desired voltage is low, then it will turn itself on again.

What say you?
I like the idea of a dump controller, the issue with the dumb charger I have built is that it is very inefficient, however if you can get the battery pack voltage near the mains nominal voltage its efficiency would jump dramatically aka around 120-144v nominal battery voltage. Also using that controller combined with a cap charger or a random transformer would probably make for good results and a much more efficient design.

Another issue with my dumb charger is safety, its not isolated but so long as the packs are hidden and you don't fool with the cars battery cable system while under charge I see no reason not to use it.

For now my dummy charger does its job nicely, charging small unusual voltage batteries, peaking off and trickle charging poorly performing batteries, being used in conjuction with other items to desulphate and the like.

My belief is that DIY devices should be as simple as possible but no simpler, too bad I don't have much electronics design know how

Cheers
Ryan
Attached Thumbnails
Click image for larger version

Name:	Dscf1413.jpg
Views:	128
Size:	107.9 KB
ID:	3519   Click image for larger version

Name:	Dscf1415.jpg
Views:	108
Size:	59.6 KB
ID:	3520  
  Reply With Quote
Old 05-20-2009, 01:35 AM   #65 (permalink)
Joe
 
Join Date: Feb 2009
Location: phx
Posts: 260
Thanks: 0
Thanked 48 Times in 38 Posts
Quote:
Originally Posted by ev59rag View Post

What say you?
I'm not sure! Maybe we should try it? I'm headed down the path of a typical power supply buck converter (which i have some progress to update on) and think it's going to be doable. Maybe someone else is up to the task?

Two of my goals are high power (~4 kw) and charge control. High power gives you quicker charge times and (from what i've read) can extend the life of lead acid batteries. Charge control gives you automation and assurance that the batteries are optimally charged for both life cycle and capacity. Also, with an unforgiving chemistry like Lithiums, you must charge it correctly - any mistake can ruin a $15k pack!

Anyway, I think PWM and mosfets are the way to go, so that's where I'm headed...
  Reply With Quote
Old 05-20-2009, 02:30 AM   #66 (permalink)
Joe
 
Join Date: Feb 2009
Location: phx
Posts: 260
Thanks: 0
Thanked 48 Times in 38 Posts
More Progress

The short story: I've got a working prototype power section! It surely isn't pretty, but I tested it this evening and was charging at 22A into my 144V nom pack. It was actually charging at 155V, so that's 3.4kw!

Temperatures were looking really good:
Ambient: 35C
Mosfet: 41.5C
Diode: 44.5C
Caps: 63C

The details:

I was having problems with the mosfets getting too hot a burning up. The problems were mostly due to the electrical insulation of the mosfet to heatsink. The drain pin wasn't isolated from the back of the case; in my design, the drain changes voltages from ground to pack (-) every switching cycle and the parasitic capacitance of the heatsink caused weird voltage spikes if it's not isolated. I tried using isolation material and aluminum oxide tabs, but they only worked ok. Great electrical isolaters, but also pretty good thermal isolators. I got up to 18 amps with 2 paralleled mosfets, but they were at 80C already.

One solution would be to make this a high side configuration so that the drain stays at the same voltage (the + from the rectifier). I'd have to use some sort of charge pump high side driver instead of the simple-to-use low side driver being used now, so I didn't pursue this beyond thinking about it...

Then, I discovered isolated mosfets whose backsides are internally isolated from the pins! Unfortunately, this is the one I wanted to get and no one has it for a reasonable price:

Digi-Key - IXFB100N50P-ND (IXYS - IXFB100N50P)

I could've tried a couple of the smaller ones, but I was a little frustrated at this point and just wanted it to work. So, I ordered this one:

IXYS SEMICONDUCTOR|IXFN100N50P|MOSFET, N, SOT-227B | Newark.com

It has the same Rds_on as the ST mosfet I was initially using, but has a larger base that is isolated so it can be placed directly on the heatsink. It was a little cheaper when I ordered it, 28 I think (plus the extra 20 to ship from England).

*Note that there are lower voltage isolated FETs available, but I don't think you'd be able to use them on a 240vac line which rectifies to about 350V. These would be an option if all you were looking to use are 120vac power sources.

I also picked up one of those fancy cpu heat pumps, again mostly due to frustration. My new approach would be to get something together that worked and then optimize price/size later.

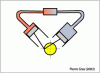
The pictures show this hacked together prototype. I used two diodes in parallel mounted on their own heatsink and again tried to make everything on the input loop close together to limit parasitic inductance and resulting voltage spikes. I also added a thermistor current limiter on the input and output so that I'd reduce the sparks when plugging in the AC and the batteries.

I think it performed really well as the temperatures were much less than I expected. This means I probably over did it with the larger mosfet and the heatsink, but maybe it'll make for a robust design. Or, maybe I can push it up to 30A... (I actually stopped at 22amps only because the output thermistor was rated for 20amps... thinkin of getting bigger ones....) I was a little surprised at the Cap temps. Maybe more smaller ones would be better? More surface area for cooling and lower ESR in parallel...

I guess costs have changed a little with these current components.

Big 400V caps: $3x 10 each
Big 30A Inductors: 2x $27 each
600V 37A diode: 2x $5
500V 60A FET: $33
600V 40A bridge: $6 (from a surplus site)
Various heatsinks: 50 + a small cpu heatsink I had.

Looks like 280 or so before any of the control hardware and things like a case and PCB. But, a comparable charger like the PFC20 is over 2k, so I think it's still good.

Speaking of, I think a PC board for this power section would be pretty easy to make...

My next steps will be to work on a PCB layout and programming/incorporating the control hardware.
  Reply With Quote
Old 05-20-2009, 02:56 AM   #67 (permalink)
Joe
 
Join Date: Feb 2009
Location: phx
Posts: 260
Thanks: 0
Thanked 48 Times in 38 Posts
Oh yeah, pictures. If you want to see these with captions, i put them up on picasa too.

Picasa Web Albums - Joseph - Charger Pictures
Attached Thumbnails
Click image for larger version

Name:	aIMG_0609.jpg
Views:	166
Size:	63.8 KB
ID:	3521   Click image for larger version

Name:	aIMG_0612.jpg
Views:	137
Size:	76.6 KB
ID:	3522   Click image for larger version

Name:	aIMG_0628.jpg
Views:	134
Size:	97.4 KB
ID:	3523   Click image for larger version

Name:	aIMG_0649.jpg
Views:	136
Size:	74.8 KB
ID:	3524   Click image for larger version

Name:	aIMG_0651 (2).jpg
Views:	126
Size:	79.4 KB
ID:	3525  

  Reply With Quote
Old 05-20-2009, 02:57 AM   #68 (permalink)
Joe
 
Join Date: Feb 2009
Location: phx
Posts: 260
Thanks: 0
Thanked 48 Times in 38 Posts
more...
Attached Thumbnails
Click image for larger version

Name:	aIMG_0652 (3).jpg
Views:	101
Size:	55.5 KB
ID:	3526   Click image for larger version

Name:	aIMG_0655.jpg
Views:	113
Size:	94.8 KB
ID:	3527   Click image for larger version

Name:	aIMG_0656.jpg
Views:	115
Size:	91.6 KB
ID:	3528  
  Reply With Quote
Old 05-20-2009, 09:17 AM   #69 (permalink)
2004 Prius Owner
 
lectruck's Avatar
 
Join Date: Oct 2008
Location: Hendersonville, Tn
Posts: 42
Thanks: 0
Thanked 0 Times in 0 Posts
WOW!!! I like the progress, keep up the good work!!

Don
  Reply With Quote
Old 05-20-2009, 09:46 AM   #70 (permalink)
PaulH
 
MPaulHolmes's Avatar
 
Join Date: Feb 2008
Location: Maricopa, AZ (sort of. Actually outside of town)
Posts: 3,832

Michael's Electric Beetle - '71 Volkswagen Superbeetle 500000
Thanks: 1,368
Thanked 1,202 Times in 765 Posts
Awesome Awesome job!!!!!!!!!!!! I wholeheartedly agree with your "get it working and then optimize" approach! Awesome work! I definitely think that smaller caps will give you cooler temps. I suggest something from this family:

http://www.panasonic.com/industrial/..._ed_ts_dne.pdf

Also, too high of a ripple current causes heating in the caps, but you can add significant ripple current per capacitor with these little buggers, and people use them to protect against voltage spikes. Fran on the EV Tech list is adding them to his design for a controller that he's going to push to it's voltage and current limits. Just put them in parallel with the electrolytics. I haven't tried them, but I'm ordering some 250v ones:

Digi-Key - P12240-ND (Panasonic - ECG - ECW-F4225JL)

Your inductors are working nicely? I can't wait to see your parts list! I want to make one too!!!! Awesome job!

__________________
kits and boards
  Reply With Quote
Reply  Post New Thread


Tags
ev charger

Thread Tools


Similar Threads
Thread Thread Starter Forum Replies Last Post
Electric car conversion: Project ForkenSwift MetroMPG Fossil Fuel Free 1041 07-28-2014 09:19 AM
Any interest in developing an open source fuel economy gauge/computer? MetroMPG OpenGauge / MPGuino FE computer 182 06-25-2010 07:00 AM
Open source PCB design dcb OpenGauge / MPGuino FE computer 39 04-25-2010 09:18 PM
Open Source electric conversion information bennelson Fossil Fuel Free 8 02-14-2009 11:23 AM
Open Source LEV Controller FrankG Alternative Transportation 1 03-24-2008 03:10 AM


Powered by vBulletin® Version 3.8.11
Copyright ©2000 - 2024, vBulletin Solutions Inc.
Content Relevant URLs by vBSEO 3.5.2
All content copyright EcoModder.com