Go Back   EcoModder Forum > EcoModding > Aerodynamics
Register Now
 Register Now

Now available from EcoModder: ScanGauge II fuel economy gauge.  Click for details.  

Reply  Post New Thread
 
Submit Tools LinkBack Thread Tools
Old 05-07-2011, 09:11 AM   #1 (permalink)
Empty Pocketed Ecomodder
 
Join Date: Jan 2011
Location: Illinois
Posts: 626

Gen - '05 Liberty Sport
90 day: 22.09 mpg (US)

Blurry - '03 Focus SE
90 day: 35.31 mpg (US)
Thanks: 33
Thanked 53 Times in 42 Posts
Ford Focus front belly pan

Today is the day that my girlfriend's Focus get's it's front belly pan. It will also be getting ducting from the grill to the radiator as well as a partial grill block, I will be taking pictures of the process and will post them later tonight, or tomorrow morning.


(Support Ecomodder.com & get rid of these annoying ads!)      
 
__________________


  Reply With Quote
The Following 2 Users Say Thank You to Joenavy85 For This Useful Post:
BamZipPow (05-07-2011), metroschultz (05-07-2011)
Old 05-07-2011, 07:21 PM   #2 (permalink)
Empty Pocketed Ecomodder
 
Join Date: Jan 2011
Location: Illinois
Posts: 626

Gen - '05 Liberty Sport
90 day: 22.09 mpg (US)

Blurry - '03 Focus SE
90 day: 35.31 mpg (US)
Thanks: 33
Thanked 53 Times in 42 Posts
ducting is in and the belly pan is on, not permanent yet (i still need to refine it all) but it looks pretty clean and after a test drive around town i didn't notice any unusual changes to the coolant temp, so i think i'm good to go to make it permanent. Pictures will be posted once i get back home (had to drive to her parents house to use a floor jack and stands)
__________________


  Reply With Quote
Old 05-07-2011, 07:23 PM   #3 (permalink)
Efficiency Aficionado
 
CigaR007's Avatar
 
Join Date: Jul 2010
Location: Province of Québec
Posts: 459

GreenTurtle - '01 Echo Sedan
90 day: 42.53 mpg (US)
Thanks: 107
Thanked 75 Times in 62 Posts
I am eager to see the ducting.
  Reply With Quote
Old 05-07-2011, 07:48 PM   #4 (permalink)
Idiot Suv?? Sav?? Sev?? S
 
metroschultz's Avatar
 
Join Date: Dec 2007
Location: Virginia Beach, Va. USA
Posts: 853

SuperElasticBubblePlastic - '93 Metro plainjane
90 day: 53.91 mpg (US)

SilverHairBeauty - '01 Avalon XL
90 day: 24.06 mpg (US)
Thanks: 14
Thanked 21 Times in 19 Posts
Send a message via AIM to metroschultz
Pictures!!
Pictures!!
__________________

You can turn painful situations around through laughter. If you can find humor in anything - even poverty - you can survive it. Bill Cosby
  Reply With Quote
Old 05-07-2011, 09:43 PM   #5 (permalink)
Empty Pocketed Ecomodder
 
Join Date: Jan 2011
Location: Illinois
Posts: 626

Gen - '05 Liberty Sport
90 day: 22.09 mpg (US)

Blurry - '03 Focus SE
90 day: 35.31 mpg (US)
Thanks: 33
Thanked 53 Times in 42 Posts
Ok, it took a bit to upload and edit the pictures, I had to re-activate my photobucket account then edit out the license plate but here they are.

First we have the big gaping hole under the engine.


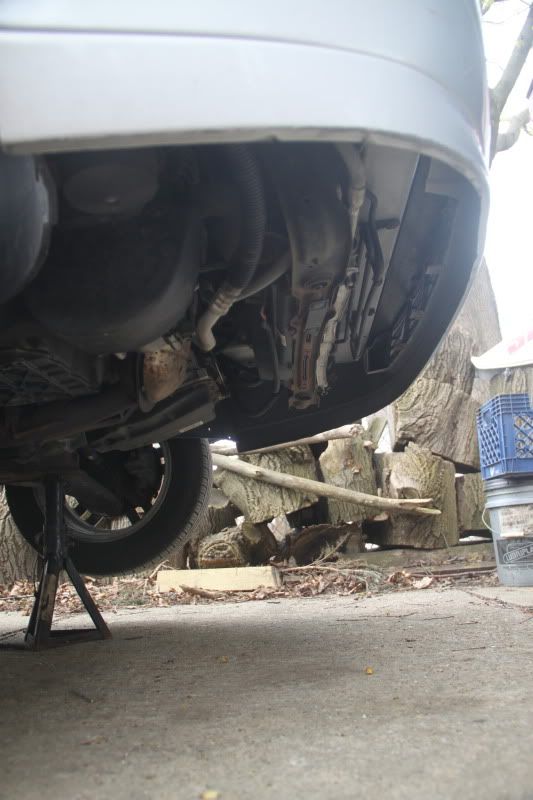
I noticed this the first time i changed the oil and figured it isn't much better than no front fascia, and had to do something with it.


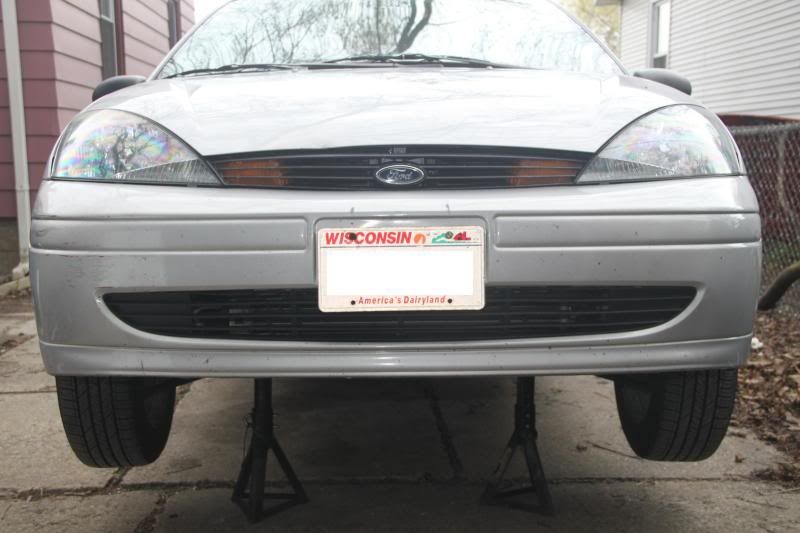
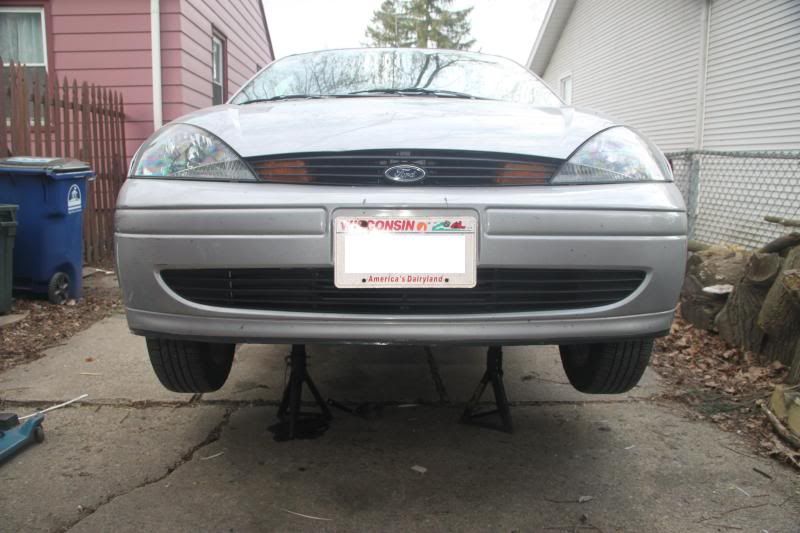
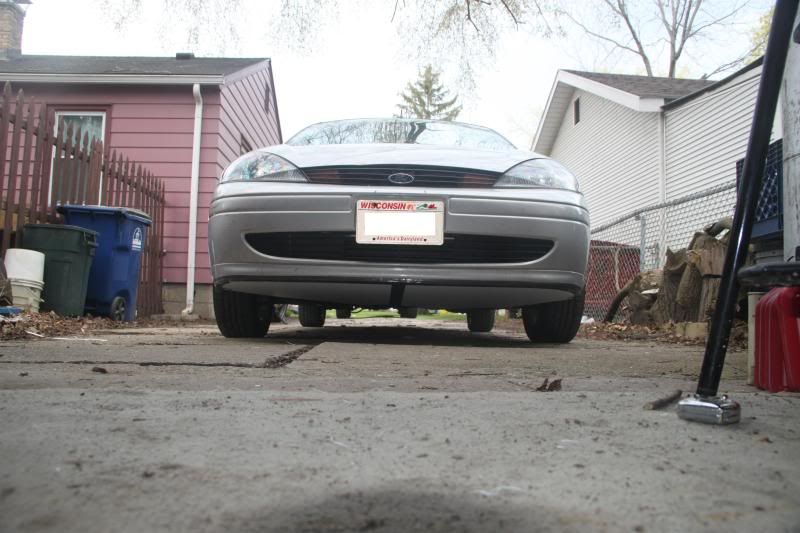
Here's the front view before anything started (including before the oil change).


I started by first blocking the 2 outer openings in the chin grill with coroplast (painted black).


Next I made to 2 baffles (1 on each side) to keep the air from going around the radiator. The first 1 (on the passenger side) was shaped by heating it with a 500W shop light.


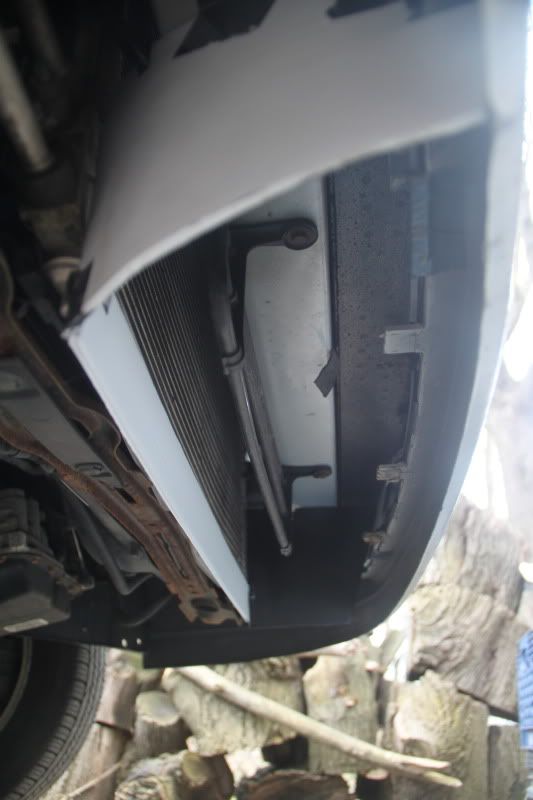
The second I accidentally cut a little small, but it actually worked because it now braces the drivers side grill block against the back of the grill.


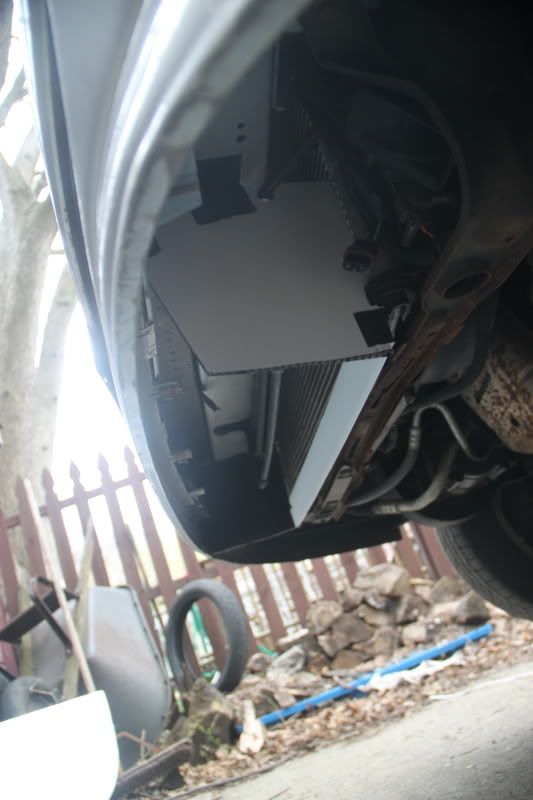
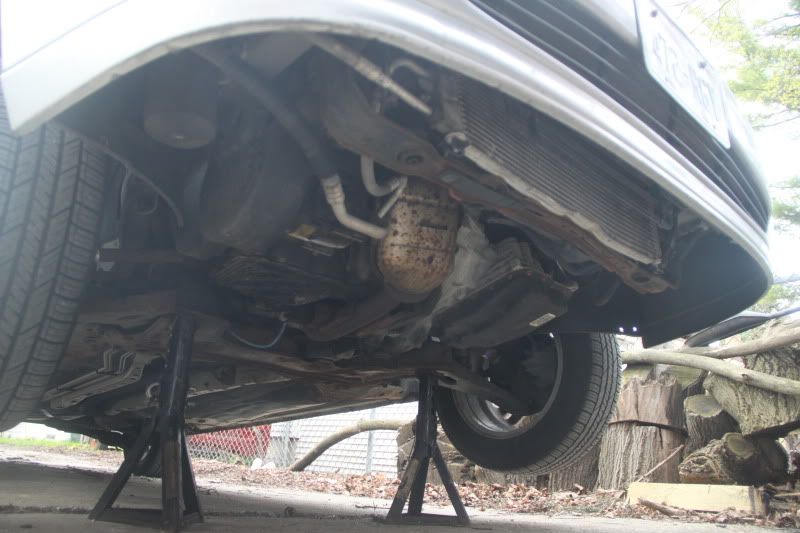
Also in the last 2 pictures you can see the lower block that fills under the radiator (which was damaged in winter 09-10).

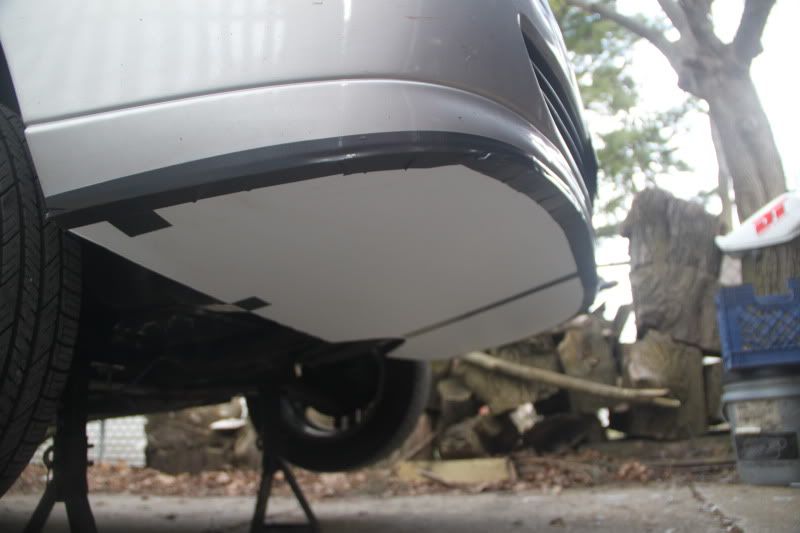
Here is the belly pan, made from 2 pieces of coroplast held together with a center piece. This was eventually abandoned when the glue I had failed to hold as anticipated. Note the area cut out of the trailing edge to give room for the Catalytic Converter (about a 5 inch clearance all the way around.


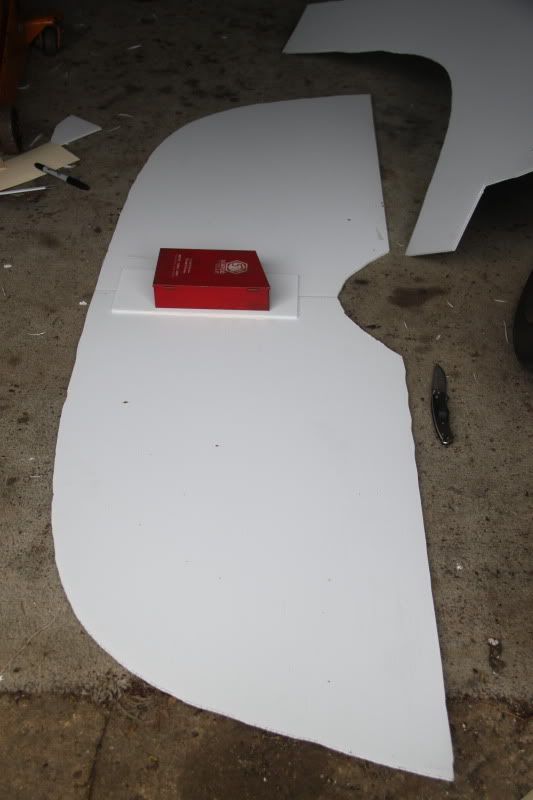
I didn't take a picture of the bottom piece of the duct, but it just attaches to the 2 sides and the fill piece under the radiator.

Here is the belly pan Duck Taped into place.


Front view after the install.


And what you can see from a low angle.


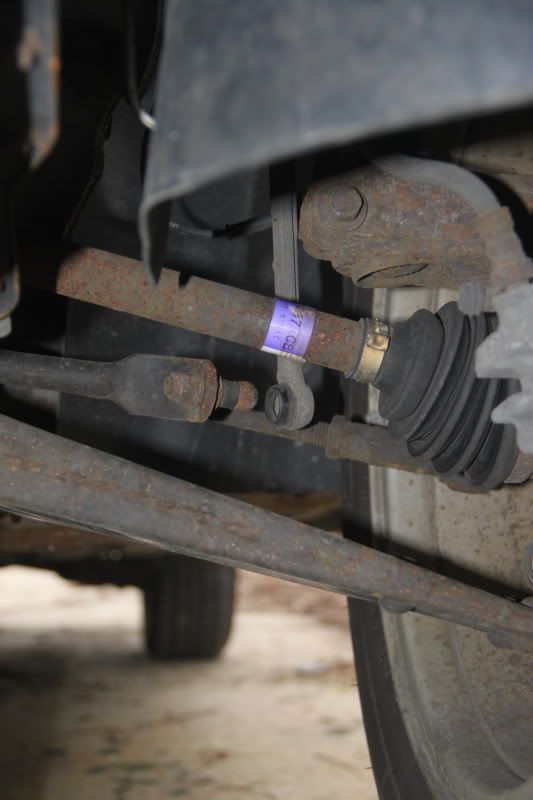
While doing all of this I discovered what has been making the rattling noises while driving. I had suspected that it was due to a stabilizer bar bushing being worn out, but it ended up being a disconnected stabilizer bar link, which connects the bar to the suspension. This will be getting fixed tomorrow.
__________________


Last edited by Joenavy85; 05-07-2011 at 10:03 PM..
  Reply With Quote
The Following 4 Users Say Thank You to Joenavy85 For This Useful Post:
aerohead (05-21-2011), BamZipPow (05-14-2011), California98Civic (05-07-2011), Christ (05-07-2011)
Old 05-07-2011, 10:34 PM   #6 (permalink)
60+ mpg at posted speeds
 
California98Civic's Avatar
 
Join Date: Mar 2011
Location: Coastal Southern California
Posts: 1,190

Black and Green - '98 Civic DX Coupe
Team Honda
90 day: 64.83 mpg (US)
Thanks: 384
Thanked 166 Times in 113 Posts
The baffles were a smart touch. I like it.
__________________


Black and Green will be rebuilt over decades as parts die--until it becomes a different car. Goal is only 60-70 mpg at posted speeds. I'm not trying for highest possible mileage.

Calculators: standard deviation, Ohms Law, & drag HP losses.
  Reply With Quote
Old 05-07-2011, 10:46 PM   #7 (permalink)
EcoModding Lurker
 
Join Date: Feb 2011
Location: virginia
Posts: 2
Thanks: 0
Thanked 0 Times in 0 Posts
Wow, very nicely done! Let us know how it holds up.
  Reply With Quote
Old 05-07-2011, 11:25 PM   #8 (permalink)
Moderate your Moderation.
 
Join Date: Nov 2008
Location: Troy, Pa.
Posts: 8,382

Herbie - '86 Golf Diesel
90 day: 51.89 mpg (US)

Steve - '92 Festiva
Thanks: 955
Thanked 324 Times in 273 Posts
Looks good, Joe!
__________________
"¿ʞɐǝɹɟ ɐ ǝɹ,noʎ uǝɥʍ 'ʇı ʇ,usı 'ʎlǝuol s,ʇı"
  Reply With Quote
Old 05-09-2011, 12:58 AM   #9 (permalink)
EcoModding Apprentice
 
Join Date: Apr 2011
Location: Houston
Posts: 228
Thanks: 0
Thanked 20 Times in 16 Posts
good ideas and nice execution.

gorilla glue is good for gluing coroplast. i have never had a glue failure with it.
  Reply With Quote
The Following User Says Thank You to Bill in Houston For This Useful Post:
ericthemidget (05-12-2011)
Old 05-09-2011, 04:33 AM   #10 (permalink)
Master EcoModder
 
Join Date: Feb 2008
Location: belgium
Posts: 663

vectra a - '95 Vectra GLS
90 day: 37.51 mpg (US)
Thanks: 14
Thanked 47 Times in 33 Posts
looking good!


now that you have a nice surface to build on, you may try to add tire dams. i'd say about 5 cm from the tray down and the width of the tires and perhaps part of the suspention as well, also you could extend the front airdam sides (about 2-3 cm) in front of the tires only.

also the next step i took after doing something similar was cover the rest of the engine bay with an aluminum sheet, it turned out the subframe had square holes that where inteded for dirt cheap matal clips that could take a screw... although my car never had an undertray, it did have provisions for one, so perhaps that's worth chekking too.


(Support Ecomodder.com & get rid of these annoying ads!)      
 
__________________
aer·o·dy·nam·ics: the science of passing gass

*i can coast for miles and miles and miles*
  Reply With Quote
Reply  Post New Thread

Thread Tools


Powered by vBulletin® Version 3.8.7
Copyright ©2000 - 2012, vBulletin Solutions, Inc.
Content Relevant URLs by vBSEO 3.5.2
All content copyright EcoModder.com