Go Back   EcoModder Forum > EcoModding > Fossil Fuel Free
Register Now
 Register Now
 

Reply  Post New Thread
 
Submit Tools LinkBack Thread Tools
Old 10-10-2014, 12:41 PM   #21 (permalink)
Dreamer
 
Join Date: Nov 2013
Location: Australia
Posts: 350
Thanks: 95
Thanked 214 Times in 151 Posts
Bit of an update.

I now have an engine hoist on loan from my brother-in-law which should make the removal of the engine block easier. That should happen in the next week or so.

Here are a couple of photos of the electric motor.
I managed to weigh it and it is 74 kilos (163 lbs). This is actually less than i expected. I was expecting around 85 kilos (187 lbs). So that was a pleasant surprise. It would have weighed even less if i had went for the lighter flange but i like the idea of the motor mounting bolts being as far as possible from the shaft to reduce the torque they are subjected to.
The feet on the motor will be removed which will knock a little bit more weight off as well.
Of course now that it has the nice big flange mount, there is the possibility that it may need some surgery to prevent it fouling on the axle that runs past the motor.
Won't know for sure until i get the ICE engine out of the engine bay to do some measurements.


In the next shot you can see the wires exiting a small hole, these are for the encoder bearing which is internal to the motor.


Regulations say the high voltage cables need to be orange in colour so i have several meters of orange heat shrink which will go over each of the phase cables.

I may also change the terminal box as i don't like the way two of the phase cables are squeezed into a single hole. I may put a new box on it with three appropriately sized holes and add some cable glands to stop them moving and abrading.

I will also see if i can remove some of the blue paint that was sprayed over everything including the cables.

  Reply With Quote
Alt Today
Popular topics

Other popular topics in this forum...

   
Old 10-10-2014, 02:28 PM   #22 (permalink)
Administrator
 
Daox's Avatar
 
Join Date: Dec 2007
Location: Germantown, WI
Posts: 11,203

CM400E - '81 Honda CM400E
90 day: 51.49 mpg (US)

Daox's Grey Prius - '04 Toyota Prius
Team Toyota
90 day: 49.53 mpg (US)

Daox's Insight - '00 Honda Insight
90 day: 64.33 mpg (US)

Swarthy - '14 Mitsubishi Mirage DE
Mitsubishi
90 day: 56.69 mpg (US)

Daox's Volt - '13 Chevrolet Volt
Thanks: 2,501
Thanked 2,585 Times in 1,553 Posts
I'm quite familiar with those motors. We use them on all our equipment here at work.
__________________
Current project: A better alternator delete
  Reply With Quote
Old 10-11-2014, 03:52 AM   #23 (permalink)
Dreamer
 
Join Date: Nov 2013
Location: Australia
Posts: 350
Thanks: 95
Thanked 214 Times in 151 Posts
Quote:
Originally Posted by Daox View Post
I'm quite familiar with those motors. We use them on all our equipment here at work.
They are just the common 3 phase industrial motor but with windings swapped out for a more electric vehicle type of wind.
In my case a 48V wind.
It should certainly be solid enough.
Custom EV Performance did mine.
  Reply With Quote
Old 10-12-2014, 04:42 AM   #24 (permalink)
Dreamer
 
Join Date: Nov 2013
Location: Australia
Posts: 350
Thanks: 95
Thanked 214 Times in 151 Posts
Quote:
Originally Posted by Daox View Post
I'm quite familiar with those motors. We use them on all our equipment here at work.
Do you ever get motors that may have damaged windings? Salvaging a faulty motor may be a cheap way to get a reasonable AC motor for an electric vehicle. I am guestimating that getting a motor rewinder to rewind a motor for EV use would be somewhere around $1000. I could be way off with that estimate but certainly cheaper than a brand new HPEVS AC50 or similar. So if you can source a motor carcas for scrap value then it could be well worth it.
Even if it is only 80% as good as a designed from the ground up EV motor then it may be more than enough for some users. That's what i am hoping for. I don't expect the same performance as an AC50 but something approaching that level of performance would be more than enough for me.
It is all an experiment. Hopefully if it all works out then it will give other EV'ers another affordable path to AC drive.
  Reply With Quote
The Following User Says Thank You to Astro For This Useful Post:
thingstodo (11-10-2014)
Old 10-12-2014, 07:23 AM   #25 (permalink)
EcoModding Lurker
 
Join Date: Dec 2011
Location: Poland
Posts: 66
Thanks: 12
Thanked 27 Times in 22 Posts
As for power steering - some later production (but still "B" generation) Corsas had full electric power assisted steering column instead of hydraulic rack. It's easy to find complete kit in UK because it's often used to retro-fit PS into oldtimers or kitcars; here's first search result at eBay. In Poland it would cost ~100€ because we've imported a lot of UK cars and RHD stuff is useless...
You'd still have to check if there were some changes in body bracket for steering column between hydraulic and EPS cars; even with some mods needed I think it's still worth it!
  Reply With Quote
The Following User Says Thank You to z_power For This Useful Post:
Astro (10-13-2014)
Old 10-12-2014, 07:48 AM   #26 (permalink)
Dreamer
 
Join Date: Nov 2013
Location: Australia
Posts: 350
Thanks: 95
Thanked 214 Times in 151 Posts
Finally finished enough cell top modules (53) to cover the number of cells going into the car (48). All built and tested.

Here's some pictures of the result. Not shown in the picture is the many sleepless nights, strained eyes and singed fingers.

This is the system described in the Low Cost BMS thread.

I used a modified version of the cell top PCB. Another forum member, Arber333 made many changes to the PCB for me. Mainly to suit the smaller terminal spacing on the 40Ah cells. But he also added a resistor and LED in parallel with the load resistors so that i can see when they are in use. Very handy.

I have 4 Winston 40Ah cells that i am using for testing. Another 44 cells will be added later. The communications connections between cells will be changed for shorter lengths later to make things neater.


I changed the LCD from the 2 line version to a 4 line version as there are some additions to the set up that i want to add later that will require more screen area.
I also changed the master modules micro controller to a 16F1847. This is a drop-in replacement for the 16F1827, but it has more memory which should increase the number of cell top modules it can keep track of.


As you can see the cells are quite out of balance due to testing each of the cell top module's load resistors. These cells will now be individually charged and brought back into balance. Cell 1 is the highest with 3.34v and cell 3 is the lowest with 3.28v.

Some more pictures.


I mounted the load resistors with a bit of air space between them and the PCB to allow for better heat dissipation.
If i built them again i would swap the two capacitors around so that the capacitor with the metal can wasn't so close to the load resistors.
I didn't put any pins in the programming port as i found it wasn't necessary, simply putting the programmers pins in the holes and keeping a small amount of sideways pressure gave good contact for the couple of seconds required to program the micro controller.
This saved me soldering 265 extra connections and it also reduces the chance of a stray communications connector coming into contact with a pin on the programming port.
  Reply With Quote
Old 10-12-2014, 08:12 AM   #27 (permalink)
Dreamer
 
Join Date: Nov 2013
Location: Australia
Posts: 350
Thanks: 95
Thanked 214 Times in 151 Posts
Quote:
Originally Posted by z_power View Post
As for power steering - some later production (but still "B" generation) Corsas had full electric power assisted steering column instead of hydraulic rack. It's easy to find complete kit in UK because it's often used to retro-fit PS into oldtimers or kitcars; here's first search result at eBay. In Poland it would cost ~100€ because we've imported a lot of UK cars and RHD stuff is useless...
You'd still have to check if there were some changes in body bracket for steering column between hydraulic and EPS cars; even with some mods needed I think it's still worth it!
I suspect that sort of swap wouldn't be approved by the engineers here in Australia.
I have found a company here in Australia that sells kits for doing the swap but they only talk about doing the swap in race cars not road going passenger cars.
I have shot them an email to find out.
For the moment i will continue with the electric hydraulic as planned just because it is a less than $50 cost and i know it has been used by other EV conversions without issues getting it past the engineers.
I may look at changing it over to EPAS later if i find out it will be legal.
  Reply With Quote
Old 10-13-2014, 01:24 AM   #28 (permalink)
Dreamer
 
Join Date: Nov 2013
Location: Australia
Posts: 350
Thanks: 95
Thanked 214 Times in 151 Posts
Quote:
Originally Posted by Astro View Post
I suspect that sort of swap wouldn't be approved by the engineers here in Australia.
I received a reply from the company that supplies EPAS kits.
They say their kit is suitable for on road use but it needs to be approved by an authorised engineer. Seeing as how the whole car is going to through the engineering inspection for the EV conversion this should not be an issue. I will have to have a ferret around on the internet to see if any of the Corsa B models imported into Australia were fitted with EPAS units.
Thank you z_power
  Reply With Quote
Old 10-13-2014, 03:37 PM   #29 (permalink)
EcoModding Lurker
 
Join Date: Dec 2011
Location: Poland
Posts: 66
Thanks: 12
Thanked 27 Times in 22 Posts
I'm currently tweaking last 10% of my FIAT Cinquecento conversion (as we all know this step takes >90% of total work time) and around 98th percent there's scheduled upgrade to EPS from younger Seicento.
We (Poland) still have quite liberal regulations regarding technical approval but after joining EU there's drift in the same direction, maybe not as strict as in Germany, OZ or NZ but definitely not into liberal side like in US. Ahh, "the more freedom, the more control" - heard it yesterday in punkrock song in radio
Good luck with your build, euro Corsa B was on my list of potential gliders for first conversion, too
  Reply With Quote
The Following User Says Thank You to z_power For This Useful Post:
Astro (10-14-2014)
Old 10-27-2014, 04:00 AM   #30 (permalink)
Dreamer
 
Join Date: Nov 2013
Location: Australia
Posts: 350
Thanks: 95
Thanked 214 Times in 151 Posts
Well i finally managed to get several things on site at the same time.
The engine crane, my father-in-law and myself.

My father-in-law is going to help me with the adaptor plate and shaft coupler. He has access to heavy machining equipment.

We wanted to be able to take measurements of all the pieces and my father-in-law needed to be able to see how it all goes together so that my crazy descriptions could make sense.

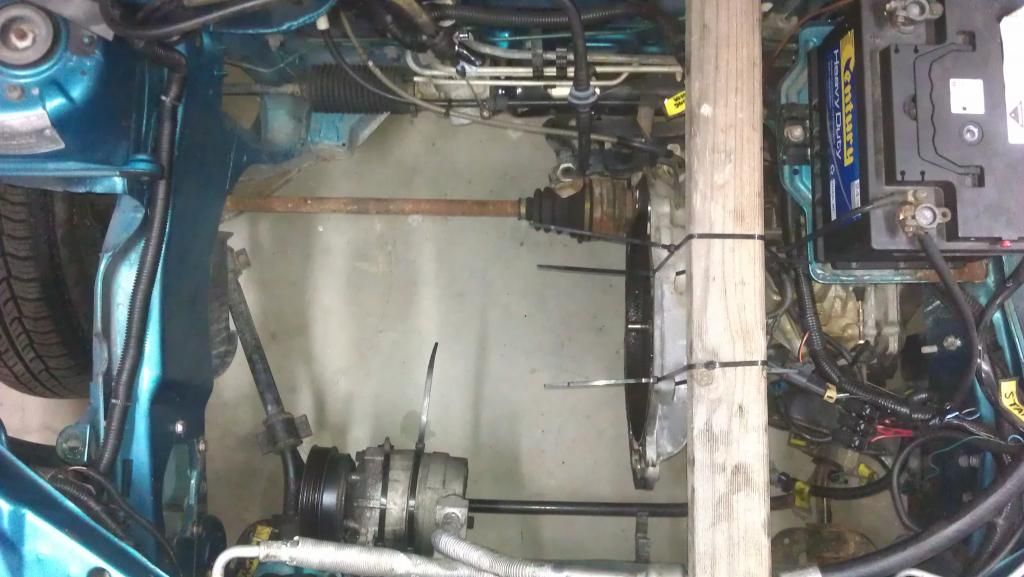
After a little bit of struggling we managed to convince the car to release its burden.


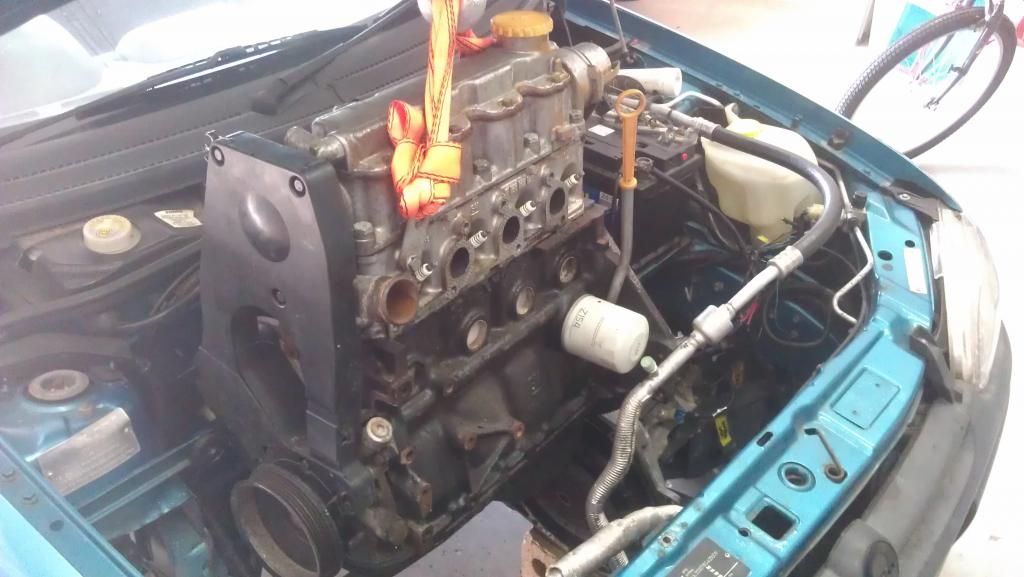
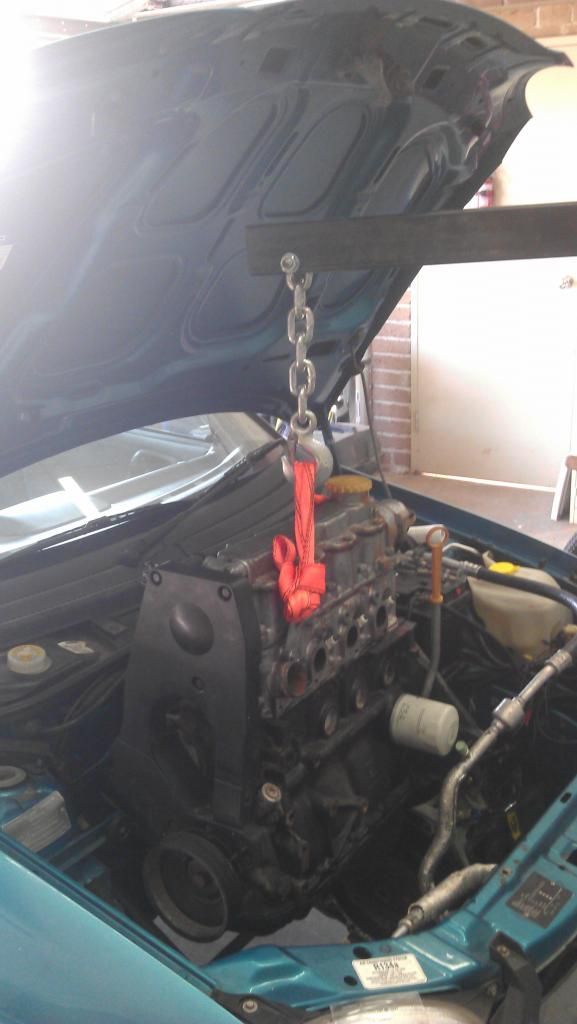
The last time i removed a motor from a SB Barina it was super easy but this time there seemed to be something stopping the motor from clearing the bell housing.
In the end we just removed the clutch and pressure plate which cleared the obstruction.
I didn't have to do this last time.
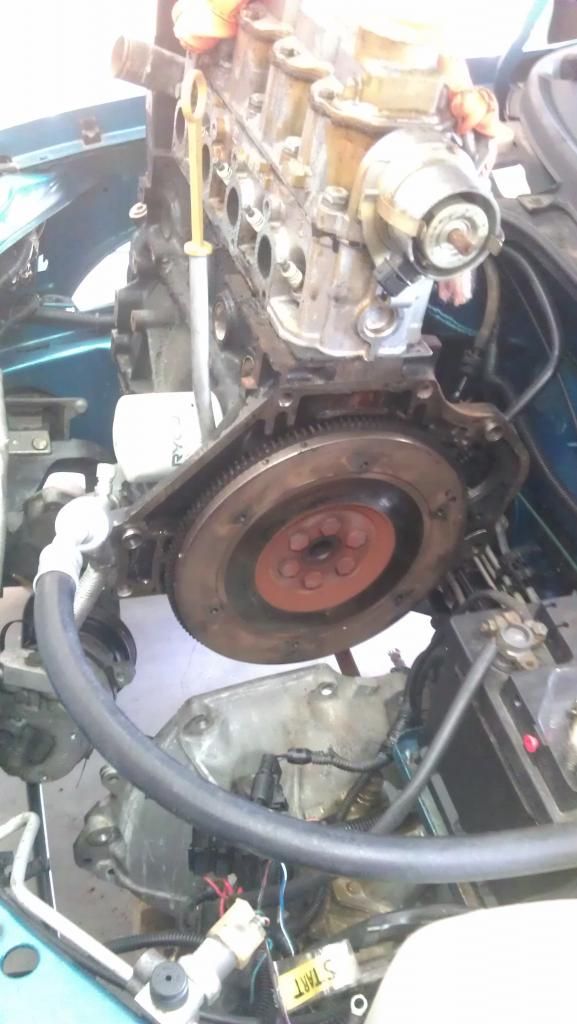
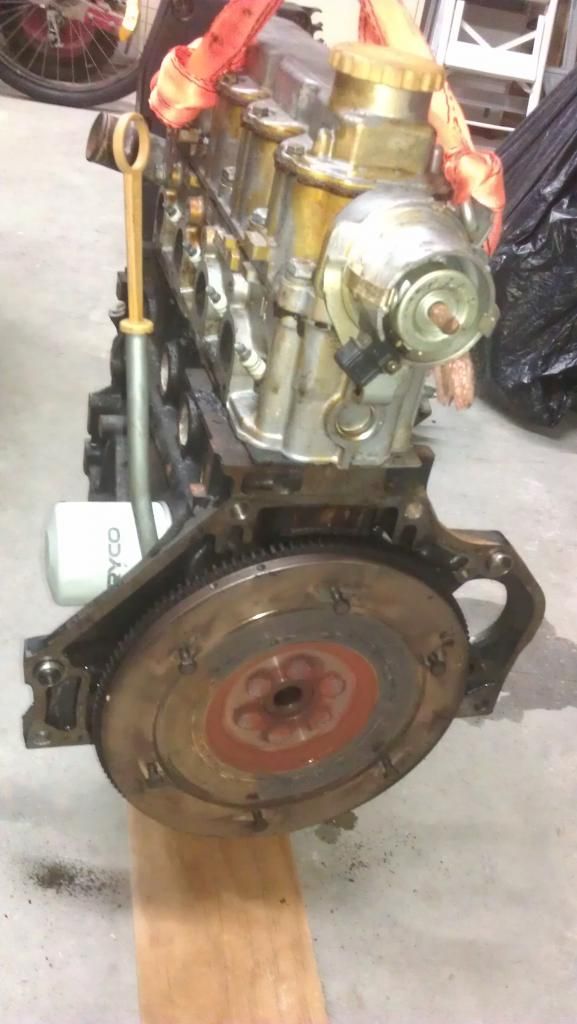
Once the motor was out it was easy to see what the problem was.

The input shaft to the gearbox was different. It was extra long, it protruded well past the bell housing. On the other Barina there was no smooth area to the input shaft just the splined section. It was that extra inch or more that had us tricked. When we thought the clutch should have been well clear it was still entangled with the input shaft.
We think we will cut off this extra length as it is not supported by the crankshaft. The hole in the crankshaft is much larger than this shaft extension.
But for the moment it gives us a nice centre reference that protrudes beyond the flat plane of the bell housing so should hopefully help with getting accurate measurements for the adaptor plate holes.


But at least we got there in the end.


Then we spent a little while measuring everything and working out a strategy for the creation of the adaptor plate and the coupling hub.

But that's for another post.

  Reply With Quote
The Following User Says Thank You to Astro For This Useful Post:
thingstodo (11-10-2014)
Reply  Post New Thread


Tags
barina

Thread Tools


Powered by vBulletin® Version 3.8.11
Copyright ©2000 - 2024, vBulletin Solutions Inc.
Content Relevant URLs by vBSEO 3.5.2
All content copyright EcoModder.com