11-05-2014, 01:38 AM
|
#1 (permalink)
|
|
Furry Furfag
Join Date: Nov 2013
Location: Apple Valley
Posts: 2,084
Thanks: 67
Thanked 409 Times in 313 Posts
|
DIY Injector kill switch install. (Honda insight).
Ok guys just brace yourselves, because I'm ludicrously bad at writing these. I didn't take a ton of pictures but yea. It should give you the jist and help you along.
[Edit]: Cowmeat, now you have no excuses  .
Ok so, first off, tools and dodads needed (from memory).
10mm socket wrench.
Wire cutters/strippers.
Crimping tool.
Female spade connectors.
Pliers.
5-Pin relay (I don't think a 4-pin would work? idk).
Momentary Normally open switch, or some form of toggle switch.
Wire (duh?)
Common sense.
Follow basic instructions?
So lets begin.
First, lets do the wiring from the cabin into the engine bay. This can be very easy, or very difficult, it's just how you personally want to do it. I personally just ran it up the door, I am way to lazy to drill/find another way into the cabin.
Remove the 2 10mm bolts on the drivers side fender under the hood, and the one that's parallel to the mirror. As below.

Pull the fender slightly back, no need to be brutal here, and wire it like so (in this picture I had already put the 10mm bolt back on, as you can see it).

Now that you have the wiring into the cabin, lets deal with getting the injector wires exposed.
Remove the engine cover, using the 10mm rachet (again). You will see a plastic cover over the wires, as pictured below, just use a screw driver and brute force to pull it apart. I personally unhooked the metal tubing right above it and moved it out of the way, it made life WAY EASIER working in that area. Careful as coolant comes out of one of the tubes (the one I have zip tied up). In the picture below I had already removed the electrical tape around the wires, I figured just showing you covered wires would be a waste of mine/your time. I also moved the PCV valve tube and this other tiny one out of the way.

Next, cut the yellow/black wires, but give yourself enough room to work, DO NOT DAMAGE THE OTHER COLORED WIRES, I believe those are what send the pulses to the injectors. Like below. I had already wire-nutted one end so you can see what it should look like.

Continued on next page.
__________________

Last edited by Baltothewolf; 11-05-2014 at 01:51 AM..
|
|
|

|
|
The Following 4 Users Say Thank You to Baltothewolf For This Useful Post:
|
|
 Today Today
|
|
|
|
 Other popular topics in this forum...
|
|
|
|
|
11-05-2014, 01:39 AM
|
#2 (permalink)
|
|
Furry Furfag
Join Date: Nov 2013
Location: Apple Valley
Posts: 2,084
Thanks: 67
Thanked 409 Times in 313 Posts
|
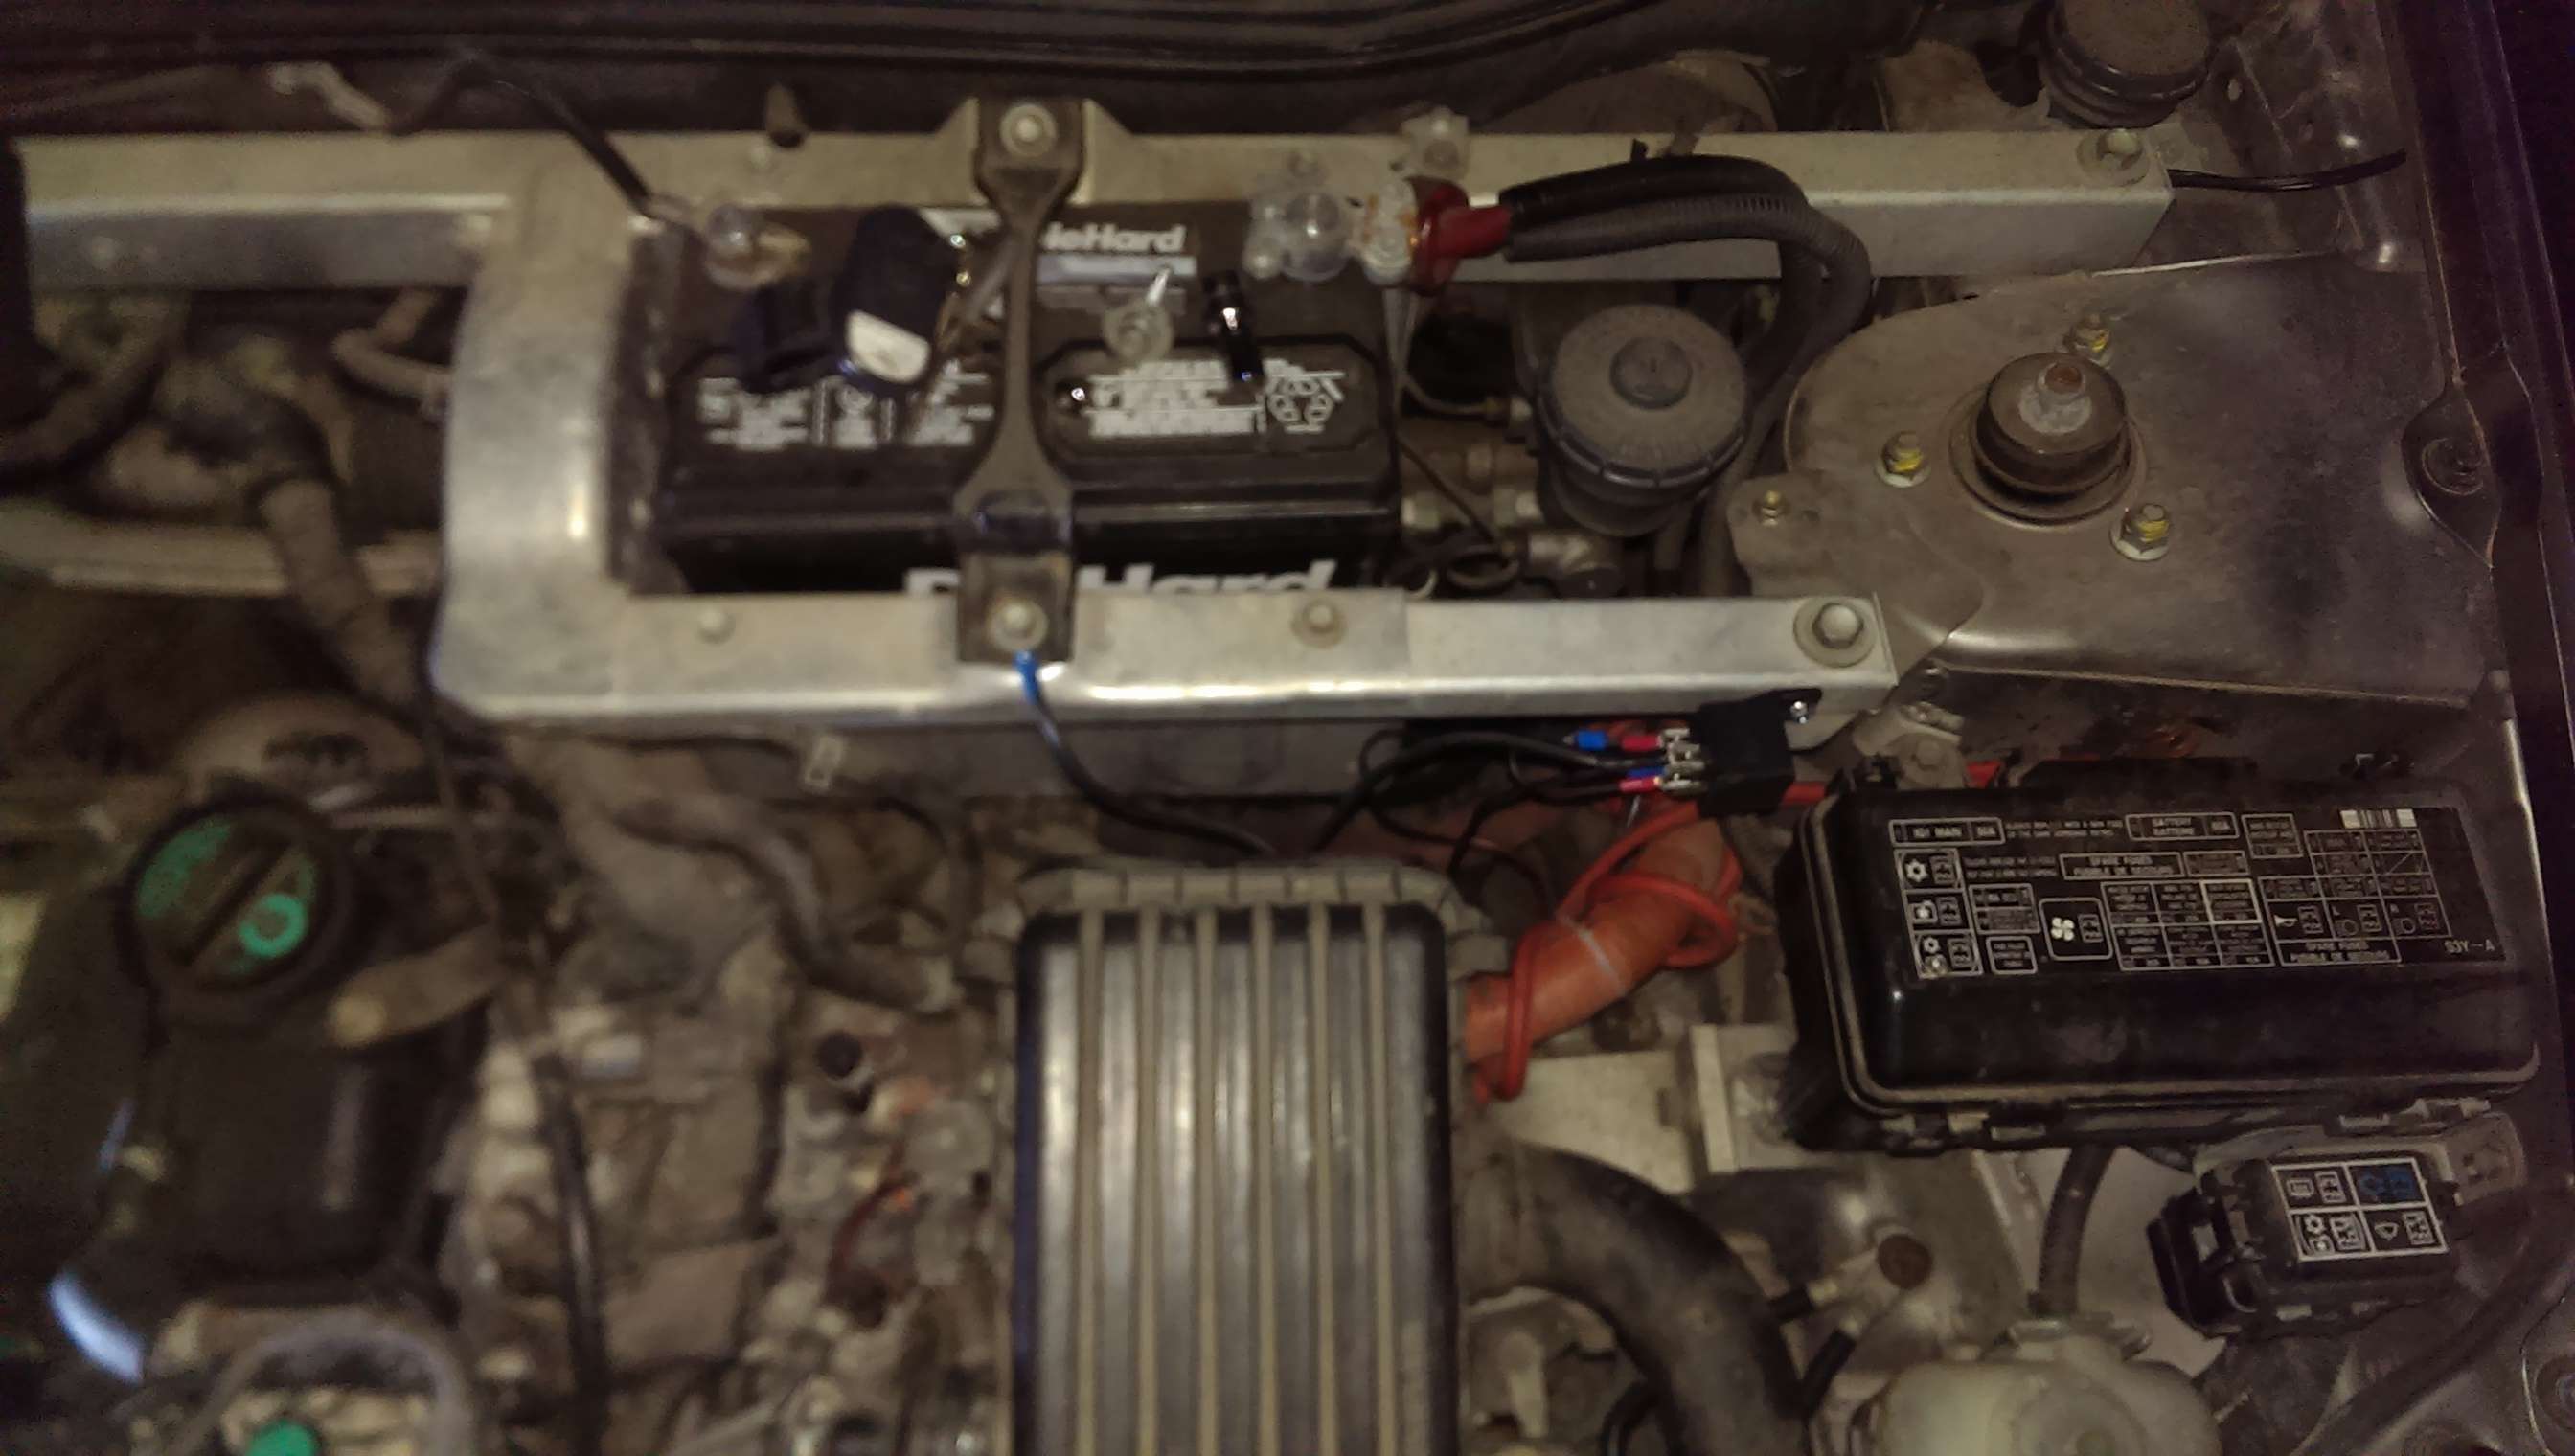
Both of the wires wire-nutted off and routed to the relay.

Now you must decide where you want your relay, I opted for next to the battery, I just find that the best spot. If you blow out a rad hose or squirt oil everywhere, chances are you won't get anything on it, and it doesn't get in the way of basic maintenance, (oil change, spark pugs, etc etc). This pic has everything hooked up, so yea. Just showing where I put mine.

Now, once you have your relay mounted and both of your injector cuts all sorted out, you must get them plugged in!
The HOT side of the injector plug goes into port #30 on the relay. You must create a jumper from the hot side to pin #85, this is how I did mine.

Next, you want to hook up the COLD side of the injectors to the #87A.
After that, you want to wire one end of your wires going to your switch into pin #86.
Ground the other wire coming from your switch, I used the bolt on the battery box, like so.

__________________
|
|
|
|
|
The Following 2 Users Say Thank You to Baltothewolf For This Useful Post:
|
Ecky (11-23-2014), KFM (05-02-2017) |
|
11-05-2014, 01:39 AM
|
#3 (permalink)
|
|
Furry Furfag
Join Date: Nov 2013
Location: Apple Valley
Posts: 2,084
Thanks: 67
Thanked 409 Times in 313 Posts
|
Now go into the cabin and clean it up! Like so! All done, it almost (almost haha not really) looks like stock!

But this, not so much stock.

And that's it! I know I'm horrible at this, but nobody else gave the effort to make this, and I know at least one person will appreciate this. So it's worth my time! If you guys have any questions or comments, please let me know.
Here, have 2 more since I can of the engine bay after the install, it looks pretty clean to me. Was worth the 2 hours or so it took to install!

__________________
Last edited by Baltothewolf; 11-05-2014 at 01:50 AM..
|
|
|
|
|
The Following 3 Users Say Thank You to Baltothewolf For This Useful Post:
|
|
|
11-05-2014, 01:52 AM
|
#4 (permalink)
|
|
Furry Furfag
Join Date: Nov 2013
Location: Apple Valley
Posts: 2,084
Thanks: 67
Thanked 409 Times in 313 Posts
|
I would like to add, I drove around grabbing coroplast election signs (shh...) and I think it was about 10-15 miles around town and it works like a charm, engine dies really fast, and it actually dies with no lugging or other weird symptoms like the coil kill method was causing.
__________________
|
|
|
|
|
The Following 2 Users Say Thank You to Baltothewolf For This Useful Post:
|
|
|
11-10-2014, 09:23 AM
|
#5 (permalink)
|
|
Batman Junior
Join Date: Nov 2007
Location: 1000 Islands, Ontario, Canada
Posts: 22,514
Thanks: 4,060
Thanked 6,959 Times in 3,603 Posts
|
Thanks for posting this, Balto. Too bad the simpler spark-kill method didn't work on your Insight like it did on mine.
|
|
|
|
|
11-10-2014, 10:25 AM
|
#6 (permalink)
|
|
Not Doug
Join Date: Jun 2012
Location: Show Low, AZ
Posts: 12,186
Thanks: 7,225
Thanked 2,217 Times in 1,708 Posts
|
Balto, I only see two images at the end of your build thread. Am I missing something? |
|
|
|
|
11-10-2014, 10:40 AM
|
#7 (permalink)
|
|
Furry Furfag
Join Date: Nov 2013
Location: Apple Valley
Posts: 2,084
Thanks: 67
Thanked 409 Times in 313 Posts
|
Quote:
Originally Posted by MetroMPG

Thanks for posting this, Balto. Too bad the simpler spark-kill method didn't work on your Insight like it did on mine.
|
I don't mind, enjoy doing projects like this, so I'm glad I had the opportunity to do something special to my car :P.
Quote:
Originally Posted by Xist
Balto, I only see two images at the end of your build thread. Am I missing something? |
Yea they must not be loading for you, there are 10 pics total.
__________________
|
|
|
|
|
12-05-2014, 08:01 PM
|
#8 (permalink)
|
|
Liberty Lover
Join Date: Feb 2011
Location: central california
Posts: 587
Thanks: 439
Thanked 83 Times in 60 Posts
|
relay attachment
Quote:
Originally Posted by Xist
Balto, I only see two images at the end of your build thread. Am I missing something? |
The links show up when quoting the messages, but not the images.
Baltothewolf,
That's a great idea how you routed the wires through the door.
What is this that you attached the relay to?
https://imagizer.imageshack.us/v2/77...674/tzl6MP.jpg |
|
|
|
|
12-18-2014, 05:28 AM
|
#9 (permalink)
|
|
Master EcoModder
Join Date: Jan 2014
Location: South Carolina
Posts: 1,659
Thanks: 128
Thanked 764 Times in 461 Posts
|
I have four days off on Christmas weekend, I'm going to install a kill switch then. Couldn't find time while I was on vacation since I had all that other crap to do.
Balto, it looks like you wired all three of the yellow injector wires together. How does that work? Are the remaining wires you didn't cut the ones that send the signal to fire the injectors? I really don't know anything about the wiring, so I'll probably be calling you!
Duh, now that I read it again I see you already answered me above!
__________________

Last edited by cowmeat; 12-18-2014 at 05:33 AM..
|
|
|
|
|
12-18-2014, 01:38 PM
|
#10 (permalink)
|
|
Furry Furfag
Join Date: Nov 2013
Location: Apple Valley
Posts: 2,084
Thanks: 67
Thanked 409 Times in 313 Posts
|
Quote:
Originally Posted by johnlvs2run
|
It's the battery tray, my little brother grabbed a drill and drilled a hole, then stuck a screw in it. Works great!
Quote:
Originally Posted by cowmeat
I have four days off on Christmas weekend, I'm going to install a kill switch then. Couldn't find time while I was on vacation since I had all that other crap to do.
Balto, it looks like you wired all three of the yellow injector wires together. How does that work? Are the remaining wires you didn't cut the ones that send the signal to fire the injectors? I really don't know anything about the wiring, so I'll probably be calling you!
Duh, now that I read it again I see you already answered me above!
|
I'll just reiterate. The yellow wires, from the time the key is on the accessories position is hot. The other colored wires are what receive and send out the injector pulses. I also believe that somewhere down the line, it's where the FCD gets its mpg reading from.
__________________
|
|
|
|
|