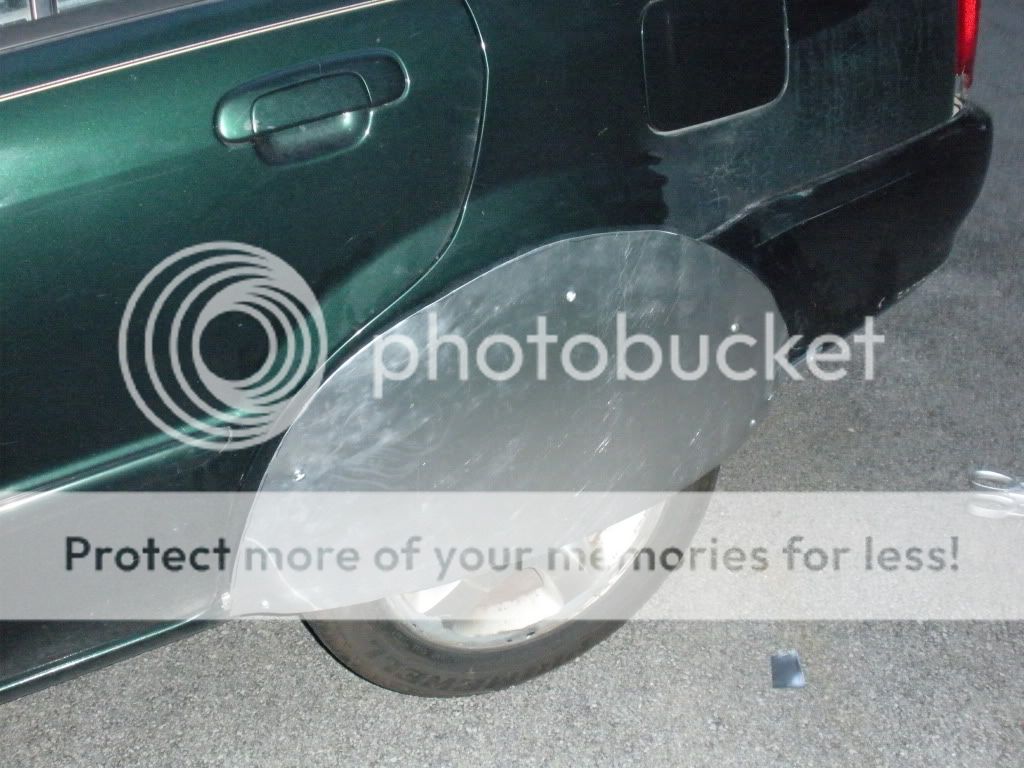
So today I "finished" (one still needs to be tweaked slightly, and probably will paint both) my rear wheel skirts for my protege.
Before:

After:

Materials Used:
(1) 2' x 4' Sheet of Aluminum
(2) 4' x 1" Aluminum Bars
(12) Stainless Steel Locknuts
(12) Cadmium Plated 1/4" Machine Screws
(6) Stainless Steel Washers
Tools:
Screwdriver
7/16 Wrench
Drill w/ 1/4 drill bit
Sheet metal sheers
Hack Saw
Marker
Optional Tools:
Vice stand
Drill Press
Grinder
Step 1:
Create wheel skirt support bar.
On my car the front of the bar I placed one 1/4 bolt to the sheetmetal of my car. The rear of the bar has two bolts due to being attached to the plastic rear bumper.
My car, like many, the middle of the wheel sticks out from the body of the car. To compensate for this I bent some angles in the bar to jog it out away from the wheel. I gave my wheel about 1/2" clearance.

Because of where the bar was positioned, I also needed to twist the bar twice to make it more on the same plane as where the majority of the skirt would lay. The aluminum is nice for this because these bends can be done by hand if you don't have a vice handy.
Step 2: Creating the skirt panel
I first taped some newspaper of the wheel well so that I could trace a rough outline of the shape. Then I cut the outline out and laid it on the sheetmetal. From there I taped the outline to the metal so it wouldn't move and traced it to the sheetmetal.

I then cut the outline out, being sure to oversize it slightly so that I could tweak the design some if need be. This is important because the metal may need a compound curve when it is held to the car. This will "shorten" the metal up slightly and you want to be sure that there is still enough overlap to keep it secure.
Step 3: Positioning attachment points
I first drilled two holes to attach the lower panel to the bar.

From there I needed to experiment with where the panel needed pressure to keep it flush to the car. The above picture has 3 other machine screws attached representing the three points I decided on.
Step 4: Final Fabrication
The final fabrication step involves the creation of 3 "z-clips" which serve two purposes. First they hold the panel flush. They also provide the final support the panel needs so that the wind doesn't rip it off your car.
I used a hack saw to cut up some scrap aluminum bar and then put two bends in them that would pull the skirt panel into the car when sized properly. This step is critical to get the thickness just right for each clip. If they are tight enough they will prevent vibration that over time might damage your car's finish and possibly the integrity of the skirt panel.
In my case each clip had a different depth to it.

Here is an image of the clips attached to the skirt panel:

You will notice that the bottom clip in this image is turned differently. This is to make installation of the skirt easier.
To install the skirt panel you just slide the z-clips up behind your cars wheel well. If you got the tolerances right it will hold itself in place while you install the bar screws. Finally reach up in the well and turn that final clip (the one that was originally positioned funny in the 2nd photo up) up into position to hold skirt flush.
The main thing that I like about this design is that it is very easy to remove. Two machines screws to take the panel off, and two or three more if you need to remove the bar.
Here is the picture of the other side finished:

I wish you all good luck with your skirts!