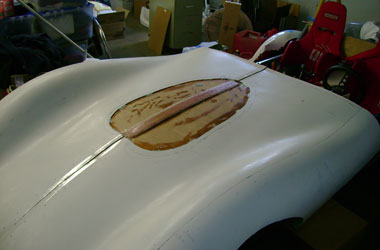
Pluggin' along on it. I cut off the bubble and the unbubbled portion of the right side of the nose, so I could at least have a semi-symmetrical hole to fill in. These things weren't totally symmetrical to begin with--aluminum bodies hammered to fit the powerplants, after all--but I think I can give it the period look of kindasortasymmetrical and keep the airflow smooth, just by foam, body putty, and eyeball.
I've decided to make the nose in three major pieces (two fenders and a hood) so I can do the final fitting by just messing with the hood part. I'll make this nose into a pattern for a mold for the hood, then cut out the hood portion (which will be too heavy to use for an econocar, since it'll have a bunch of body putty and wood attached) which will leave me two front fenders, and that'll do for the nose. Knock wood.
I flexed the nose to shape and bonded the halves back together. I paneled in the open hole with a 1/8" plywood door skin, shaped a center rib out of urethane foam, 'glassed over the rib, and next I'll bond in some more foam to cover the plywood, shape it (using the rib and the surrounding body as my sanding block guides), skin it over with fiberglass cloth and then on to the body putty stage of the operation.
