OK - Part 3 is now part 2

EM Photo Albums.
When you sign up to EM you get a photo album where you can place images for use on EM. As before nothing naughty, make sure you have permission (copyright etc.) and only images for EM.
The advantage of an album is that the images will stay here as long as your album is on EM, so it keeps the "integrity" of the forum. If you link to images elsewhere they may be removed and you will see dead link images instead.
The downside is that it uses EM space so I'm not sure what the policy is in terms of limits.
If you are sensible then it should be OK. -
MODs feel free to add to this please.
1 - To get to your albums, go to your control panel. Your login at the top of the page includes a link to this :

2 - The link to your albums is on the left hand side.
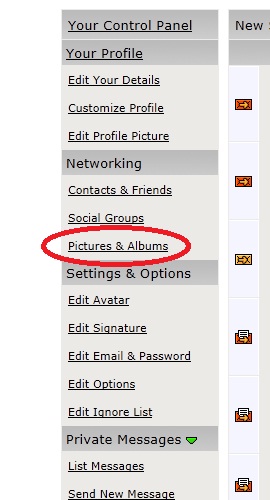
3 - Once clicked if you have some albums they will be displayed there.

4 - To edit an existing album click on it, otherwise click on Add Album (at the top and bottom of the list) to add a new one. This is the album properties :
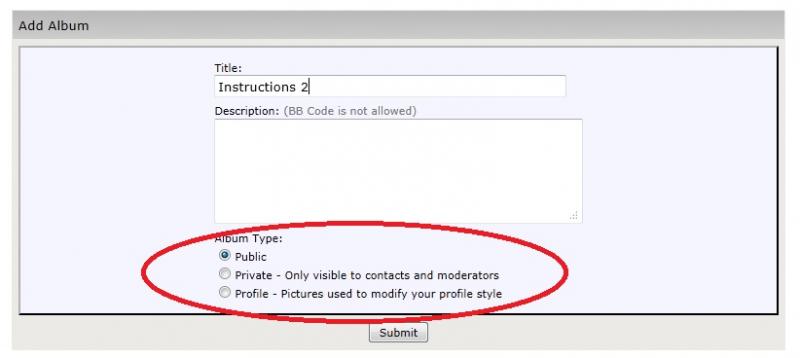
Enter a unique name and decide on the visibility. Public is, er, public - select this if you are putting images into a posting. Private means only you and your friends can see it, and profile is for Avatars, signatures etc. Don't go mad on this last one - no rock god signatures please

Click on Submit to add the album or save changes.
5 - Next the list of photos is shown. In this example I don't have any - yet.

If you look at the top and bottom there are several "Upload Pictures" links. To add a picture click on any of them.
6 - This is where you select your images to upload. You can choose up to 3 at a time, and these must be on your own computer.
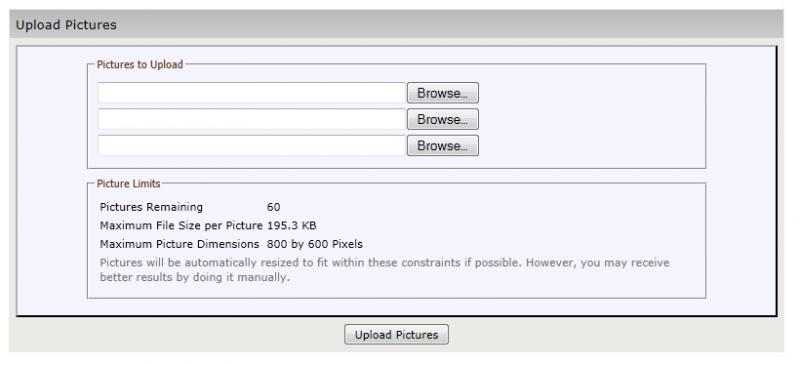
Click on Browse... to select an image. This is the usual file|open window you will see on your computer for other things.
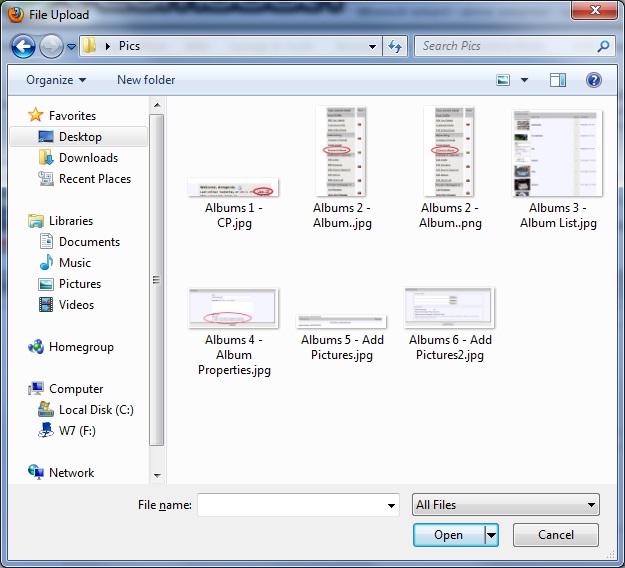
7 - Click on Open and the file name is copied into the window.
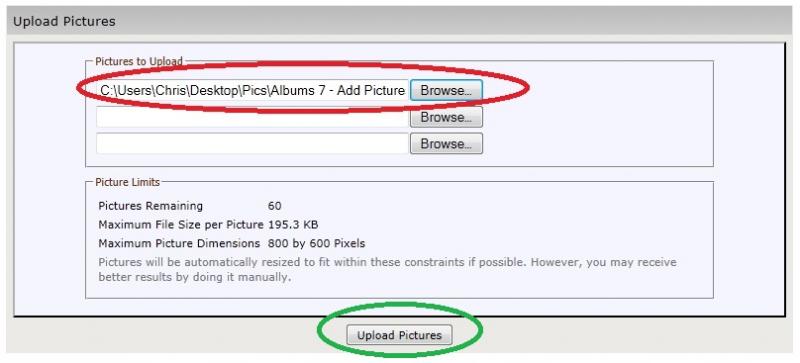
Repeat this for the other two file names if you need to.
Note that your Image is not uploaded yet. You must click on the Green button to do the uploading.
8 - Once the images are uploaded, they are displayed in a list. In this example I only uploaded one image, they would appear on top of each other.

Note the options -
Delete This Picture - marks the image to be removed when the Save Changes is clicked.
Move to Album - you can move the image to another album by selecting it here.
This is the Album Cover - this is the image you will see in the list of albums. The first image you upload is the default one.
Save Changes - makes all this happen.
Nothing changes until you click on this.
9 - Once uploaded the images are showin the album.
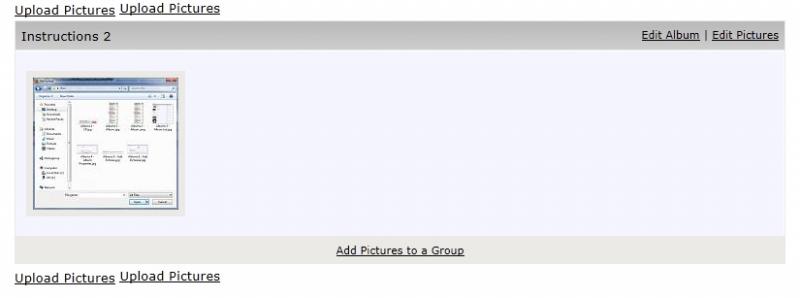
10 - To link an image to a post, see my above instructions. The code you need is made up for you on EM. Click on the image in your album and it is shown full size with the details you need underneath.
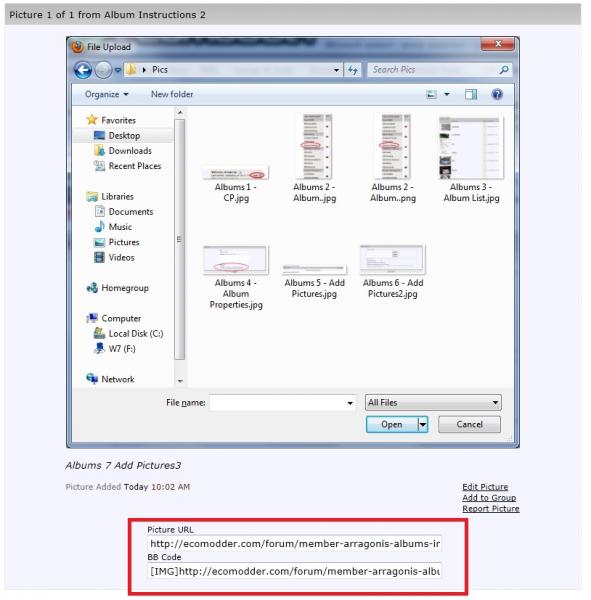
Copy the contents of the second box (Ctrl+C to copy) and paste it (Ctrl+V) into your new posting.