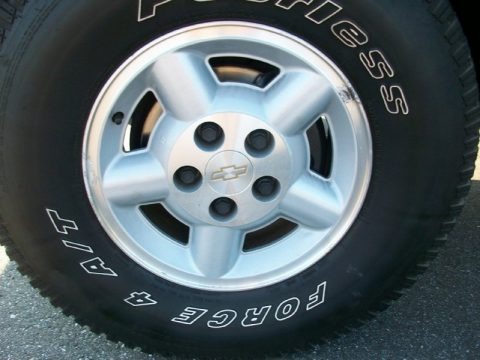
This is a DIY guide for mounting a set of smooth wheel covers to a wheel. The vehicle being modded today is a '99 Chevy Blazer 4x4.
If you like this then see my clean DIY mirror delete guide. -
http://ecomodder.com/forum/showthrea...ete-23608.html
Materials and tools needed:
- 4- 16 inch smooth pizza pans (Size is adequate for 14'' or 15'' wheels)
- 4- 3/8x1.5'' bolts
- 4- 3/8 standard hex nuts
- 4- 3/8 lock nuts
- 16- 3/8 washers
- 1- Tube of epoxy or strong adhesive
This also requires:
- center punch
- 3/8 drill bit
- Drill
- Standard ratchet set
- Hammer
- Small block of wood
First, gather the materials.

Next, we need to mark the center of the pizza pan.
I didn't have access to a compass large enough for this project, so I set a tape measure to 8'' from the outside edge, held a pencil against the metal edge at the center of the pan, and made several arcs from different quadrants of the pan.
Now take the hammer and center punch and make a mark in the center of the pan where the arcs intersect. This mark is to keep the drill bit from wandering and helps ensure the hole is centered.
With that done you can now drill the hole. Be sure to use a block of wood behind the pan while drilling.
Now, we turn our attention to the wheels and mounting of the pan. This is specifically done with the wheels below as they are perfect for our modding. If you are creative you can employ a similar mounting method for almost any wheel with a plastic center cap.

First, remove the plastic center cap. This may require some patience to avoid damaging the unit. If this is too difficult the wheel can be removed and the cap punched out from the backside.
My cap looks like this, and is an aftermarket blank replacement. Your cap may have a bow tie or logo on it.

Now we find the center of this cap and drill another 3/8 hole.
With that done you can now place a bolt and washer through the hole on the back side of the cap. Next, place a washer and the standard nut on the front side; This effectively holds the bolt in place and spaces the wheel cover mounting plane out further.

Back side of the cap. This faces the axle. I had to use extra washers during mockup because my bolt had an unthreaded neck below the head. You may do the same if necessary.

Side view.

Front side. This faces out, away from the vehicle.

Now take the pan and the mounting stud and do a quick mock up on the vehicle. The pan may not sit flush with the wheel if you have wheel weights on the outer edge.
Does it fit snugly? Is it centered? Are you eager for better aero?
To secure the center cap in place we are going to need some type of adhesive. I chose to use a standard two part epoxy. Mix up the adhesive and apply a consistent coating to the inside radius of the cap mounting bore, then insert the cap.

At this point it is important we let the adhesive cure before moving on.
With the adhesive cured, now we place a washer on the mounting stud before the pan goes on. Next, slide the wheel cover over the stud with the rolled edge facing outwards. Place a washer on the front side of the pan and finish off with gently snugging the lock nut.

Done!