Here is how-to for making a template for an upper grille that has compound curves (curves in two directions), and some notes on working with ABS sheet material for the actual cover.
The info here is general, but some points are particular to the 2005-2007 Ford Focus.
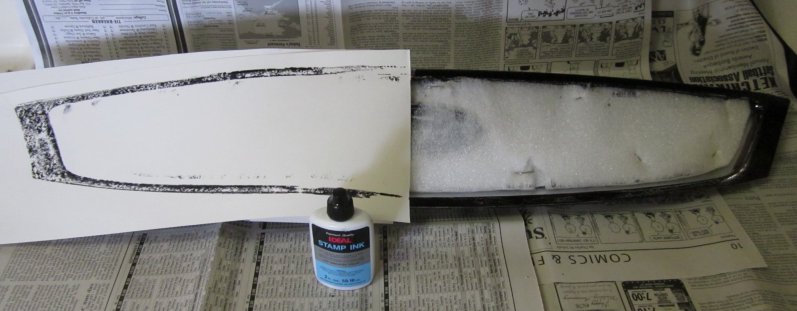
I selected ABS sheet plastic for the cover, leaving the gloss side out. These sheets commonly come textured on the "finish" side and blemished on the glossy side. So it goes ... the blemishes are slight, and I intend to paint it later anyway. My ABS material is 3/32" thick. That's thin enough to work into place, and still thick enough for countersinking for flathead screws. I got mine from Tap Plastics, which will cut small orders to size.
1. The Focus grille has a deep recess, which I had filled with closed-cell sheet foam material for my previous, temporary grille block. (It had served both as an air block and support a covering made from a heavy duty construction garbage bag material, so wind wouldn't dish it it.) The sheet foam was wired in place. I left it there to both help support the thin ABS material of the new cover and to help support my template material while inking it.
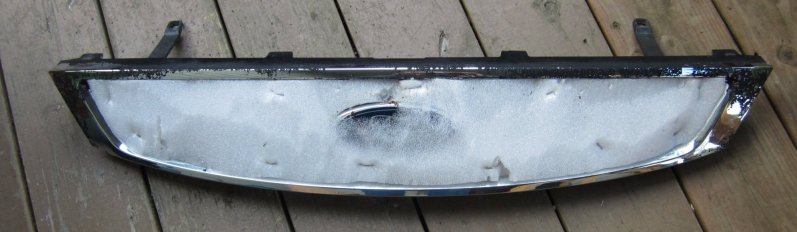
2. The grille is awkward to work with for two reasons. One is a combination of its balance and two long plastic legs that stick out from the upper backside. The other is the compound curves. My first attempt at making a template (for sawing the ABS material) failed because I the curves kept me from inking the template uniformly, completely, and without shifting. Here a means for taping the template down that was very secure and worked:
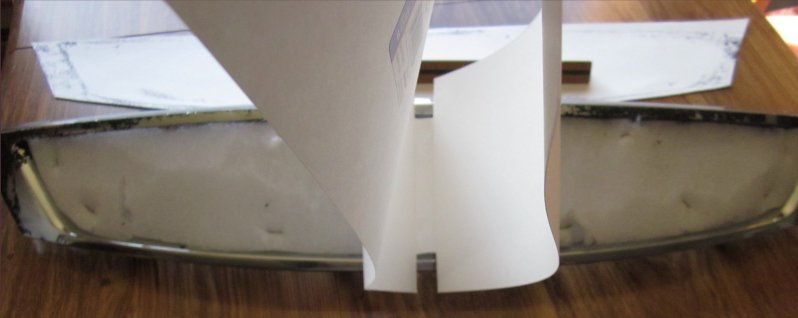
My first (failed) template is in the background.
3. I had sharp folds in the template material so I could ink one side at a time. I used ink-stamp ink, which is thick and didn't diffuse into the thin poster material I used. I put it on heavy, using a thick edge of a scrap of paper towel, folded over several times. The ink wiped off of the grille easily with another paper towel. Then I could put the inked template half back down on its side and do the other side.
4. Here is the finished ABS cover. I used 18 stainless #6 flathead screws, for a square head screw driver. I had planned on using half that many, but needed to hold down bulges along the edges. I tried heating the ABS with a paint removal gun, to make permanent compound curves, but I stopped when I could see that I was going to end up with an uniform, dimpled cover.


5. Here it is on the car. The curves are smooth but don't appear that way in the photo because clouds are reflected. (Car needs a bath!)

6. Here are my previous grille blocks, when first installed. This worked great for over half a year, until ravens worked it over. They picked out all the pipe insulation, leaving me only one piece of it. Days later they pecked holes in the garbage bag (they love digging for food in any garbage bag they spot - guess I was lucky mine lasted so long).

Last word -- The grille cover itself isn't unique, but I thought the template making technique would be useful for others. Also, a trick for working with those long legs on the back of grille is to use two boards on the sawhorses (as shown), so the legs can be down the split, out of the way.