*thought it was about time to drag this over from GS*
So I just installed a kill switch in my CX and I thought I'd share the info with all my fellow Civic owners so that you will not have to obsess over wiring diagrams all afternoon like I did.
This How-To (for the "basic" kill switch) will work for all 5th generation Honda Civics and DelSols (1992-1995) that have airbags (SRS).
Difficulty level **
Advantages: fast engine kill, easily removable (you'll never know it was there).
Disadvantages: also kills the speedometer/odometer while the switch is off.
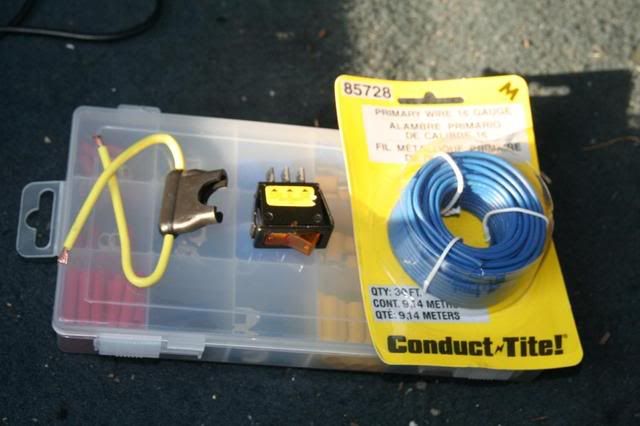
First, let's list the parts that you will need:
-Inline ATC style fuse holder
-Interrupter switch (simple rocker switch sold at an auto parts store)
-Male spade connectors (2)
-Female spade connectors (2-3)
-Butt Splice connector (1)
-Round or forked terminal (optional)
-5' of 16-14awg wire
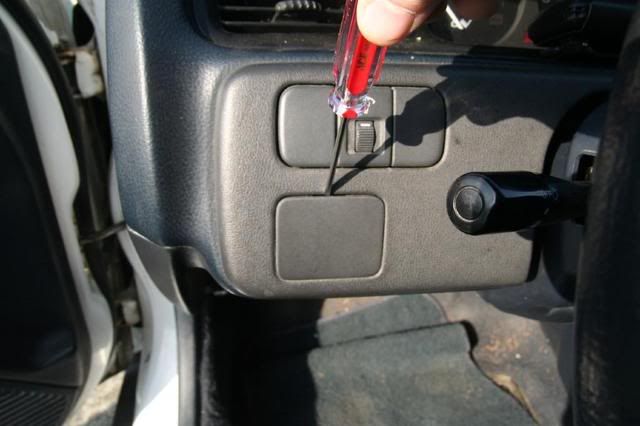
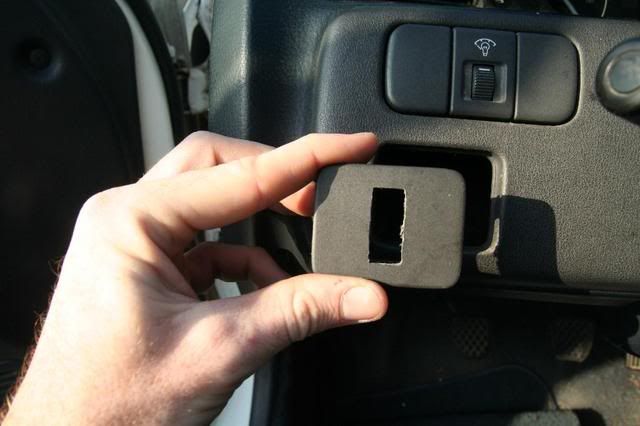
First I'd recommend you find some place that you'd like to put your switch in. The easiest thing to do is to find a blank accessory panel in your dash and install the switch in there. Just gently pry one out with a small screwdriver.
Next you need to open the fuse panel under the dash, and locate the 15 amp fuse that supplies the switched power to the PGM-FI main relay. Pull out this fuse. Now try to start your car. If it cranks but won't start, you pulled the right fuse. Congrats.

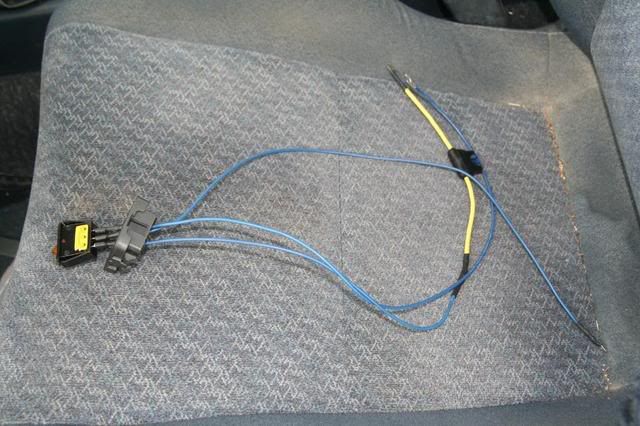
Now you have to put together the wires that will run between the fuse box and the switch.
-The first piece will be about 2' piece of wire with a male spade on one end and a female spade on the other. (shown at top of photo)
-The second piece will start with the ATC fuse holder, but a male spade on one end, and the butt splice on the other. The butt splice will connect to one end of an approximately 1' length of wire (depending on where your switch is placed), with a female spade on the other end. (shown in middle of photo)
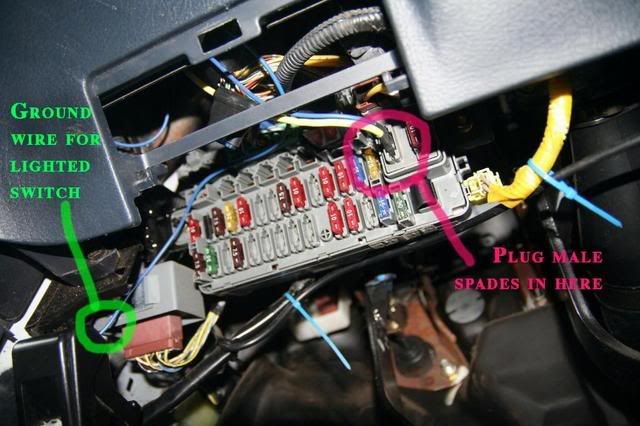
-The third piece is optional and only applies if you have a lighted switch, a lighted switch requires a ground wire, so you need a piece of wire about 2' long with a female spade on one end and a round or forked terminal on the other. (shown at bottom of photo, coiled)

Now you'll need to cut a hole to mount your switch in.
Now put your wires through the hole you've made, and hook them up to the switch the first wire will go to the terminal marked "switched" (or something like that, markings will vary among manufacturers)
The second wire (with the fuse) will go on the terminal marked "power"
and the final ground wire will go on the terminal marked "ground" (if you have one)
Now, put that 15 amp fuse that you pulled out of your fuse block into the inline fuse holder in the second wire. Now plug in the two male spades in the first and second wires into the place in the fuse block where the 15 amp fuse came from. If you have a ground wire, just find a bolt or screw that goes into a metal panel or firewall, loosen it, and slide the terminal of the ground wire underneath. Re-tighten the bolt and you're done.
Enjoy your kill switch!
