Many people wish that there cars were a little closer to the ground. There are a lot of reasons for this; some people enjoy the look of a car that has been lowered, while others like the improved handling or reduced aerodynamic drag. For most people, all of these things are benefits, so naturally, there are lots of people out there with lowered cars. Now, it may seem like a daunting task, but it's really not all the time consuming, expensive, or hard. Because this is a fuel economy oriented site let's take a look at some of the theory behind the idea that a lowered car has less aerodynamic drag.

* V = wind velocity in tunnel
* S = frontal area of vehicle
* E = wheelbase
* Cx = coefficient of drag
* Cy = coefficient of drift
* Cz = coefficient of lift
Here you can see that drag is directly proportional to vehicle frontal area. When you lower the car you reduce the frontal area, and therefore the drag. Any drag benefit is specific to the vehicle but all should benefit (though it may end up being a very tiny amount).
Purpose: To intall adjustable coilovers that will let your change your ride height on a whim
Time: 4 hours
Tools:
-Strut spring compressors
-Jack and blocks (don't trust a jack alone!)
-Basic socket set for general purposes.
-For my car I needed:
-Jack
-Blocks to sit the car on (don't trust a jack alone!)
-19mm deep socket for lug nuts
-1/2" drive
-3/8" drive
-Torque wrench
-14mm socket
-Some extensions
-Two 17mm sockets
-14mm wrench
-Hex set (forget the size)
-Hammer
-Screwdriver or two
-Shop Manual
Warnings: Get an alignment when you change ride height or at least do the toe yourself! I will talk more about this later.
Use spring compressors! Don't shoot the spring off the strut into a wall or some nonsense, many auto parts stores have free loaner spring compressors.
If you get the cheap springs like I did they will be bouncier than stock because of increased spring rate, and because of stock struts will be more likely to bottom out!
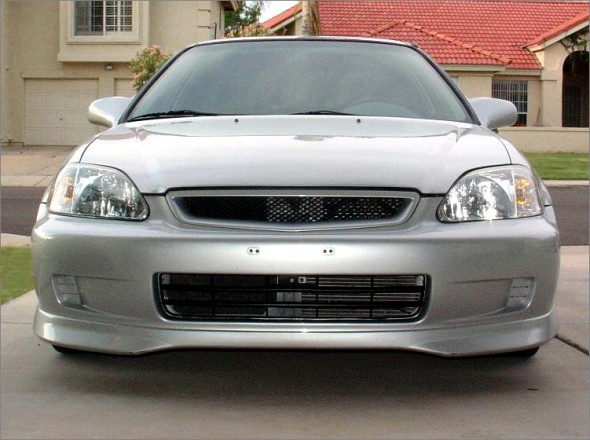
Before picture:

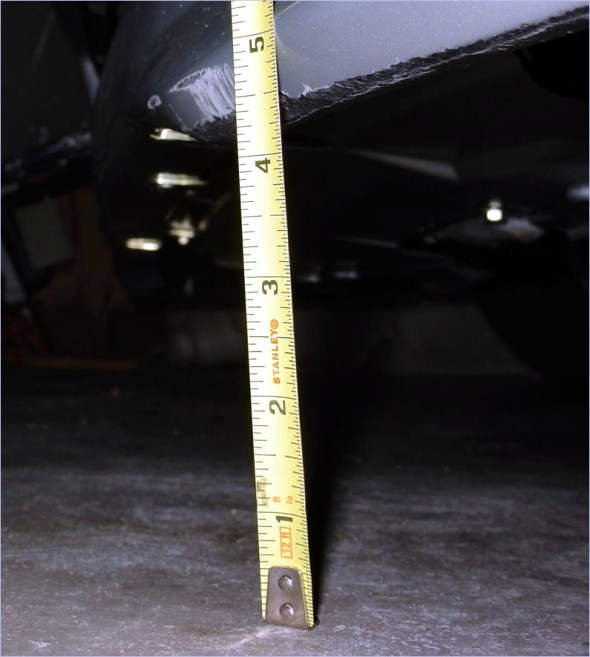
Front wheel well:

Rear wheel well:

1. Decide which wheel you're gonna start with, loosen the lug nuts, jack the car up, and take that wheel off. Don't forget to put bricks behind wheels to keep it from fidgeting. Also, sit the car on some blocks to keep it safely up in the air. Safety first.

2. I started with the front, so grab the front passenger wheel off and look at the stuff.

3. My first step was to take off the two 14mm bolts holding on the brake line you see above.
4. Then take out the 14mm bolt holding the bottom of the strut to the strut fork forgot to picture, but it's right at the bottom of the strut and attaches it to a fork looking thing).
5. Take the 17mm bolt out holding the fork on. It's a nut and bolt so I used my breaker bar to hold the nut while I undid the bolt. I had to use a hammer and screwdriver to get the bolt out, so do that and release the strut except for the stuff holding it on top. Then pull the fork part out completely so the bottom of the shock looks like this:


6. Get under the hood and undo the two 14mm nuts holding the shock up. There will be three, do the outer two, the middle holds the spring compressed. Hold onto the shock while you take the nuts off so it doesn't fall straight to the ground. I forgot pictures of this but can take some later.

7. Now that the shock is down take your spring compressors and hook the little holder ends in there and connect with the rods. Try to have them on opposite sides. I had to smash the holders in with a hammer. As far out to the end of the springs as possible is good too. I know I pictured this but I lost it. Anyway, snug the bars down and begin to tighten the compressors a bit on each side, alternating. Mine used a 19mm head for the big rod. Compressor the spring evenly on both sides until it seperates from the ends on the strut where it is and use your hex key/14mm wrench combo to undo that middle nut on the top.
8. When it comes off take all the junk off and slide the spring off the shock. Keep track of all your washers and junk.
9. Undo the spring compressors the same way you put them on, turns out I had a broken spring:

10. Take the dust cover off your shock and reassemble everything like it was before but with the new coilover in place of the old spring. Put some little rubber washers that come with it down at the base of the shock to prevent rubbing and what not. Also, take the rubber thing out of the top hat and just sit the coilover in there without that thing in the way. Make sure during this reassembly not to leave stuff out like washers.
11. Slap everything together the way it came apart and look at your new shock junk, then stick it back in the way it came out and torque everything to spec.

12. Put the rim back on and whatnot and go about the other side on the front the same way as this.
13. With the front done, move onto the back. The back on my car is easier. you just need to unbolt to strut from the lower control arm and the lower control arm from the brake knuckle to move it out of the way.


14. So undo the 14mm on the strut/lca, then the 14 on the lca/knuckle.
15. Undo the two 14mms in the hatch (same deal as last time with the outside) and take the strut out.

16. Work the spring compressors again, and the same deal for dissassembly and reassembly of the coilover/strut.
17. Put it all back together again, toque to spec, and sit the car down.
18. Adjust the height like goodness so it's level and what not and then you're done with that part!
Here's an after shot, pretty nice:


 Today
Today


")