I've reached a benchmark on the drafting -- all the sections are drawn in their finished form. The next step will be to drawing the jigsaw joints and lay out the pieces on the 2'x8' foam sheets -- this will take a while!
Here's a more detailed look at a sampling of the section starting just behind the high point of the roof moving back through the CarBEN EV5 chassis.

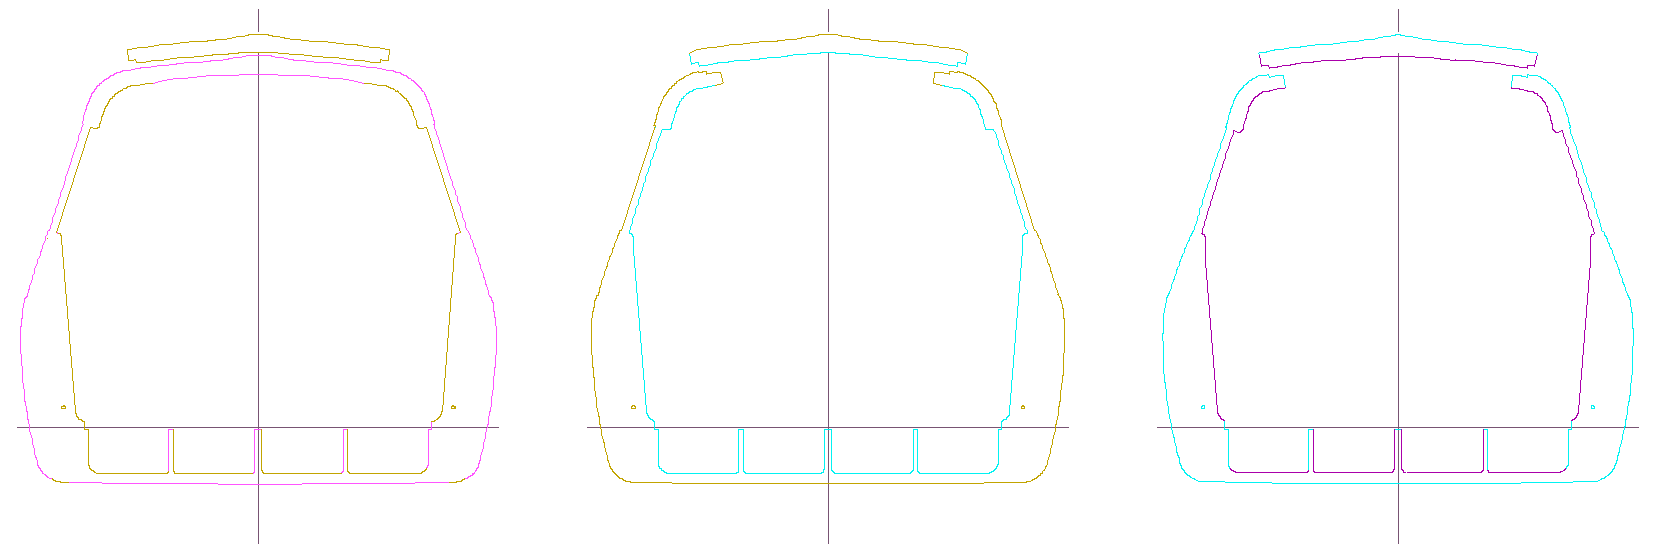
The different colors show the areas where the adjacent section behind adds material to the forward section. In other words, the tapered shape must have an excess of material -- because both the outside and the inside of the same taper.
I hope this makes sense.

These are the sections at the top hinge of the hatch door. I've started the interlocking lip on the door and the opening that holds the seal and acts as a water gutter when the door is open.
Also, note the 1/2" diameter alignment dowel holes -- these are modeled straight through the entire model. As the chassis tapers, I added other alignment holes.

These sections show the transition in side windows -- the 'C' pillar that is just ahead of the rear wheels. I'm intending the have 2 layers of glazing on the side windows and the hatch and door windows, to provide more insulation.
The section on the right has the front top of the hatch windows, near the center.
The two center rectangles in the floor are the battery bays. The vertical rectangles on the center and right section are for the rear suspension; which is probably going to be a trailing swing arm(s).

These section have the front pieces of the rear wheels and the wheel skirts. Notice the hatch window is getting wider the closer you get the back.
I moved the wheels to where they may fit more efficiently when cutting the foam. And the rear shock / spring units will probably be located here.

The rear wheels are attached to the chassis here, for the purposes of building the model so it can sit on the ground as the car will. After the chassis is (started?) to be fiberglassed, the wheels will be cut out and the suspension components can be designed and have the anchors affixed to the chassis.
The section on the right has voids for where a lateral link arm can be located. This will form a box beam across the floor between the rear wheels.

These sections are at the back of the rear wheels, and I moved them where they fit efficiently on the foam sheets.
I am hoping to be able to use the alignment holes as a wire chase, so I am cutting a connecting channel from the outer hols to the inner holes that pass through the section closer to the back.

These sections show the rear wheel strakes and the diffuser fins on the underside of the chassis. Also, I'm cutting a small area so the tail lights can be wired -- the small triangular holes at the "shoulder".
The rear exhaust air vents (that exit flush to the sides of the rear fenders) are shown in the section on the right.

These sections show the exhaust air vents and the end of the rear wheel strakes. Also, the hatch windows stops at this point.
This is the 'D' pillar and the outer edges of the rear bumper starts on the section on the right.

This is the very back of the chassis (nearly) and the section on the left has the rear door stops and the exhaust air vents. These are 1" thick sections because the taper on the very back is much "steeper".
The center rib on the hatch door will act as a supporting stop at the center of the rear doors. I also have added a small "dorsal" fin at the center of the hatch spine. This was not on the SketchUp model; though I hope to remake the SU model from these sections that is much smoother and much more complete as well with all of the interior voids included in the model.

I cut sections parallel through the rear doors, so these are true size and I'll cut them from the flat foam sheets, avoiding an awkward bit of smoothing. The red lines are the actual edges of the doors and windows, and the gray lines are additional material so I can form the jambs.
The rear bumper and roof "spoiler" trailing edges are a very wide chevron, to match the way the rear doors close.