Prep for the sheet metal skin (phase 2) required a lot of head-scratching, but I think I'm about ready to fab now (or whenever the illness around my house clears up).
First off, 3dcadbrowser's human reviewer rejected my upload, which came as a surprise. I'll probably try again... later... (because I really really want a Prius CAD model, if not the Civic model.)
So I clamped some strips together on top of the frame in the real world, eyeballed the tail profile, and then took the dimensions from the strips. This is a pretty good way of doing it anyhow.
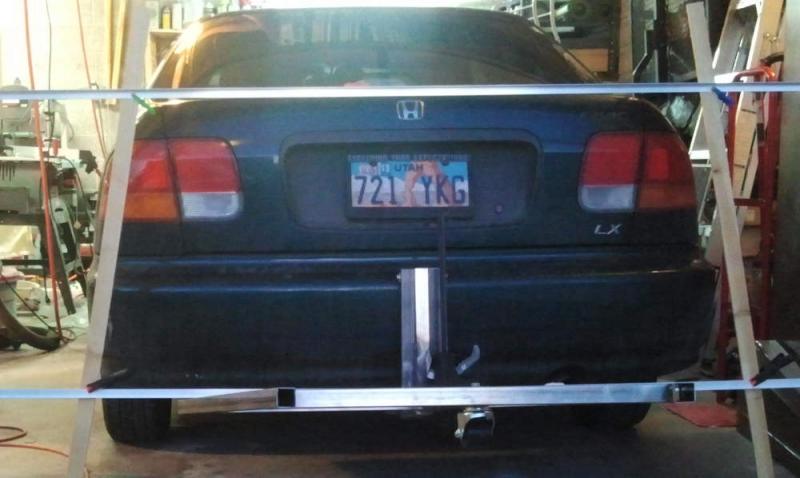
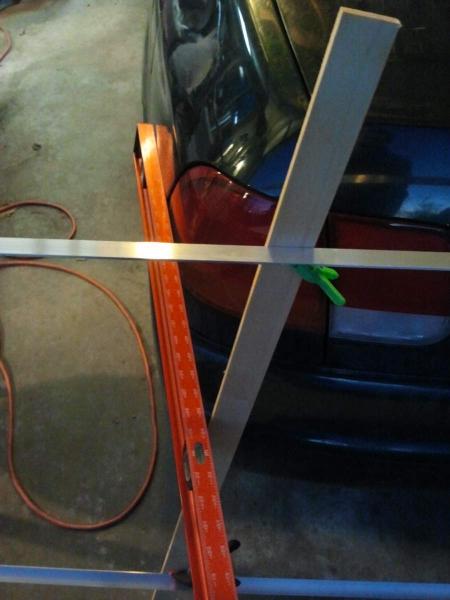
I had the box height exactly right, but it turns out the width I got from my diagrams was about 5 inches short. I adjusted my design accordingly, but I'm not going to change the steel floor frame now - it won't look quite right, but a typical load isn't going to unduly stress the edges.
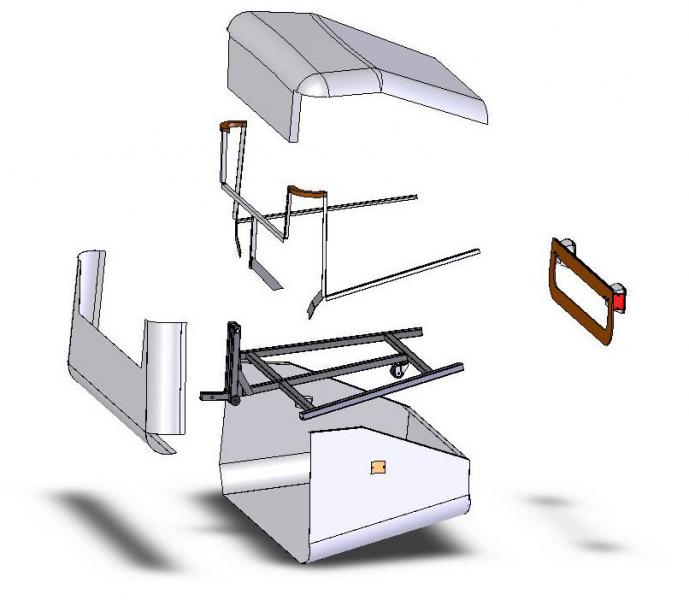
Most of the head-scratching went into deciding where to place the ribs and how to constrain and assemble everything and whether I needed a buck. Here's what I came up with:
- I bought a 4'x12' .032 thick Aluminum sheet from a local supplier for only $56. So far that's the only thing that's cost less than I expected. The sheet was pretty easy to roll up and fit in my Corolla's backseat for the trip home. At $1.17 per sqft, I have a feeling this will become my ecomodding material of choice for a variety of mods.
- The lid will be fiberglass over foam (like a surfboard or like 3wheeler's Insight tail).
- The lid hinge is in the back and the lid is cut low in the front so that large items can be removed from the trunk while the box is on the hitch. (BTW it turns out the pin for the frame hinge is not easy to remove and replace; alignment is challenging. So that isn't the right method to get large items in and out of the trunk.)
- The skin will be in 2 pieces; front and back. The back piece starts on bottom and folds up over the sides and back. The front piece has 2 compound corners to shrink (which are not shown in the CAD; Solidworks doesn't like to make compound sheet metal). Actually in order to fit the front piece onto the 4'x12' sheet I have to cut it out in two halves and rivet it together. Details, details.
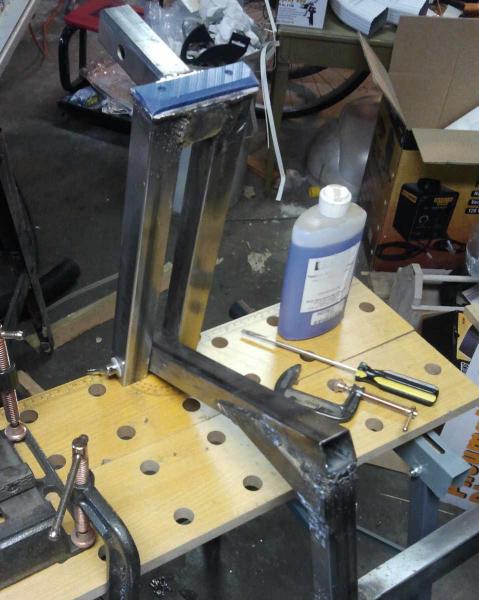
- First step is to rivet the rear skin onto the floor frame. The very tail end shape is constrained with a thin plywood form. (It goes on the inside of the skin; I didn't do that exploded view quite right.) The 0.05 thick aluminum right-angle side-ribs are attached to the skin and then the sides and back are bent up. There will be no buck; the forward section will be measured at the lip, maybe use strips to clamp securely in place, the rearward is constrained by the plywood and then the back and sides are riveted together. Then the aluminum ribs get bolted to steel brackets that weld onto the floor frame, using a welding blanket or such to protect the aluminum sheets.
- Next step is to form the front skin, using the box itself to verify the shape. Then rivet it in place. Then add aluminum ribs and weld the front bracket on.
- There's also a plywood lip around the curves at the top that I need for the lid to seal against.
There will be a PDF with component drawings on my website sometime later, as well as a ZIP with STEP and Solidworks CAD.
EDIT: files are ready:
Index of /files- CAD in Solidworks format
- CAD in STEP format
- CAD in VRML (polygon) format
- Drawings in PDF
The lid will be phase 3.
======================================
I also had a chance to finish the frame and put it on the car, load up the trunk with 180lbs, and drive around a bit. I did test my driveway and a dip not far away. The caster actually never struck, but at 180lbs the blue UHMW slip pad definitely bottoms out on the driveway. No surprises there.
I don't think the UHMW slip pad is going to last forever, but I'll probably put a few runs on it first, if it convinces me it is a long-term problem (and if I would be unhappy periodically replacing the slip pad) I have a backup plan for some plastic wheels that will bolt onto the front of the frame. You can see them in my CAD. I couldn't find quite the right off-the-shelf wheel, so I figure I'd cut them from plastic rod-stock and attach to bolt-on idler shafts.
Also, it would make sense to use UHMW slip pad(s) instead of the caster in the back, since ground strikes on the back end of the box have turned out to be a rather light duty application.