For the latest info, please go to the wiki
http://ecomodder.com/wiki/index.php/MPGuino
The information in this post is no longer being maintained
MPGuino is part of the OpenGauge instrumentation effort, which was created to make available efficiency instrumentation of all sorts. MPGuino specifically is a Miles Per Gallon gauge for fuel injected vehicles that is based on the arduino platform with some extra circuitry for monitoring the fuel injectors and the speed sensor in the vehicle.
This is the workspace for the mpguino release one, where we can sort out the final issues. The first post here will be updated with diagrams till someone runs with the wiki parts. The change log will be posted at the end of the posts as changes occur. This does require some electronical and a minute bit of automotive skill to identify and utilize the hookup points and assemble the electronics so proceed at your own risk.
I do ask that once we get this reasonably stable that users contribute to the knowledge base of how to install it in a specific car and what parameters worked well for that car so that new users can hopefully just lookup the vehicle specifics, or add theirs once they figure out the proper parameters.
Current status: In vehicle testing in progress... We are still working out the bugs in the software and possibly the hardware. The source code is available
from here , just copy and paste it into the arduino ide(
Arduino - HomePage ).
Some of the skills required
Identifying the right injector leads with a volt meter.
Identifying the vss with schematics/ECU diagrams/online tools.
Identifying battery power source with a schematic and/or voltmeter.
Soldering.
Chasing a wire or two through the firewall.
Possibly making updates to the circuit if we can't find a software solution to any problems that are exposed, etc.)
Being able to reprogram the device when we do find software solutions, or new features.
Parts List:
2 5.1v zener diodes
1 2n3906 PNP Transistor
1 220 ohm resistor
2 100k resistors
3 tactile switches
1 freeduino arduino clone (any arduino can probably be made to work)
i.e. an iduino:
http://spiffie.org/kits/iduino/ or a
Freeduino
1 LCD (others might work as well, check pinout and chipset, etc).
16x2 LCD Module While Characters Blue Backlight
Or a green one from sparkfun or
mouser
(a number of folks like the green ones better)
Note: If you would rather work with the CPU directly and can figure out how to program it from arduino IDE then have a at the schematic in this thread:
http://ecomodder.com/forum/showthrea...html#post32427 and skip the wiring diagram below because you will need to build the whole thing from scratch.
Wiring diagrams:
For the arduino style boards:
LCD is upside down in this diagram. All seems to be working well in the hardware department.
 For the iDuino style boards:
Will need to procure a 7805 voltage regulator a 1n4004 diode, a 330 uf cap and a .1uf cap.
 For the do it yourselfer:
refer to the diagrams in the
http://ecomodder.com/forum/showthrea...html#post32427 thread
Prototype:
Here is the prototype I'm using (serial freeduino and 16x2 blue lcd hot glued to a piece of thick balsa, with a component board for the transistors/etc. and any extra wire smashed out of the way)

And here is a model built from scratch
 Screens:
1. Instant MPG/Speed
Current MPG/Distance
2. Instant MPG/Speed
Tank MPG/Distance
3. Large font instant MPG
4. Large font current MPG
5. Large font tank MPG
6. Current MPH, MPG, Miles, Gallons
7. Tank MPH, MPG, Miles, Gallons
8. Instant Raw Data (very useful for connection troubleshooting)
Injector open seconds, Injector open microSeconds,
Injector pulse count, Vehicle Speed Sensor pulse count
9. Current trip Raw Data
Injector open seconds, Injector open microSeconds,
Injector pulse count, Vehicle Speed Sensor pulse count
10. Tank trip Raw Data
Injector open seconds, Injector open microSeconds,
Injector pulse count, Vehicle Speed Sensor pulse count
11. CPU Monitor
Max CPU %utilization, Tank running Time mm.ss,
Free Memory (bytes)
There is also a setup screen that displays the first time the program is run and by pressing all three buttons at once. It walks you through the following setup variables. Use left and right buttons to select the digit you wish to change or the OK or Cancel (XX) items. Use middle button to rotate the current digit or select OK or XX if that is where the cursor is. Selecting OK will save the currently displayed value to the current variable and advance to the next variable. Selecting XX will just advance to the next variable.
Contrast - This comes up first on a brand new run and changes on the screen are immediate so if you can't see anything try pressing middle button a few times.
VSS Pulses/Mile - use this to adjust displayed speed/miles. If the speed/miles displayed on the mpguino is low then decrease this number by the percentage that it is off and vice versa for high readings. Most asian cars will be a multiple of 8204 and GM will be 10000, we are hoping users will contribute model specific data here.
MicroSec/Gallon - use this to adjust displayed fuel consumption. You may want to readjust this initially to get a ballpark MPG reading (after VSS Pulses/Mile is deemed accurate), then calibrate it with a couple fillups. If the mpguino displayed MPG is high or the displayed tank gallons is low at fillup then reduce MicroSec/Gallon by the percentage that the gallons are low or the displayed mpg is high. Like the vss pulses, this would benefit from user contributions about what values work for what specific cars.
Pulses/2 revs - not currently used, but a single injector on a 4 cylinder sequential system will make 1 squirt in 2 revolutions. Hope to be able to base RPM on this at some point.
Timout(microSec) - defaults to 7 minutes. If there are no injector or speed signals from the car and no buttons are pressed in that time then the display backlight turns off. When activity resumes the display will turn back on and the current trip will reset and the tank trip will be restored to the point of last activity.
Tank Gal * 1000 - not currently used, but defaults to 13300 or 13.3 gallons.
Injector DelayuS - Represents the mechanical delay of the injector in microseconds. Advanced topic.
Buttons:
Current button assignments as follows,
left: cycle through screeens in reverse
middle: cycle through pre-defined brightness settings
right: cycle through screeens forward
left+middle: tank reset
right+middle: current reset
left+middle+right: go to setup screen
Installation notes:
For Identifying where to tap into the fuel injector:
1. turn on the ignition, leave engine off.
2. Unplug an injector.
3. With a voltmeter, measure the voltage on each injector connection. One should be 12 volts and the other should be more like 0. You will want to tap into the one that is at 0 volts.
For finding the VSS hookup, there are several approaches, but at the bottom of
Technical Support is a tool that might help you identify the VSS wire location and color. Also here is another online source of ECU pinouts, I'm sure there are more:
ECU Pin-out Diagrams :: Innovate Motorsports Application Notes
IMPORTANT, you must be very deliberate when hooking up the mpguino to your cars battery power. There have been several cases where people had to reflash their atmegas and it is noted in the datasheet that the flash memory can be corrupted if the power requirements are interrupted. So line up those pins and get it hooked up the first shot.
On my saturn I tapped into an injector ground lead, and used ground and battery voltage and speedo (possibly vss) signal from the ecu plugs.

Here are some shots of hooking up the prototype on a saturn. I got lucky with the splice clips on the power but had to trim the insulation (carefully) on the injector lead and vss lead and solder the connection. I also had the wrong vss lead, so don't go by color here. But it was straight forward, and pinching through an existing rubber grommet in the firewall with a piece of coathanger was easy so I could get to the injector tap.


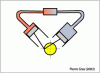
 Metro installation
FYI, here is the hookup points in a 98 metro
VSS:

Injector:
 Source code:
Work in progress, just cut and paste into the arduino ide. Available from
here


 Today
Today