Go Back   EcoModder Forum > EcoModding > EcoModding Central
Register Now
 Register Now

Now available from EcoModder: ScanGauge II fuel economy gauge.  Click for details.  

Reply  Post New Thread
 
Submit Tools LinkBack Thread Tools
Old 07-25-2010, 02:00 AM   #1 (permalink)
"Inconceivable"
 
moorecomp's Avatar
 
Join Date: Jul 2008
Location: Mancelona, MI
Posts: 252

My ZX2 - '99 Escort ZX2
Team ZX2
90 day: 40.5 mpg (US)

Her RAV4 - '011 Rav4 4x4
90 day: 24.98 mpg (US)
Thanks: 1
Thanked 55 Times in 33 Posts
Home Depot Air Dam

Finally got around to installing the HD air dam today. No ABA testing planned, as it would be a pain to r/r. I think it turned out pretty good. Sorry for the crappy cell phone pic.


(Support Ecomodder.com & get rid of these annoying ads!)      
 
__________________
moorecomp
Mancelona, MI

  Reply With Quote
The Following 2 Users Say Thank You to moorecomp For This Useful Post:
drasher502 (12-05-2010), VegasDude (09-09-2010)
Old 07-25-2010, 02:19 AM   #2 (permalink)
Pokémoderator
 
cfg83's Avatar
 
Join Date: Dec 2007
Location: Southern California
Posts: 5,724

1999 Saturn SW2 - '99 SW2 Wagon
Team Saturn
90 day: 43.05 mpg (US)
Thanks: 385
Thanked 459 Times in 315 Posts
moorecomp -

I think it looks good too. Very OEM-ish.

CarloSW2
__________________

What's your EPA MPG? Go Here and find out!
American Solar Energy Society
  Reply With Quote
Old 07-25-2010, 02:24 AM   #3 (permalink)
EcoModding Lurker
 
Join Date: Jul 2010
Location: newark nj
Posts: 5
Thanks: 2
Thanked 0 Times in 0 Posts
Quote:
Originally Posted by moorecomp View Post
Finally got around to installing the HD air dam today. No ABA testing planned, as it would be a pain to r/r. I think it turned out pretty good. Sorry for the crappy cell phone pic.
What material did you use to make it?
  Reply With Quote
Old 07-25-2010, 06:03 PM   #4 (permalink)
Master EcoModder
 
Join Date: Dec 2008
Location: South Jersey
Posts: 537

Little Blue - '98 Escort ZX2 Cool
Team ZX2
90 day: 46.69 mpg (US)

Big Red - '00 Excursion XLT
90 day: 15.53 mpg (US)
Thanks: 4
Thanked 23 Times in 19 Posts
Wow! Very nice installation. Could you post some detail photos of how you attached it?

I think you will see some nice benefits from this!
__________________
  Reply With Quote
Old 07-25-2010, 06:58 PM   #5 (permalink)
Master EcoModder
 
Patrick's Avatar
 
Join Date: Apr 2008
Location: Northern Florida, USA
Posts: 450

Hot Tamale - '010 Prius III
Thanks: 15
Thanked 64 Times in 51 Posts
Quote:
Originally Posted by Monark View Post
What material did you use to make it?
It looks like lawn edging: Suncast Corporation 5 In. Landscape Lawn Edging, 20 Ft. - PCE2090 at The Home Depot
  Reply With Quote
Old 07-25-2010, 09:29 PM   #6 (permalink)
It's MPG Season
 
aburk4's Avatar
 
Join Date: Jul 2010
Location: Pinckney, MI
Posts: 10
Thanks: 0
Thanked 0 Times in 0 Posts
Looks good!

Is that a permanent install? Or just a cold weather modification?
  Reply With Quote
Old 07-25-2010, 10:02 PM   #7 (permalink)
"Inconceivable"
 
moorecomp's Avatar
 
Join Date: Jul 2008
Location: Mancelona, MI
Posts: 252

My ZX2 - '99 Escort ZX2
Team ZX2
90 day: 40.5 mpg (US)

Her RAV4 - '011 Rav4 4x4
90 day: 24.98 mpg (US)
Thanks: 1
Thanked 55 Times in 33 Posts
Yes, lawn edging from HD. $7 and change for 20 feet. There is no need for detailed mounting pics, as it is simply screwed in place with sheet metal pan head screws. The nice thing about this edging is it has a lip on the edge that covers the screws installed. Simply held in place and drilled through the edging and plastic bumper. Installed screw under the lip of the lawn edging and the mounting is quite secure. At the wheel well openings, just cut the top and bottom where the lip and round part are and fold it around the edge of the opening. You can push the bottom in or out to get the look you want, then screw in place. I may add a brace in the center, as it does have a slight curve there but I am hoping the sun will straighten it out. Another pic.

__________________
moorecomp
Mancelona, MI

  Reply With Quote
The Following 2 Users Say Thank You to moorecomp For This Useful Post:
BuckarooBanzai (09-10-2010), johnlvs2run (02-23-2011)
Old 07-25-2010, 10:10 PM   #8 (permalink)
It's MPG Season
 
aburk4's Avatar
 
Join Date: Jul 2010
Location: Pinckney, MI
Posts: 10
Thanks: 0
Thanked 0 Times in 0 Posts
I see. I see. Those tires are looking pretty damn good too.
  Reply With Quote
Old 07-25-2010, 10:12 PM   #9 (permalink)
"Inconceivable"
 
moorecomp's Avatar
 
Join Date: Jul 2008
Location: Mancelona, MI
Posts: 252

My ZX2 - '99 Escort ZX2
Team ZX2
90 day: 40.5 mpg (US)

Her RAV4 - '011 Rav4 4x4
90 day: 24.98 mpg (US)
Thanks: 1
Thanked 55 Times in 33 Posts
Quote:
Originally Posted by aburk4 View Post
Looks good!

Is that a permanent install? Or just a cold weather modification?
It is held on by sheet metal screws, and can be removed in 10 minutes or less. It would be permanent, unless the deep snow causes problems, then I will remove it in winter.
__________________
moorecomp
Mancelona, MI

  Reply With Quote
Old 07-25-2010, 11:42 PM   #10 (permalink)
Master EcoModder
 
wagonman76's Avatar
 
Join Date: Jun 2008
Location: Northwest Lower Michigan
Posts: 1,006

Red Car - '89 Celebrity CL 4 door
Team Chevy
90 day: 36.47 mpg (US)

Winter Wagon - '89 6000 LE Wagon
90 day: 28.26 mpg (US)
Thanks: 8
Thanked 13 Times in 12 Posts
Hey you finally did it, looks good man!

Considering my results of using it on my 6000 wagon all last winter, I think yours will hold up just fine. Only thing I did differently was mounted it upside down from what you did. The 6000 is not as round as yours on the bottom and when I tried it like you did, the corners wanted to kink. So I mounted it upside down from what you did and no kinks. Plus that put the screws through 2 layers of material instead of one. I just used drywall screws on mine, going through the existing lower lip piece that was cracked in a few places already, so I used a lot of screws.

I've pushed through a lot of hardened snow chunks with no problems. I've parked up against snow protrusions on the snowbank at work for 9 hours, and yes it did deform pretty bad but after a few hours it went back to the shape it was supposed to be. Right now as it sits it looks as good as the day I put it on. Extremely resilient stuff.

I bet you will see an improvement. I got a 2 mpg improvement with the airdam on my Celeb. When I get a chance I will replace it with this stuff too because the metal one is really getting beat to crap. I picked up a bunch from spring cleanup piles and I have enough left to do the Celeb.


(Support Ecomodder.com & get rid of these annoying ads!)      
 
__________________

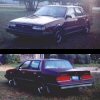
Winter daily driver, parked most days right now


Summer daily driver
  Reply With Quote
The Following User Says Thank You to wagonman76 For This Useful Post:
moorecomp (07-26-2010)
Reply  Post New Thread

Thread Tools


Similar Threads
Thread Thread Starter Forum Replies Last Post
Air dam and belly pan wildfire8 Aerodynamics 2 05-01-2010 12:04 AM
start to play with IAT sensor on Mercedes E250D-Turbo 98' poisas EcoModding Central 5 10-09-2009 11:09 AM
Comparing Warm Air Intakes (WAI) & Cold Air Intakes (CAI) toomuch EcoModding Central 22 04-07-2009 09:30 PM
Moving air intake into the engine compartment? pasadena_commut Aerodynamics 5 07-25-2008 03:24 PM


Powered by vBulletin® Version 3.8.7
Copyright ©2000 - 2012, vBulletin Solutions, Inc.
Content Relevant URLs by vBSEO 3.5.2
All content copyright EcoModder.com