08-24-2008, 09:59 PM
|
This thread is in the EcoModder Project Library |
#1 (permalink)
|
|
Batman Junior
Join Date: Nov 2007
Location: 1000 Islands, Ontario, Canada
Posts: 22,541
Thanks: 4,085
Thanked 6,988 Times in 3,618 Posts
|
I basjoosed my headlights today (sealed the surrounding gap)
basjoos (v.) - to make aerodynamic optimizations at a micro (vs. macro) level.
(OK, yes, obviously basjoos does macro too, but whenever I start nitpicking about some small aero detail, I instantly think about his silicone-filled panel gaps. The "basjoosed panel gaps".)
---

So, no, I don't have any pics to post yet, but today I bought a roll of 3 mm (about 1/8) thick peel 'n' stick weatherstrip because I was looking for a quick 'n' clean aeromod project to do before my next big one.
I fit the foam strip in the gap all around the driver's side headlight assembly. (I'll do the other side tomorrow.)
That gap ultimately leads into the engine compartment and under the car, so despite it being a small area, it's pretty much the top of the list in terms of where I don't want air to go unnecessarily.
I calculated a total open area of 43.2 cm2 around both lights, or 6.7 square inches.
Inconsequential? Mercedes didn't think so ("sealed joints on headlights"):

From thread: http://ecomodder.com/forum/showthrea...5-up-1221.html
|
|
|

|
|
The Following User Says Thank You to MetroMPG For This Useful Post:
|
|
 Today Today
|
|
|
|
 Other popular topics in this forum...
|
|
|
|
|
08-24-2008, 10:39 PM
|
#2 (permalink)
|
|
Mr. Blue Tape
Join Date: Jun 2008
Location: Fresno, CA
Posts: 345
Thanks: 0
Thanked 2 Times in 2 Posts
|
Wow... 0.25 Cd. I wonder how much of that is because of the FULL SMOOTH-SURFACED UNDERBODY PANELING?  Looks like they don't consider the hubcaps a priority, opting for weight over aero.
I never gave that gap much thought but now that you mention it and seeing that pic... you're making me a believer. I recently removed my ad hoc smooth hubcaps and rear skirts because they weren't having any effect on my routes but this sounds easy/small enough for me to squeeze in before I get back to my real job of schooling.
Does Prius have a "show me" diagram like that? I'd be interested in seeing all their upgrades, plus those from the Volt. Time to call upon the mighty search engine gods!
__________________
 My 5 pillars of fuel efficiency:
- driving style
- aerodynamics
- tires
- weight reduction
- engine maintenance
|
|
|
|
|
08-25-2008, 08:38 AM
|
#3 (permalink)
|
|
Batman Junior
Join Date: Nov 2007
Location: 1000 Islands, Ontario, Canada
Posts: 22,541
Thanks: 4,085
Thanked 6,988 Times in 3,618 Posts
|
Quote:
Originally Posted by azraelswrd

I recently removed my ad hoc smooth hubcaps and rear skirts because they weren't having any effect on my routes
|
Really? Are you able to detect a change as small as a couple of percent above the noise of normal variation?
Quote:
|
Does Prius have a "show me" diagram like that?
|
I haven't seen one. If you turn anything up, let us know. |
|
|
|
|
08-25-2008, 02:51 PM
|
#4 (permalink)
|
|
Mr. Blue Tape
Join Date: Jun 2008
Location: Fresno, CA
Posts: 345
Thanks: 0
Thanked 2 Times in 2 Posts
|
There was some slight noise reduction but it didn't translate to my scangauge. I will need more testing though under more optimal conditions. The wind lately has been annoying (HEADWIND???) and another reason I needed to remove all the tire tape was because I was getting my tires rotated today.
Got a lot of questions about my grill block though... blue tape does that.
__________________
My 5 pillars of fuel efficiency:- driving style
- aerodynamics
- tires
- weight reduction
- engine maintenance
|
|
|
|
|
08-25-2008, 08:18 PM
|
#5 (permalink)
|
|
EcoModding Apprentice
Join Date: Jul 2008
Location: Sault Ste Marie, ON, Canada
Posts: 128
Thanks: 19
Thanked 16 Times in 16 Posts
|
When I was fixing my inner fenders on my TDI (replaced one, coroplast-patched the other), I noticed that I could see HUGE gaps between my headlights and bumpers. I ended up stuffing 1/2" x 7/16" weatherstripping into the gap below.
If I need airflow into the engine bay -- well, that's what the vents for the Radiator and Intercooler are for, not "extra" venting via the headlights.
No idea what improvement it's doing at this point, since I'm still calibrating my Scanguage II. That said, I know sealing that up that gap into a dead space shouldn't be counter productive.
__________________
Current mod: Skidplate/Undertray for my MkIV Jetta. Next mod: CAD drawing for skidplate so other Jetta/Golf drivers can make one too!
|
|
|
|
|
08-25-2008, 08:36 PM
|
#6 (permalink)
|
|
I REFUSE!
Join Date: Apr 2008
Location: 92596
Posts: 262
Thanks: 0
Thanked 0 Times in 0 Posts
|
Quote:
Originally Posted by ChrstphrR
When I was fixing my inner fenders on my TDI (replaced one, coroplast-patched the other), I noticed that I could see HUGE gaps between my headlights and bumpers. I ended up stuffing 1/2" x 7/16" weatherstripping into the gap below.
If I need airflow into the engine bay -- well, that's what the vents for the Radiator and Intercooler are for, not "extra" venting via the headlights.
No idea what improvement it's doing at this point, since I'm still calibrating my Scanguage II. That said, I know sealing that up that gap into a dead space shouldn't be counter productive.
|
I'd imagine the minor air ducting to the lamps is to dissipate the heat produced by the bulbs.
__________________

|
|
|
|
|
08-25-2008, 08:48 PM
|
#7 (permalink)
|
|
Batman Junior
Join Date: Nov 2007
Location: 1000 Islands, Ontario, Canada
Posts: 22,541
Thanks: 4,085
Thanked 6,988 Times in 3,618 Posts
|
azrealswrd: Ben suggested I use lime green tape for my temporary mods. Nuh uh.  I bet your blue tape got lots of attention.
The fact that you thought it was quieter tells me that's probably a worthwhile aeromod.
ChristphrR: well, I did the other light this evening, and measured it. Total gap area (projected) around both headlight assemblies is 43.2 cm2, or 6.7 square inches - practically the size of a business card.
I figure: if I've got a business card sized hole smack in the front of my car that does nothing functional, and ultimately lets air into the aerodynamic torture chamber that is the engine compartment/underbody area, why wouldn't I cover it up?
GM obviously thought it was worth putting speed tape over the headlights (and other panel gaps) to squeeze max efficiency from the GM EV1 / Impact for its record setting speed run:
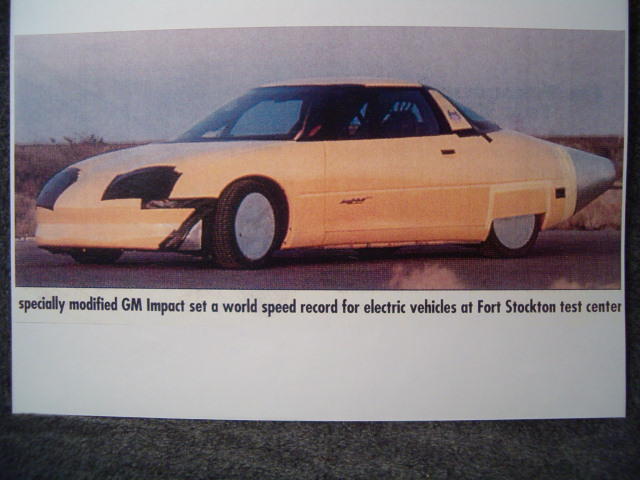
Will post pics of my weatherstripping mod in a few minutes... |
|
|
|
|
08-25-2008, 09:05 PM
|
#8 (permalink)
|
|
Hi-Tech Redneck
Join Date: May 2008
Location: Ashtabula, Ohio
Posts: 1,436
Thanks: 6
Thanked 49 Times in 42 Posts
|
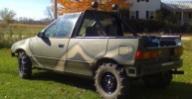
I seen that on Christine when doing the front grill block (bumper block) and was surprised at all the air gaps! I was not at all concerned with an entire blockage after seeing all this..............
__________________
GeoMetroforum.com - got mpg?
|
|
|
|
|
08-25-2008, 09:18 PM
|
#9 (permalink)
|
|
Batman Junior
Join Date: Nov 2007
Location: 1000 Islands, Ontario, Canada
Posts: 22,541
Thanks: 4,085
Thanked 6,988 Times in 3,618 Posts
|
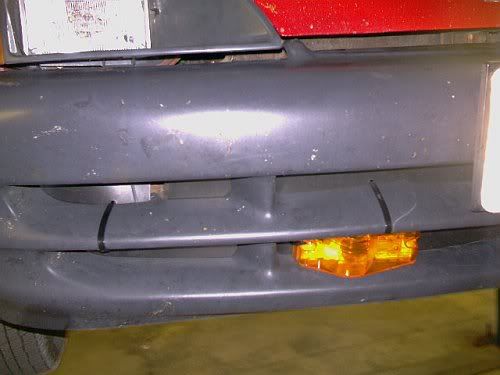
Pics:

Above: the gaps! It's no Lexus.

The 3 mm weatherstripping. I cut this in half, width wise.

This worked out quite nicely: the strip was just the right size so I could position it in the gap and peel the backing off with it staying in place. Then I lifted up on the bumper to squish the adhesive down nicely.

Top view: the hood presses lightly against this.

No more business card size hole in the front of the car! Mercedes, eat your heart out.
I need to finish the quarter panel gap around the side marker portion of the assembly. I'll just use black silicone there since it's too small for the foam strip. |
|
|
|
|
The Following User Says Thank You to MetroMPG For This Useful Post:
|
|
|
08-25-2008, 09:47 PM
|
#10 (permalink)
|
|
EcoModding Apprentice
Join Date: Jul 2008
Location: Sault Ste Marie, ON, Canada
Posts: 128
Thanks: 19
Thanked 16 Times in 16 Posts
|
Quote:
Originally Posted by thebrad
I'd imagine the minor air ducting to the lamps is to dissipate the heat produced by the bulbs.
|
Hrm, well, maybe I'll clean out the car, and put a fire extinguisher inside. (My Dad and I both have the bad luck of having vehicle fires, anyway...)
And MetroMPG - nice picture showing the before, during, and after.
The size of the gap under your lights looks a lot like what I saw under my car (different make and all). I used a broken DQ Blizzard spoon to help shoehorn my weatherstripping under the lights, sticking it to the bumper fascia on the bottom, and sticking the top weather stripping to the plastic lense, again, like you did.
__________________
Current mod: Skidplate/Undertray for my MkIV Jetta. Next mod: CAD drawing for skidplate so other Jetta/Golf drivers can make one too!
Last edited by ChrstphrR; 08-25-2008 at 09:51 PM..
Reason: Saw the pictures and didn't want to double-post!
|
|
|
|
|