A few months ago I did a
Partial Front Bellypan. This post is to detail how I completed the belly pan to run the entire length of the car. I decided this was important for two reasons: 1) The metro bumper in it's current shape forces a lot of air underneath the car (I plan on later fixing this with a nosecone like
aerocivic's or a full airdam like
AndrewJ's - but until then all that pressurized air would probably benefit from a smoother underbelly. and 2) getting rid of the 4x8 sheet of coreplast on the roof of my boat was one of my wife's conditions for me finally getting my 67 mustang rat rod (sort of the opposite of the metro... it's a story for another time).
Without Further ado, here is the How-To:
Tools/Supplies Needed:
- 4x8 Sheet of Coreplast
- Self Tapping Sheet Metal screws
- Drill
- Zip Ties
- Razor Knife
- Permanent Marker
- floor jack and jackstands
- 1-2 hours of your life
Step 1: Jack up the back of the car as high as you can and put it on jackstands (Be sure to chock the front wheels, your e-brake has no effect on them at all)
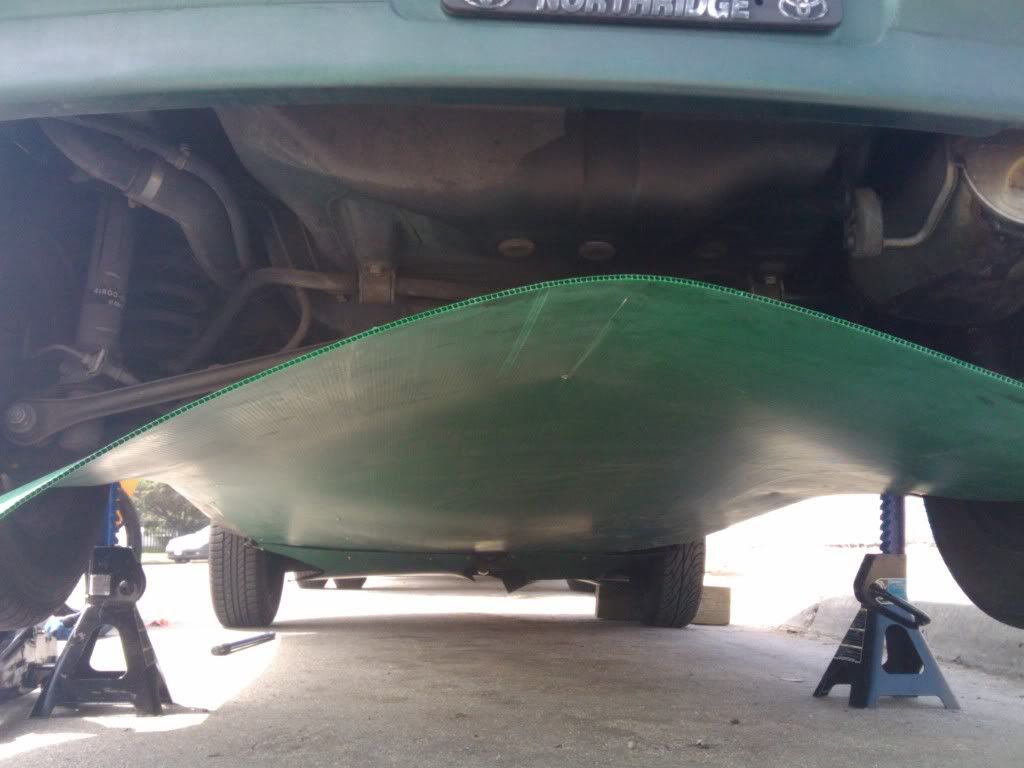
Step 2: Be sure the coreplast is nice and straight with the body of the car and tuck the front edge up over the trailing edge of the partial or front bellypan (this keeps air from getting under the front edge of your full bellypan (which would be very bad) I secured this in only two places by drilling some self tappers through the coreplast and into the belly of the car near the jack points. At this point it should look something like this:
 Step 3:
 Pick appropriate mounting points and use the self tapping screws to secure your bellypan to the underside of the car. Do this from front to back to ensure you keep things nice and smooth and don't create any bulges or ripples. I found a low point on each side of body that was about two feet back from the first screws and two feet in from the outside edge of the car. Then another pair of screws a bit farther back but along the edges again (6 screws total at this point).
Step 4: Next you'll need to secure the back of the bellypan but you'll find the wheels are in the way. Estimate how much to trim off of the sides to accommodate the wheels and make cuts that look like:
] [
Remember the back wheels don't turn so you won't need to get fancy like we did in the front
 Step 5:
 Lastly I placed one screw into a nice solid steely frame bit right in the rear center of the car which pinned it up nice so that it dropped on either side with the rear suspension bits.
NOTE: I did not drill into the gas tank, wire harness, or any exhaust components and you should be careful not to either

. At this point it should look something like this:
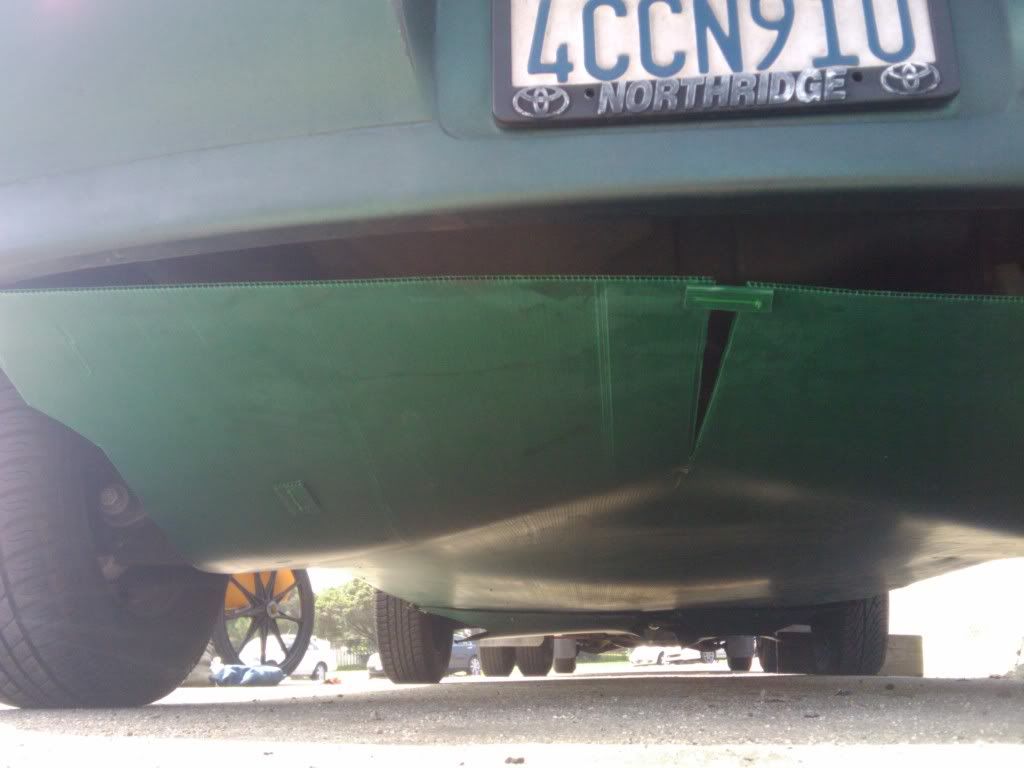
 Step 6:
 At this point I realized the perfect piece of coreplast would have been 8'6" to give me a little extra to trim and secure perfectly to the rear bumper. As it is though, it was about 2" short of perfect but no worries. The piece would be long enough to reach the back bumper on it's two corners only, but because of the compound dips for the suspension I needed to slice the center a bit to allow it to spread and curve correctly.
Step 7: I had noticed that in the front the pan had sagged a bit from the suspension arms. I imagine this is because the suspension hangs a bit lower when the car is jacked up and the wheel is in the air so I decided to place some zip ties to secure the coreplast around the suspension arm so it could stay snug when it travelled. I cut a small piece of coreplast and drilled through it and the pan on both ends straddling the suspension arm then ran some zip ties around it.
Step 8: Next I took two self tapping screws and secured the rearmost corners of the coreplast to the bottom of the rear bumper. The exhaust caused the right side of the split bellypan to sag weirdly so I then used another fortifying scrap of coreplast and a ziptie to raise up and match together the two halves of the bellypan.
(Step 6, 7, and 8 are all kinda pictured here

In the end I'm pretty happy with the result. I wish the coreplast could have been just a hair longer, I would have liked to secure it all along the bottom edge of the rear bumper. As it stands though, the pan cuts off 1/2 inch to 2 inches ahead of the rear bumper lip but well lower so it should direct air past that parachute like edge without incident.
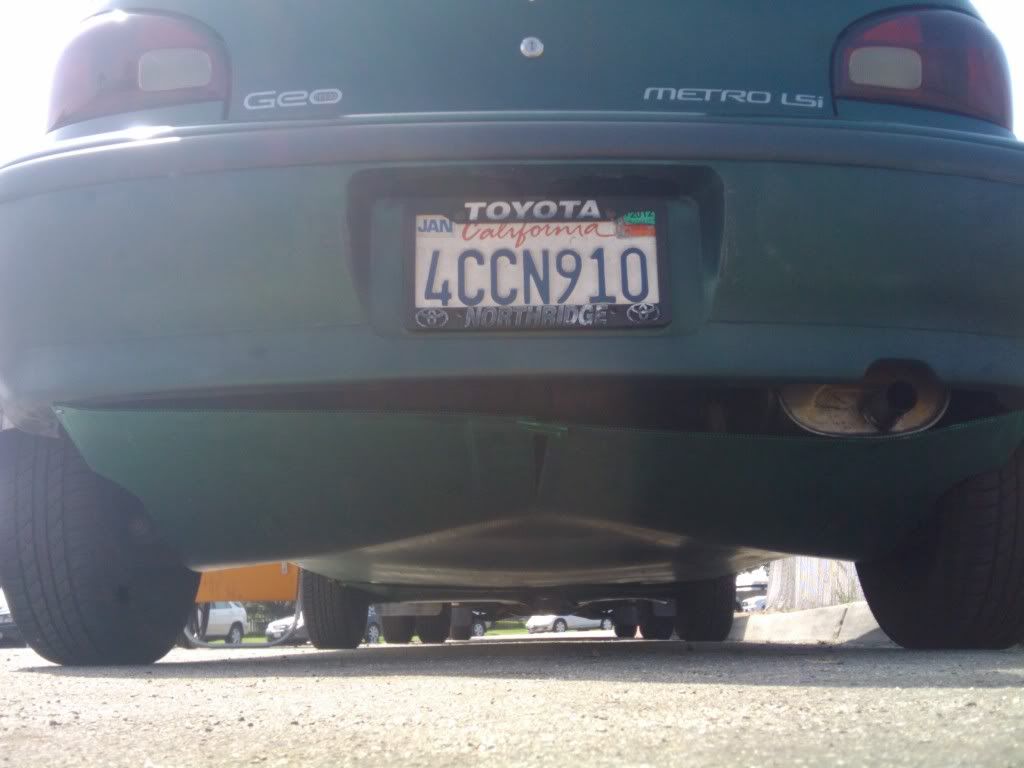
*I made no accommodations for hot exhaust components. I'm not worried about the piping much, as it's a bit tunneled in the car's underbody but the muffler is literally touching part of the pan. So far I've taken 2 10 minute drives and no melting, but I'll keep an eye on that. My first plan had been to cut out areas subject to heat and rivet in some aluminum flashing but that hasn't proved necessary so far.
OH! and while I was under the car I cleaned up the front pan a bit. Those dogbones under the front suspension were really sagging and I rigged them up with a ziptie loop just like we saw here. I also trimmed a few bits of the front bellypan just to keep things looking nice.