Go Back   EcoModder Forum > EcoModding > Aerodynamics
Register Now
 Register Now
 

Reply  Post New Thread
 
Submit Tools LinkBack Thread Tools
Old 03-26-2008, 08:18 PM   #121 (permalink)
Awesomeness personified
 
AndrewJ's Avatar
 
Join Date: Dec 2007
Location: Columbia, MO
Posts: 642

Harold - '94 Honda Civic CX
90 day: 54.51 mpg (US)

Margot - '08 Surly Big Dummy
Thanks: 0
Thanked 28 Times in 18 Posts
Send a message via AIM to AndrewJ
The easiest WAI ever!

So, after reading Hondaworkshops thread, I decided today was a pretty good day try out the warm air intake (hereafter referred to as WAI) that I've been scheming about for a few weeks.

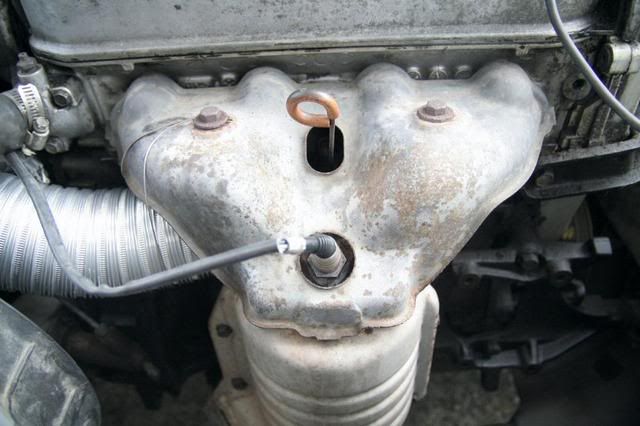
Knowing that there is at least part of the intake coming from inside the engine compartment (about 1 foot from the header) I convinced myself that Honda wouldn't have possibly made it that easy to do a WAI.

"Surely," I thought, "there must be another intake point in the resonator somewhere crammed into the front bumper under the passenger headlight."

So, intakes were dissassembled, bumpers were partially pried off, but no other source of intake air was found.

"Surely," I thought, "Honda couldn't have made it that easy. That second intake point must be SOMEWHERE back there where I can't reach it!"

The heavy artillery was called in.

I hooked up the shop-vac to the intake, stuffed all the known holes with rags, then I flipped the switch.

Technically, I was right.

Honda did leave another point for intake air to enter the resonator. And when I say "point" I really mean it. It's a drain-hole in the bottom of the resonator in the bumper, about 1/8" in diameter. Not even worth bothering with.

30 minutes of dirty work all to find out that Honda actually did make it that easy to make a WAI. /


So, what is neccessary for the worlds easiest WAI, you ask?

One 18" length of 3" aluminum vent hose.
One zip tie.
And one ~12" piece of wire.

Slip the vent hose over the intake "port" (or whatever you want to call it), zip tie the vent hose in place.


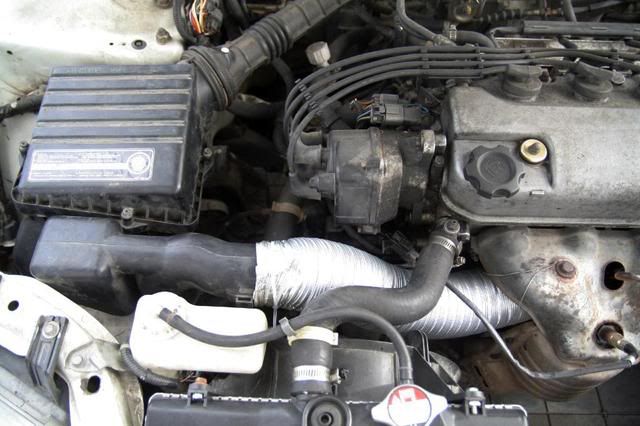
Stretch the end of the vent hose up in-between your header and catalytic converter, use your piece of wire to hold it in place.


I illicitly "borrowed" my wifes digital probe thermometer from the kitchen and hooked it up to the intake of my car, just above the air filter and ran a little before and after test.

Before the WAI, intake temps varied from 65º to 85º, getting steadily cooler at higher speeds.

After the WAI, intake temps were around 140º in town and varied from 120º to 180º on the highway.

__________________
"I got 350 heads on a 305 engine. I get 10 miles to the gallon. I ain't got no good intentions." - The Drive By Truckers.

  Reply With Quote
Alt Today
Popular topics

Other popular topics in this forum...

   
Old 03-27-2008, 02:21 PM   #122 (permalink)
Cd
Ultimate Fail
 
Cd's Avatar
 
Join Date: Feb 2008
Location: Austin,Texas
Posts: 3,585
Thanks: 2,872
Thanked 1,121 Times in 679 Posts
I've always seen COLD air intakes. It helps the engine breathe better and produce more horsepower.
Wouldn't a hot air intake just choke the engine ?

It seems like you will be producing less horsepower and making your engine work harder.
( I'm really anxious to see what a warm air intake does and if indeed it strangles the engine, but you guys are the pros, so I'll watch and learn - and if it does anything beneficial, I'll copy you )
  Reply With Quote
Old 03-27-2008, 02:23 PM   #123 (permalink)
Batman Junior
 
MetroMPG's Avatar
 
Join Date: Nov 2007
Location: 1000 Islands, Ontario, Canada
Posts: 22,513

Blackfly - '98 Geo Metro
Team Metro
Last 3: 70.09 mpg (US)

MPGiata - '90 Mazda Miata
90 day: 52.71 mpg (US)

Even Fancier Metro - '14 Mitsubishi Mirage top spec
90 day: 70.75 mpg (US)

Appliance car - '14 Mitsubishi Mirage ES (base)
90 day: 60.16 mpg (US)
Thanks: 4,058
Thanked 6,957 Times in 3,602 Posts
Search is your friend:

http://forum.ecomodder.com/showthrea...ht=intake+warm
__________________
Project MPGiata! Mods for getting 50+ MPG from a 1990 Miata
Honda mods: Ecomodding my $800 Honda Fit 5-speed beater
Mitsu mods: 70 MPG in my ecomodded, dirt cheap, 3-cylinder Mirage.
Ecodriving test: Manual vs. automatic transmission MPG showdown


EcoModder
has launched a forum for the efficient new Mitsubishi Mirage
www.MetroMPG.com - fuel efficiency info for Geo Metro owners
www.ForkenSwift.com - electric car conversion on a beer budget
  Reply With Quote
Old 03-27-2008, 02:30 PM   #124 (permalink)
Cd
Ultimate Fail
 
Cd's Avatar
 
Join Date: Feb 2008
Location: Austin,Texas
Posts: 3,585
Thanks: 2,872
Thanked 1,121 Times in 679 Posts
Laziness is my enemy. Thanks D
  Reply With Quote
Old 03-27-2008, 02:31 PM   #125 (permalink)
Batman Junior
 
MetroMPG's Avatar
 
Join Date: Nov 2007
Location: 1000 Islands, Ontario, Canada
Posts: 22,513

Blackfly - '98 Geo Metro
Team Metro
Last 3: 70.09 mpg (US)

MPGiata - '90 Mazda Miata
90 day: 52.71 mpg (US)

Even Fancier Metro - '14 Mitsubishi Mirage top spec
90 day: 70.75 mpg (US)

Appliance car - '14 Mitsubishi Mirage ES (base)
90 day: 60.16 mpg (US)
Thanks: 4,058
Thanked 6,957 Times in 3,602 Posts
No problem. Helps that I was here when that thread was created, so I knew to go searching for it.
__________________
Project MPGiata! Mods for getting 50+ MPG from a 1990 Miata
Honda mods: Ecomodding my $800 Honda Fit 5-speed beater
Mitsu mods: 70 MPG in my ecomodded, dirt cheap, 3-cylinder Mirage.
Ecodriving test: Manual vs. automatic transmission MPG showdown


EcoModder
has launched a forum for the efficient new Mitsubishi Mirage
www.MetroMPG.com - fuel efficiency info for Geo Metro owners
www.ForkenSwift.com - electric car conversion on a beer budget
  Reply With Quote
Old 03-30-2008, 05:39 PM   #126 (permalink)
Cd
Ultimate Fail
 
Cd's Avatar
 
Join Date: Feb 2008
Location: Austin,Texas
Posts: 3,585
Thanks: 2,872
Thanked 1,121 Times in 679 Posts
AndrewJ : Sometimes it's the obvious things that I tend to overlook.
I had assumed that the bolts that hold the spoiler assembly on were holding the hatch on.
I had read stories of hood latches never lining up correctly once they were removed and so I was overly cautious.

I have the spoiler off now but still have to figure out how the third brake light comes out. I undid the two screws that hold the light in place, but it still won't budge.
I'll figure it out ...or maybe just leave it the way that it is and copy your LED light idea.
How hard was it to wire up the light ? Did you wire it into the third brake light wiring or the main taillight wiring ?
I'm also in the process of installing front wheel gap fillers. ( I'll post pictures with my progress later.
I still plan to do some tuft testing this week. This time I will post video along with still images.
( If I finish adding the "patented AndrewJ style" spoiler to the back of the car by the time I do the test, I'll try and do some tuft testing with it as well. )
  Reply With Quote
Old 03-30-2008, 06:20 PM   #127 (permalink)
Awesomeness personified
 
AndrewJ's Avatar
 
Join Date: Dec 2007
Location: Columbia, MO
Posts: 642

Harold - '94 Honda Civic CX
90 day: 54.51 mpg (US)

Margot - '08 Surly Big Dummy
Thanks: 0
Thanked 28 Times in 18 Posts
Send a message via AIM to AndrewJ
Quote:
Originally Posted by .Cd View Post
I have the spoiler off now but still have to figure out how the third brake light comes out. I undid the two screws that hold the light in place, but it still won't budge.
That little light is a complete ******* to get out, I just pried the thing to death with a few screwdrivers till it popped out. I wasn't exactly looking to keep the OEM spoiler, so I pretty much just went at it.


Quote:
Originally Posted by .Cd View Post
How hard was it to wire up the light ? Did you wire it into the third brake light wiring or the main taillight wiring ?
The light was easy. Just cut the two wires from the stock light, and solder (or crimp) on to the two wires for the LED light. It might be interesting to keep the OEM light though, as it is DOT certified, and therefore a legal rear brake light.
Though if you keep the OEM light, you'll need to splice in some wires to extend it. That way you'll be able to bolt it up to the end of the kammback.

Quote:
Originally Posted by .Cd View Post
I still plan to do some tuft testing this week. This time I will post video along with still images.

Seeing some tuft testing would be sweet
I can't seem to get up the motivation to do any of my own...


Oh, and stay tuned loyal viewers.

Tomorrow I'll prolly re-vamp the airdam.

I got 4 big (free!) pieces of coroplast, so I'm gonna take 2" of the airdam and make (at least) a front bellypan.

The airdam is getting a little torn up by abrasion anyway....
__________________
"I got 350 heads on a 305 engine. I get 10 miles to the gallon. I ain't got no good intentions." - The Drive By Truckers.

  Reply With Quote
Old 03-31-2008, 08:25 AM   #128 (permalink)
Cd
Ultimate Fail
 
Cd's Avatar
 
Join Date: Feb 2008
Location: Austin,Texas
Posts: 3,585
Thanks: 2,872
Thanked 1,121 Times in 679 Posts
Good to see you starting on the undertray. I can't wait to see what you come up with.

Besides wheel gap fillers, rear wheel skirts and adding the 'AndrewJ style' spoiler
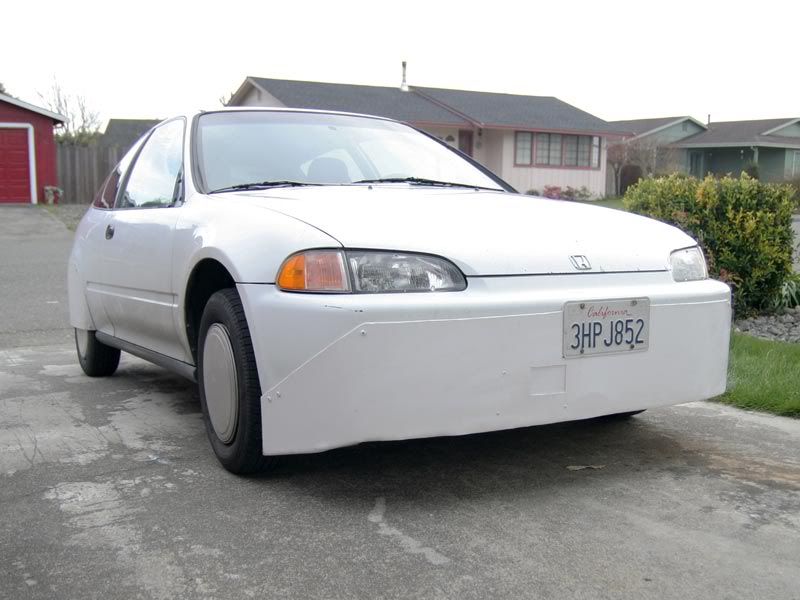
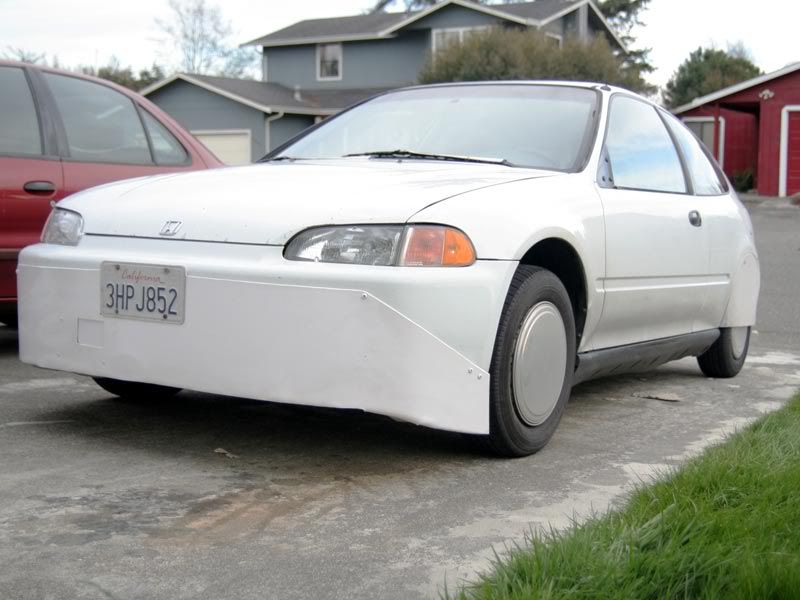
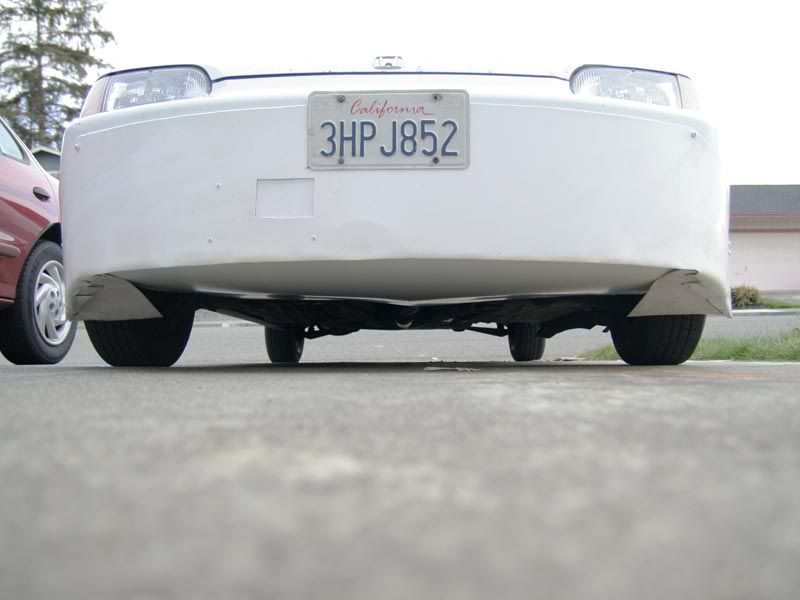
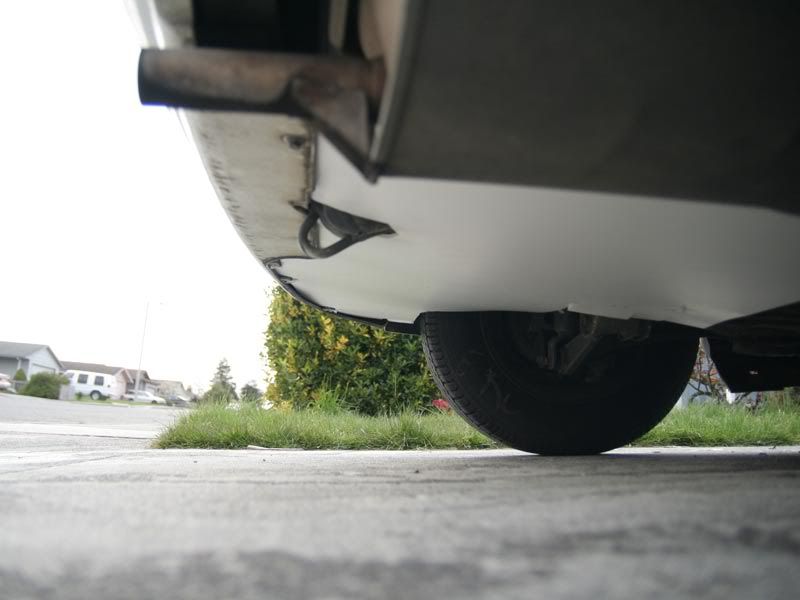
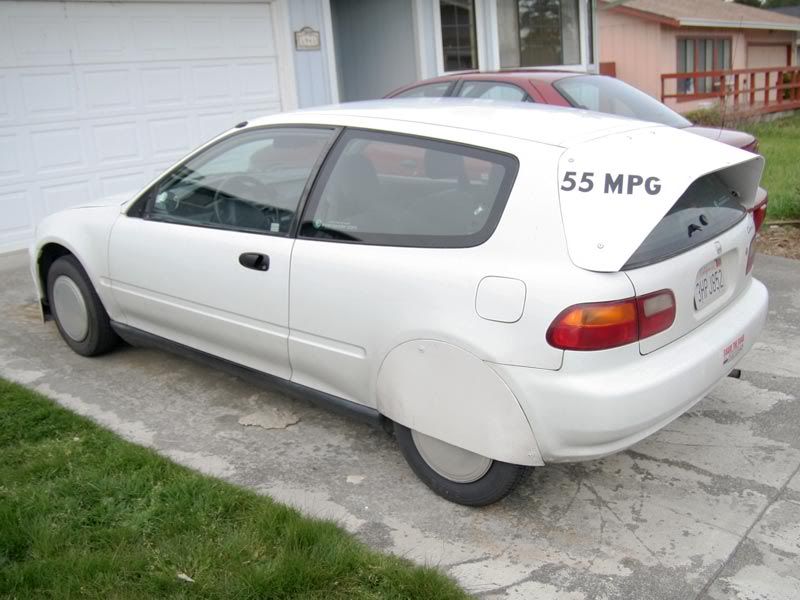
, I also plan to add a diffuser to the back of the car.
Can you remind me what the optimal angle is for the diffuser ?

I'm also going to try and incorporate something behind the wheel to smooth the airflow.
( Something similar to DieselJohns )
I have the muffler on one side which not only messes up the airflow on that side, but also makes any mods on that side harder since I have to worry about the heat generated from it.

I've got a ton of things to do on vacation this week, so we'll se what I can actually accomplish.
  Reply With Quote
Old 03-31-2008, 11:16 PM   #129 (permalink)
Awesomeness personified
 
AndrewJ's Avatar
 
Join Date: Dec 2007
Location: Columbia, MO
Posts: 642

Harold - '94 Honda Civic CX
90 day: 54.51 mpg (US)

Margot - '08 Surly Big Dummy
Thanks: 0
Thanked 28 Times in 18 Posts
Send a message via AIM to AndrewJ
coroplast anyone?

So here's what I managed to get done with a couple pieces of my coroplast.

First, I took off my airdam and chopped 2" off of the bottom. It was getting pretty abraded and I was afraid that the small cracks at the bottom would start working their way up the airdam.

So, now the airdam only portrudes an inch below the stock bumper.


I got a partial front bellypan on, it goes from the airdam to the back of the transmission/engine.


I also closed up the major parachute-like rear bumper area.


And here's a little shot of my 3" letter-stickers that I got from the hardware store.


__________________
"I got 350 heads on a 305 engine. I get 10 miles to the gallon. I ain't got no good intentions." - The Drive By Truckers.

  Reply With Quote
Old 04-01-2008, 12:18 AM   #130 (permalink)
Future EV Owner
 
Join Date: Mar 2008
Location: Sussex Wisconsin
Posts: 674

Wannabe - '05 Honda Civic LX
90 day: 40.53 mpg (US)
Thanks: 0
Thanked 4 Times in 4 Posts
Andrew, those mods are fantastic. Are you able to change your oil without tearing apart your the bellypan? Also, it looks like your right rear bumper is still in need of a mod. I was thinking about filling mine with spray-on insulating foam, since it would be easy to sculpt. The heat from the exhaust would need to be taken into account, however.

__________________

Last edited by Arminius; 04-01-2008 at 01:28 AM..
  Reply With Quote
Reply  Post New Thread


Thread Tools


Powered by vBulletin® Version 3.8.11
Copyright ©2000 - 2024, vBulletin Solutions Inc.
Content Relevant URLs by vBSEO 3.5.2
All content copyright EcoModder.com