02-23-2014, 11:05 PM
|
#1 (permalink)
|
|
Master EcoModder
Join Date: Aug 2012
Location: northwest of normal
Posts: 29,348
Thanks: 8,349
Thanked 9,114 Times in 7,525 Posts
|
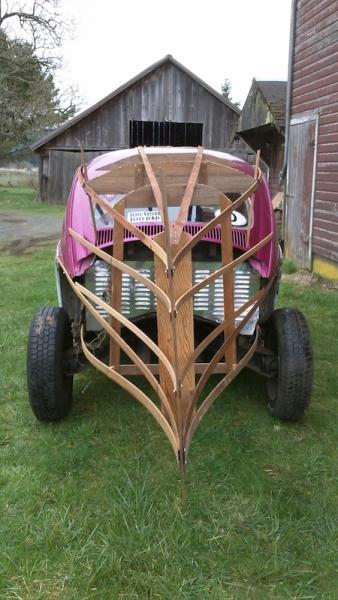
Beetle aerodynamics (full-scale streamlining mockup of original Beetle)
The reason I focus on the Beetle body is that I think that the area between the windshield and the C-pillar is optimal (excluding the external drip-rails, too fast roofline and non-flushed door windows). It's two occupants wide and plan taper starts at the B-pillar, not the rear axle. Taper in plan meets before the Template line gets anywhere nearly done, so I use a Tropfenwagen tail.
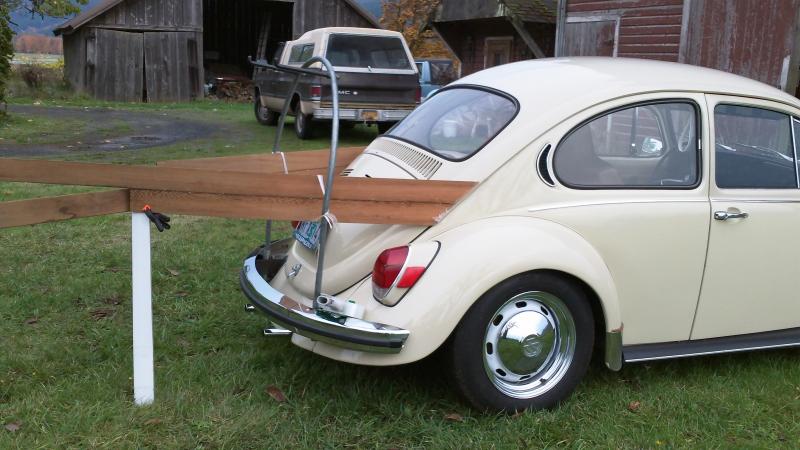
Having looked at the situation with a 3D modeling program, I decided that it was time to 'get real' and see what I could learn. This experiment probably is complete; any further development would be two separate piecesthe front ending at the windshield and the rear beginning with an arc across the roof to the drip-rails. The idea was to leave the fenders and drivetrain undefined for now.
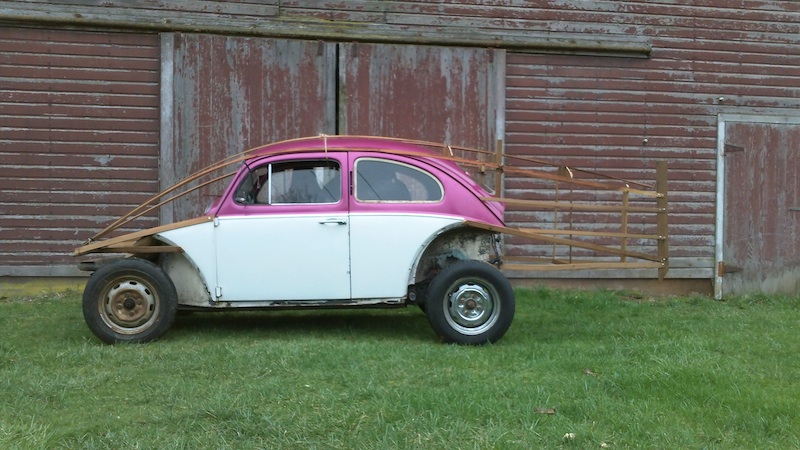
I used 16ft long strips of redwood benderboard to find streamlines from the stagnation point to the tail. They touch at three pointsthe nose, the roof and the tail, and being knot-free they settle into the smoothest curve. I notice that if the line is pushed sideways the strip wants to twist. It is attached at fender mounting bolts (2 front, 4 rear), side trim holes in front, and with clamps at the lower rear. The rope was a convenience at first and is unnecessary now. It's held together with pop-rivets, 1/2" staples and soft wire. The U-shaped bar at the front is the inner bumper reinforcement from a Type III.
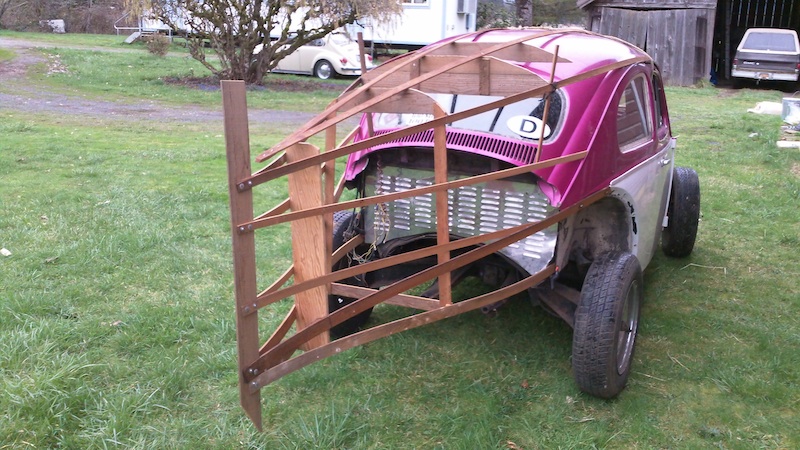
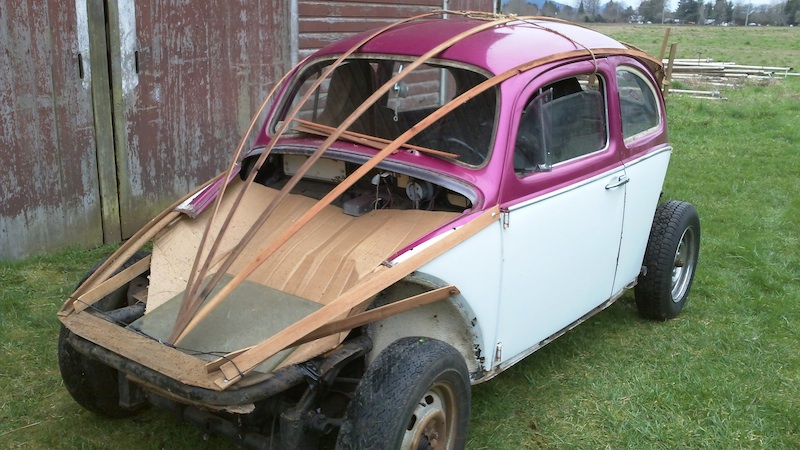
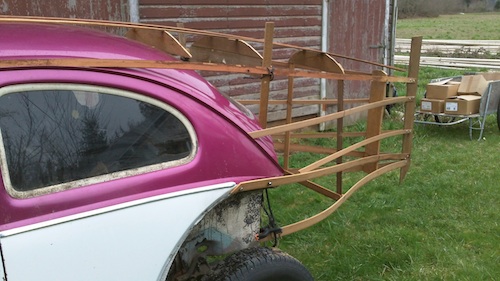
The tail is extrapolated from the earlier experiments with the Superbeetle. The added length is reverse cambered. The first bulkhead is at the position of the earlier 45° tail. The second bulkhead is at the location of the stock rear bumper. It's not an optimal, precise shape. It's asymmetrical and barely held together. The 2nd bulkhead is trapezoidal and the tail leans to one side because I let the materials dictate instead of trying to force it. It goes from reverse cambered at the bottom to not at the top. If the rear wheels were moved out and back, the lower line could be extended to the front of the rear wheel-well without much change at all.
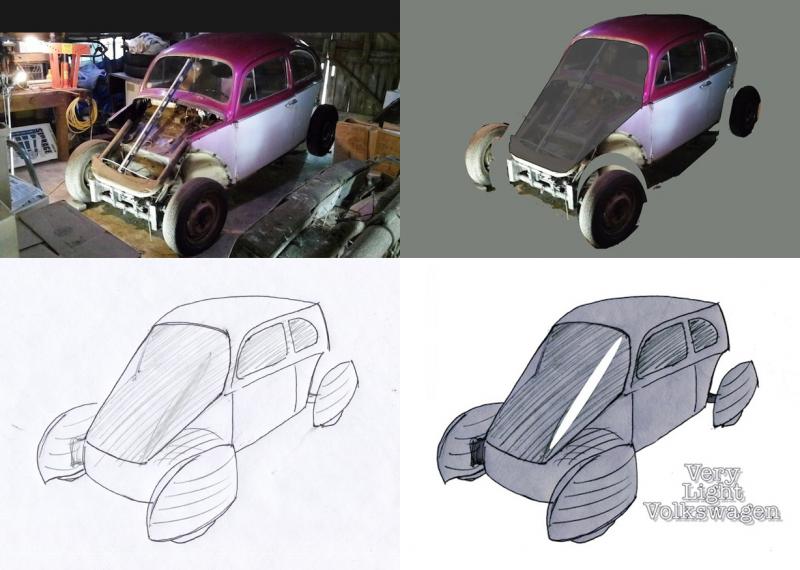
This could be done with no fenders, stock fenders, or VLC style pontoon fenders. With an electric drivetrain, the lower rear could be raised quite a bit. If the top of the rear was raised, a V-shaped backlight could be added.
At this point I'l probably go back to the Superbeetle. I had an 'a-ha' moment on that the other day. ...and it's drivable.
|
|
|

|
|
The Following 6 Users Say Thank You to freebeard For This Useful Post:
|
|
 Today Today
|
|
|
|
 Other popular topics in this forum...
|
|
|
|
|
02-24-2014, 12:22 AM
|
#2 (permalink)
|
|
EcoModding Apprentice
Join Date: Jul 2010
Location: ATL (stuck in traffic)
Posts: 104
Bertha - '16 Mercedes Benz Metris
Thanks: 23
Thanked 11 Times in 6 Posts
|
Neat
__________________
 RETIRED
|
|
|
|
|
02-24-2014, 09:17 AM
|
#3 (permalink)
|
|
Master EcoModder
Join Date: Jul 2011
Location: Ann Arbor, Michigan
Posts: 4,211
Thanks: 141
Thanked 2,825 Times in 1,982 Posts
|
A very interesting full scale study, looks like you had a lot of fun.
Certainly looks to be at the limit of fitting into a parking spot length wise.
I'm not sure how you are resisting the impulse to fabric wrap this, even if just in painter's plastic drop cloth.
__________________
George
Architect, Artist and Designer of Objects
2012 Infiniti G37X Coupe
1977 Porsche 911s Targa
1998 Chevy S-10 Pick-Up truck
1989 Scat II HP Hovercraft
You cannot sell aerodynamics in a can............
|
|
|
|
|
02-24-2014, 10:59 AM
|
#4 (permalink)
|
|
Batman Junior
Join Date: Nov 2007
Location: 1000 Islands, Ontario, Canada
Posts: 22,541
Thanks: 4,085
Thanked 6,989 Times in 3,619 Posts
|
Isn't it fun noodling these things?
|
|
|
|
|
02-24-2014, 11:42 AM
|
#5 (permalink)
|
|
EcoModding Lurker
Join Date: Jun 2012
Location: Minnesota
Posts: 54
Thanks: 1
Thanked 13 Times in 10 Posts
|
|
|
|
|
|
The Following 2 Users Say Thank You to ron22 For This Useful Post:
|
|
|
02-24-2014, 11:48 AM
|
#6 (permalink)
|
|
Master EcoModder
Join Date: Aug 2012
Location: northwest of normal
Posts: 29,348
Thanks: 8,349
Thanked 9,114 Times in 7,525 Posts
|
Thanks for the comments.
Quote:
|
I'm not sure how you are resisting the impulse to fabric wrap this, even if just in painter's plastic drop cloth.
|
I actually have a roll of the cling film they use to wrap pallets of stuff that I was going to use, with a heat gun to shrink it into place. This has been dragging on for some time and yesterday I beat the rain by about 0 minutes. I may still do it.
I didn't cut off those uprights because I was concerned using the coping saw would pull staples all over the thing, and I didn't glue the joints because it's supposed to be temporary. I may save the back half and fit it to the Superbeetle for some coast-down testing.
Quote:
|
Certainly looks to be at the limit of fitting into a parking spot length wise.
|
It's less than 16ft. That's how long the redwood strips are. |
|
|
|
|
The Following User Says Thank You to freebeard For This Useful Post:
|
|
|
02-24-2014, 10:18 PM
|
#7 (permalink)
|
|
EcoModding Lurker
Join Date: Dec 2013
Location: My own world
Posts: 19
Thanks: 3
Thanked 5 Times in 4 Posts
|
Nice project! Good job.
|
|
|
|
|
06-27-2014, 09:01 PM
|
#8 (permalink)
|
|
Drive less save more
Join Date: Jul 2011
Location: Vancouver Island, Canada
Posts: 1,189
Thanks: 134
Thanked 162 Times in 135 Posts
|
Im going to do Kammback mock up on my Beetle as well , Seeing your wood frame mock up in position gives me encouragement in using wood as my kammbacks permanate framework, like the hand built cars of yesteryear were.
I have access to Rough Cut cedar lumber both yellow & red , for good prices $30 for a Clear 20ft 4x4 (true dimension) that I can cut down into strip size pieces for the frame work.
I would seal then Paint the Cedar framework with something fiberglass will bond to.
The wood needs to be dried thoroughly then sealed water tight before placement.
To avoid shrinking or swelling of the wood , especially cedar , it shrinks a lot while curing and swells just as much back up if it gets moisture. But its the strongest lightest most flexible wood Growing in North America.
Cedar is also bug proof
I am convinced Cedar frame work is my Best / cheapest / strongest / easiest choice for the frame of the Kammback.
I am a Artist Carver & Carpenter so working with Cedar is easy for me.
I'll be sure to post its Image in this thread for continuity.
__________________
Save gas
Ride a Mtn bike for errands exercise entertainment and outright fun
__________________

|
|
|
|
|
06-28-2014, 01:28 AM
|
#9 (permalink)
|
|
Master EcoModder
Join Date: Aug 2012
Location: northwest of normal
Posts: 29,348
Thanks: 8,349
Thanked 9,114 Times in 7,525 Posts
|
Well, then...
_______
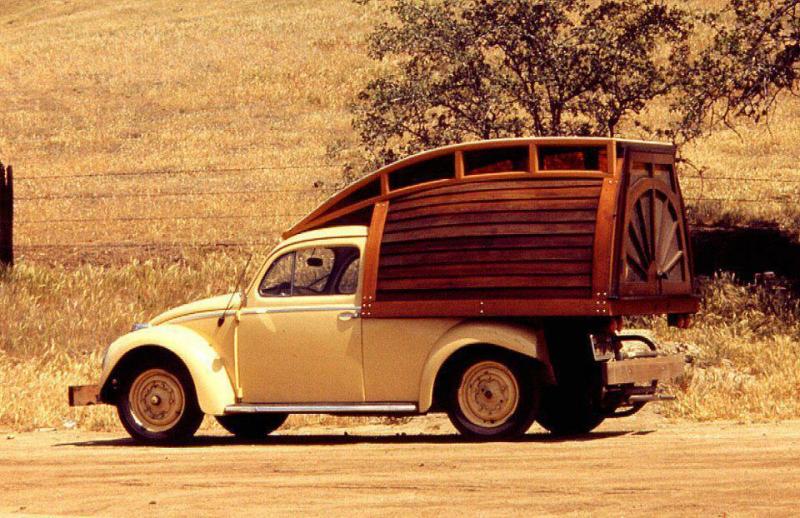
In other news, it looks like the '58 Beetle may be getting a drive train. I'm waiting for a transaction to be perfected. It will result in some improvement to the Gold Bug, such as new mirrors, seat belts and a clutch and trailer hitch.
The engine options are a stroker 1776, a 36hp for racing, or an electric conversion. Transmission options are a 5-speed, or a rebuildable 4-speed that would qualify for the 36hp Challenge classes. The 1776 is really a truck engine, the 36hp is a case only—needs everything and I'm thinking what if I don't get another chance at an electric. |
|
|
|
|
The Following User Says Thank You to freebeard For This Useful Post:
|
|
|
06-28-2014, 03:42 AM
|
#10 (permalink)
|
|
Drive less save more
Join Date: Jul 2011
Location: Vancouver Island, Canada
Posts: 1,189
Thanks: 134
Thanked 162 Times in 135 Posts
|
A Electric would be with the times , Metro has one for sale .. just saying You should buy it !
Tell me more on the gold / yellow bug in the Photo , Your bug and Photoshop meet ?
__________________
Save gas
Ride a Mtn bike for errands exercise entertainment and outright fun
__________________
|
|
|
|
|