05-01-2019, 10:46 AM
|
#1 (permalink)
|
|
Master EcoModder
Join Date: Apr 2012
Location: Evensville, TN
Posts: 676
Thanks: 237
Thanked 580 Times in 322 Posts
|
1999 4Runner 4x4 Streamlining
Purchased a 1999 Toyota 4Runner, 3.4L V6, 5 Speed R151F Transmission, 4x4, 4:10s. It was selected because it has real 4WD, stick shift, 4 Doors, will fit two car seats and two adults, capable of towing and hauling, smaller than my Suburban, and has a comfortable ride. My wife has a similar one and I enjoy it (other than the missing clutch in hers). This vehicle will be for daily driving and moderate off-road use.
I am not going to mess with the powertrain on this one, mainly just some aero add-ons and a few off-road related items. I am putting this in the Aero subsection since that is the focus of this thread.
Currently planning the following:
Aero Mods:
Swap 265/70R16 Cooper AT3 to 245/75R16 Michelin LTX (in progress)
Remove roof rack, rear deflector, side steps, and fender flares.
Small boat tail attached to the rear hatch. (Fiberglass over foam)
Belly Pan/ Skid plates (1/4 Aluminum)
Tire Spats (Conveyor Belt)
Grill Ducting
Other Mods:
Change all fluids and stop oil cooler O-ring leak (in progress)
Upgraded Sway Bars
Front and Rear high clearance hitches, with winch on cradle.
255/85R16 tires on extra wheels to swap for dedicated trips.
Extra Insulation/sound deadening in interior.
Dream wishlist:
E-locker axle swap.
Dyna 5th gear swap in transmission during future rebuild.
I am open to suggestions, please give me your ideas on what all I should do/not do to this vehicle. I will post some more details below of my planned aero mods.
|
|
|

|
|
The Following User Says Thank You to aardvarcus For This Useful Post:
|
|
 Today Today
|
|
|
|
 Other popular topics in this forum...
|
|
|
|
|
05-01-2019, 10:47 AM
|
#2 (permalink)
|
|
Master EcoModder
Join Date: Apr 2012
Location: Evensville, TN
Posts: 676
Thanks: 237
Thanked 580 Times in 322 Posts
|
Aero Mod Details:
The tire swap and accessory removal is straightforward. 245/75R16 tires are more aero in addition to better rolling resistance. Wheels will be Factory 05+ TRD Off-road 16 Alloys that I have already. I will baseline the vehicle once this is completed.
From a rear body aero standpoint, having the rear hatch is a great blank canvas to build from, since I dont need to hinge an add on device separately. I checked and the top isnt going to bind. Built an upper kamm back from tail lights up. Taper at AST-II from top and 4:1 AST from sides, use existing deflector bolt holes and double sided tape for attachment. Using the bumper as the stopping point I can get about 17 on top tapering down to 8 at the sides above the tail lights. There is some existing taper to the vehicle, once I do the tire swap I will get accurate measurements to start my taper where the factory left off. I will rough it out of XPS foam, carve it to the proper shape, and fiberglass over it, same way I built the aeroshell on my 05 Tacoma.
The belly pan will be bent aluminum using ¼ aluminum material I already have. Slope down in front from bumper to crossmember, flat belly, slope back up to hitch after rear axle. Slope from frame up to body on sides. No pan under exhaust, may try to also insulate some exhaust pipes to keep down the oven effect.
Planning fore and aft tire spats to direct the airflow around the tires. Probably U shaped metal frames on bodywork with conveyor belt attached hanging down.
Grill duct is probably coroplast, ducting upper grill to radiator. Lower grill probably blocked.
|
|
|
|
|
The Following User Says Thank You to aardvarcus For This Useful Post:
|
|
|
05-01-2019, 01:45 PM
|
#3 (permalink)
|
|
Master EcoModder
Join Date: Jan 2008
Location: Sanger,Texas,U.S.A.
Posts: 16,548
Thanks: 24,522
Thanked 7,443 Times in 4,822 Posts
|
4RUNNER
*Flush,ventilated wheel covers could help a little.
*Rear wheel skirts.
*The area immediately behind the rear wheels,from the top of the bumper,to bottom of where the mudflaps terminate right now.
*If your approach angle would allow it (off road),an airdam extension might help keep some of the air going around,rather than under.
*Your mirrors are pretty dirty,but you might need all that when towing.(safety first!)
*If you do the cooling ductwork,it may be possible to abandon all the upper grille opening.
__________________
Photobucket album: http://s1271.photobucket.com/albums/jj622/aerohead2/
|
|
|
|
|
The Following User Says Thank You to aerohead For This Useful Post:
|
|
|
05-05-2019, 12:11 AM
|
#4 (permalink)
|
|
Master EcoModder
Join Date: Aug 2012
Location: northwest of normal
Posts: 29,465
Thanks: 8,384
Thanked 9,142 Times in 7,548 Posts
|
Quote:
Currently planning...
Small boat tail attached to the rear hatch. (Fiberglass over foam)
|
Awaiting details on this. Is the hatch split? Horizontal or vertical? How close is the hinge line to free air?
Box cavity or cargo carrier?
__________________
.
.Without freedom of speech we wouldn't know who all the idiots are. -- anonymous poster
___________________
.
.Necessity is the mother of invention, but simplicity is it's favorite aunt --Amish proverb
|
|
|
|
|
The Following User Says Thank You to freebeard For This Useful Post:
|
|
|
05-05-2019, 10:00 AM
|
#5 (permalink)
|
|
Master EcoModder
Join Date: Jul 2011
Location: Ann Arbor, Michigan
Posts: 4,218
Thanks: 146
Thanked 2,829 Times in 1,985 Posts
|
Quote:
Originally Posted by aardvarcus

This vehicle will be for daily driving and moderate off-road use.............
Belly Pan/ Skid plates (1/4” Aluminum)
Tire Spats (Conveyor Belt)........
|
Personally, I would go with a 3"-4" conveyor belt chin spoiler and rear box cavity - no belly pan.
A full 1/4" aluminum belly pan that you describe in later posts sounds heavy, really heavy.
https://ecomodder.com/forum/showthre...car-33237.html
Quote:
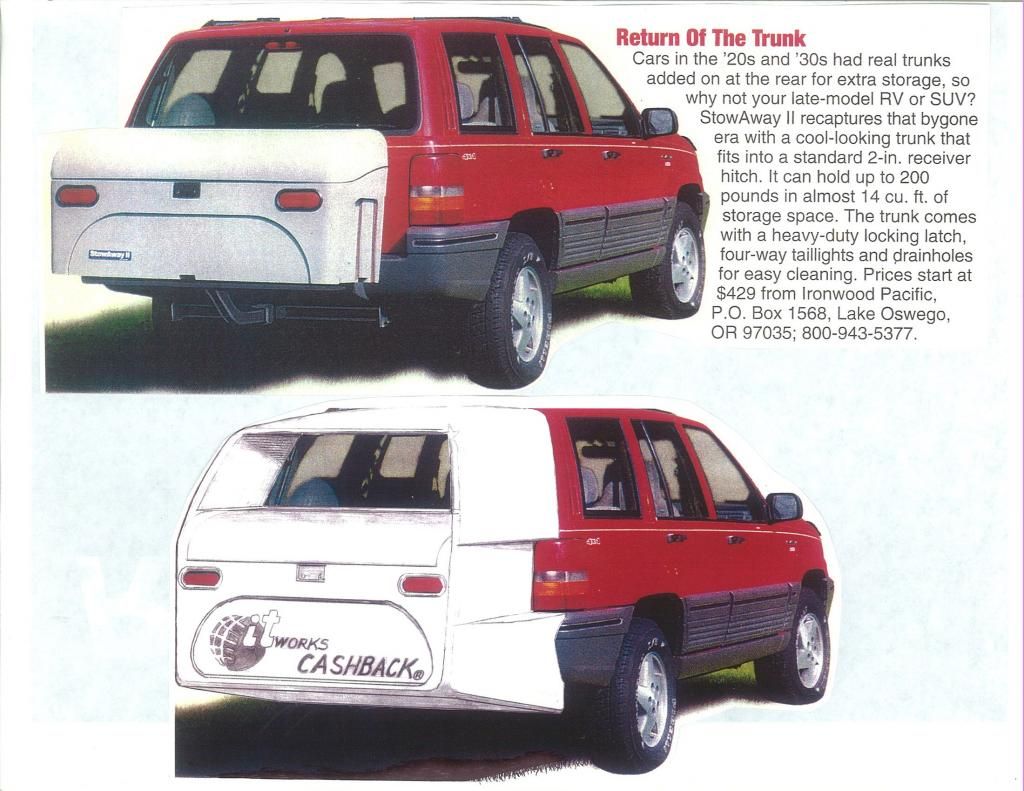
Originally Posted by aerohead
Here's a rendering of a quasi-commercial setup which combines the wing and box into an aerodynamic boattail/box-cavity/storage container.
It rolls up to the SUV/wagon receiver hitch on four castor'd pogos,which rise and stow into the belly while on the road.
3-4 mpg.
 |
https://ecomodder.com/forum/showthre...ded-36151.html


Quote:
Originally Posted by mannydantyla
Conclusions
The experiment wasn't perfect and is certainly not rigorous by any stretch of the imagination. I wish the road was longer, the wind didn't shift, I had cruise control, there was less traffic at my turnaround point, the app didn't crash during the second C run, etc.
But I'm fairly confident that making a permanent version of this out of sheet metal could get me around 1 mpg better then before, and possible even more at higher speeds. The open ended kammback is a go!
What do you think?
|
__________________
George
Architect, Artist and Designer of Objects
2012 Infiniti G37X Coupe
1977 Porsche 911s Targa
1998 Chevy S-10 Pick-Up truck
1989 Scat II HP Hovercraft
You cannot sell aerodynamics in a can............
|
|
|
|
|
The Following 2 Users Say Thank You to kach22i For This Useful Post:
|
|
|
05-13-2019, 02:03 PM
|
#6 (permalink)
|
|
Master EcoModder
Join Date: Apr 2012
Location: Evensville, TN
Posts: 676
Thanks: 237
Thanked 580 Times in 322 Posts
|
Everyone,
Sorry for the delay, I have been away from the internet working daylight to dark on another project. I did mange to get some of the basic things done in some spare time I had here and there. Tires have been swapped, all fluids have been changed, oil leak was fixed, front bumper replaced, side steps removed, roof rack removed, fender flares removed, mudflaps removed, etcetera. I have been driving it, but dont have a baseline yet but I will by the end of the week.
Aerohead,
Thanks, those are good thoughts. I wrestle with the tradeoffs of lighter wheels (Factory alloys) versus more aero wheels (factory steel wheels with smooth hubcaps). I plan to rig up front and rear spats on each wheel out of conveyor belt. I want to try a belly pan on this project, versus another air dam. I would like to swap mirrors if I can find some better factory options or mirror bodies that I can adapt to my bases. I dont want to go too custom-crazy on this project, unlike my Suburban.
Freebeard,
The hatch is all one piece, hinging on the top (with self-contained roll up/down glass). The hatch hinge line is below the bodywork, with a cavity beneath to allow it to open without binding, luckily the seam is fairly flush (1/8 down) and the slopes on the top part of the hatch are reasonable. I have some pictures that illustrate this. As long as I dont add anything to the first two inches of the top of the hatch it wont bind, which shouldnt be a problem.
As for the kamm, I am planning on it just being a box cavity above the tail lights to the roof. I plan on attaching four brackets to the hatch to hold the sculpted foam fiberglass piece. I will add a third brake light to the kamm. I have started making aluminum brackets, the top two are using existing fastener locations and I plan to add two new rivet nuts or some good double-sided tape to the hatch to hold the bottom brackets securely. I want to be able to remove the kamm from the brackets relatively easily (i.e. 4-6 screws). I will block it out of foam oversized and sculpt it down to shape. I plan to go back about 23 at the top.
Kach22i,
Understood. Part of it is that I have done two project vehicles with conveyor belt air dams and I want to try something different. The 4Runner came factory with relatively thin steel skid plates, I will remove those to partially offset some of the weight gain. I do have some thinner aluminum I may use in some less demanding places. I also do not plan on lifting the vehicle (maybe 1 max) so the belly pan would serve as a skid plate for off road use, as opposed to lifting the vehicle further which would negatively affect handling. But I understand the sentiment of not increasing weight substantially and may source some additional thinner material if needed.
|
|
|
|
|
The Following 2 Users Say Thank You to aardvarcus For This Useful Post:
|
|
|
05-13-2019, 02:58 PM
|
#7 (permalink)
|
|
Master EcoModder
Join Date: Aug 2012
Location: northwest of normal
Posts: 29,465
Thanks: 8,384
Thanked 9,142 Times in 7,548 Posts
|
Quote:
|
I plan to rig up front and rear spats on each wheel out of conveyor belt.
|
I drew this in 2013, I suspect you could be the first. 
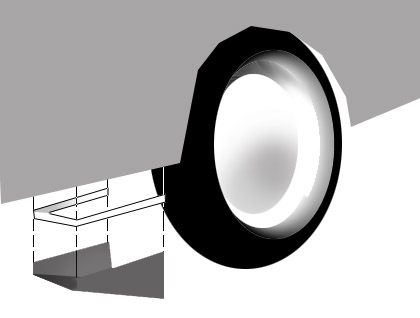
The idea is two U-shaped pieces, one metal, one conveyor material. Fastening only on the two long sides would allow the conveyor material to flex on ground strikes, allowing them to be longer. I may be wrong again.
__________________
.
.Without freedom of speech we wouldn't know who all the idiots are. -- anonymous poster
___________________
.
.Necessity is the mother of invention, but simplicity is it's favorite aunt --Amish proverb
|
|
|
|
|
The Following User Says Thank You to freebeard For This Useful Post:
|
|
|
05-13-2019, 03:53 PM
|
#8 (permalink)
|
|
Master EcoModder
Join Date: Apr 2012
Location: Evensville, TN
Posts: 676
Thanks: 237
Thanked 580 Times in 322 Posts
|
Your post reminded me there was a good thread on this topic in 2015, unfortunately the OP changed vehicles before he got around to implementing it...
https://ecomodder.com/forum/showthre...tml#post481676
Hard to believe that was four years ago. |
|
|
|
|
The Following User Says Thank You to aardvarcus For This Useful Post:
|
|
|
05-14-2019, 09:13 AM
|
#9 (permalink)
|
|
Master EcoModder
Join Date: Apr 2012
Location: Evensville, TN
Posts: 676
Thanks: 237
Thanked 580 Times in 322 Posts
|
Trying to keep charging forward on this vehicle in my spare time. I was able to finish fabricating the two upper brackets for the kamm back and get them installed. They are nice and sturdy. My current plan is to bend two angle brackets for the lower side and install them with 3M automotive tape just below/beside the rear window. I might do that after the kamm is made to get the positioning right.
I have done lots of measuring of the surface contours of the vehicle and have been planning and doing overlays of the tail. I will block out the rough shape using extruded polystyrene foam and gorilla glue to form the blank. I will then shape it to the contours of the vehicle through rasping and sanding.
I plan to fiberglass it using epoxy resin. I hope to try the plastic film trick to get the surface smooth, my Tacoma Aeroshell taught me the difficulty of bondo work over rough fiberglass and epoxy.
|
|
|
|
|
The Following User Says Thank You to aardvarcus For This Useful Post:
|
|
|
05-14-2019, 11:42 AM
|
#10 (permalink)
|
|
Master EcoModder
Join Date: Aug 2012
Location: northwest of normal
Posts: 29,465
Thanks: 8,384
Thanked 9,142 Times in 7,548 Posts
|
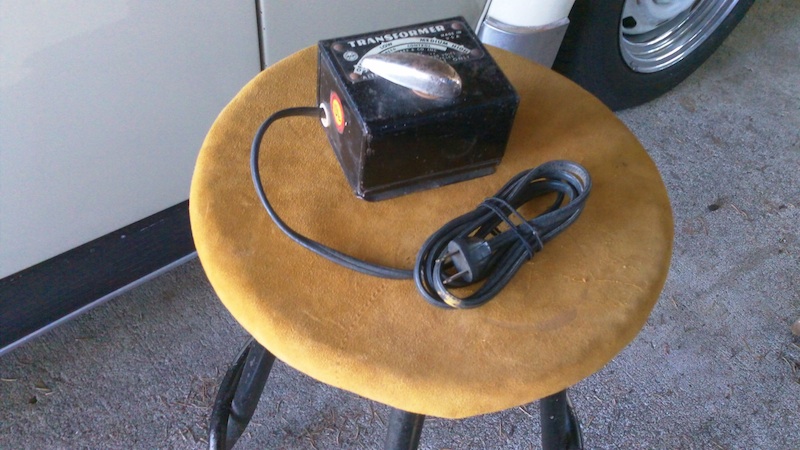
That's the reason I don't like fiberglass. Instead of a rasp, use a Nichrome wire. This one (doesn't) work on D-cell batteries.
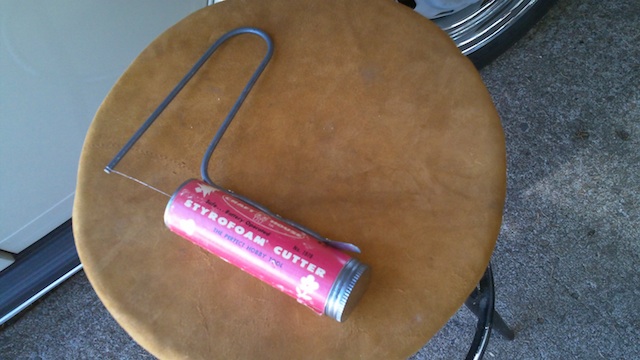
My parents used this very Lionel transformer to cut Styrofoam in a rig like a jig saw. A coping saw handle would be more portable.
The rasp leaves a shredded surface.
__________________
.
.Without freedom of speech we wouldn't know who all the idiots are. -- anonymous poster
___________________
.
.Necessity is the mother of invention, but simplicity is it's favorite aunt --Amish proverb
|
|
|
|
|
The Following 2 Users Say Thank You to freebeard For This Useful Post:
|
|
|