12-09-2009, 03:21 AM
|
#11 (permalink)
|
|
EcoModding Apprentice
Join Date: Oct 2009
Location: Jyvaskyla, Finland
Posts: 143
Thanks: 44
Thanked 35 Times in 28 Posts
|
Quote:
Originally Posted by Tweety

The diode D1, what is it supposed to do really? Cuz right now it's not really doing anything a normal wire couldn't do...
My guess the intention is to protect the circuit? Ie swap ground and +12V and nothing goes poof?
|
Hey, glad to see you in this thread. You definitely know these things better than I do. I appreciate your time you spent replying.
Actually, I was wondering the same when I saw the circuit for a first time. I thought I could leave it out but kept it since I don't know if it has some meanings as protection. Remember, I have done nothing but placed components on a pcb. Didn't even pay a thought but I guess I really should have. Original one was on simple board with tin/wire bridges all around. Schematics are also made by the same guy. I should ask him what he was thinking when placing that diode there.
Quote:
Originally Posted by Tweety
Then it really should be connected to the ground wire... Facing so that the ground flows out of the circuit is open, but nothing goes in that way, since that is what makes things go poof... Connecting ground to +12V won't make anything go poof... It just won't do anything hooked up that way, no lights, no magic smoke...
Move the diode to the ground connector and have it block the path into the circuit and it gives protection... As it sits now you can just replace it with a wire and the circuit will work the same...
|
Now I see, maybe the original plan was to do so, to prevent connecting meter reversed. Simple protection.
|
|
|

|
 Today Today
|
|
|
|
 Other popular topics in this forum...
|
|
|
|
|
12-09-2009, 12:54 PM
|
#12 (permalink)
|
|
Out of my mind, back in 5
Join Date: Nov 2009
Location: Malmoe, SWEDEN
Posts: 124
Thanks: 1
Thanked 7 Times in 6 Posts
|
I did this on my break today...
The actual PCB won't be of much use as it's SMD and dual layer, but the schematic shows where to put the diode to have it actually protect something...
And I added a transistor and a couple of resistors, making a simple remote on/off switch... Just add a +12V wire to a single switch for all the boards... Since you are using through mount replace the SMD BC847 with the BC547 instead...
R7 is used as a jumper, place a wire here and you can use the board without the transistor and it works as your previous boards, leave R7 off and add the transistor and R6 and you can hook up the switch and stack them...
The jumper JP1 is to set Bar/Dot mode... can also hook the wire coming out to +12V and it does the same... (I'm going to pot mine in, so I needed the jumper...)
Last edited by Tweety; 12-09-2009 at 01:00 PM..
|
|
|
|
|
12-09-2009, 12:58 PM
|
#13 (permalink)
|
|
needs more cowbell
Join Date: Feb 2008
Location: ÿ
Posts: 5,038
Thanks: 158
Thanked 269 Times in 212 Posts
|
can you expand on that pic, i.e. add a small battery pack of 3 12v batteries and 3 led monitors and show what goes where?
__________________
WINDMILLS DO NOT WORK THAT WAY!!!
|
|
|
|
|
12-09-2009, 01:02 PM
|
#14 (permalink)
|
|
Out of my mind, back in 5
Join Date: Nov 2009
Location: Malmoe, SWEDEN
Posts: 124
Thanks: 1
Thanked 7 Times in 6 Posts
|
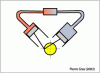
Hm... Ok... How about I label stuff a bit better...  |
|
|
|
|
12-09-2009, 01:03 PM
|
#15 (permalink)
|
|
needs more cowbell
Join Date: Feb 2008
Location: ÿ
Posts: 5,038
Thanks: 158
Thanked 269 Times in 212 Posts
|
x
__________________
WINDMILLS DO NOT WORK THAT WAY!!!
|
|
|
|
|
12-09-2009, 01:12 PM
|
#16 (permalink)
|
|
Out of my mind, back in 5
Join Date: Nov 2009
Location: Malmoe, SWEDEN
Posts: 124
Thanks: 1
Thanked 7 Times in 6 Posts
|
Same circuit, better labels...
The things that have changed from mora's design is the diode and the 4 input terminals...
The four connections the left are inputs... Ie either a wire or on my PCB I'm using a set of four screw terminals...
Moved the diode to the negative terminal...
Added the transistor and two resistors at the lowest terminal... You use either the R7 alone making this circuit behave exactly like mora's (except for the diode)
OR the R6 and transistor and then you use a switch and sent +12V to each of these terminals and all boards switch on...
|
|
|
|
|
12-09-2009, 01:23 PM
|
#17 (permalink)
|
|
Out of my mind, back in 5
Join Date: Nov 2009
Location: Malmoe, SWEDEN
Posts: 124
Thanks: 1
Thanked 7 Times in 6 Posts
|
To make things more understandable... What you need outside the picture...
Hook each battery to the positive and negative terminals... One battery to one monitor... just like mora...
Then, assuming you are using more than one in a stack hook the enable pins of all boards to one switch and supply that with +12V (from you aux battery or such)... That switch now switches all the monitors on or off... (The drain on the aux battery is somewhere around .02 mA per monitor or so, so not really noticable) and once off it's disconnected from all batteries so no parasitic drains...
The Mode connector can either not be used and then you solder (or not) the internal jumper to set the bar/dot mode permanently... Or you hook this to a switch with +12V and you can now select mode as well... |
|
|
|
|
12-09-2009, 02:28 PM
|
#18 (permalink)
|
|
needs more cowbell
Join Date: Feb 2008
Location: ÿ
Posts: 5,038
Thanks: 158
Thanked 269 Times in 212 Posts
|
Like I said, It would be nice to see several attached to a small stack of batteries, that is the tricky bit. Not sure your enable is above the rail in all cases, but putting these in context of the whole might make it more or less evident.
__________________
WINDMILLS DO NOT WORK THAT WAY!!!
|
|
|
|
|
12-09-2009, 04:17 PM
|
#19 (permalink)
|
|
EcoModding Apprentice
Join Date: Oct 2009
Location: Jyvaskyla, Finland
Posts: 143
Thanks: 44
Thanked 35 Times in 28 Posts
|
Now that's great. I made the diode correction to single layer pcb file but didn't upload it yet. Hook up enable switch to 12V system and led meters turn on as you turn the key.
|
|
|
|
|
12-09-2009, 04:30 PM
|
#20 (permalink)
|
|
Out of my mind, back in 5
Join Date: Nov 2009
Location: Malmoe, SWEDEN
Posts: 124
Thanks: 1
Thanked 7 Times in 6 Posts
|
Don't worry yet... I'm still thinking... I just came up with a scenario where that screws up the readings... So I'm back to the drawingboard...
|
|
|
|
|