 07-16-2010, 05:54 AM
|
#1 (permalink)
|
|
Jeep Ecomodder
Join Date: Aug 2009
Location: Georgia
Posts: 160
Thanks: 16
Thanked 24 Times in 13 Posts
|
 Jeep Cherokee "Aeromatics" (Kammback / partial boat tail)
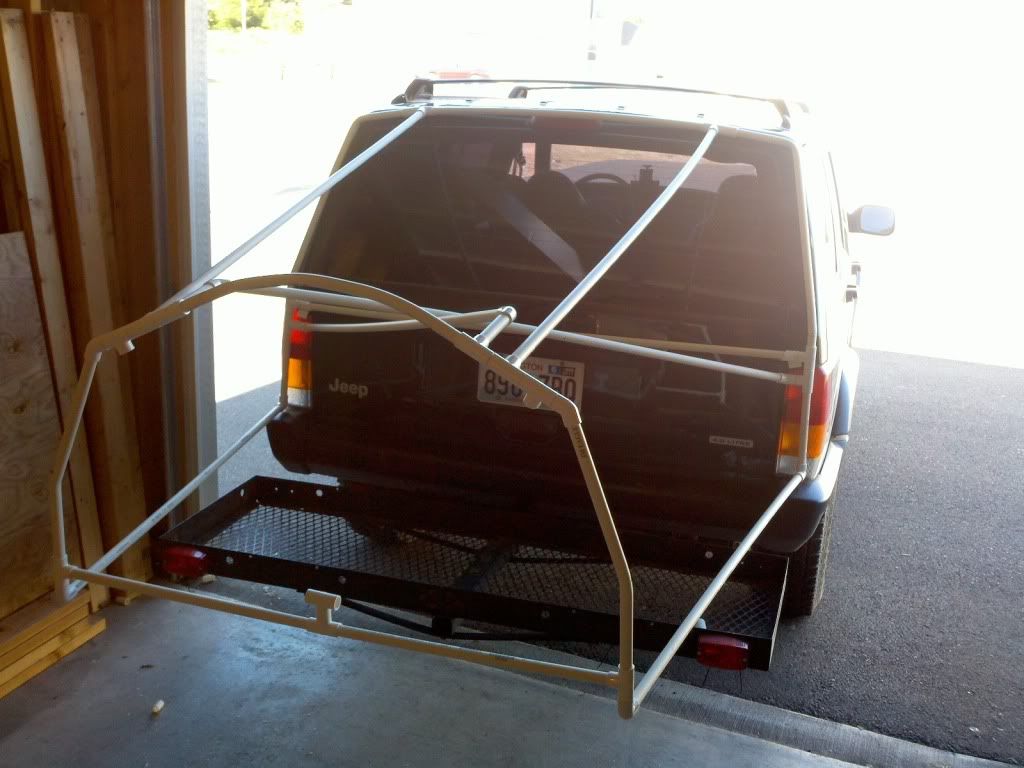
Ok, I've been on this site for a while now, but I've really only adjusted the nut, courtesy of the ScanGauge II (which is still awesome). And I decided to make my first aeromod starting in the back of my Cherokee (oh, and sorry FastPlastic, it's not going to be very stealthy like yours). I don't know what to call it, it's partially a Kamm, and also like a partial boattail, just with no bottom because I still tow pretty often and use my cargo carrier (in the picture). I also wanted to make this thing easily removable so when I want to go out on the trails, I can take it off without destroying it. Lets just call it a JeepKamm for now
I decided to make it from 1/2 inch PVC pipe for the frame and 6 mil black plastic as the skin. I've also sourced some scrap lexan to "window" my taillights so as not to need to add auxiliary lights to the JeepKamm (for now anyway). I'm also custom forming some poly gutter hangers into the mechisms to hold on the mod (second picture).
So here is where it sits at tonight, as I have to go to bed to be up in about three hours for work. I hope to finish tomorrow evening and start road testing it this weekend. 
|
|
|

|
 Today Today
|
|
|
|
 Other popular topics in this forum...
|
|
|
|
 07-16-2010, 04:07 PM
|
#2 (permalink)
|
|
Master EcoModder
Join Date: Jan 2008
Location: Sanger,Texas,U.S.A.
Posts: 16,532
Thanks: 24,520
Thanked 7,436 Times in 4,817 Posts
|
JeepKamm
You're definitely working on the correct end of the Jeep.
It's hard to tell what the curvature is without a side photo.The Aerodynamic Streamlining Template can help you with that.
I hope you are using schedule-40 PVC,as it will be strongest,and that the weight is actually supported by the cargo carrier.
I would recommend as much triangulation as you can get for rigidity.You may be relying on the 4-mil skin for carrying quite a bit of the load.
If the plastic pipe fractures and fails,it may occur elsewhere rapidly,accelerating into a complete collapse.
Work your speed up in increments and mentally rehearse for what you might do should you experience a failure.
And use a lot of attachment points,spreading stresses over many locations.
|
|
|

|
 07-16-2010, 06:42 PM
|
#3 (permalink)
|
|
Jeep Ecomodder
Join Date: Aug 2009
Location: Georgia
Posts: 160
Thanks: 16
Thanked 24 Times in 13 Posts
|
 Yep, I'm using schedule 40 and am going to be cementing everything together when I'm satisfied with the rigidity. I bought 6 mil plastic for the skin, so we'll see where that gets me. I reconfigured the frame this morning to function better. Models pictures to follow when I have the frame finished. |
|
|

|
 07-16-2010, 09:41 PM
|
#4 (permalink)
|
|
Jeep Ecomodder
Join Date: Aug 2009
Location: Georgia
Posts: 160
Thanks: 16
Thanked 24 Times in 13 Posts
|
Update!
OK, posting some pics of where I'm at now. I more or less redesigned it on the fly this afternoon for more rigidity and am pleased with where it is at and where it is going. Still would like to get it skinned tonight but we'll see. Quality is more important than haste.
 |
|
|

|
|
The Following User Says Thank You to JeepNmpg2 For This Useful Post:
|
|
 07-17-2010, 11:51 AM
|
#5 (permalink)
|
|
Master EcoModder
Join Date: Feb 2010
Location: CT, USA
Posts: 544
RaceJeep - '98 Jeep Grand Cherokee (ZJ) 5.9 Limited 90 day: 13.62 mpg (US)
Thanks: 1
Thanked 26 Times in 23 Posts
|
Looks good! I've considered a foldable plexiglass Kammback for mine that I can clip onto the back of the factory roof rack for long trips, and store easily the rest of the time. Of course, it would be smaller, and probably less effective than yours.
__________________
Call me crazy, but I actually try for mpg with this Jeep:

Typical driving: Back in Rochester for school, driving is 60 - 70% city
|
|
|

|
 07-18-2010, 02:33 AM
|
#6 (permalink)
|
|
Jeep Ecomodder
Join Date: Aug 2009
Location: Georgia
Posts: 160
Thanks: 16
Thanked 24 Times in 13 Posts
|
 Removable jeepkamm is finished!!
|
|
|

|
 07-18-2010, 03:39 AM
|
#7 (permalink)
|
|
Basjoos Wannabe
Join Date: Apr 2009
Location: Arkansas
Posts: 870
Thanks: 174
Thanked 49 Times in 32 Posts
|
very nice work, it's inspirational for certain!
what are you using for attachment points?
__________________
 RIP Maxima 1997-2012


Quote:
Originally Posted by jamesqf

I think you missed the point I was trying to make, which is that it's not rational to do either speed or fuel economy mods for economic reasons. You do it as a form of recreation, for the fun and for the challenge.
|
|
|
|

|
 07-18-2010, 06:09 AM
|
#8 (permalink)
|
|
Jeep Ecomodder
Join Date: Aug 2009
Location: Georgia
Posts: 160
Thanks: 16
Thanked 24 Times in 13 Posts
|
 Test results are in:
Trip mpg:24.7=6.5% (based off these numbers)...
While not conclusive, it ar least gives me some heart to see an improvement. While driving I noticed an issue with how the skin being not completely taught is allowing air to form a bowl or trough at the end of the kamm. Not to mention that the whole rippling air bowl shakes the jeep from about 52 MPH on up. When I get home tomorrow I will make ribs for it out some thin coroplast sheets that I acquired a while back for trying on a small kamm. I sincerely hope that getting the skin taught will net a total of 15-20%. More modding for tomorrow I guess.
One thing I forgot to mention is that one huge benefit of this design is that it still leaves the rear hatch fully functional, albeit a few pounds heavier and you have to hold it or prop it somehow. It does look kind of neat stuck up in the air. I'll take a picture of that tomorrow when I construct those ribs.
30 mpg or bust!
|
|
|

|
 07-18-2010, 07:02 PM
|
#9 (permalink)
|
|
Jeep Ecomodder
Join Date: Aug 2009
Location: Georgia
Posts: 160
Thanks: 16
Thanked 24 Times in 13 Posts
|
 Issues: Round 1 (because I'm sure there will be more
This morning when I went out to get ready to go, I was inspecting how everything had held up overnight. Apparently, the top hatch mounts were losing their shape and had streched about an inch (probably from the sun and the 12 hours of sitting bearing the full weight after a 78 mile drive).
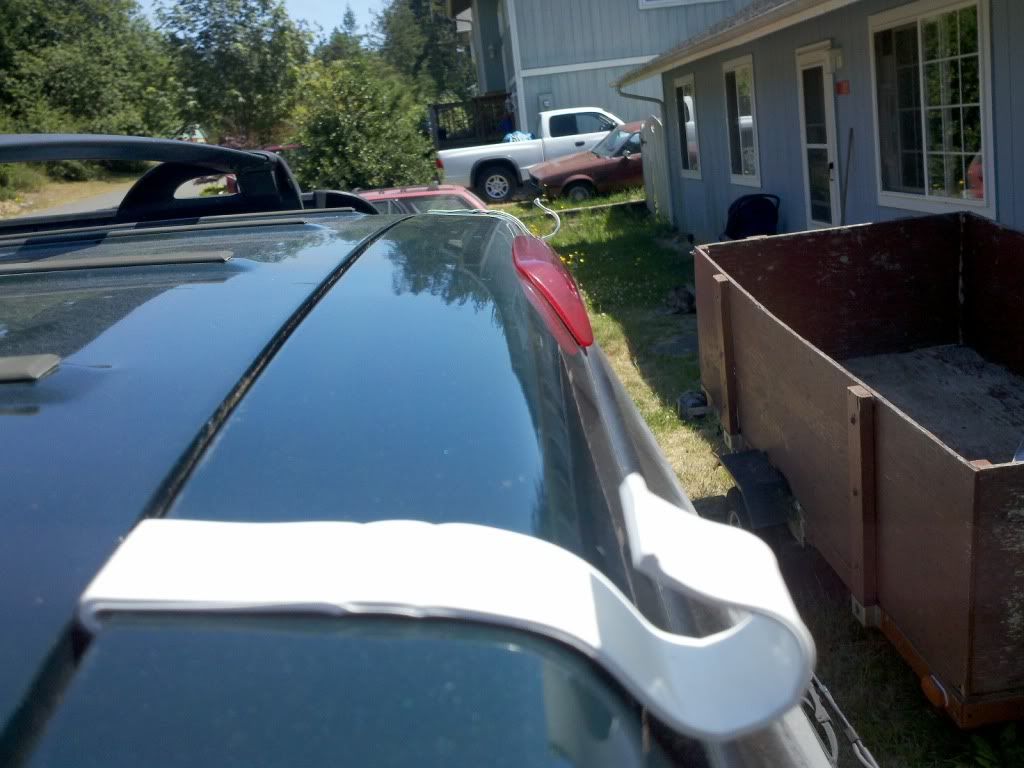
So I made a temporary mod to hold it on for the trip home and still managed 24.4 mpg with HORRIBLE RV stop and go traffic. I'll post the video later that I took.
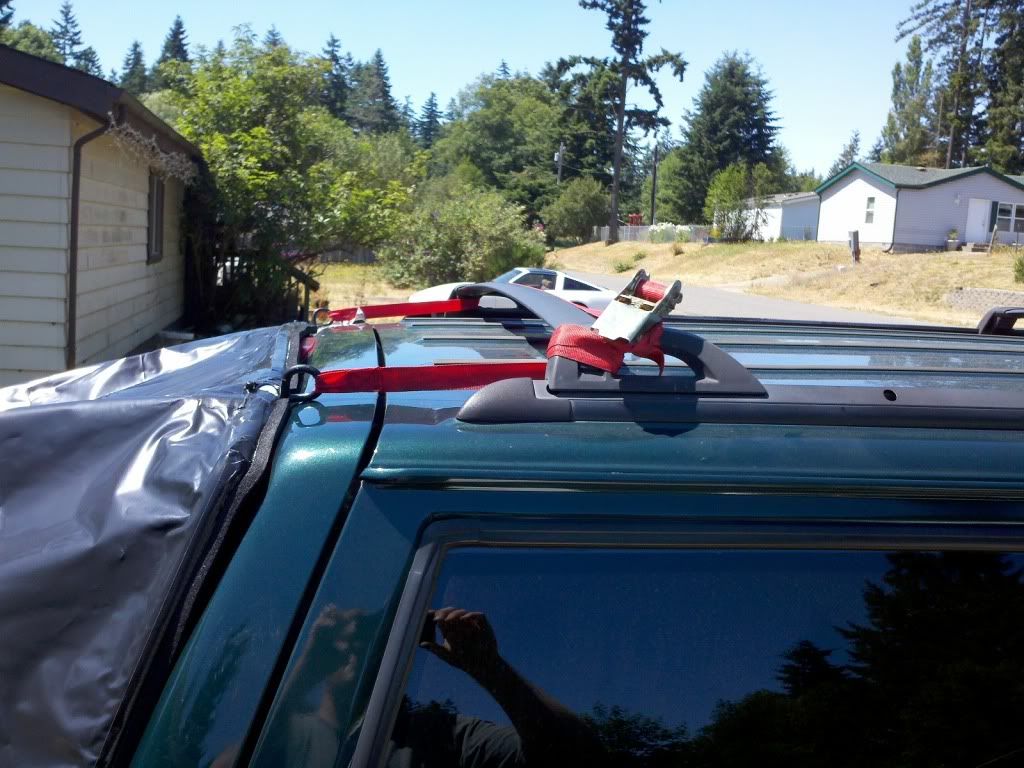
And to give it some rigidity, I added the bungie cord to hold the frame down to the cargo carrier:
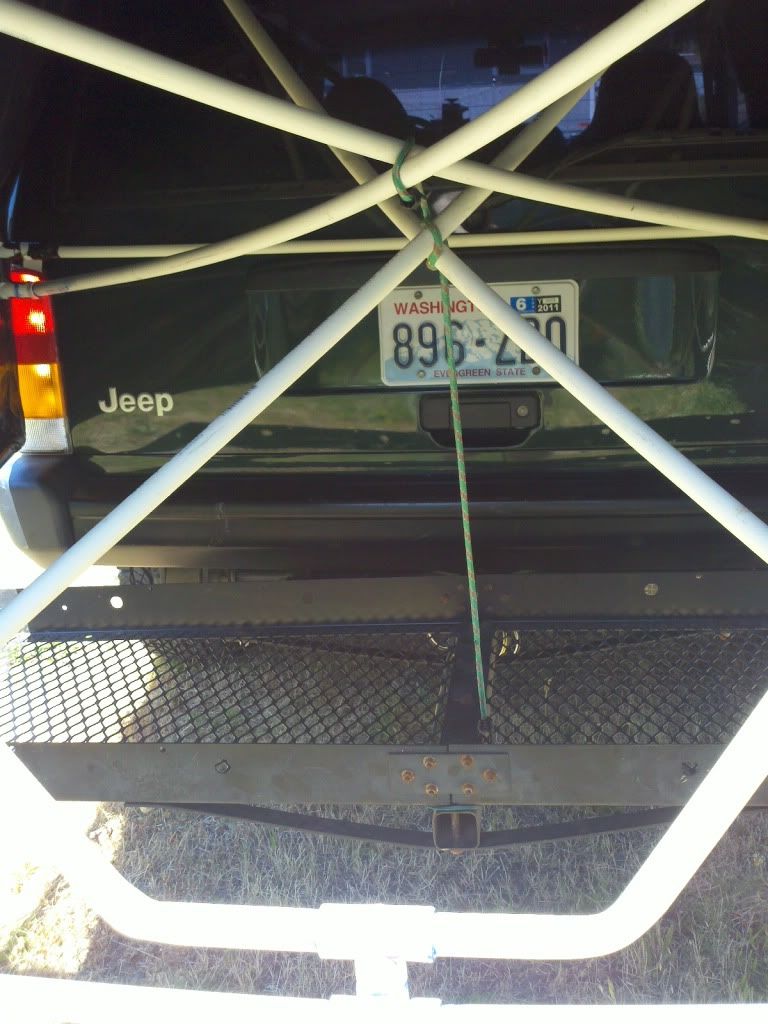
Here you can see how loose the plastic really is, I'm going to shore it up with either some cloroplast ribs or underbody or replace it all together with a kind of "shingled cloroplast skin" that I dreamt up this morning.
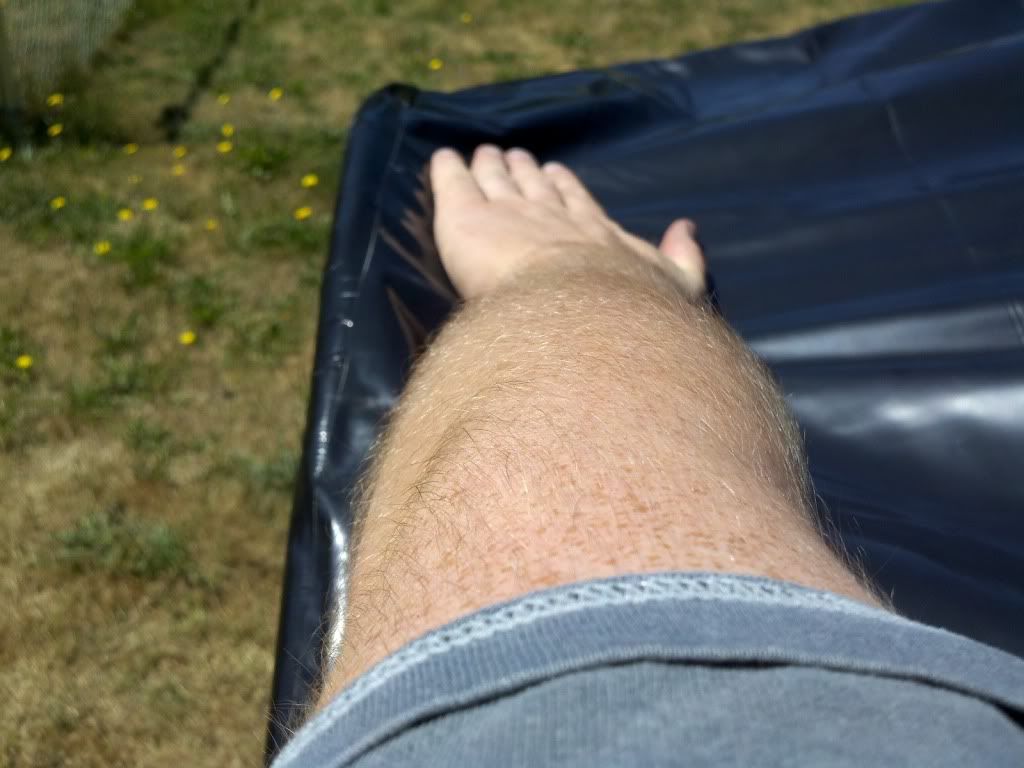
I still haven't gotten that picture of the hatch up, but I will after I get the mounting reworked. |
|
|

|
 07-18-2010, 07:16 PM
|
#10 (permalink)
|
|
Jeep Ecomodder
Join Date: Aug 2009
Location: Georgia
Posts: 160
Thanks: 16
Thanked 24 Times in 13 Posts
|
Mounting
Quote:
Originally Posted by ShadeTreeMech

very nice work, it's inspirational for certain!
what are you using for attachment points?
|
ShadeTreeMech:
They are vinyl raingutter mounts that I reshaped with my heatgun (you can see the streched top ones in a picture in the previous post) They were the longer of the two sets, the others are sealed and taped into the frame, they held up just fine. BTW, the lower mounts attach to the hatch right above the taillight, essentially sandwiching the top 2/3 of the carrier with the two mountings. It held on just fine yesterday at 70mph. Again, more to follow when I get the upgraded mounting and rib structures installed.
|
|
|

|
|