 03-10-2018, 10:27 PM
|
#241 (permalink)
|
|
Moderator
Join Date: Feb 2012
Location: Urbana, IL
Posts: 1,940
Thanks: 199
Thanked 1,807 Times in 943 Posts
|
Quote:
Originally Posted by freebeard

I was thinking about prior to your road trip and tuft testing, before you commit to the final shape. Only trying to be helpful, not contrary.
It looks pretty good. I'd radius the horizontal edges because otherwise the smooth wake your working for will be disrupted in the last foot. It might anyway, that notch is big enough for recirculation.
The forward facing fins are called Vortex traps on semi-trailers (lower right).
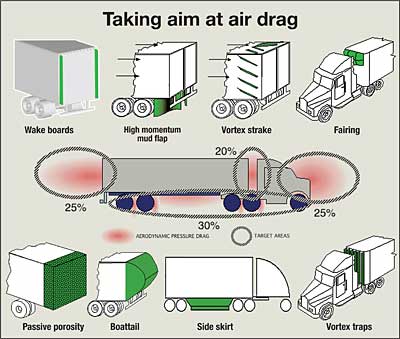
You might put clear plastic vortex traps in the taillight cutout, now that I think about it. Are you going to have turn signal repeaters? |
Yep, turn and brake in the base plate. I'm going to try and work on it more tomorrow, and just radius all the front edges.
Vortex traps in the taillight cutouts is a good idea, and I just happen to have a big piece of acrylic that I could chop up....
|
|
|

|
|
The Following User Says Thank You to Vman455 For This Useful Post:
|
|
 Today Today
|
|
|
|
 Other popular topics in this forum...
|
|
|
|
 03-11-2018, 12:15 AM
|
#242 (permalink)
|
|
Master EcoModder
Join Date: Aug 2012
Location: northwest of normal
Posts: 29,422
Thanks: 8,369
Thanked 9,128 Times in 7,537 Posts
|
Happy too help. I like the idea too.
You'd get more refraction with a curved piece.
__________________
.
.Without freedom of speech we wouldn't know who all the idiots are. -- anonymous poster
___________________
.
.tragectory: Line goes down and to the right.
|
|
|

|
 03-14-2018, 12:18 PM
|
#243 (permalink)
|
|
Moderator
Join Date: Feb 2012
Location: Urbana, IL
Posts: 1,940
Thanks: 199
Thanked 1,807 Times in 943 Posts
|
Fixing some mistakes and gaps:
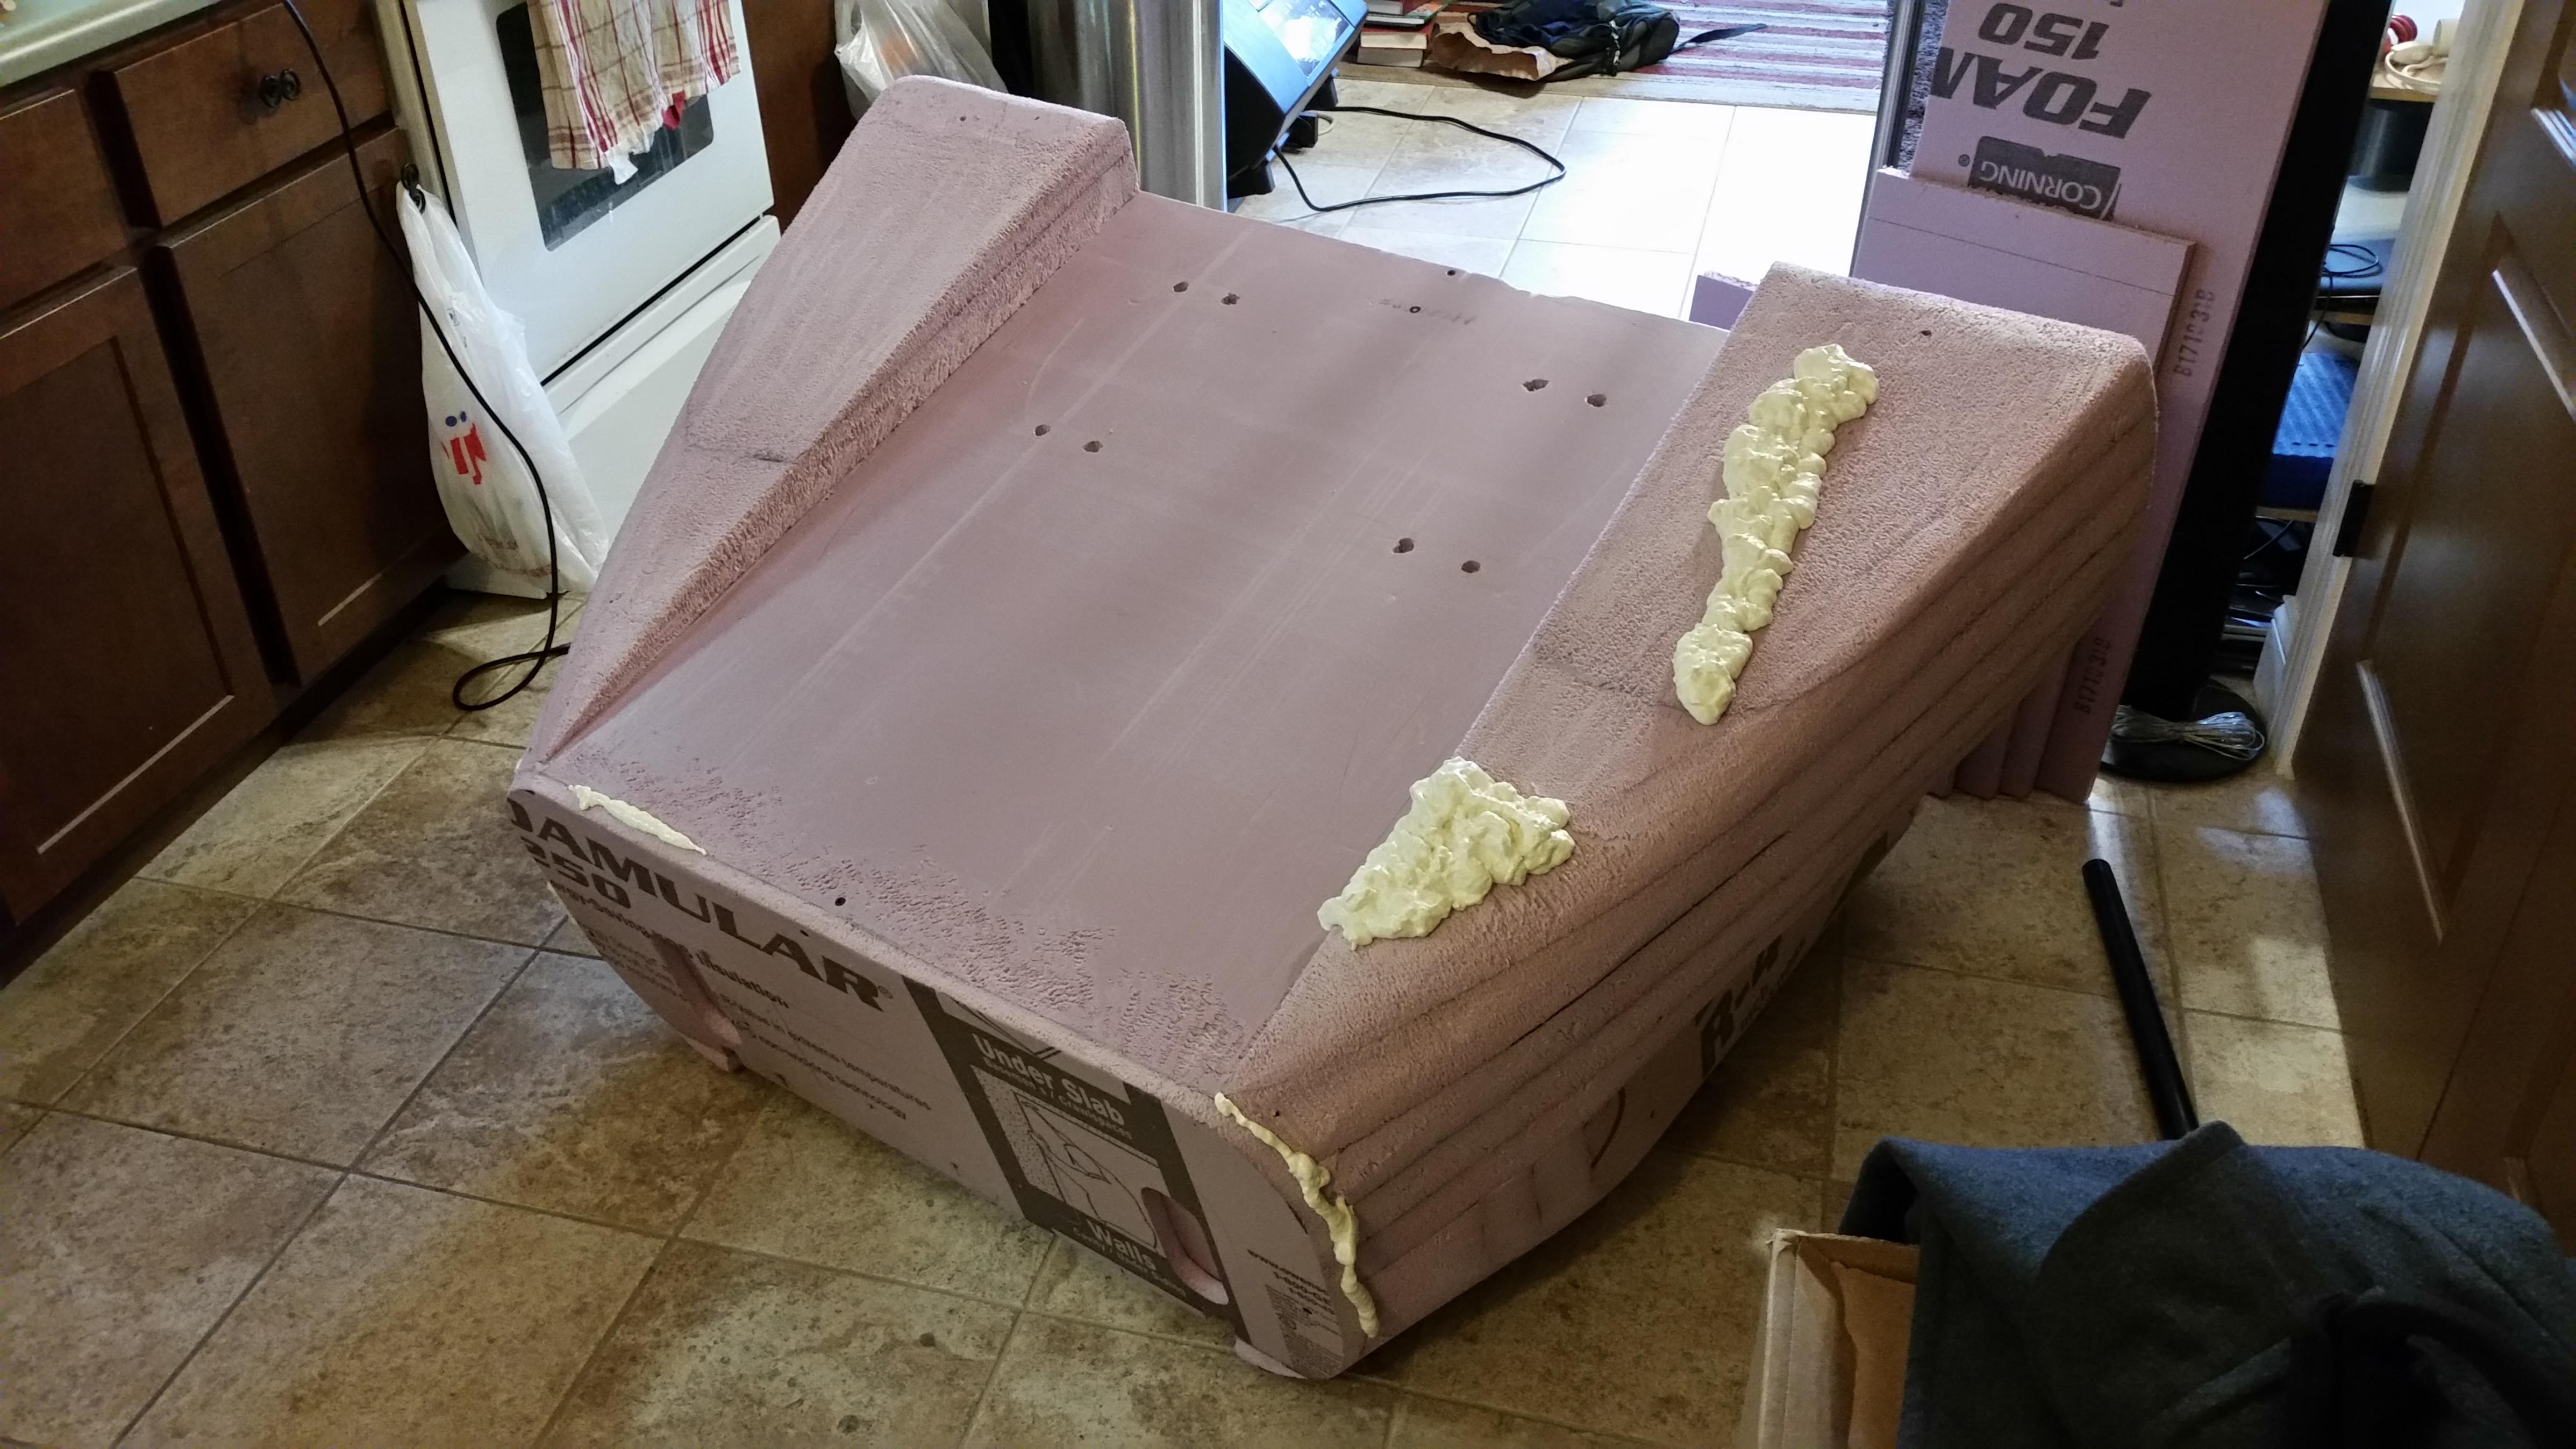
An aluminum panel will cover the underside once it's on the cargo carrier.
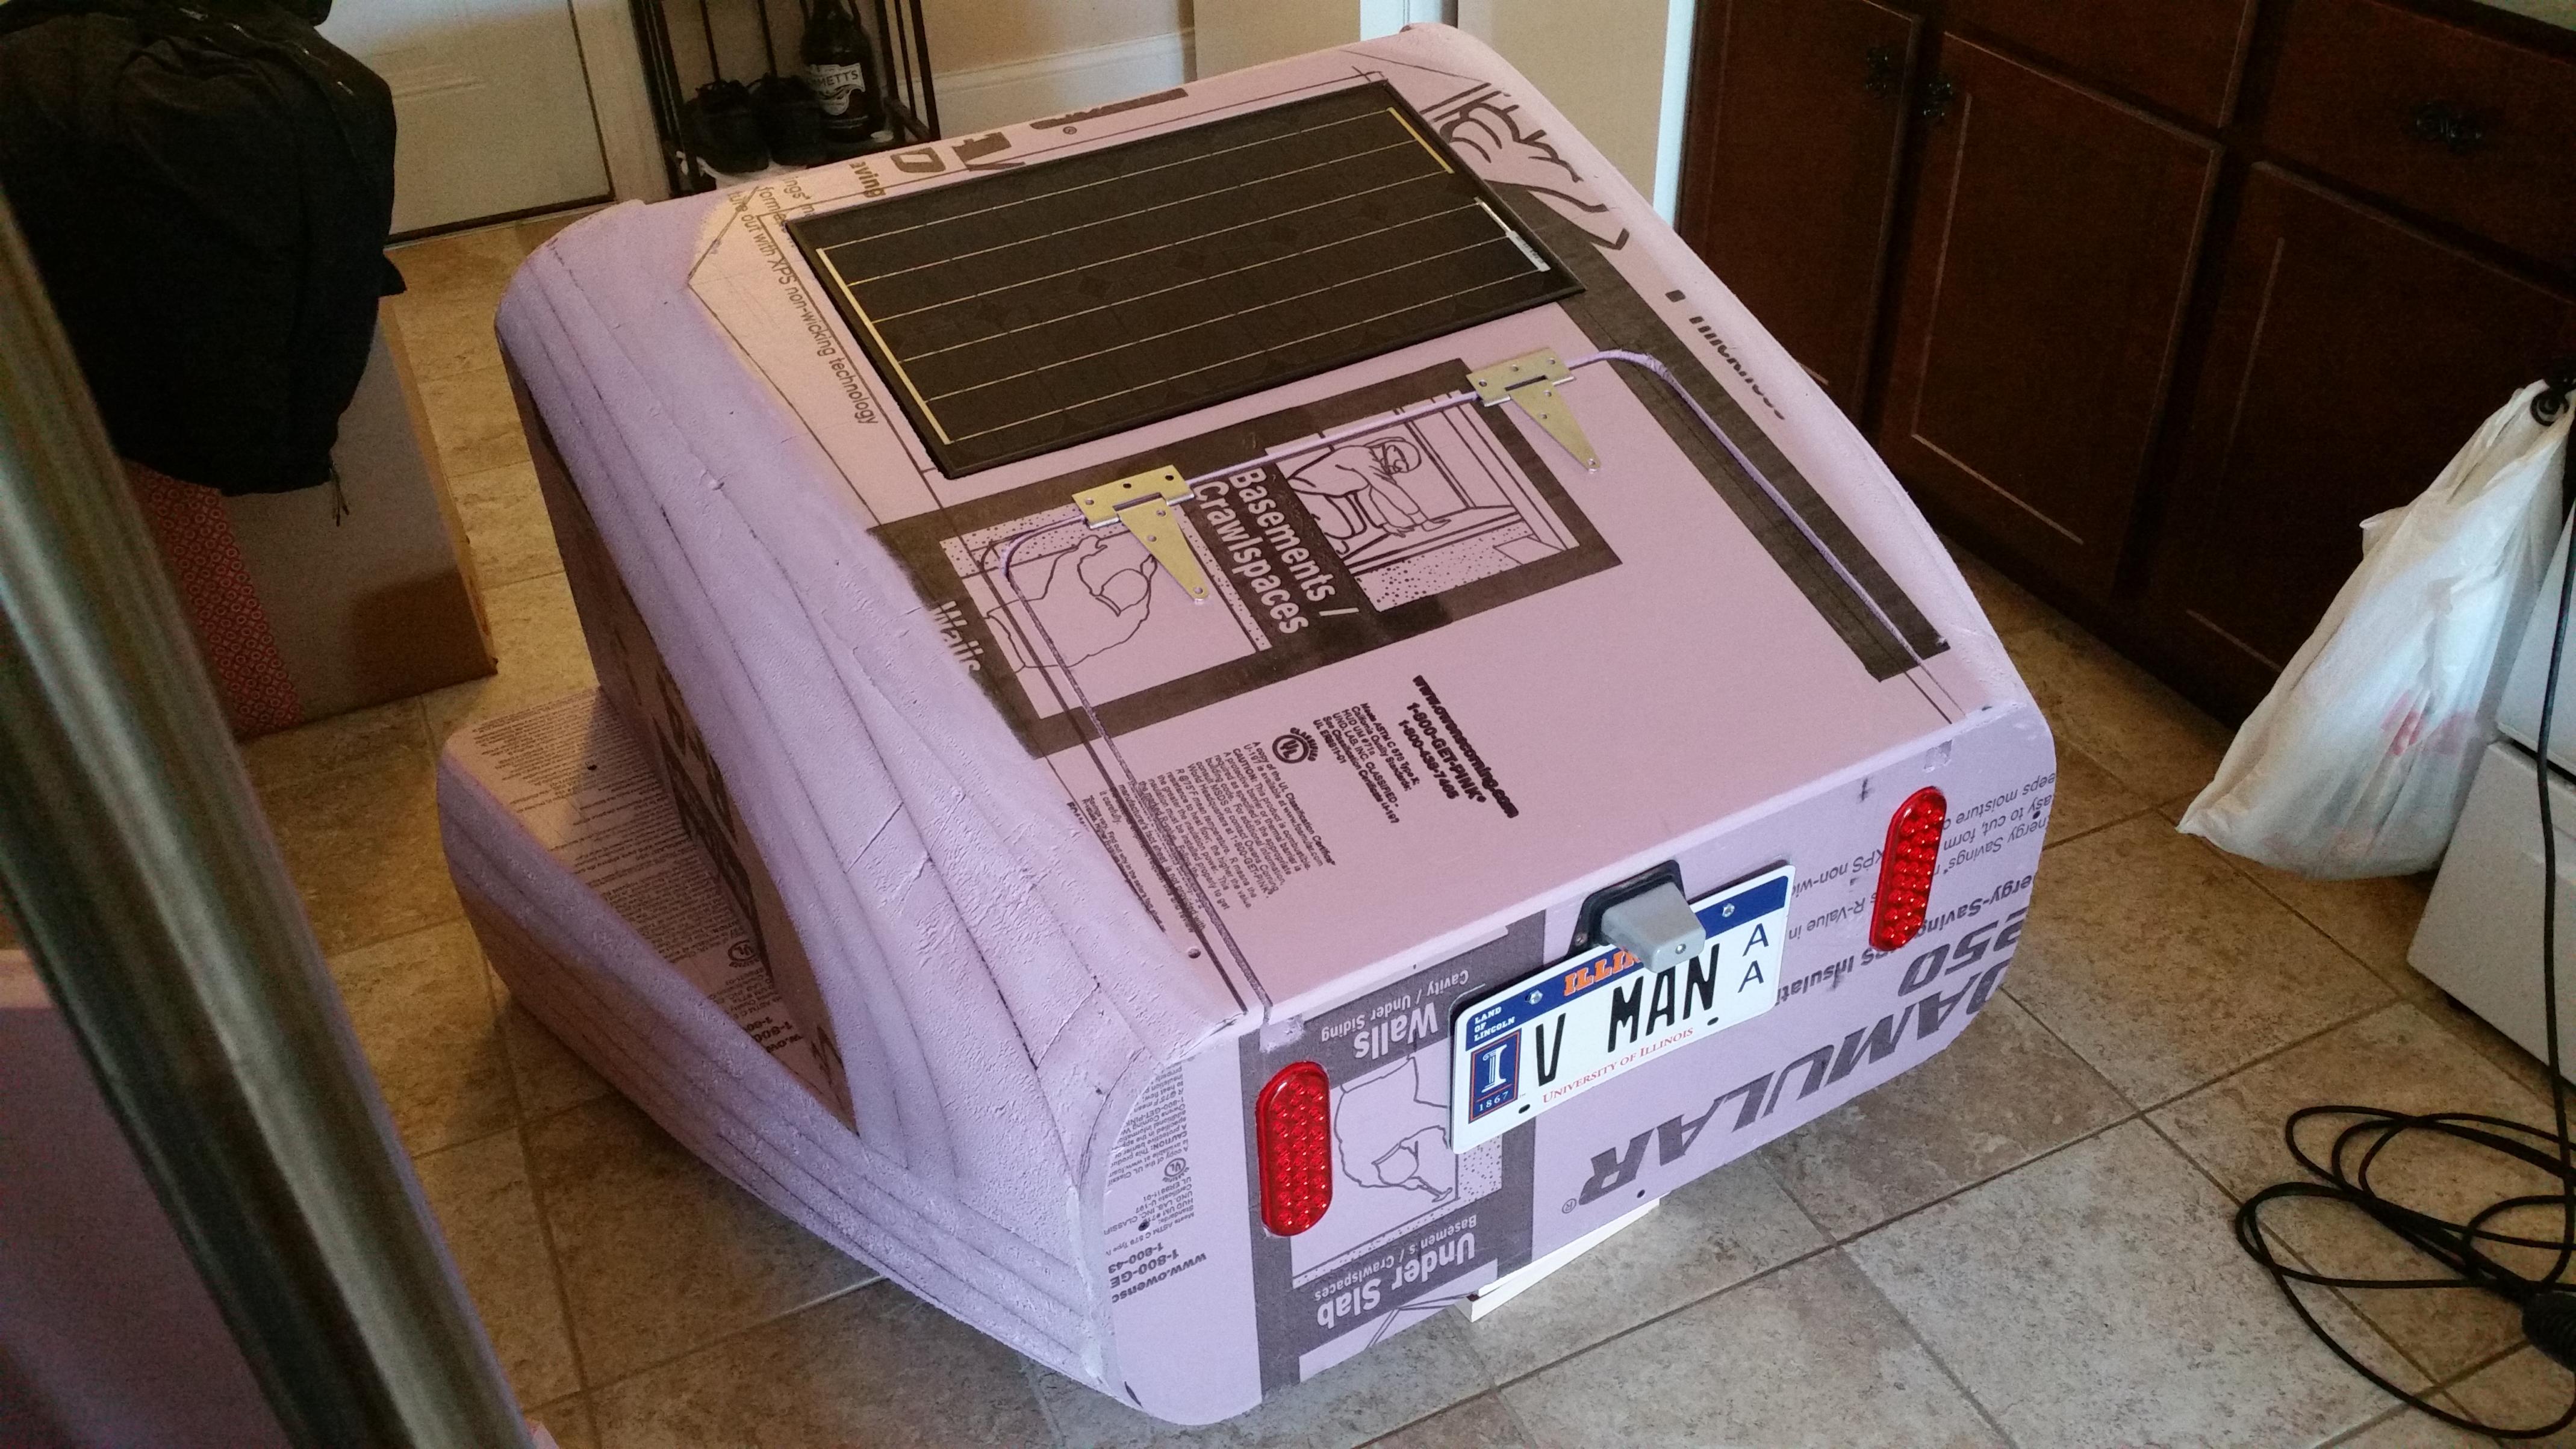
And, the almost-finished mockup, with tail lights, license plate and light, solar panel, and lid with flush hinges:
 |
|
|

|
|
The Following 9 Users Say Thank You to Vman455 For This Useful Post:
|
|
 03-14-2018, 01:13 PM
|
#244 (permalink)
|
|
Administrator
Join Date: Dec 2007
Location: Germantown, WI
Posts: 11,203
Thanks: 2,501
Thanked 2,590 Times in 1,556 Posts
|
Its looking really nice!
How do you plan on finishing it? Fiberglass & paint?
|
|
|

|
 03-14-2018, 02:17 PM
|
#245 (permalink)
|
|
Moderator
Join Date: Feb 2012
Location: Urbana, IL
Posts: 1,940
Thanks: 199
Thanked 1,807 Times in 943 Posts
|
Thanks!
1 layer of 6 oz twill and one of 8.5 oz weave, angled 45-degrees to each other; paint of some kind, although I haven't decided what yet.
|
|
|

|
|
The Following 2 Users Say Thank You to Vman455 For This Useful Post:
|
|
 03-15-2018, 09:01 AM
|
#246 (permalink)
|
|
Master EcoModder
Join Date: Dec 2011
Location: New Zealand
Posts: 5,142
Thanks: 2,930
Thanked 2,604 Times in 1,619 Posts
|
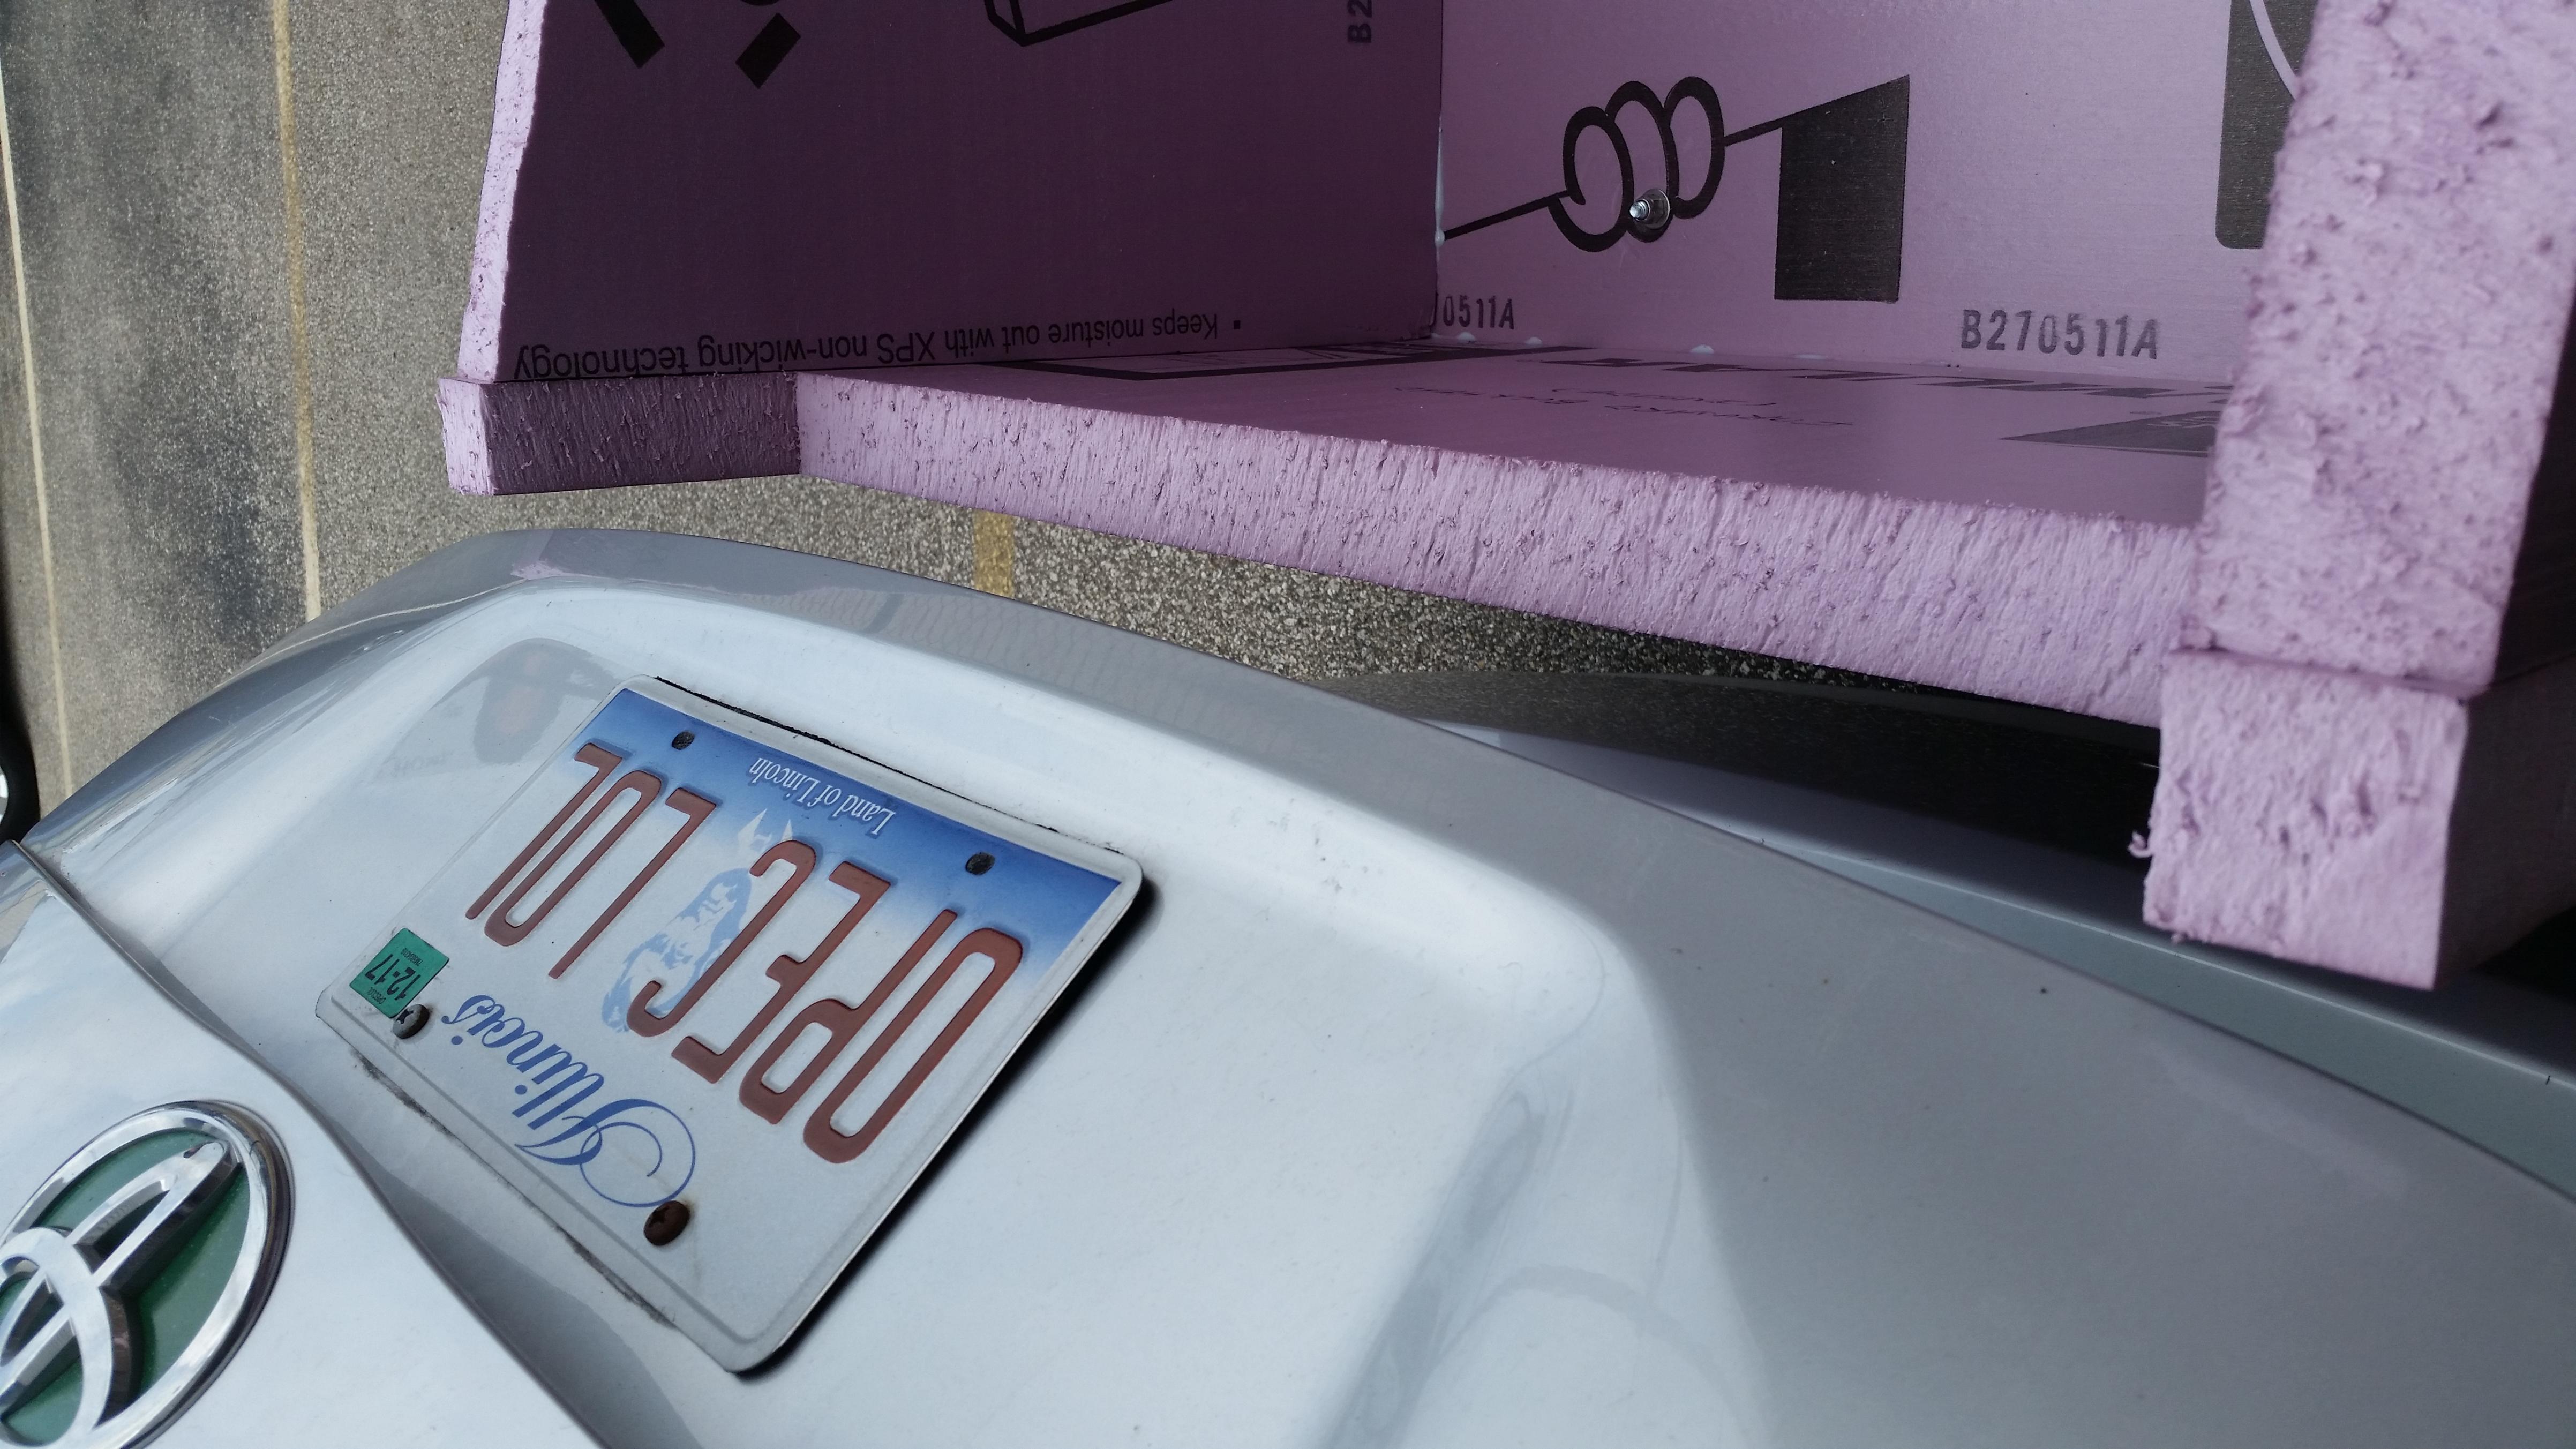
Maybe already answered, but what is your solution to being able to get into the hatch? How easy is it to get to the hitch?
|
|
|

|
 03-15-2018, 12:54 PM
|
#247 (permalink)
|
|
Moderator
Join Date: Feb 2012
Location: Urbana, IL
Posts: 1,940
Thanks: 199
Thanked 1,807 Times in 943 Posts
|
Quote:
Originally Posted by Ecky

Maybe already answered, but what is your solution to being able to get into the hatch? How easy is it to get to the hitch?
|
I have the box sitting back just far enough to clear the hatch opening, which also gives me enough space to stand between and load things in back.
|
|
|

|
|
The Following 2 Users Say Thank You to Vman455 For This Useful Post:
|
|
 03-26-2018, 06:02 PM
|
#248 (permalink)
|
|
Moderator
Join Date: Feb 2012
Location: Urbana, IL
Posts: 1,940
Thanks: 199
Thanked 1,807 Times in 943 Posts
|
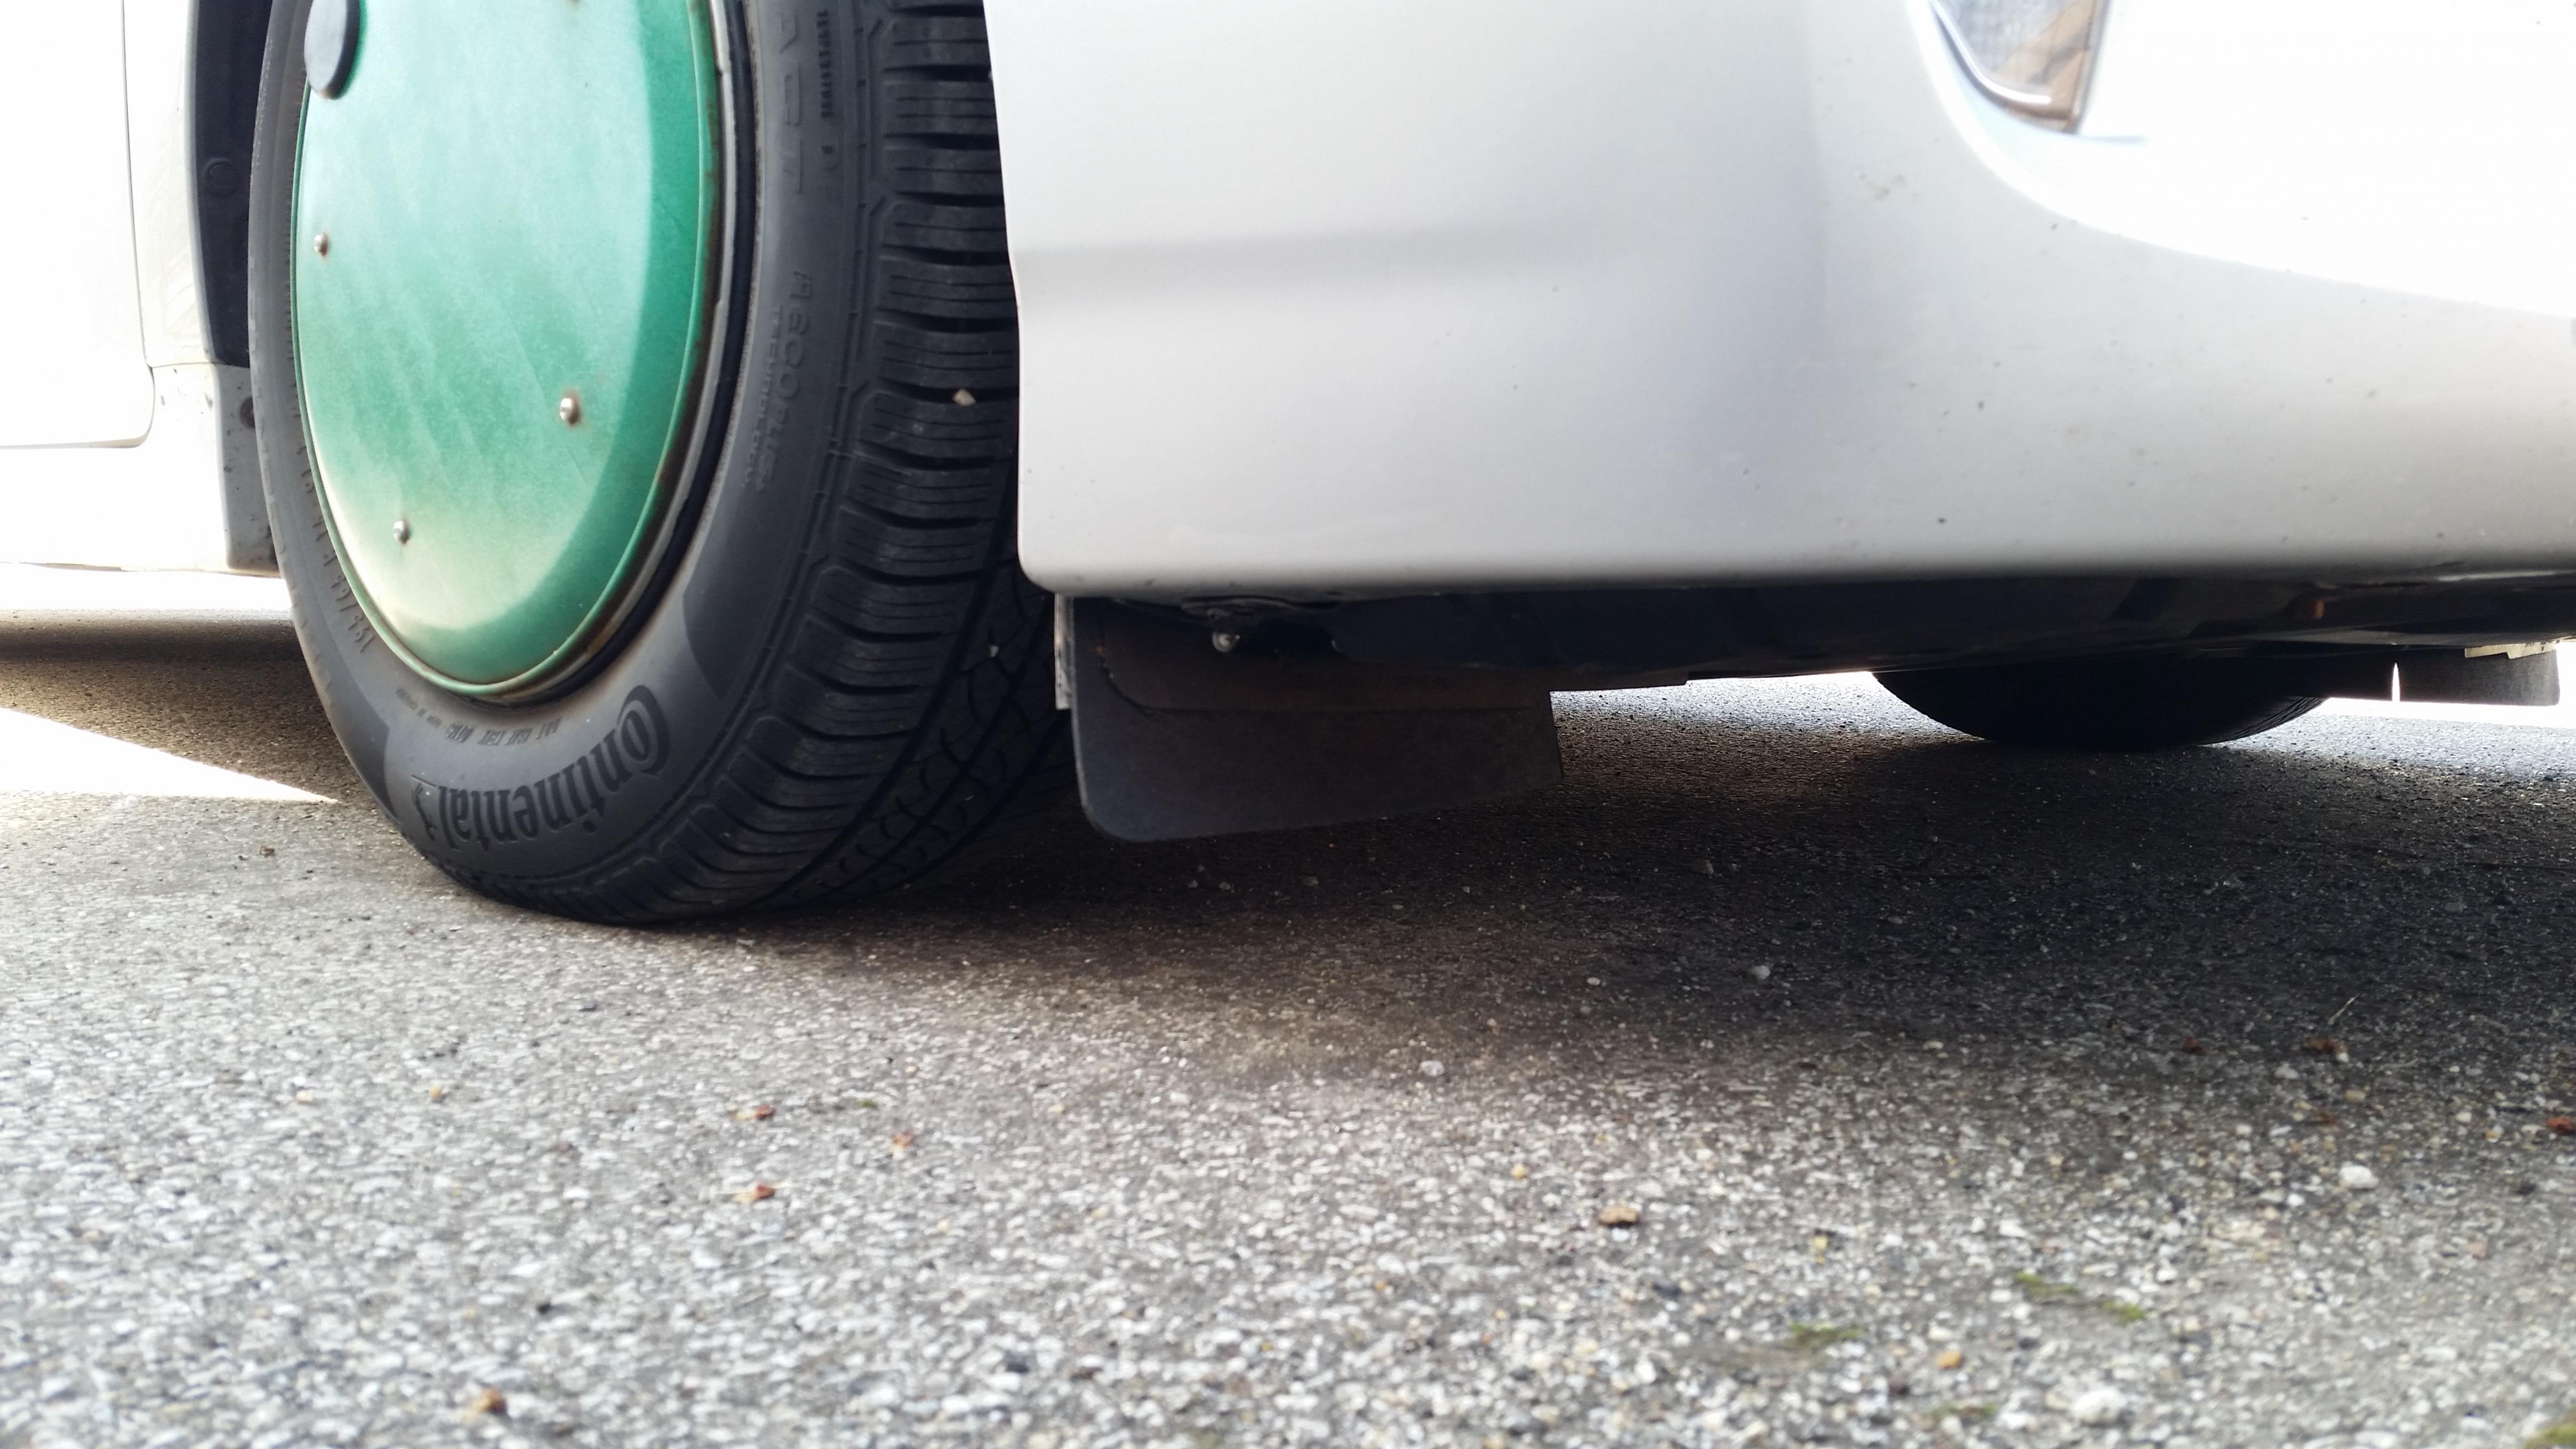
The fiberglassing is coming along, but nothing picture-worthy yet, and I'll be tied up most of this week with no time to work on it. However, one minor aeromod completed this afternoon: redesigned front wheel air dams.
Actually, these are version 2.0; version 1.0 I made entirely out of aluminum, extending 20mm below the stock air dams. However, after getting a chance to test them in the freak 4" of snow this weekend, it turns out aluminum is too rigid to use for this--they were getting bent and pulled away from the wheel well liner.
So, 2.0 uses heavy interior/exterior rubber mat I happened to find at the hardware store. The dams extend 40mm past the stock dams, to 65mm above ground. I modeled them on the Cadillac CT6 plug-in dams:
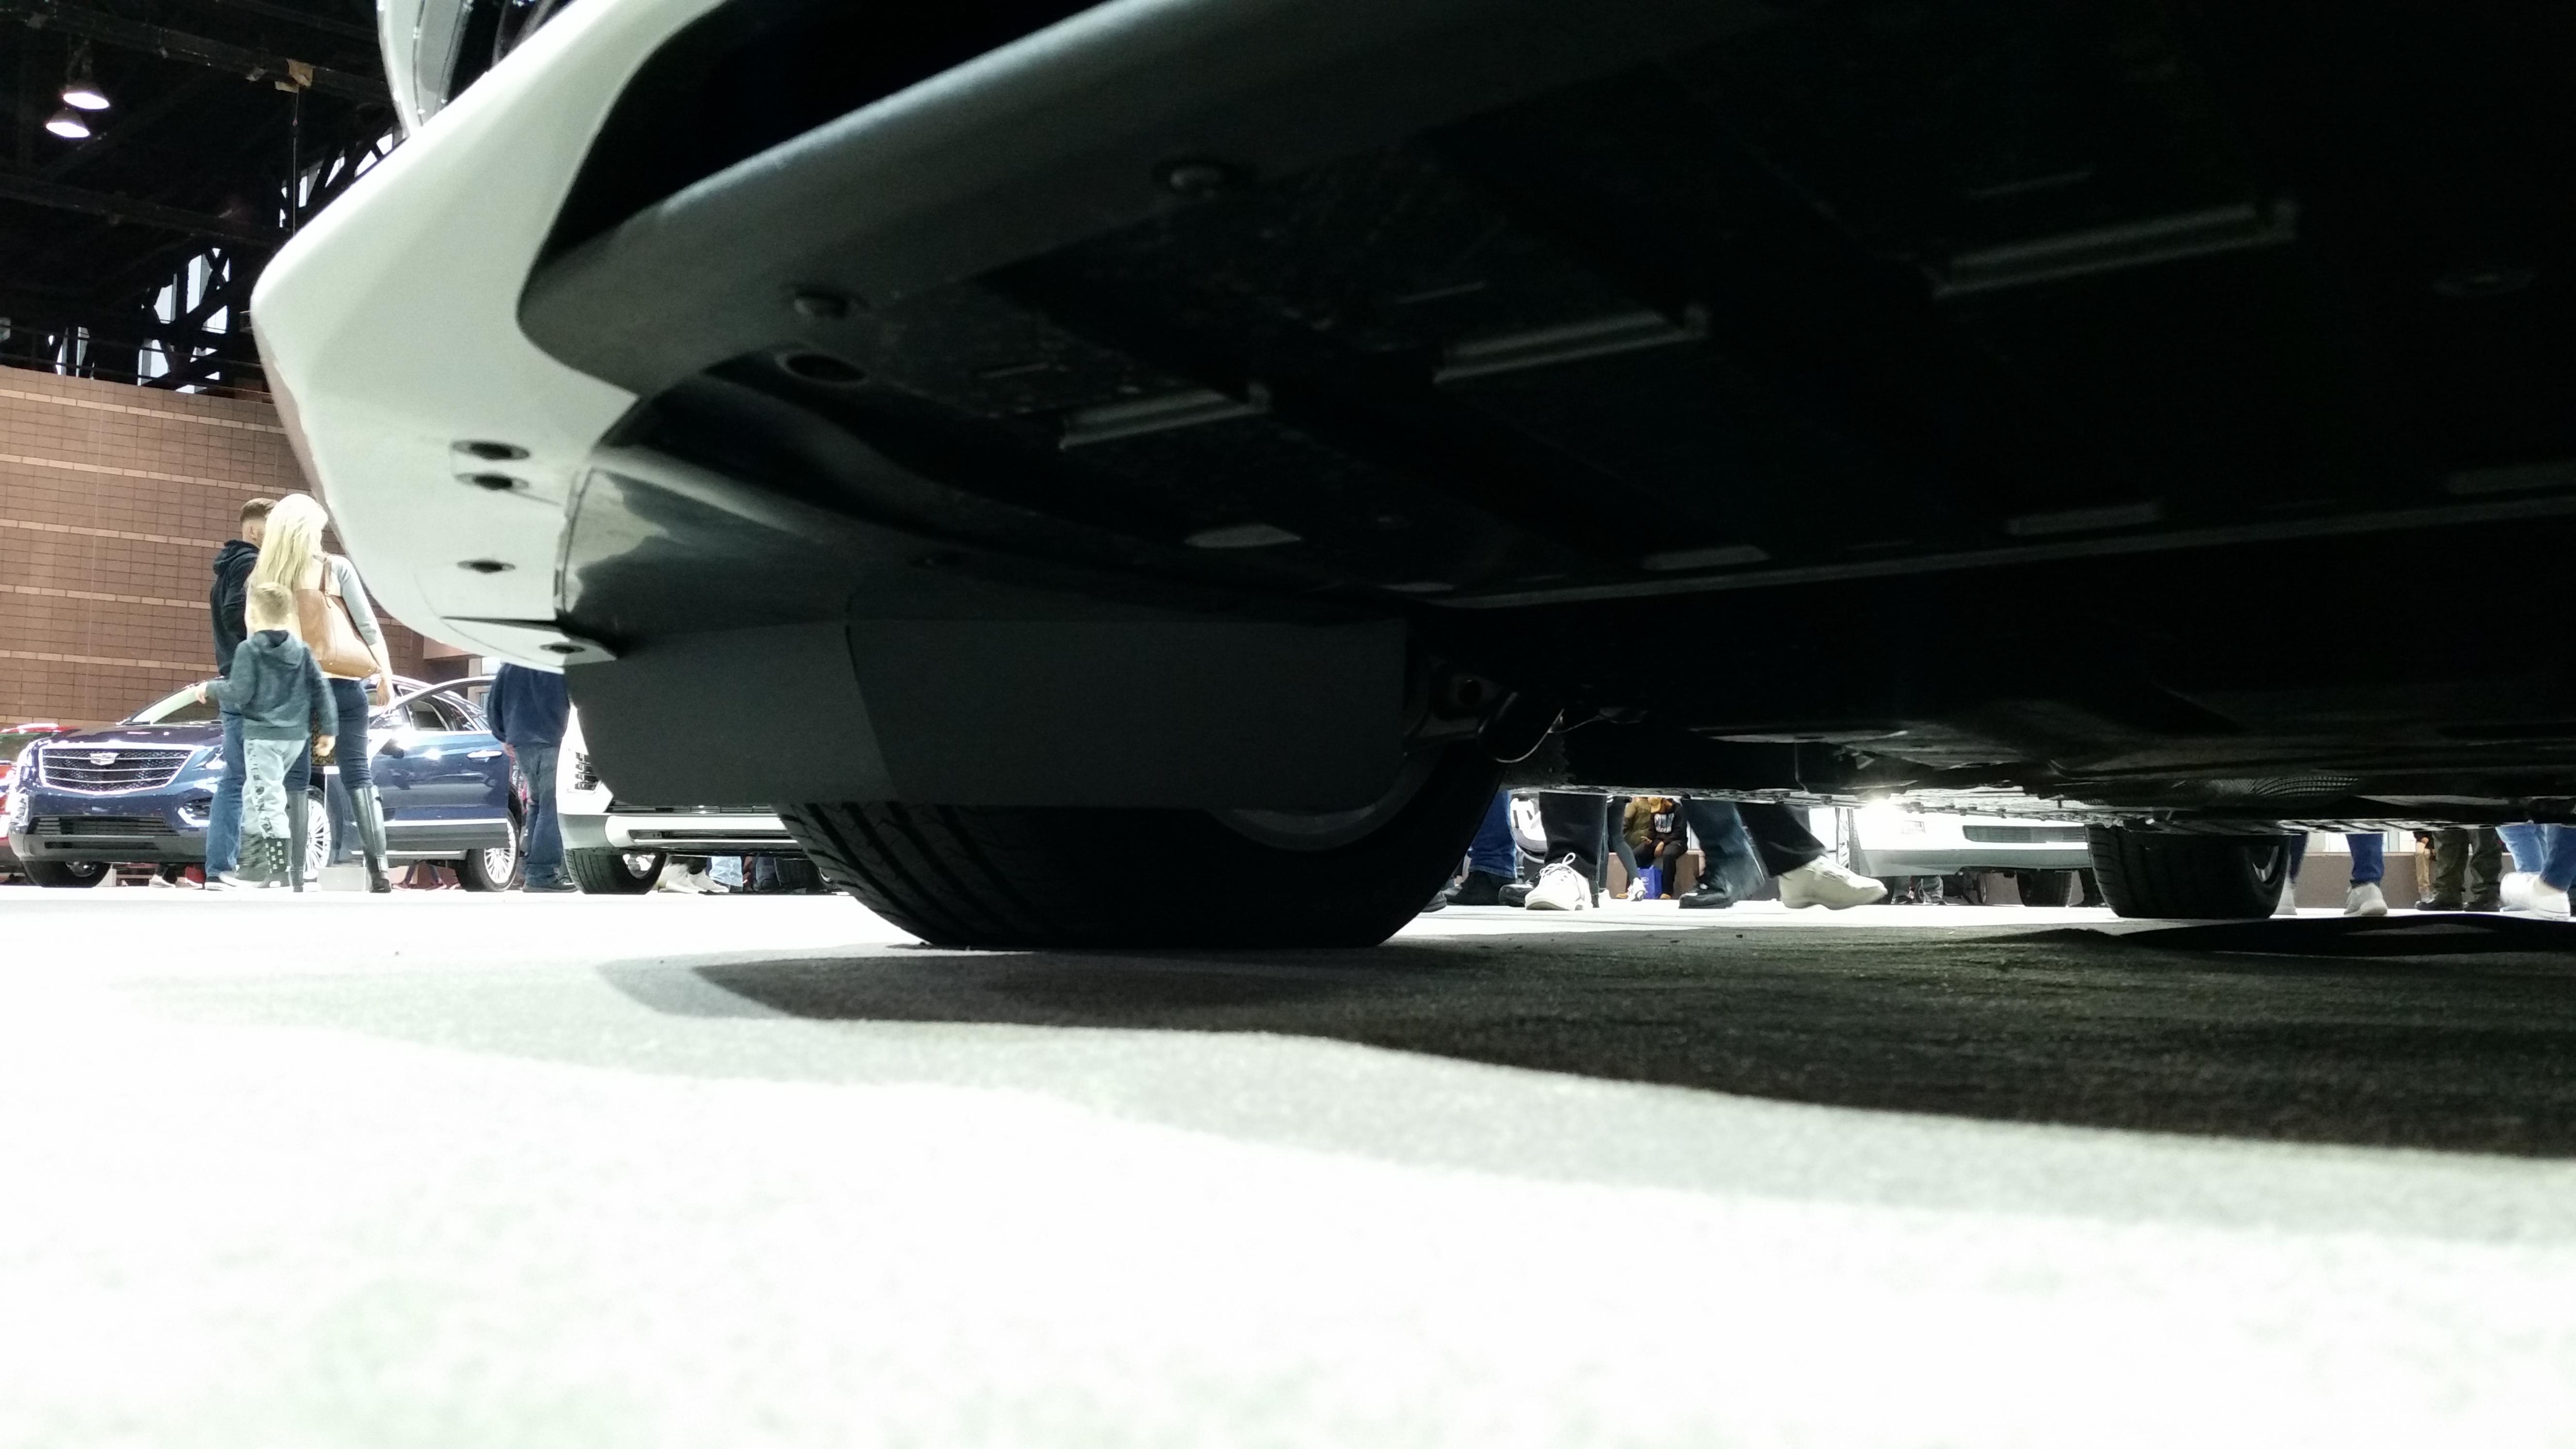
Large, two-piece for flexibility, made of heavy rubber, and wrapping around the forward part of the well.
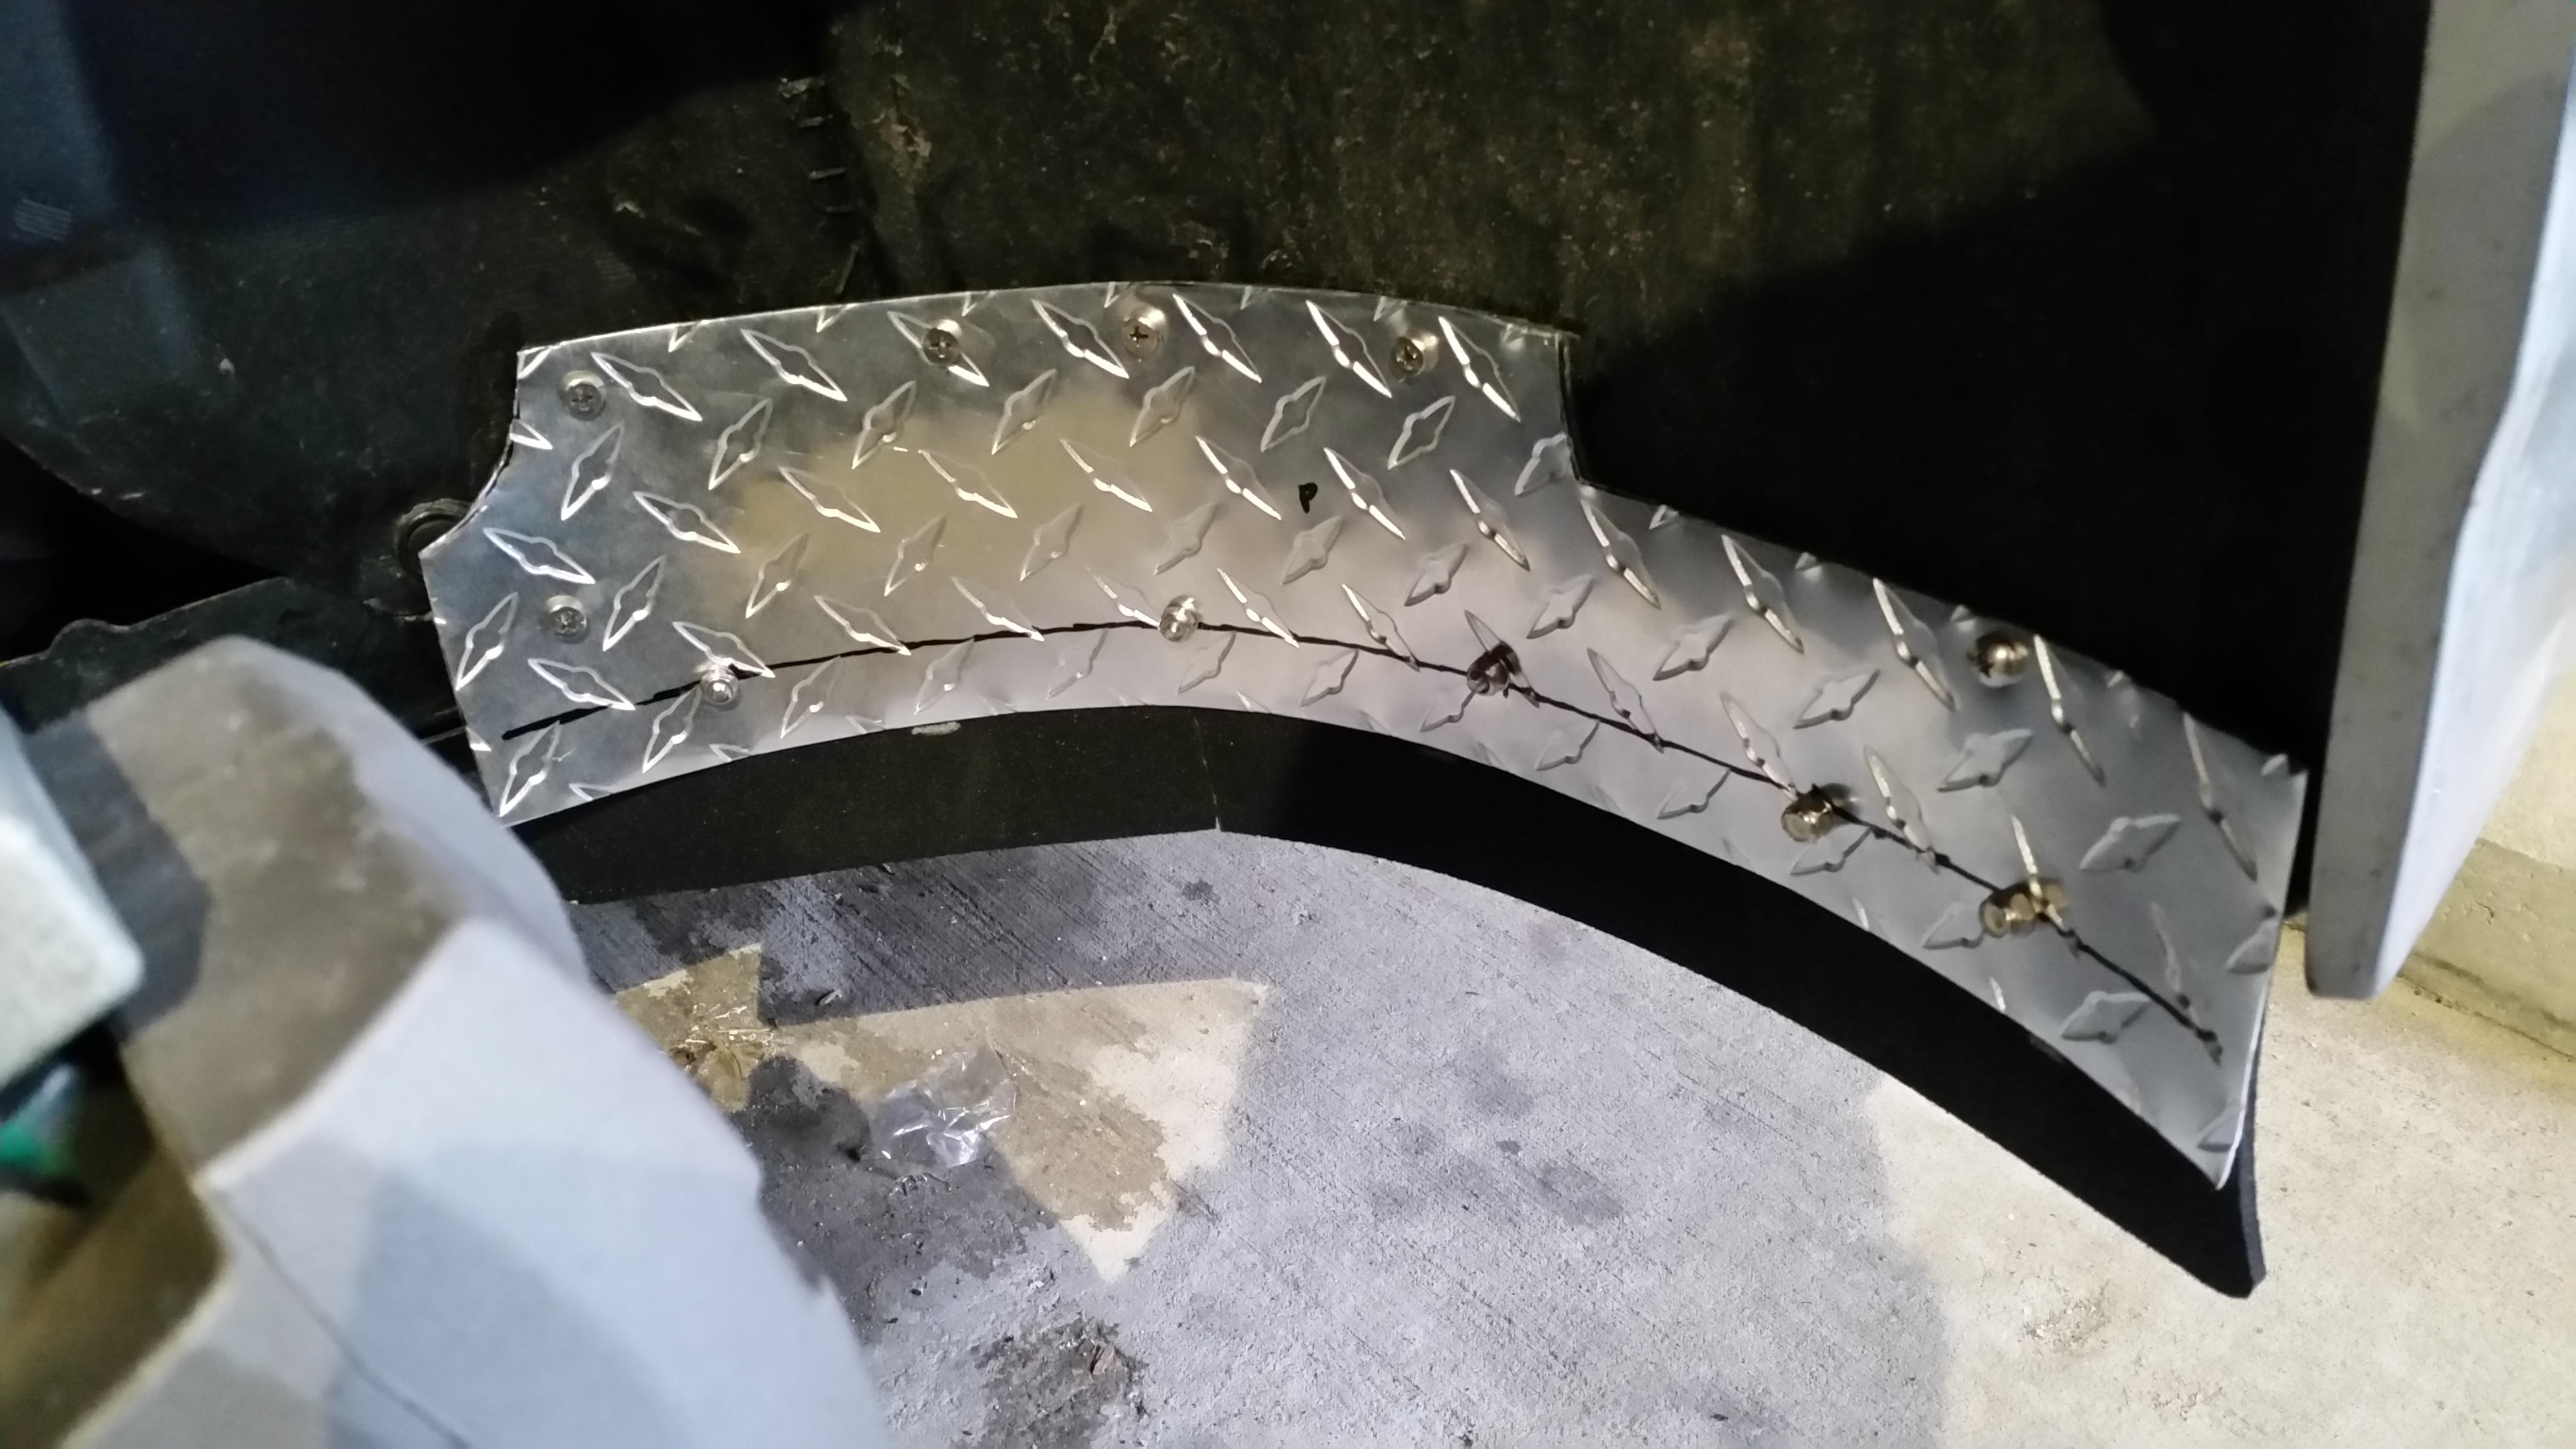
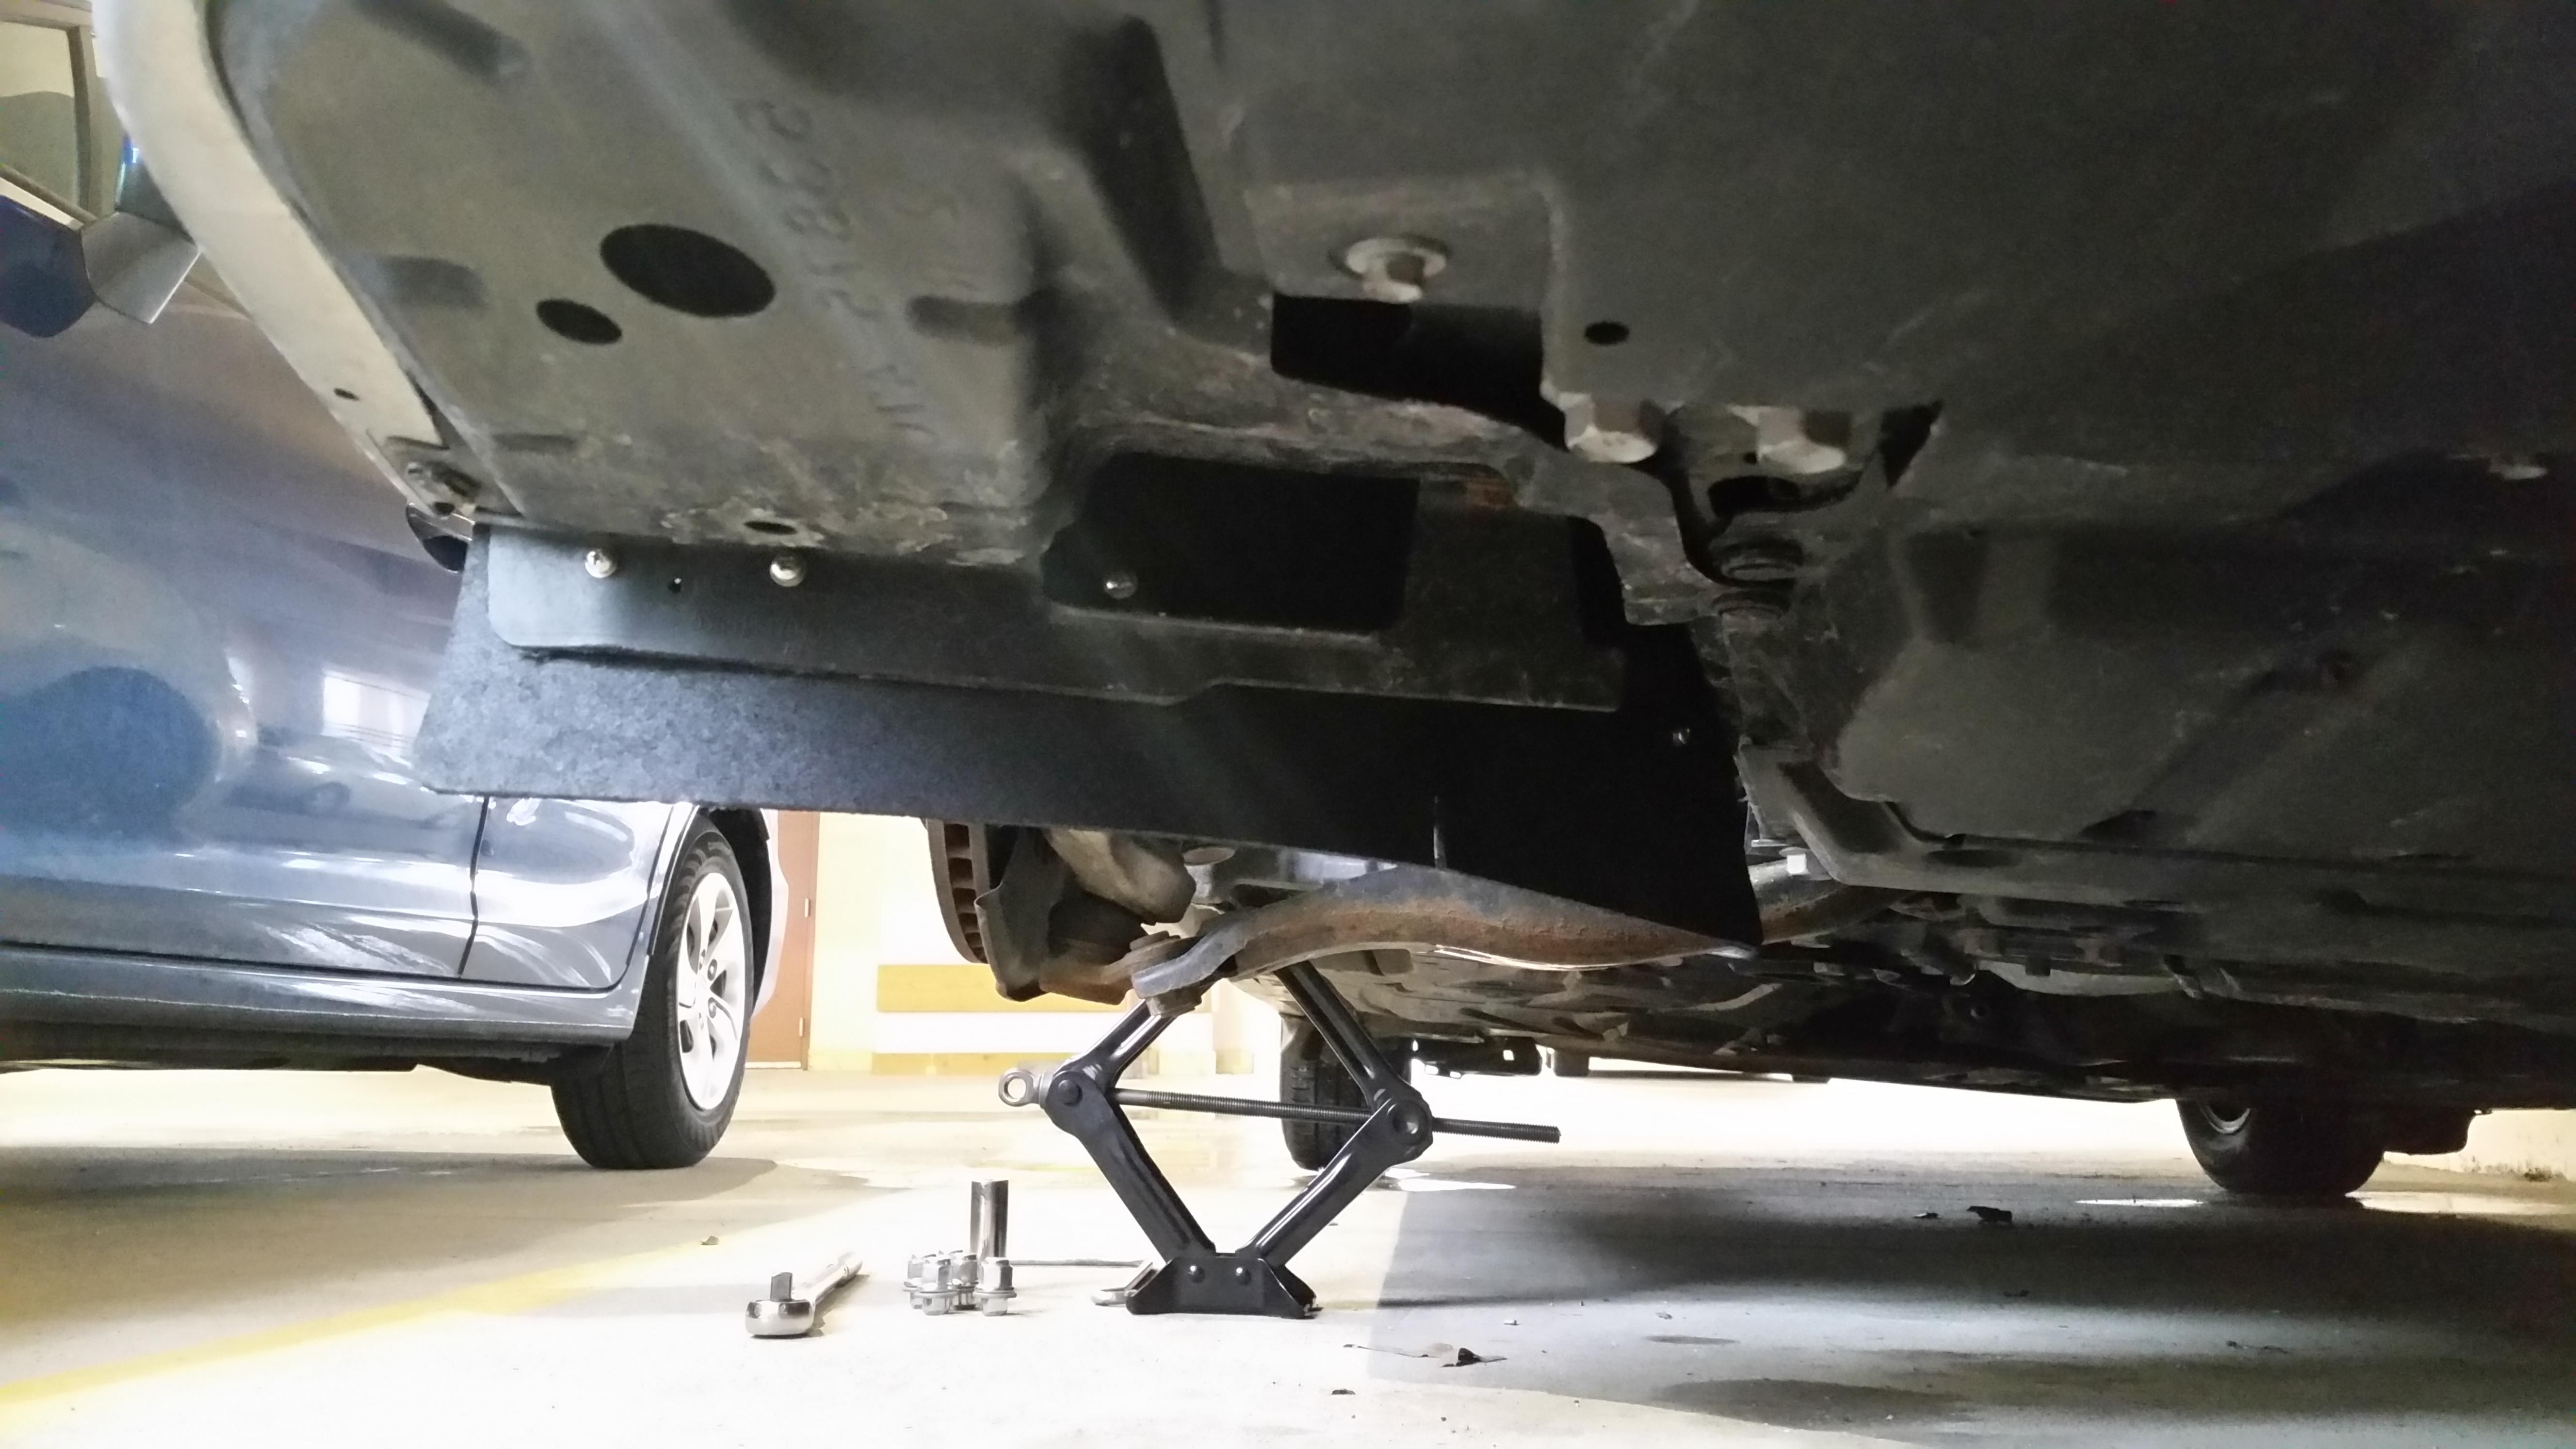
I'll see if I can get some better pictures with the car on the ground when the weather's a little nicer. |
|
|

|
|
The Following 3 Users Say Thank You to Vman455 For This Useful Post:
|
|
 04-07-2018, 04:51 PM
|
#249 (permalink)
|
|
Moderator
Join Date: Feb 2012
Location: Urbana, IL
Posts: 1,940
Thanks: 199
Thanked 1,807 Times in 943 Posts
|
The tail is done!
Well, mostly done--there are still a few odds and ends left to take care of, like wiring in the solar panel and charge controller and adding some side bracing. But, the majority of the work is done and the car is driveable (after being out of commission while I waited for a day warm enough to paint and then install the lights), just in time for the Green Grand Prix!
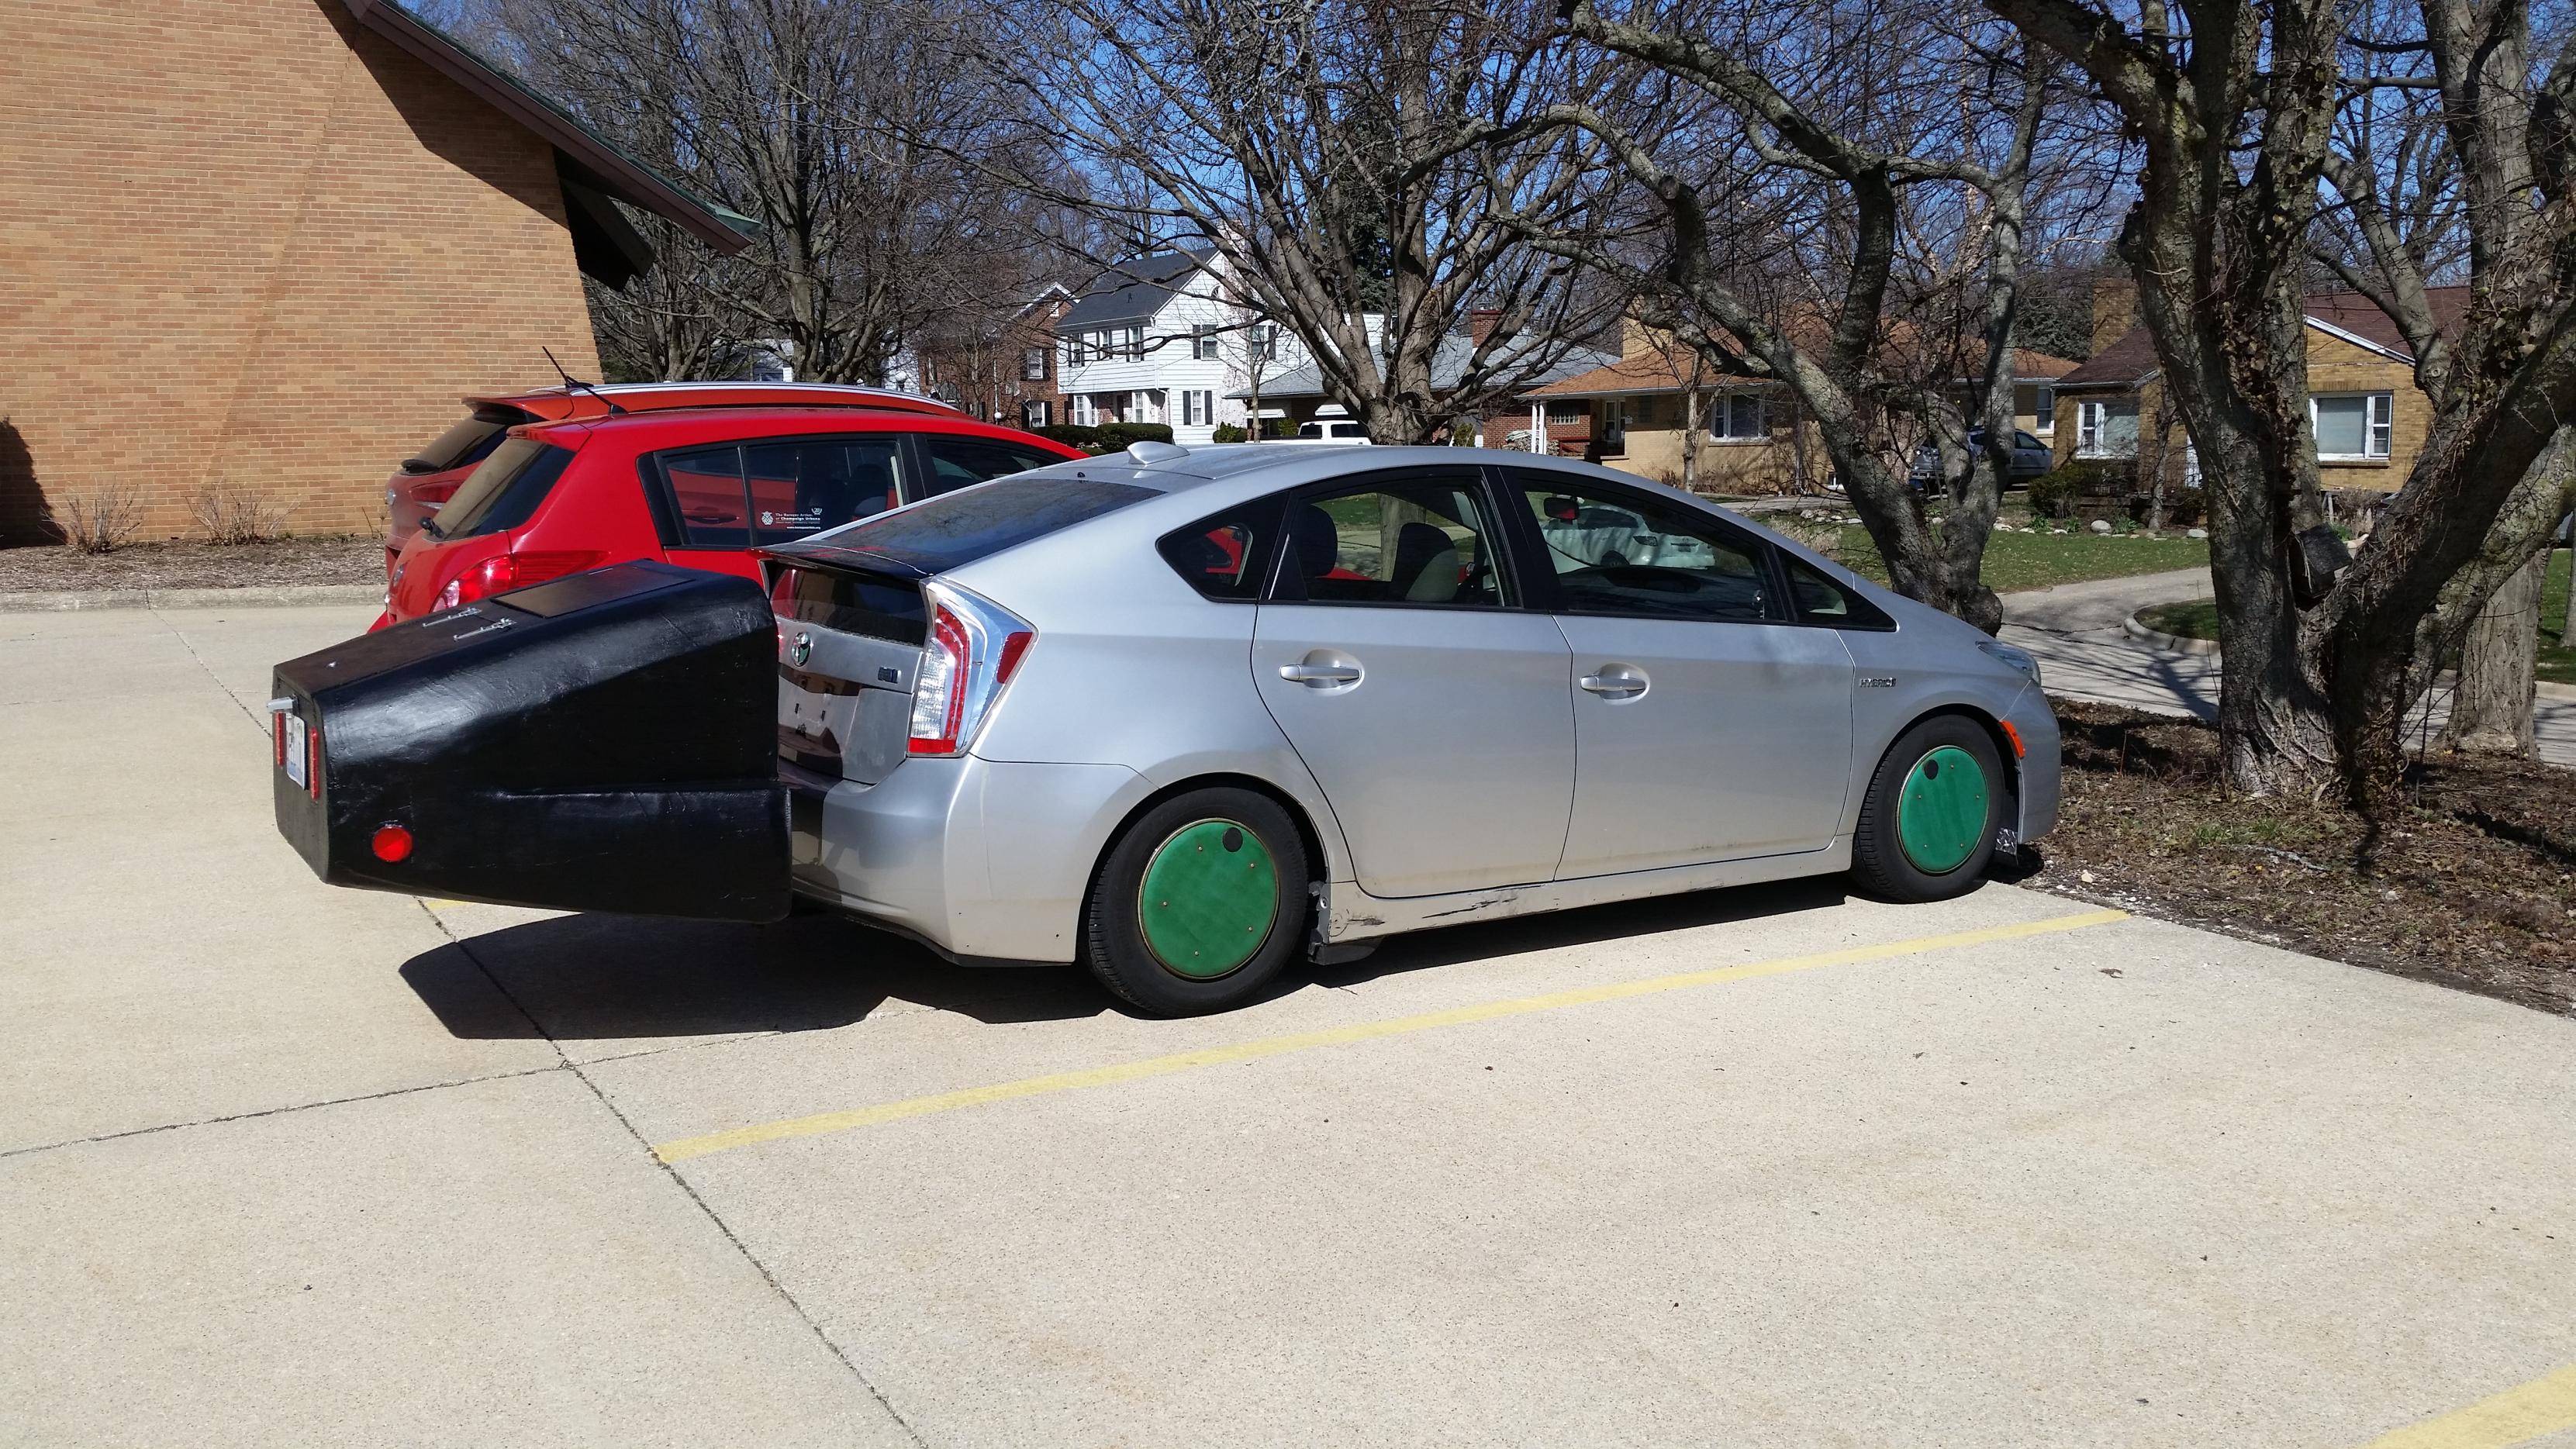
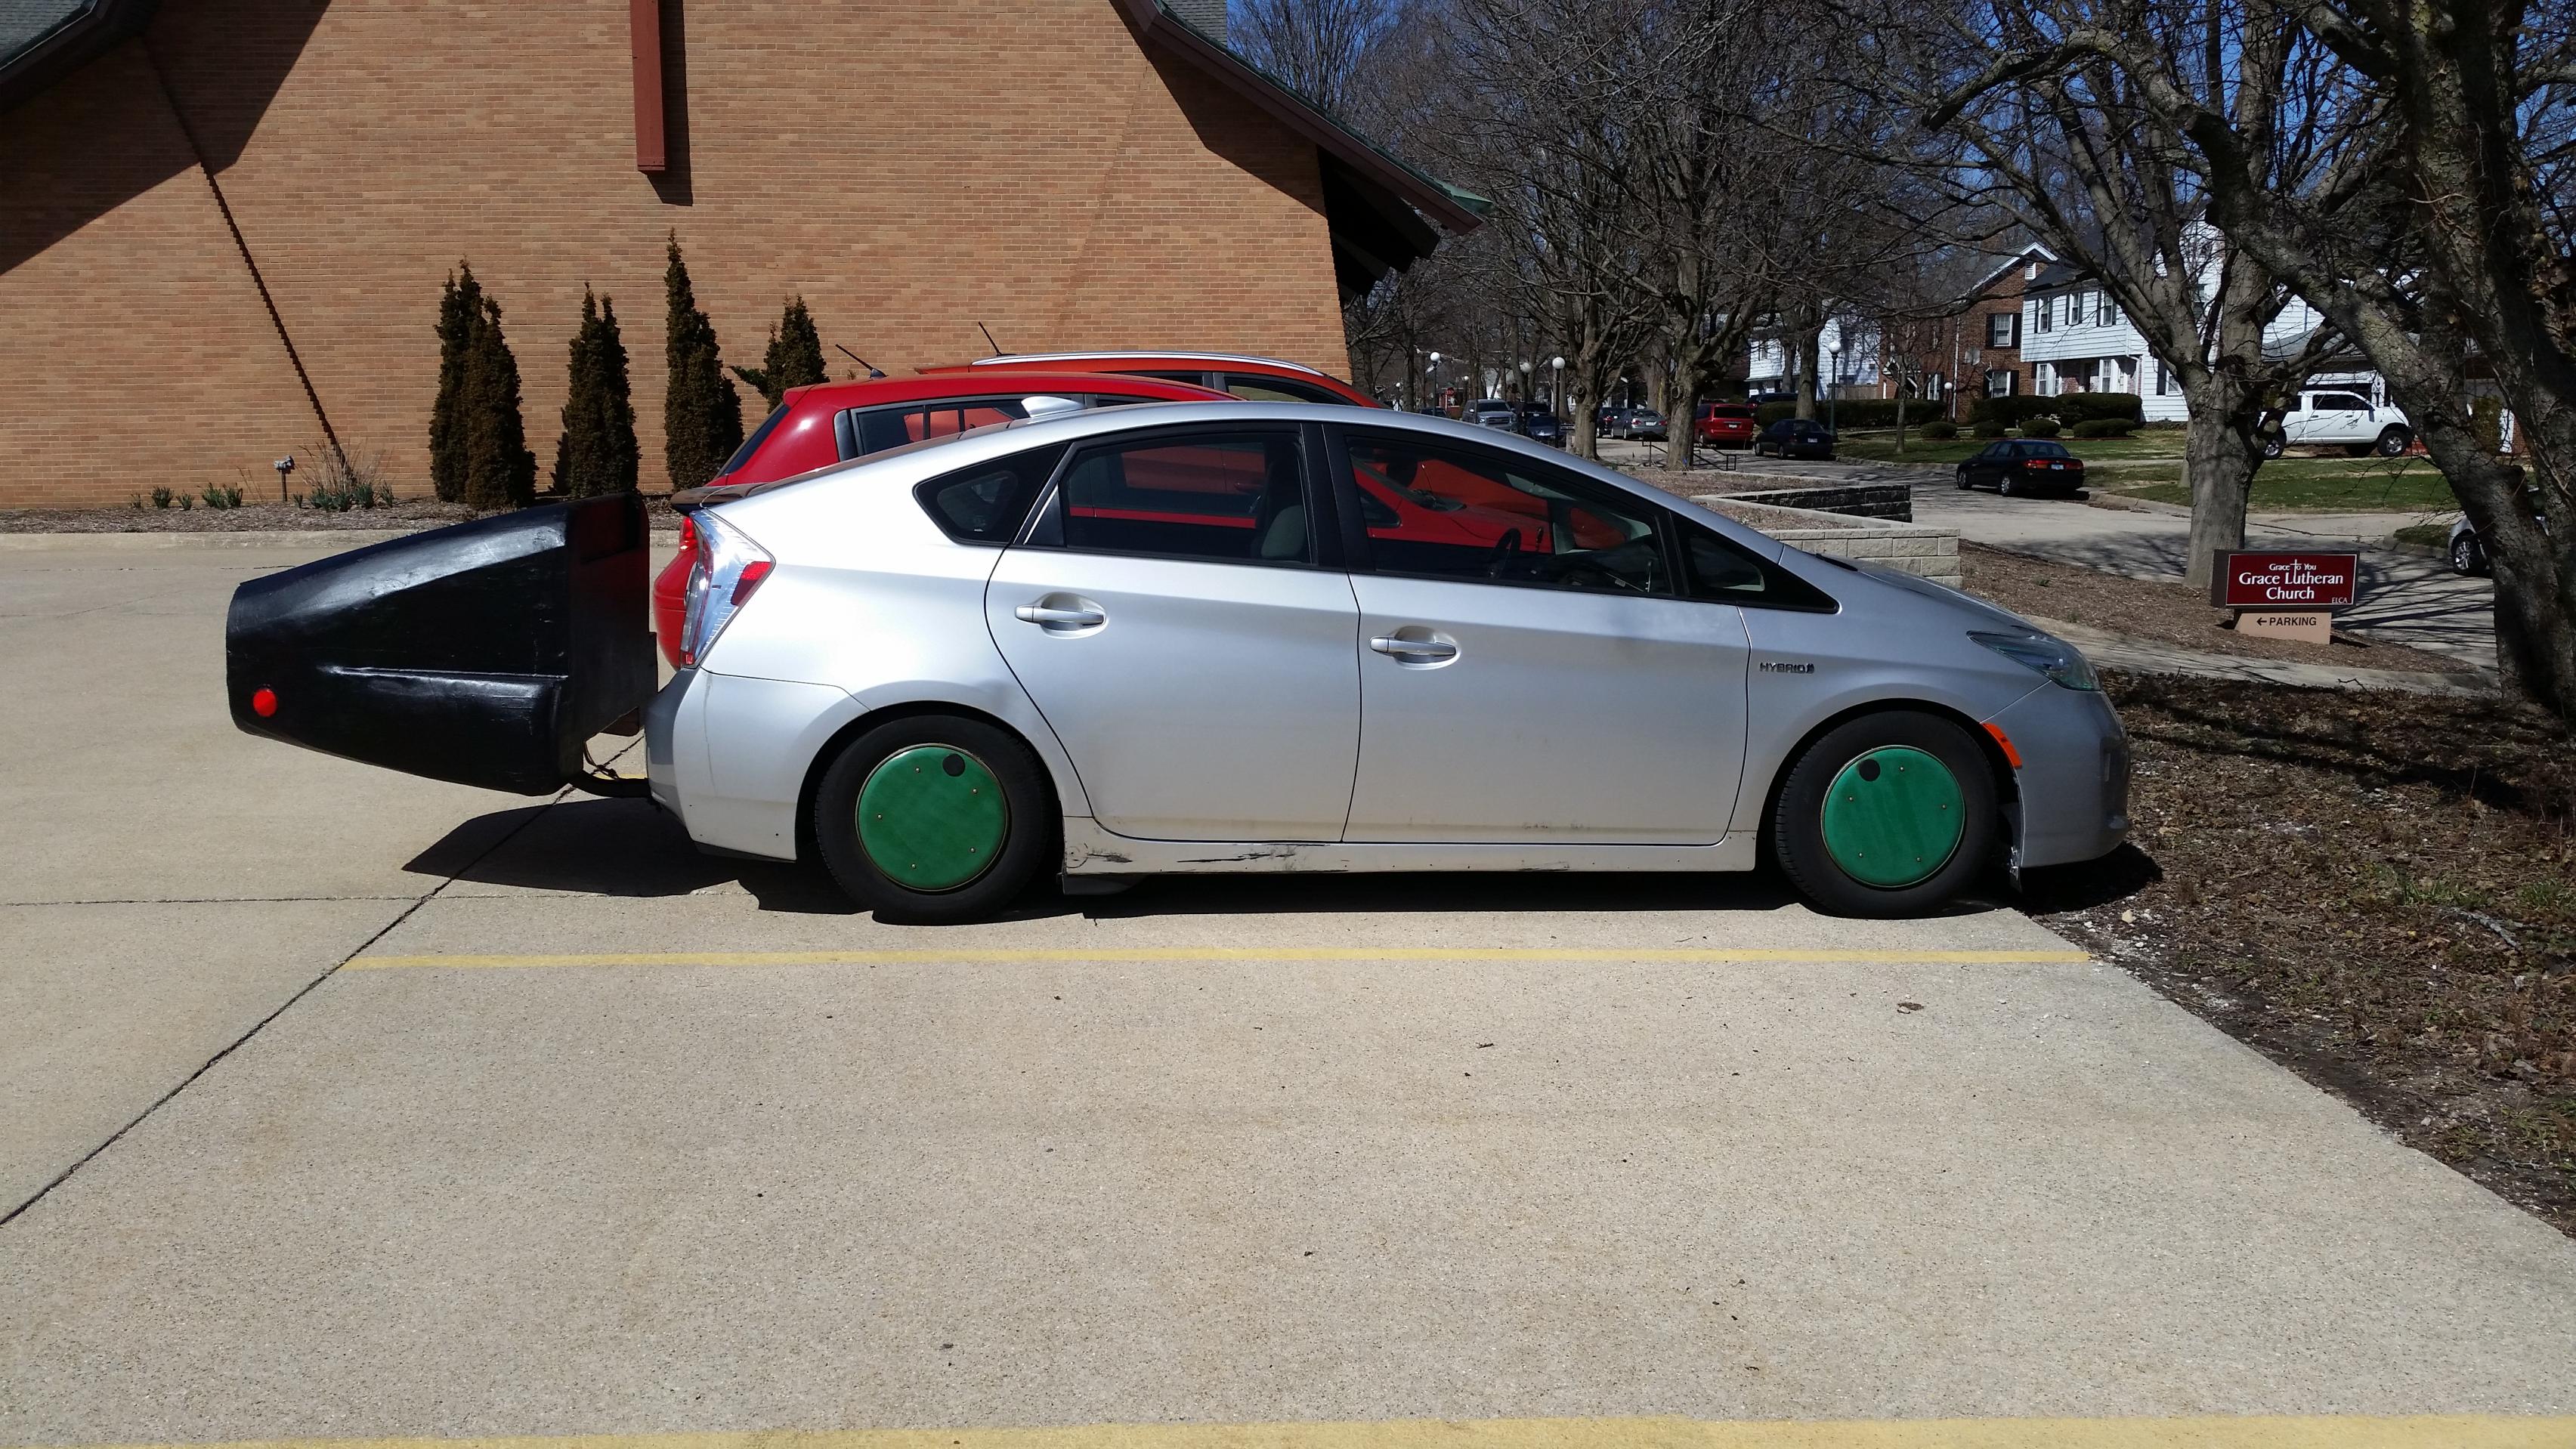
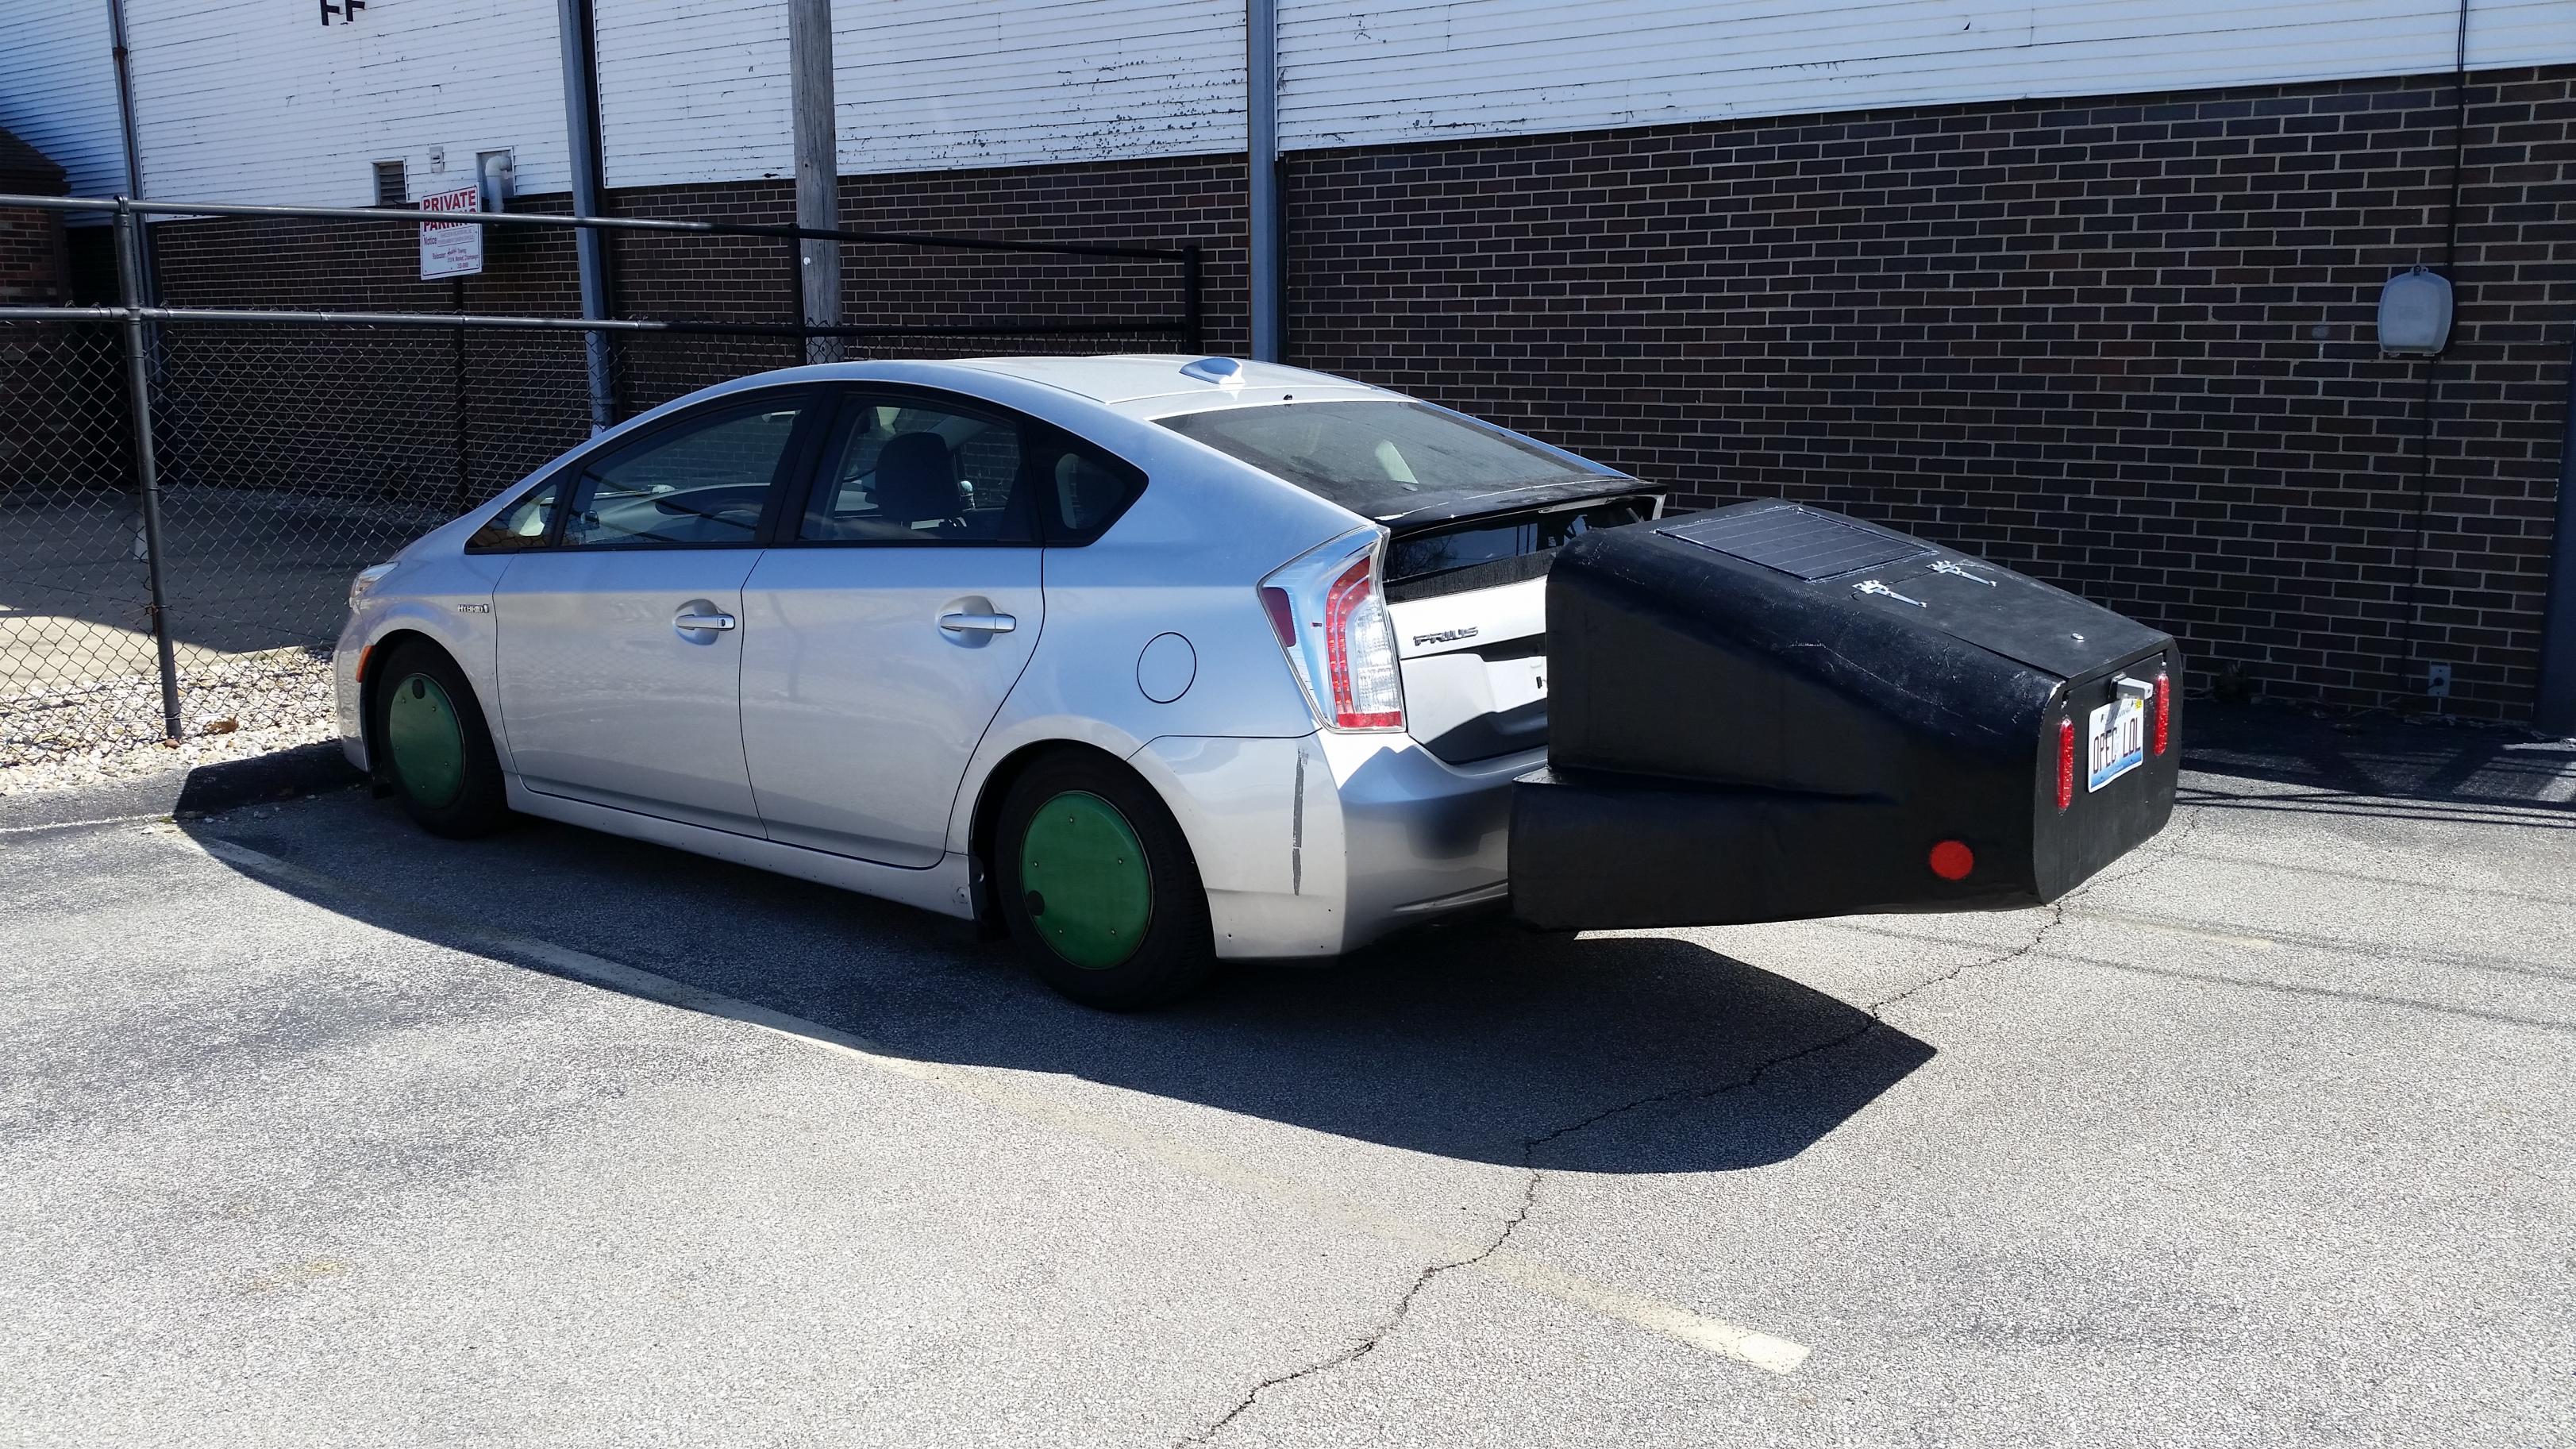
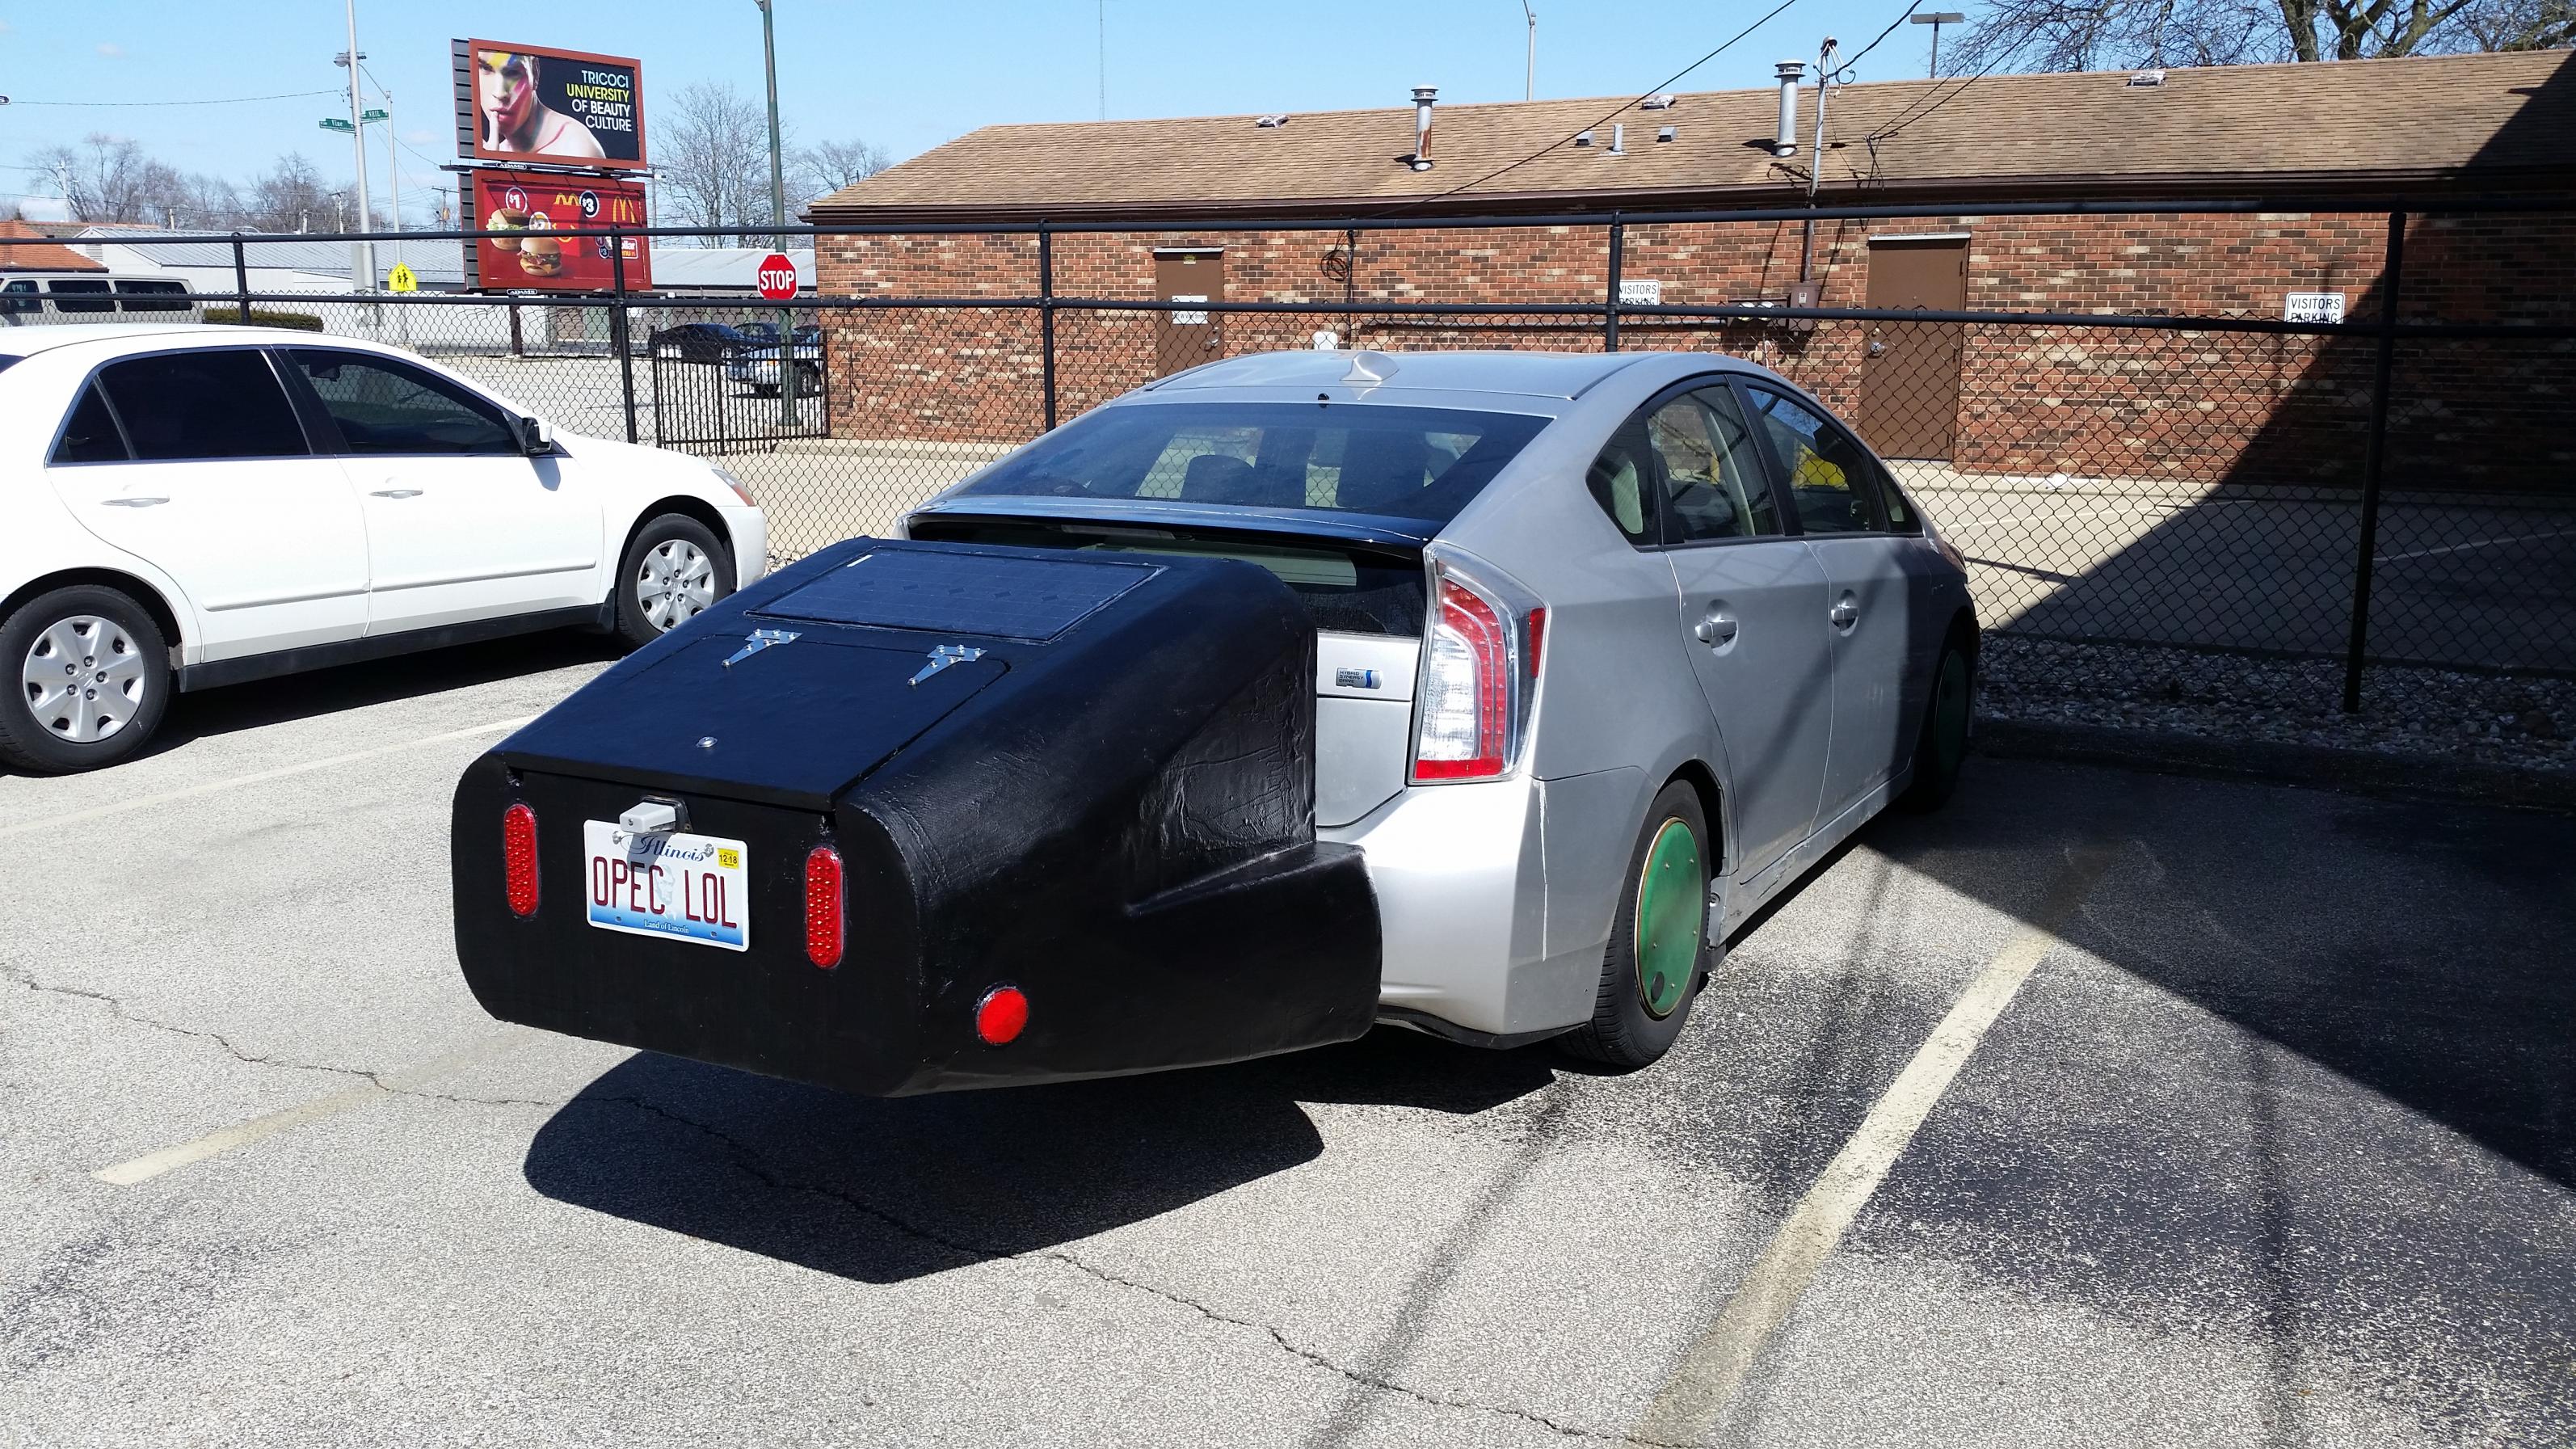
I ended up painting it with bedliner. Black+thick covers a multitude of sins; this stuff is UV resistant, abrasion resistant, and impact resistant, so it should hold up well.
I still have to attach the aluminum closeout panels on the bottom; then it will have a smooth underside.
Some other details. Rear wheel fairings:
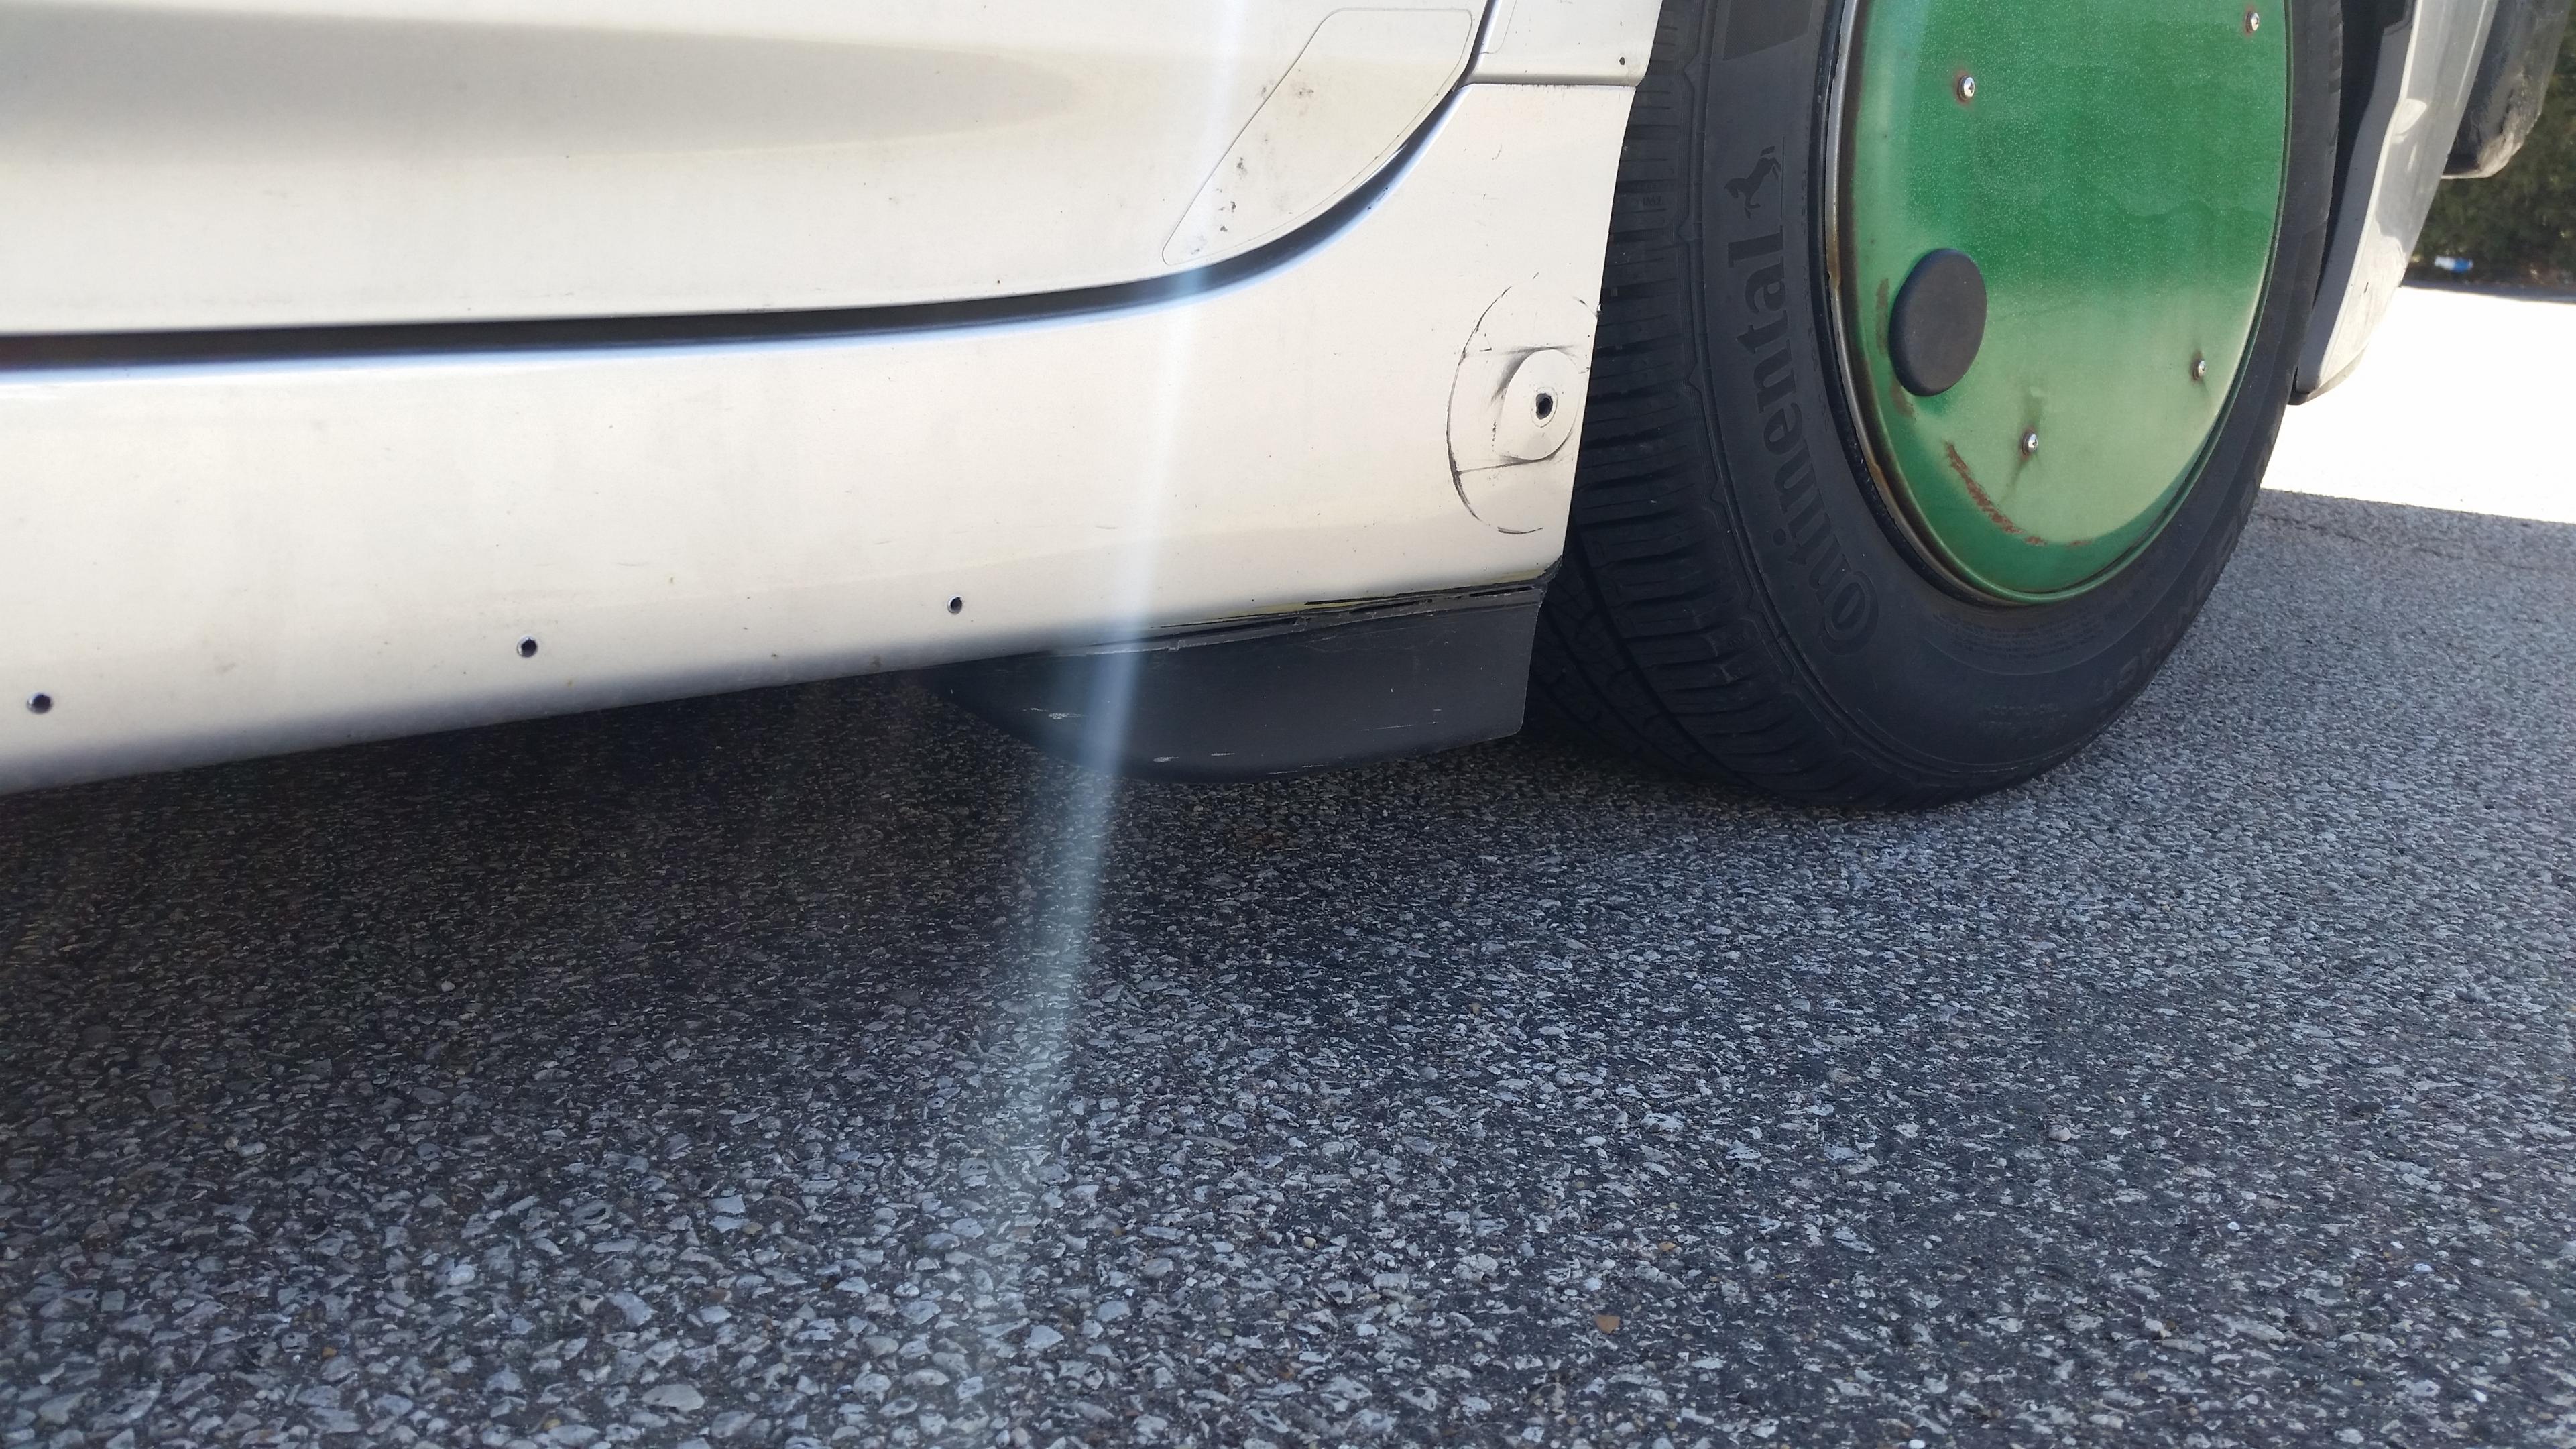
Front wheel air dams:
 |
|
|

|
|
The Following 7 Users Say Thank You to Vman455 For This Useful Post:
|
|
 04-07-2018, 05:19 PM
|
#250 (permalink)
|
|
Administrator
Join Date: Dec 2007
Location: Germantown, WI
Posts: 11,203
Thanks: 2,501
Thanked 2,590 Times in 1,556 Posts
|
Woohoo. Glad to hear you got it finished up.
Do you have plans to test its effectiveness?
|
|
|

|
|