Go Back   EcoModder Forum > EcoModding > EcoModding Central
Register Now
 Register Now
 

Reply  Post New Thread
 
Submit Tools LinkBack Thread Tools
Old 07-21-2012, 12:51 PM   #11 (permalink)
EcoModding Lurker
 
Synchronicity's Avatar
 
Join Date: Mar 2012
Location: SPAIN / AUSTRALIA
Posts: 29

TGV - '11 Renault Traffic L2H1 2900 long wheelbase cargo van
Thanks: 8
Thanked 5 Times in 2 Posts
I have nearly finished a belly pan for this van as there are quite a few gaps underneath. Total area is about 1.2 m² and it's made of powdercoated alloy + fiberglass. I'll get some before & after pics up when I can.

  Reply With Quote
Alt Today
Popular topics

Other popular topics in this forum...

   
Old 07-21-2012, 09:42 PM   #12 (permalink)
EcoModding Lurker
 
Join Date: Jul 2012
Location: NC
Posts: 10
Thanks: 3
Thanked 1 Time in 1 Post
  Reply With Quote
Old 07-22-2012, 05:09 AM   #13 (permalink)
Master EcoModder
 
euromodder's Avatar
 
Join Date: Jul 2010
Location: Belgium
Posts: 4,683

The SCUD - '15 Fiat Scudo L2
Thanks: 178
Thanked 652 Times in 516 Posts
Quote:
Originally Posted by Synchronicity View Post
I'm not tracking mpg so I don't have any reference point.
Better start tracking your fuel use, otherwise you'll never know wether what you've done helped, nor how much it helped.

Quote:
I know that I should be able to get more than 1000km to a tank. Previously I've been struggling to reach that mark, mainly because of my driving habits.
There's a lot to be gained from changing the way you drive.

Driving slower goes a long way.
On short trips (say 50km or so), it doesn't change the required time.
On long trips, you do lose time - so it comes down to how important time is to you.

Quote:
Not only do they work better, they are quieter.
Even if it may not improve the fuel use much, it's still nice to have these benefits.

Quote:
Alternatively, one will make 4 tyre spats.
Spats to go in front of the tyres ?
Mounting spats aft of the tyres adds drag.
__________________
Strayed to the Dark Diesel Side

  Reply With Quote
Old 07-22-2012, 05:18 AM   #14 (permalink)
Master EcoModder
 
euromodder's Avatar
 
Join Date: Jul 2010
Location: Belgium
Posts: 4,683

The SCUD - '15 Fiat Scudo L2
Thanks: 178
Thanked 652 Times in 516 Posts
Quote:
Originally Posted by Frank Lee View Post
He leaves the good useful stuff home (spare) and drives around with a triangle?
The triangle is mandatory.
Spain even requires you to have and put up 2 of them when you break down.

More mandatory stuff in Europe :
- fire extinguisher in most EU countries (even though it's known these small 2 lbs devices won't extinguish much, if anything)
- warning triangle(s)
- first aid kit
- and the recent fab : hi-viz throw-overs for at least the driver (France requires them for all occupants)

All introduced in the name of perceived safety ...


Removing the whole useless lot from European cars would cut down 10.000s of tons of essentially useless goods being hauled around.
__________________
Strayed to the Dark Diesel Side

  Reply With Quote
Old 08-08-2012, 12:13 PM   #15 (permalink)
EcoModding Lurker
 
Synchronicity's Avatar
 
Join Date: Mar 2012
Location: SPAIN / AUSTRALIA
Posts: 29

TGV - '11 Renault Traffic L2H1 2900 long wheelbase cargo van
Thanks: 8
Thanked 5 Times in 2 Posts
belly pan for a van

Well, I've been busy in the garage practically the whole month of July...

I bet my partner €100 that I would finish all the mods before 31st of July. That didn't happen. So I lost.

I'll try and post some photos soon.

Previously I thought I'd just do a partial belly pan, partial meaning < 1.5 m². Now I am getting close to 3.2m². The target is to make about 4.0m² totally flat. Or as best as possible.

I have literally spent HOURS under my van pondering the best way to block off the remaining gaps. There's a mighty cavern behind the fuel tank, then another one behind the rear axle where the spare tyre went. I previously did a lousy attempt at both. Even though both bits stayed bolted on, I wasn't happy with it as I knew I could do much better.

So I thought I might as well just do the whole darn lot and be done with it.

I have a strong background in Materials Science so I had to do this properly...

I've used a combination of materials for this project:
I like to experiment with things, like a lot of forum members...
  • Firstly, 6x 85mm wide powdercoated alloy extrusions (2 metres long). I have put 3 down each side of the van, I'm using fibreglass tape & polyester resin to hold them adjacent to each other... I have pop-riveted some steel 90° brackets to the car (stainless rivets), then the alloy bits are bolted on to the brackets with stainless M6 harware (pan heads on all the bolts). These sections effectively close of a gap (chambers really) about 12" deep along both sides of the van.
  • I've got about 7 or 8 anodised aluminium extrusions for the mid-section closest to the exhaust, both sides. These contraptions have a fluted bottom & are held together by a few "L" shaped alloy struts. At the moment I'm using high-temperature epoxy to hold this altogether, so there are no bolts to interrupt the air flow...
    Some pieces are fine, but other bits don't come into contact with the L bar so I'll have to glue on some more reinforcements. Once again, these have M6 stainless harware that mount onto an aluminium sub-structure.
  • Then theres 2 homemade fibreglass composite sandwich panels. First one is about 1m x 1m. Second one is about 0.9 x 0.8m. I'm using a single layer of 500g/m² fibreglass on each side with standard epoxy resin. I was vomiting the morning after I used the polyester resin, so never again.

    NOTE: Epoxy doesn't give off no where near as much of an odour as it cures. I bought this from a composites store. Now if I can get this here on the tiny island of Tenerife, you can get this anywhere in the USA. As they are essentially a wholesaler, it is MUCH cheaper than the equivalent materials in Bunnings, Home Depot or whatever. I actually returned €15 worth of expoxy (in 200ml tubes or something) and got 3kg worth for just over double that amount... Price of raw fibreglass was 1/4 of that in "Leroy Merlin" (Spanish equivalent of home depot).

    I have used prefabricated steel tablelegs for the carriers, 10cm & 15cm long. That's about how deep the gap is in the middle.
  • I modified the existing rear axle by placing a PVC sewerage pipe over it (the strongest grey version). The closet I'll come to a boat tail is on the rear axle.
  • Last but not least. The pièce de résistance (which isn't made yet). I had previously had a go at smoothing out the plastic engine cover underneath the front of the car. That, along with the sound insulation, made it too heavy, and the rear half basically fell down over the first speed hump. Not good enough Les!

    This van sees speed. So looking at all the uneccesary holes and what not, I've decided to make this into a TOTALLY flat underbelly for the engine. The best part is that I have already bought 1 square metre of carbon fibre for this... This cost €40 for 1.25 x 1.0m so is actually fairly reasonably priced. There is 1kg of epoxy resin left over. So I plan to make what is called a "hybrid composite". That is something using more than one reinforcement material... in this case it will be two layers of fibreglass and the final carbon layer. I'm pretty sure that'll be plenty strong & stiff enough. I still have to optimise the shape of this part. More on that to come...


MOST IMPORTANTLY, NO CLOROPLAST!
Well actually, I used a similar product (clear polycarbonate sheeting) for the cores of my sandwich panels. The extra 4mm thickness they provide separates the two skins of fibreglass and provides even more stiffness.
__________________
http://www.Tenerife-Training.net Pro Bike Hire in Tenerife
  Reply With Quote
Old 08-16-2012, 12:52 PM   #16 (permalink)
EcoModding Lurker
 
Synchronicity's Avatar
 
Join Date: Mar 2012
Location: SPAIN / AUSTRALIA
Posts: 29

TGV - '11 Renault Traffic L2H1 2900 long wheelbase cargo van
Thanks: 8
Thanked 5 Times in 2 Posts
FINALLY SOME PICTURES!

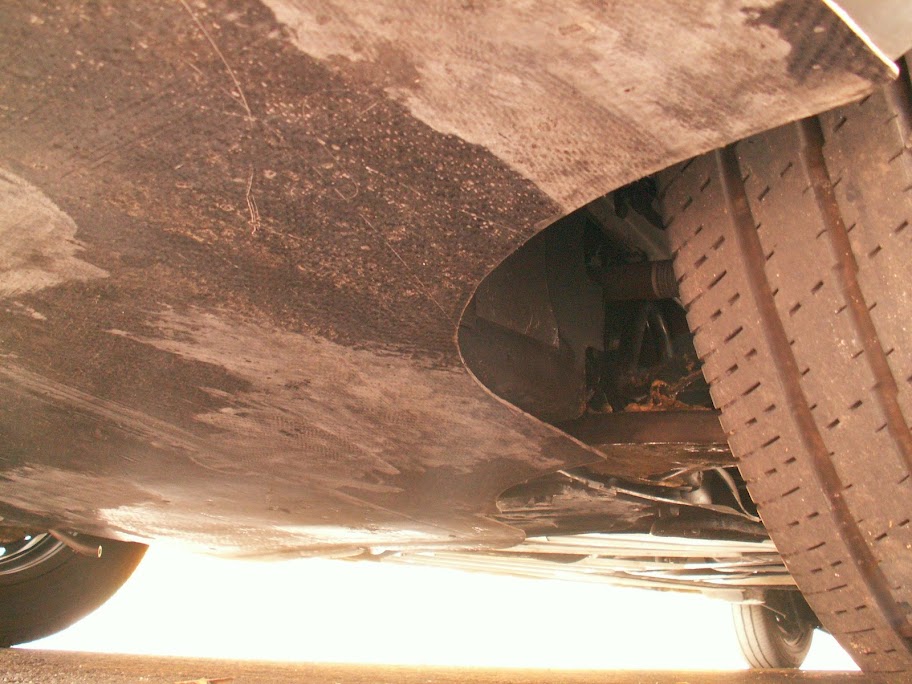
The first image shows the side undertray constructed of 3 alloy extrusions (only two on the other side as the exhaust pipe runs down there)... they're sagging a bit because I have only attached them with 3 or 4 screws each. Once finished, I'll join them up with the two main centre undertrays just ahead and behind the rear axle.


That gold colour long piece of metal is where the centre belly pan will go... pics will have to wait for another day.

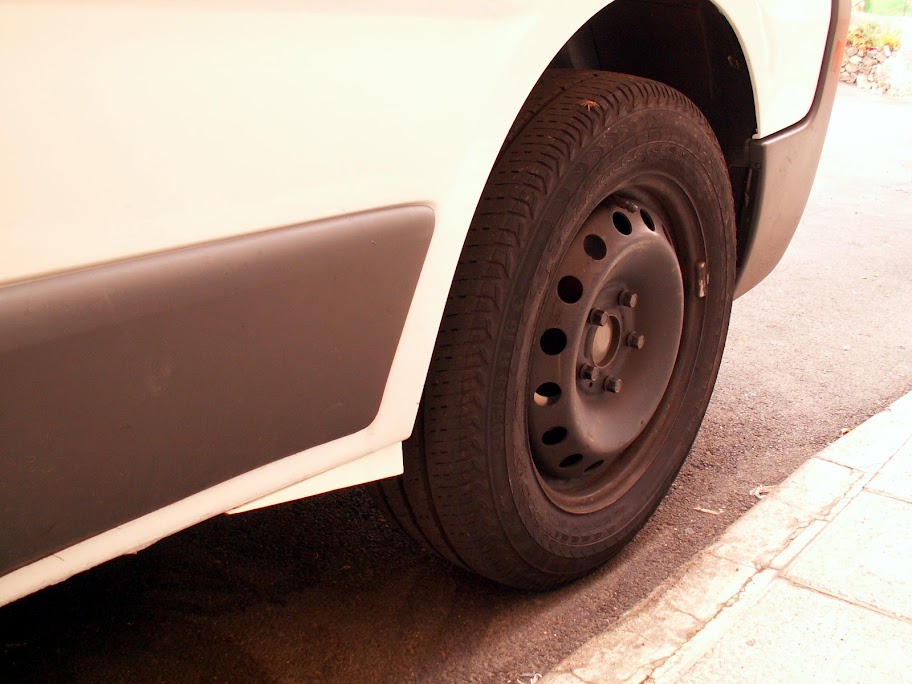
Also visible in the first shot are some rear wheel spats made of PVC pipe. I've also been working on flattening out the fuel tank.

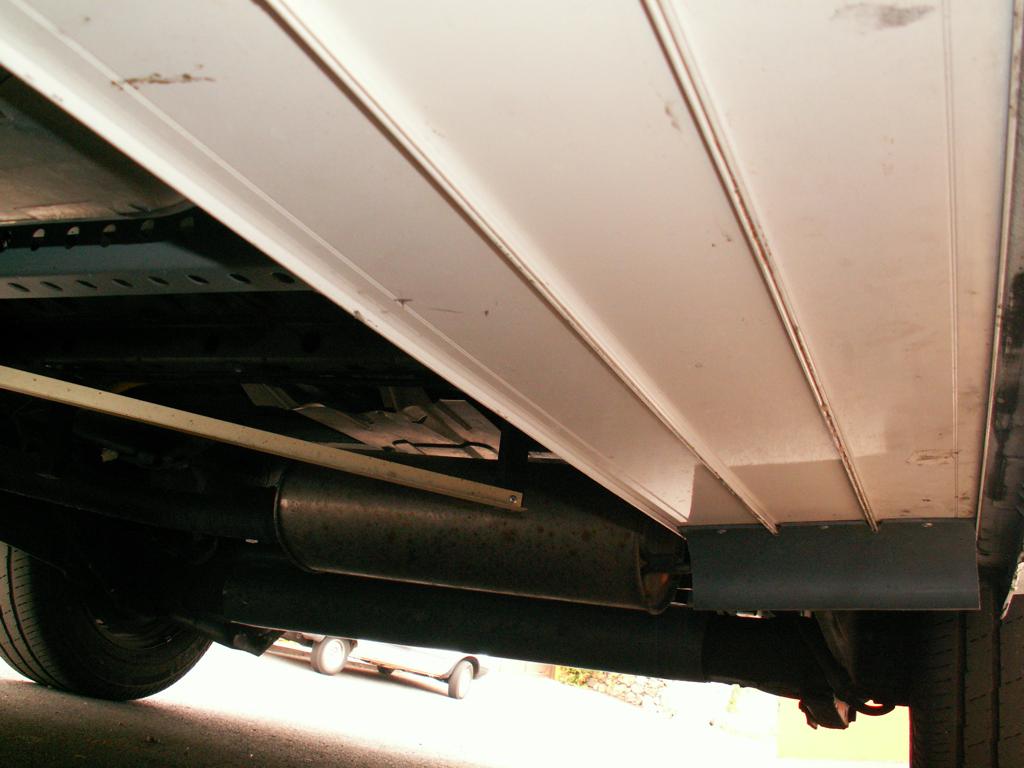
Here you can really see the length of the side under-trays, 2 metres long (approx 6 feet):


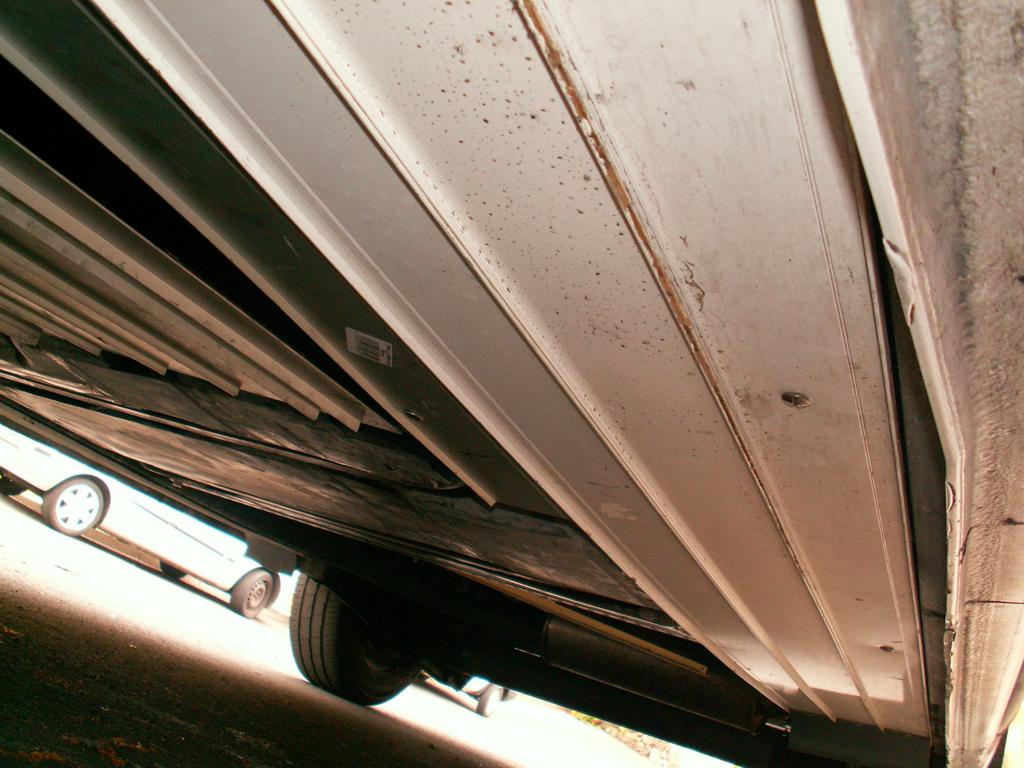
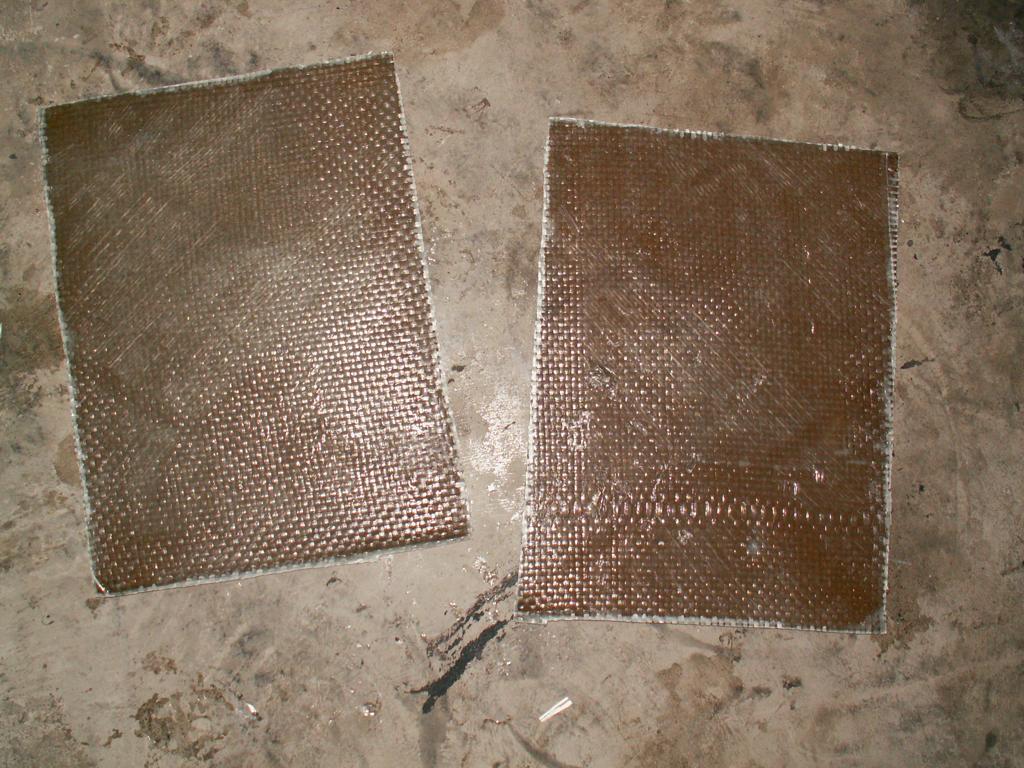
They weren't quite long enough for the whole van, so these are two additional small panels about A4 size which will go just behind the front wheels:


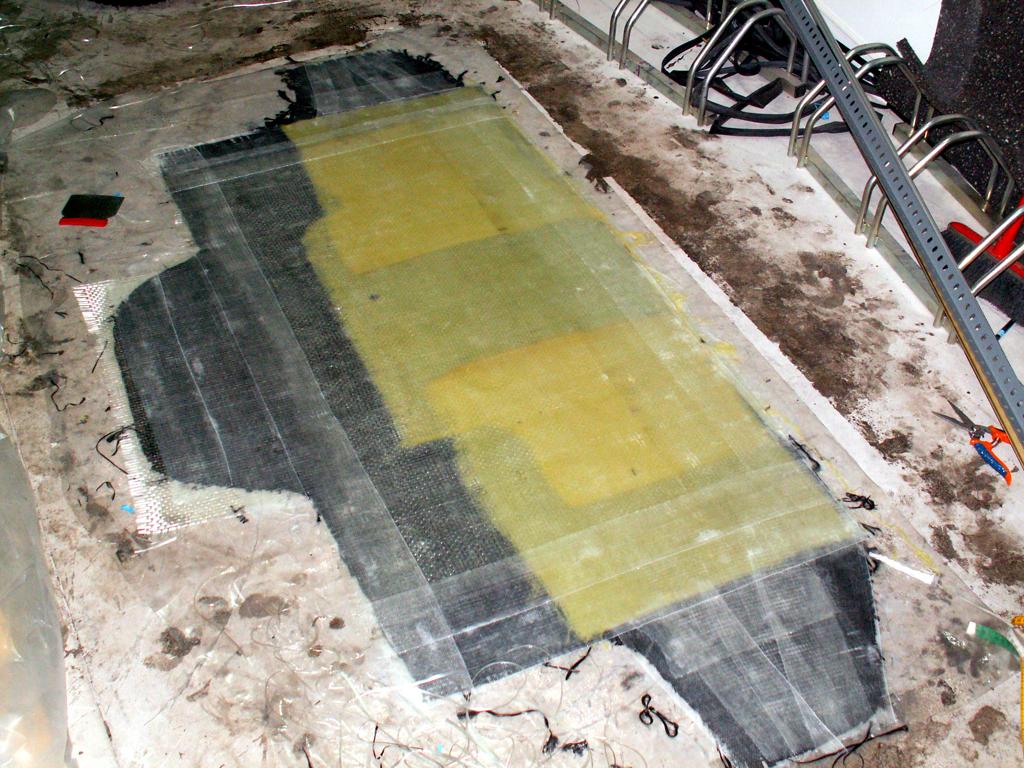
I thought these last shots were fairly interesting as you don't often see hybrid composites like this... This is the front belly pan and it was built to be TOUGH! Bottom sheet is 200 gram/m² carbon fibre, followed by a few layers of 200 gram/m² kevlar, on top of that there are about 4 layers of 800 gram/m² fibreglass. And then some finishing fibreglass tape around the edges to absorb some of the excess resin...

So basically we have a reall MUTT of a composite right here. Fibreglass is actually very cheap all things considered, so that is what the bulk of this thing is made from... I chose a finer weave for the bottom layer (it's been applied to polyethylene sheet so the final finish will end up being very smooth!)

I actually wanted to get the woven carbon/kevlar, but they were out of stock. Carbon basically adds strength, whereas kevlar really adds toughness. It's better if you can get them combined into the same weave, but at least this way it will look totally black from underneath.


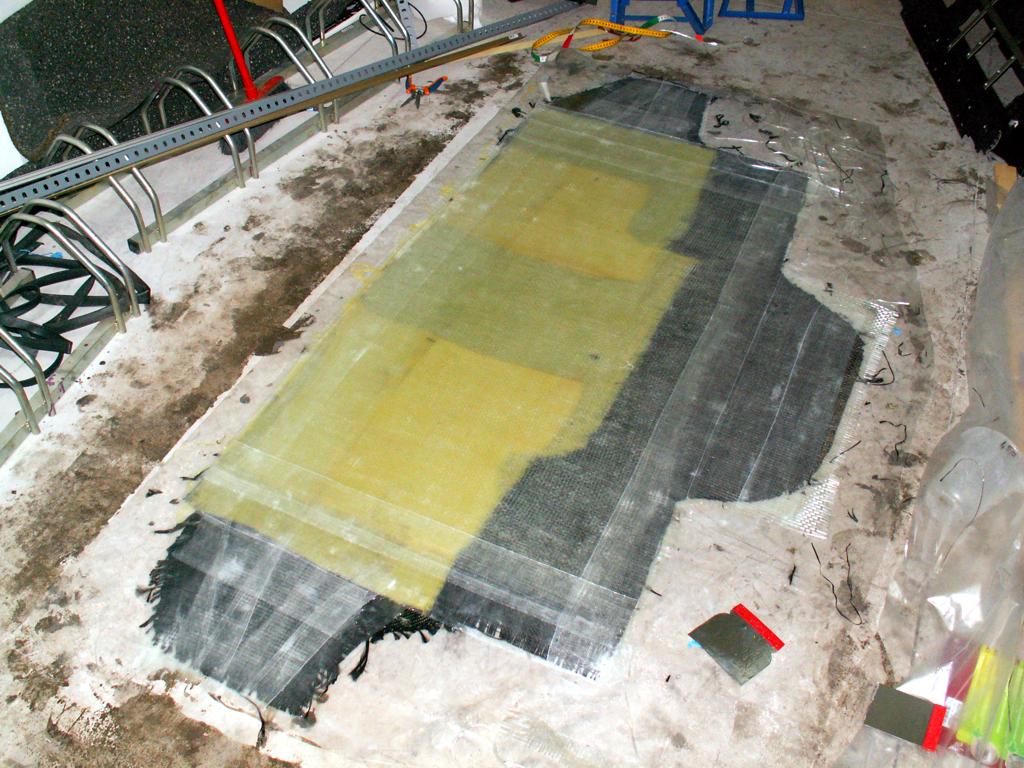
This is a rough outline. When the epoxy has cured in a few days, I'll cut this to a more exact shape. One thing I have done is extend the pan all the way to the sides of the car. These 'flaps' that you see will nicely curve back to where the wheel arch is...

__________________
http://www.Tenerife-Training.net Pro Bike Hire in Tenerife
  Reply With Quote
Old 09-20-2012, 12:31 PM   #17 (permalink)
EcoModding Lurker
 
Synchronicity's Avatar
 
Join Date: Mar 2012
Location: SPAIN / AUSTRALIA
Posts: 29

TGV - '11 Renault Traffic L2H1 2900 long wheelbase cargo van
Thanks: 8
Thanked 5 Times in 2 Posts
photos of eco aero mods to delivery van

I just took a load of photos of some minor mods to the van.
It all started because I wanted to reduce the wind noise coming from the mirrors.

These photos are taken straight from my picassa web album, comments on each photo are over there... for some insane reason I can't link directly to it... must be getting old.


__________________
http://www.Tenerife-Training.net Pro Bike Hire in Tenerife

Last edited by Synchronicity; 09-20-2012 at 12:47 PM.. Reason: added photos manually
  Reply With Quote
The Following 2 Users Say Thank You to Synchronicity For This Useful Post:
MileMonger (10-08-2012), slowmover (10-25-2012)
Old 09-20-2012, 12:48 PM   #18 (permalink)
EcoModding Lurker
 
Synchronicity's Avatar
 
Join Date: Mar 2012
Location: SPAIN / AUSTRALIA
Posts: 29

TGV - '11 Renault Traffic L2H1 2900 long wheelbase cargo van
Thanks: 8
Thanked 5 Times in 2 Posts
I still need to do the rear diffuser... the flat part is done, just saving up for some epoxy resin!
__________________
http://www.Tenerife-Training.net Pro Bike Hire in Tenerife
  Reply With Quote
Old 09-26-2012, 11:33 AM   #19 (permalink)
EcoModding Lurker
 
Synchronicity's Avatar
 
Join Date: Mar 2012
Location: SPAIN / AUSTRALIA
Posts: 29

TGV - '11 Renault Traffic L2H1 2900 long wheelbase cargo van
Thanks: 8
Thanked 5 Times in 2 Posts
I probably should have shown a photo of the underside of the van before the undertrays were put in place.
__________________
http://www.Tenerife-Training.net Pro Bike Hire in Tenerife
  Reply With Quote
Old 09-26-2012, 10:16 PM   #20 (permalink)
Master EcoModder
 
mcrews's Avatar
 
Join Date: Oct 2009
Location: Texas
Posts: 3,523

The Q Sold - '02 Infiniti Q45 Sport
90 day: 23.08 mpg (US)

blackie - '14 nissan altima sv
Thanks: 2,203
Thanked 663 Times in 478 Posts
You seem very engineering oriented.
Why would you do ALL this work and not spend $$ on a gauge to monitor your results????

Here is a link to the ScangaugeII used by most on this forum:
http://ecomodder.com/forum/showthrea...eii-23306.html

W/ a scangauge (or similar item) you can add an item and test it. Then reset the gauge and take the item off and test it.

__________________
MetroMPG: "Get the MPG gauge - it turns driving into a fuel & money saving game."

ECO MODS PERFORMED:
First: ScangaugeII
http://ecomodder.com/forum/showthrea...eii-23306.html

Second: Grille Block
http://ecomodder.com/forum/showthrea...e-10912-2.html

Third: Full underbelly pan
http://ecomodder.com/forum/showthrea...q45-11402.html

Fourth: rear skirts and 30.4mpg on trip!
http://ecomodder.com/forum/showthrea...tml#post247938
  Reply With Quote
Reply  Post New Thread


Tags
eco van, engine mods, heat shielding, tyre drag, van mods

Thread Tools


Powered by vBulletin® Version 3.8.11
Copyright ©2000 - 2024, vBulletin Solutions Inc.
Content Relevant URLs by vBSEO 3.5.2
All content copyright EcoModder.com