Go Back   EcoModder Forum > EcoModding > Fossil Fuel Free
Register Now
 Register Now
 

Reply  Post New Thread
 
Submit Tools LinkBack Thread Tools
Old 04-07-2016, 11:56 PM   #1 (permalink)
Corporate imperialist
 
oil pan 4's Avatar
 
Join Date: Jul 2011
Location: NewMexico (USA)
Posts: 11,185

Sub - '84 Chevy Diesel Suburban C10
SUV
90 day: 19.5 mpg (US)

camaro - '85 Chevy Camaro Z28

Riot - '03 Kia Rio POS
Team Hyundai
90 day: 30.21 mpg (US)

Bug - '01 VW Beetle GLSturbo
90 day: 26.43 mpg (US)

Sub2500 - '86 GMC Suburban C2500
90 day: 11.95 mpg (US)

Snow flake - '11 Nissan Leaf SL
SUV
90 day: 141.63 mpg (US)
Thanks: 270
Thanked 3,528 Times in 2,802 Posts
High amp connections for wiring electric motors

I have been doing the plant electrician thing for a while now and settled on the best way to make splices for high amp connections for wiring up an electric motor, also building and repairing my own welding machines.
I wire up everything form little 1hp to 400 horse power motors that run at sustained high power for weeks at a time with out slowing down or stopping.
All use 480v 3 phase AC but same principals apply most are in wet corrosive environments, kind of like a vehicle driven on road in the rain and snow.

The little motors up to 10 horsepower just about always get wire nuts, no thrills there.
Anything over 25 horse can use several different kinds of hardware.
Your 3 go to methods for motor wiring are:
Polaris terminal blocks
Bolting terminal lug connectors together
Split bolt connectors.
Then covered with a few layers of rubber splicing tape and then standard vinyl electrical tape over that, unless the motor has a terminal board inside the pecker head.

My early favorite were Polaris connectors they were fast and easy to use. But they are expensive, can be $20 to $40 each depending on the size and type.
Before that I had mostly used terminal lug connectors bolted together.

Both can heat and cool and loosen over time. Both ring terminals and Polaris blocks use have connections that can loosen, over heat and develop higher resistance over time.

Polaris blocks and ring terminals have a tiny amount of surface area connection compared to just split bolting the wires together.
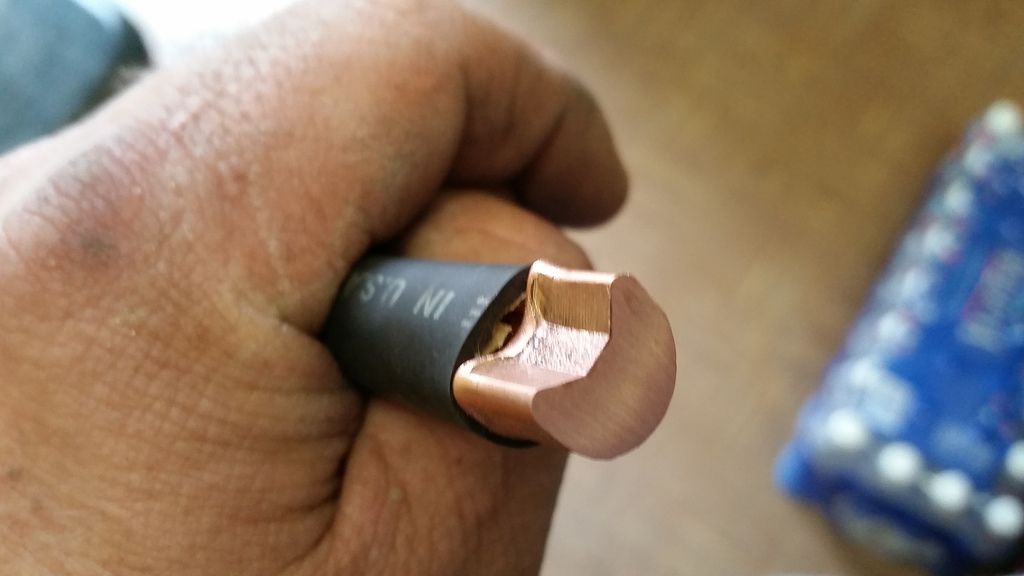
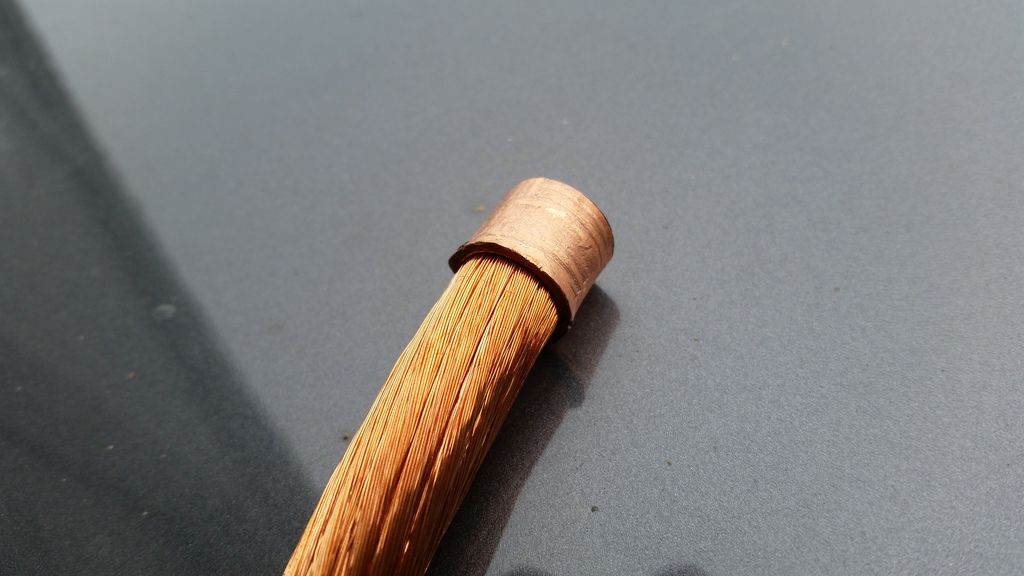
So, I would have to say the best hardware is just the simple, humble and cheap bronze split bolt connectors as long as you can keep the connection dry. You put the wire strands in direct contact with each other and crank them together with many hundreds of pounds of force. Nothing really beats that.

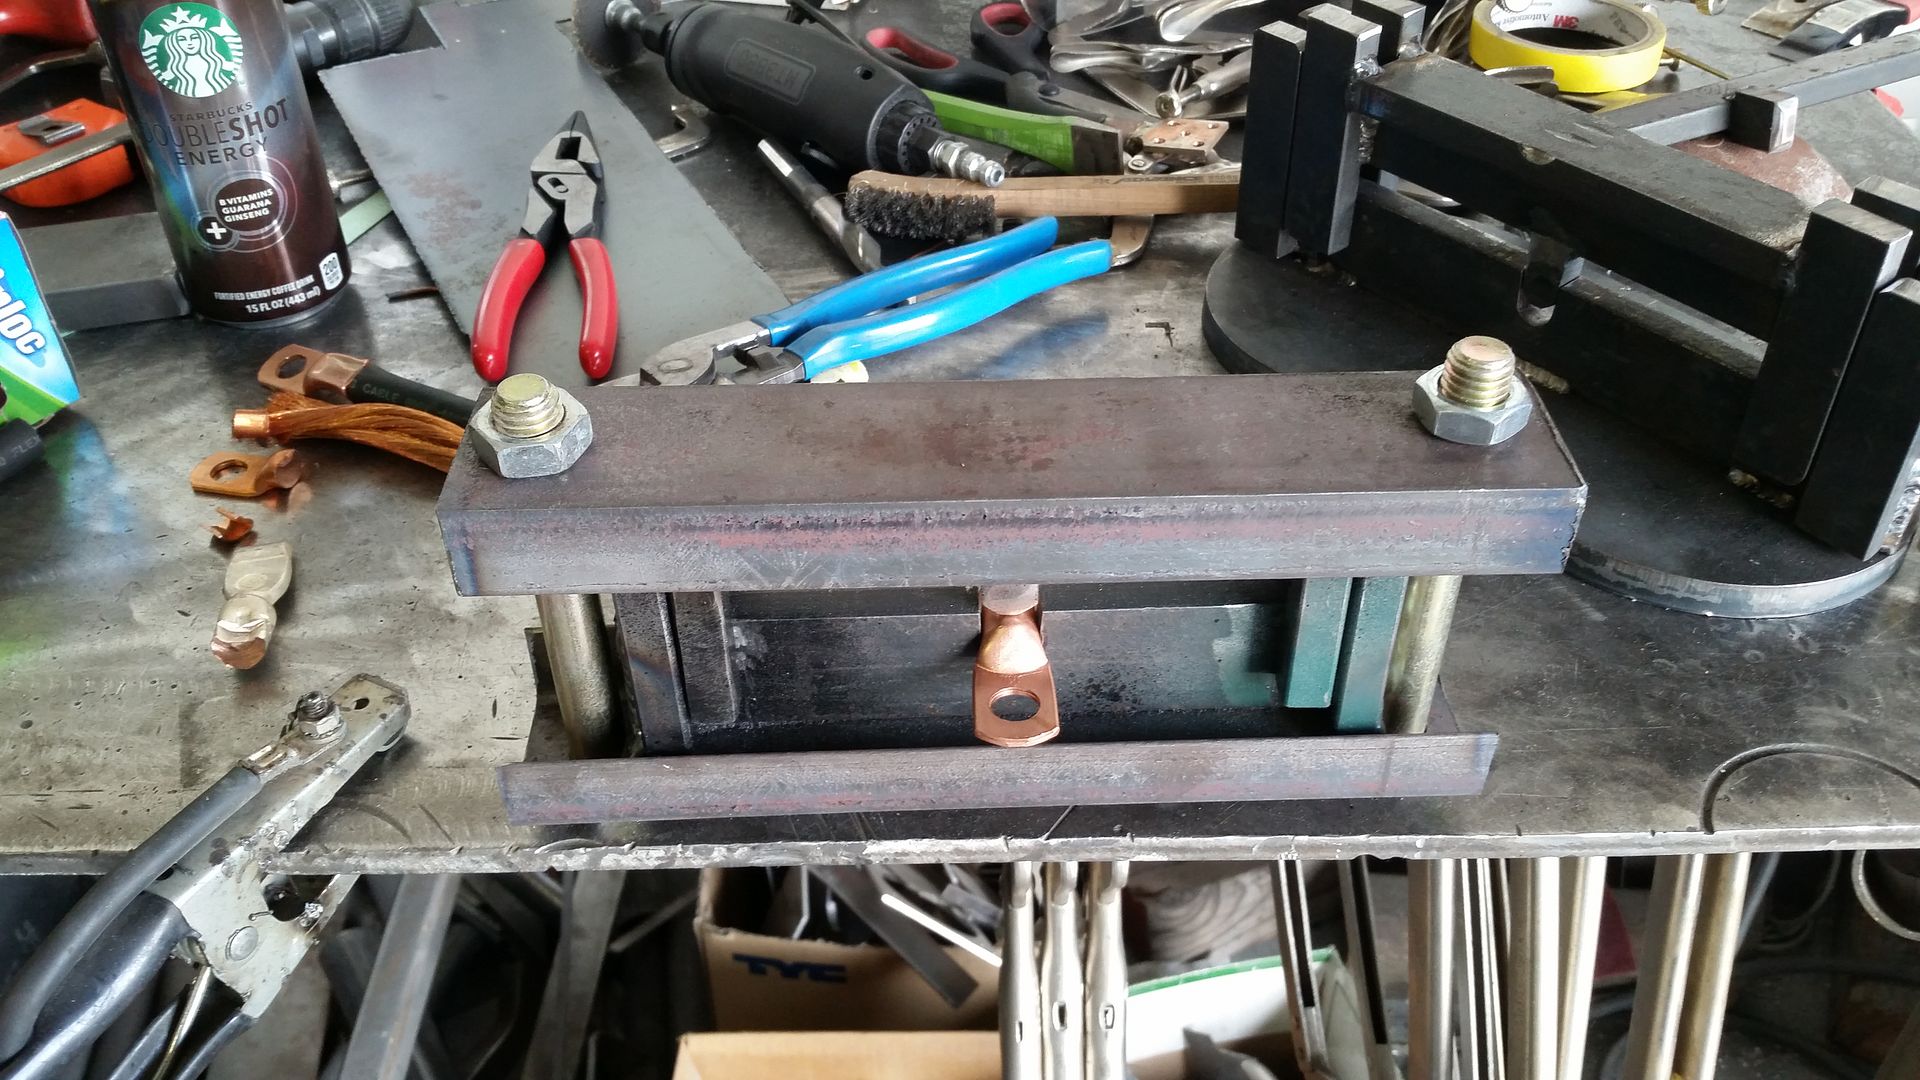
That's three 2 gauge and a 1 gauge wire connection that handles well over 1,000 amps on my home made spot welder and does not heat up.

But you can not use split bolt to go from copper to aluminum a Polaris connector should be used for that, if you use aluminum. (don't use aluminum)

This is an small alumiconn connector for 10 gauge wire, not a Polaris block but you get the idea.

If you need make multi wire connections (3 or more) that need to stay water tight the hands down choice is Polaris submersion and direct burial rated connectors, they are expensive but so worth it.

This one is about $30 to $40 just to make a single three 1 to 2 gauge wire splice. You simply remove the orange caps and jam the wire up in the prelubed sleeve. Then remove the black caps and crank down on the hex head set screws.

But on the smallest and largest AC motors and most DC motors seem to all use ring terminals on the motor.

That means some times you have to use ring terminals.
This is how I select good ring terminals.
Expensive ones are not always the best ones for the job.
Here are some 4 gauge ring terminals I have. Which one is better?
I bet you can tell which one is the cheap one.

The cheap connectors are a little more water resistant. The more expensive ones are usually built a little heavier.

To make the simple ring terminals more water resistant I crimp them and wrap some vinyl electrical tape around the copper terminal and wire insulation
You can also solder them after they are crimped or put some non-ox in the terminal before crimping. There are other ways such as liquid electrical tape to seal up the connection.

Attached Thumbnails
Click image for larger version

Name:	alumiconn.JPG
Views:	1444
Size:	59.7 KB
ID:	19887   Click image for larger version

Name:	Polaris.JPG
Views:	1472
Size:	67.0 KB
ID:	19888   Click image for larger version

Name:	ring terminal.JPG
Views:	1467
Size:	67.1 KB
ID:	19889   Click image for larger version

Name:	ringterminal.JPG
Views:	1439
Size:	74.1 KB
ID:	19890   Click image for larger version

Name:	splitbolt.JPG
Views:	1542
Size:	103.7 KB
ID:	19891  

__________________
1984 chevy suburban, custom made 6.5L diesel turbocharged with a Garrett T76 and Holset HE351VE, 22:1 compression 13psi of intercooled boost.
1989 firebird mostly stock. Aside from the 6-speed manual trans, corvette gen 5 front brakes, 1LE drive shaft, 4th Gen disc brake fbody rear end.
2011 leaf SL, white, portable 240v CHAdeMO, trailer hitch, new batt as of 2014.

Last edited by oil pan 4; 04-08-2016 at 12:10 AM..
  Reply With Quote
The Following 6 Users Say Thank You to oil pan 4 For This Useful Post:
ctgottapee (05-17-2016), deejaaa (04-08-2016), drees (05-17-2016), freebeard (04-08-2016), mort (04-08-2016), thingstodo (04-08-2016)
Alt Today
Popular topics

Other popular topics in this forum...

   
Old 04-08-2016, 09:22 AM   #2 (permalink)
Not banned yet
 
deejaaa's Avatar
 
Join Date: May 2010
Location: Texas Coast, close to Houston
Posts: 907

Blue - '03 Chevy S-10, LS
Thanks: 423
Thanked 265 Times in 212 Posts
great info. thanks for sharing.
__________________
2003 S-10, 2.2L, 5 speed, ext cab long bed.
So far: DRL delete, remove bed mount toolbox.
  Reply With Quote
Old 04-08-2016, 06:42 PM   #3 (permalink)
EcoModding Apprentice
 
Join Date: Feb 2015
Location: Sacramento
Posts: 202
Thanks: 3
Thanked 225 Times in 91 Posts
I have studied crimp terminals in depth, on a quest to get the lowest resistance connection possible. I tried all kinds of different crimpers, and finally just built my own for use on my 20 ton shop press. By in depth study, I mean build and test, repeat.


Here is what a 20 ton crimp looks like on 2/0 welding cable:


and here is a cut away view of the inside:

  Reply With Quote
The Following 4 Users Say Thank You to EVmetro For This Useful Post:
ctgottapee (05-17-2016), MobilOne (04-08-2016), Ryland (04-09-2016), thingstodo (04-08-2016)
Old 04-08-2016, 06:51 PM   #4 (permalink)
EcoModding Apprentice
 
Join Date: Feb 2015
Location: Sacramento
Posts: 202
Thanks: 3
Thanked 225 Times in 91 Posts
This was an earlier crimp. It tested with ultra low resistance, but I did not like how the anvil made such an abrupt transition from the round part of the lug to the squashed part. This one is a little wider and flatter compared to the one above. I was worried about breaking strands inside, so I made that deeper narrower shape above. I did cut them open to inspect the transition, and the taller looking crimp was flawless.

  Reply With Quote
The Following User Says Thank You to EVmetro For This Useful Post:
deejaaa (04-08-2016)
Old 04-08-2016, 10:21 PM   #5 (permalink)
Corporate imperialist
 
oil pan 4's Avatar
 
Join Date: Jul 2011
Location: NewMexico (USA)
Posts: 11,185

Sub - '84 Chevy Diesel Suburban C10
SUV
90 day: 19.5 mpg (US)

camaro - '85 Chevy Camaro Z28

Riot - '03 Kia Rio POS
Team Hyundai
90 day: 30.21 mpg (US)

Bug - '01 VW Beetle GLSturbo
90 day: 26.43 mpg (US)

Sub2500 - '86 GMC Suburban C2500
90 day: 11.95 mpg (US)

Snow flake - '11 Nissan Leaf SL
SUV
90 day: 141.63 mpg (US)
Thanks: 270
Thanked 3,528 Times in 2,802 Posts
At home I use a crimper the size of a large lock cutter with rotating dies that crimps everything from 6 gauge to 3/0 gauge.
The crimper crimps ring terminals down on welding cables that will be used in high vibration and will be getting flexed and pretty much everything else.
Also works great on SB175 connectors.
I usually just crimp them in the middle so there is a smooth transition between flexible cable and the crimp, because I found when they are crimped all the way to the end of the lug strands break like crazy.
Plus I need something a little more portable than a shop press.
__________________
1984 chevy suburban, custom made 6.5L diesel turbocharged with a Garrett T76 and Holset HE351VE, 22:1 compression 13psi of intercooled boost.
1989 firebird mostly stock. Aside from the 6-speed manual trans, corvette gen 5 front brakes, 1LE drive shaft, 4th Gen disc brake fbody rear end.
2011 leaf SL, white, portable 240v CHAdeMO, trailer hitch, new batt as of 2014.
  Reply With Quote
Old 04-09-2016, 07:29 AM   #6 (permalink)
Master EcoModder
 
Ryland's Avatar
 
Join Date: Jan 2008
Location: Western Wisconsin
Posts: 3,903

honda cb125 - '74 Honda CB 125 S1
90 day: 79.71 mpg (US)

green wedge - '81 Commuter Vehicles Inc. Commuti-Car

Blue VX - '93 Honda Civic VX
Thanks: 867
Thanked 434 Times in 354 Posts
I like crimps best as well.
I bought red and black heat shirk with hot melt glue inside to make that water tight seal.
  Reply With Quote
Old 04-09-2016, 11:57 AM   #7 (permalink)
EcoModding Apprentice
 
Join Date: Feb 2015
Location: Sacramento
Posts: 202
Thanks: 3
Thanked 225 Times in 91 Posts
Quote:
Originally Posted by oil pan 4 View Post
At home I use a crimper the size of a large lock cutter with rotating dies that crimps everything from 6 gauge to 3/0 gauge.
The crimper crimps ring terminals down on welding cables that will be used in high vibration and will be getting flexed and pretty much everything else.
Also works great on SB175 connectors.
I usually just crimp them in the middle so there is a smooth transition between flexible cable and the crimp, because I found when they are crimped all the way to the end of the lug strands break like crazy.
Plus I need something a little more portable than a shop press.
I have a variety of bolt cutter style crimpers, but I always measure higher resistance with those crimps. I tests my connections at 700 amps, and between 100 and 120 volts DC, and this seems to be where resistance variances between my batteries show up the most if the connections are not perfect. I have a real time display of all of my high current circuit connections in my pack that I can watch and record as I drive, that shows resistance and voltage of each connection. When I drive around normally, "good" connections read fine, but when I get up into the 500 to 700 amp range, I can see variances in resistance between each battery. My display has each battery numbered, so I can go right to my highest resistance connection without having to look at all the others. I cut them open, and study them, and then improve on them.

The broken strand thing that you mention is spot on, and I have had to shape my anvils many different ways to make a crimp that is "nice" to all the strands. The edge of the anvil has to be tapered so that it does not cut into the lug and the strands on the other side of the stress point. Here is a proper crimp, view of the non stressed side:


Here is a view of that same crimp on the stressed side. Notice the 45 degree cross taper. This is so that I don't shear the strands:


I do a cross cut after I chop the connection in half, and this allows me to study the stress point of the strands. I had to make a lot of anvils to finally get where I don't break any strands. You can see some damaged strands where I chopped it in half, but those are from my cutter.


I also like to go portable with my crimpers, so I have built one that I can use my 1/2" impact wrench on. I wish I could bring my shop press with me sometimes, but this crimper will do the job when I can't bring it. My shop press crimper does not have those big bolts on the ends like this one does.

  Reply With Quote
Old 04-09-2016, 12:22 PM   #8 (permalink)
EcoModding Apprentice
 
Join Date: Feb 2015
Location: Sacramento
Posts: 202
Thanks: 3
Thanked 225 Times in 91 Posts
I confess to having an unusual drive to seek out ultimate efficiency and perfection when I build an EV, and it has shown me things that I suspect most people will never really notice. Without the proper instrumentation, it is not possible to study and record the resistance of every single connection real time,and being able to do this has really taught me the difference between a nice connection and the best connection.

There are efficiency gains to be had with ultimate connections, even if they are not much. The other thing that is important about the integrity of a connection is how well it holds up over time. I have noticed that if I monitor my highest resistance connection over time, the resistance of that connection begins to get even higher faster than the resistance of my other connections. The better the connection, the longer it will last.

In the case of connections in my latest build, My controller is in communication with my BMS via canbus, and is programmed to derate my throttle as needed to prevent any one battery from dropping below whatever minimum voltage I program in. If there is a connection that has more resistance, it is calculated as a voltage drop, and my BMS will identify a lower voltage on that one battery and cut back my throttle to protect the battery. The battery is fine, but the higher resistance will effect the voltage reading. What this means is that I get less voltage sag and delta, and more throttle if my connections are perfect.
  Reply With Quote
The Following User Says Thank You to EVmetro For This Useful Post:
thingstodo (04-09-2016)
Old 04-09-2016, 12:40 PM   #9 (permalink)
EcoModding Apprentice
 
Join Date: Feb 2015
Location: Sacramento
Posts: 202
Thanks: 3
Thanked 225 Times in 91 Posts
Quote:
Originally Posted by Ryland View Post
I like crimps best as well.
I bought red and black heat shirk with hot melt glue inside to make that water tight seal.
Keeping the connection protected is indeed critical. I love mother nature, but we have to keep her out of our connections. If she gets one little taste, she will get addicted and consume it all.
  Reply With Quote
Old 04-09-2016, 02:34 PM   #10 (permalink)
Master EcoModder
 
Join Date: Sep 2010
Location: Saskatoon, canada
Posts: 1,488

Ford Prefect - '18 Ford F150 XLT XTR

Tess - '22 Tesla Y LR
Thanks: 749
Thanked 565 Times in 447 Posts
Quote:
Originally Posted by EVmetro View Post
I confess to having an unusual drive to seek out ultimate efficiency and perfection when I build an EV
My compliments on your drive and determination to achieve the best results that you can.

I see that you avoid doing what the off-the-shelf dies do - crimping uniformly around the lug, with a hex or octagon shape. You best results are from leaving the lug round on the 'bottom side' and only crimping the 'top' .. right?

For those of us with cheap chinese crimpers .. where the dies are removable and would be quite easy to change out .. do you have a sketch or drawings of your 'best-so-far' profile that you are willing to share?

Quote:
Without the proper instrumentation, it is not possible to study and record the resistance of every single connection real time,and being able to do this has really taught me the difference between a nice connection and the best connection.
I would argue that there are many things that are not noticed unless you have spent a lot of time and effort to measure them well. But you have to be willing to invest the time and $$$.

Quote:
There are efficiency gains to be had with ultimate connections, even if they are not much. The other thing that is important about the integrity of a connection is how well it holds up over time. I have noticed that if I monitor my highest resistance connection over time, the resistance of that connection begins to get even higher faster than the resistance of my other connections. The better the connection, the longer it will last.

In the case of connections in my latest build, My controller is in communication with my BMS via canbus, and is programmed to derate my throttle as needed to prevent any one battery from dropping below whatever minimum voltage I program in. If there is a connection that has more resistance, it is calculated as a voltage drop, and my BMS will identify a lower voltage on that one battery and cut back my throttle to protect the battery. The battery is fine, but the higher resistance will effect the voltage reading. What this means is that I get less voltage sag and delta, and more throttle if my connections are perfect.
Have you posted details on this BMS yet? I think I've read through all of your posts and I don't remember ... or was this a custom job?

  Reply With Quote
Reply  Post New Thread


Tags
alumiconn, polaris, ring terminal, split bolt, terminal lug


Powered by vBulletin® Version 3.8.11
Copyright ©2000 - 2024, vBulletin Solutions Inc.
Content Relevant URLs by vBSEO 3.5.2
All content copyright EcoModder.com