Go Back   EcoModder Forum > EcoModding > DIY / How-to
Register Now
 Register Now
 

Reply  Post New Thread
 
Submit Tools LinkBack Thread Tools
Old 08-23-2010, 12:39 AM   This thread is in the EcoModder Project Library | #1 (permalink)
NightKnight
 
NachtRitter's Avatar
 
Join Date: Dec 2008
Location: Placerville, CA
Posts: 1,595

Helga - '00 Volkswagen Jetta TDI
TEAM VW AUDI Group
Diesel
90 day: 54.39 mpg (US)

Mathilde - '99 Volkswagen Eurovan Camper
90 day: 16.87 mpg (US)
Thanks: 315
Thanked 314 Times in 187 Posts
Simple Honda VX Alloy Wheel Covers (drilled acorn wheel nuts as attachment points)

I'd posted this inside another thread, but realized the information probably deserves its own thread.

Got these done a few weeks ago, and they have worked out quite well.

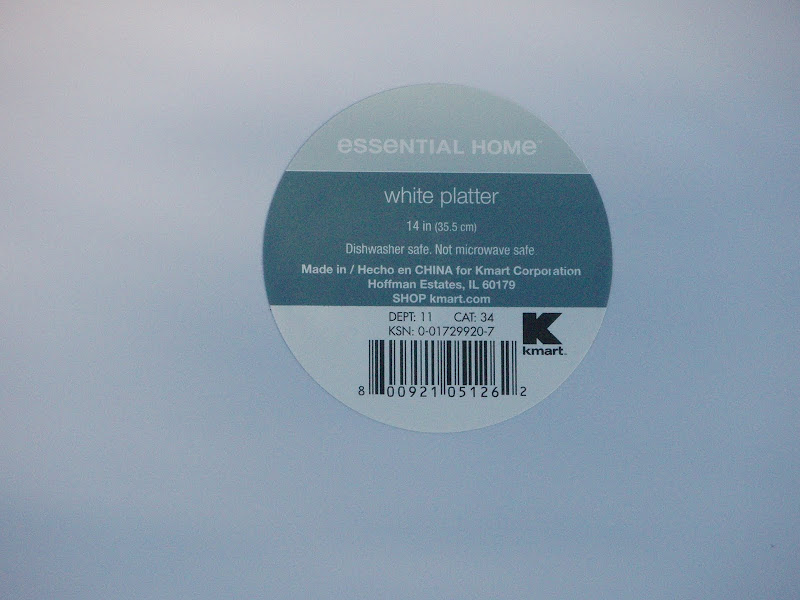
Used a melamine serving tray from KMart (fairly light weight compared to pizza pans) ($4.99 ea):

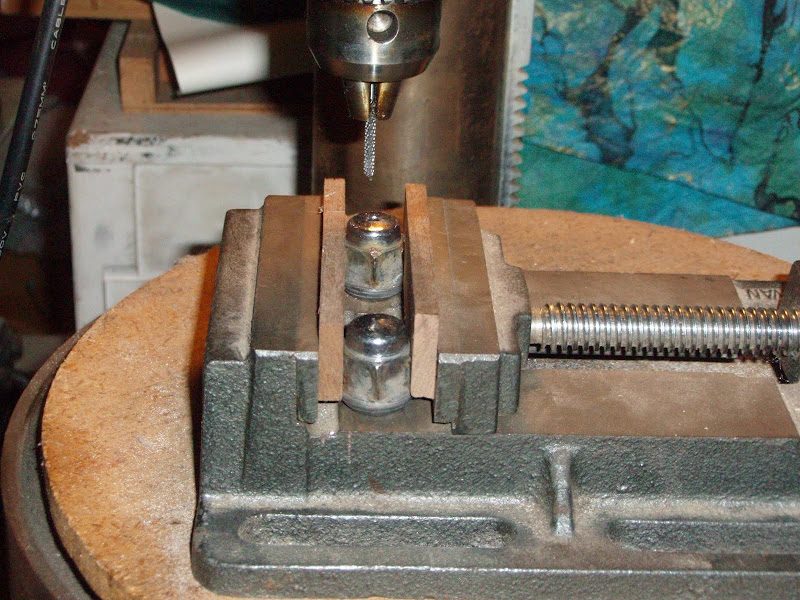
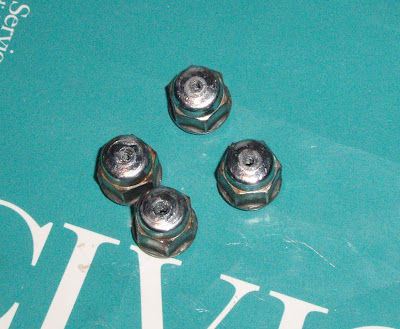
Drilled out the acorn nuts and epoxied in some washers plus smaller nuts inside:

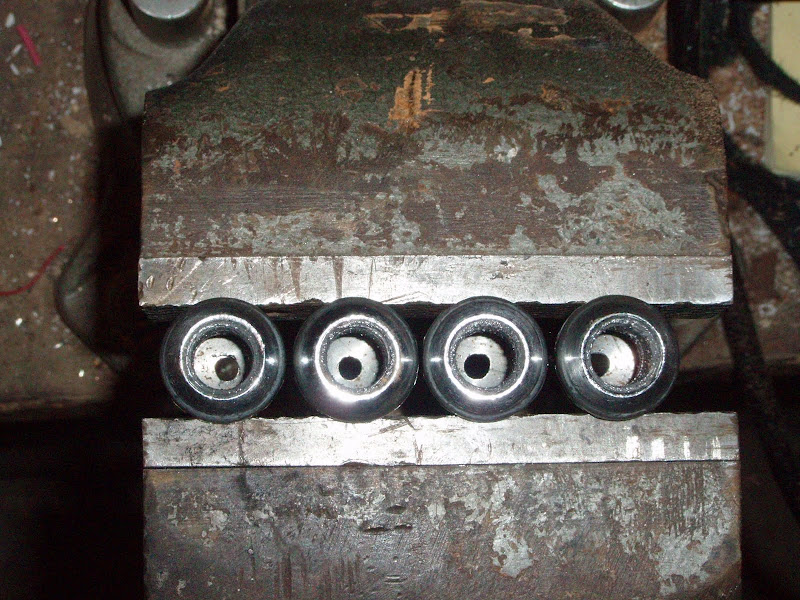
They're actually all centered... just looks off:

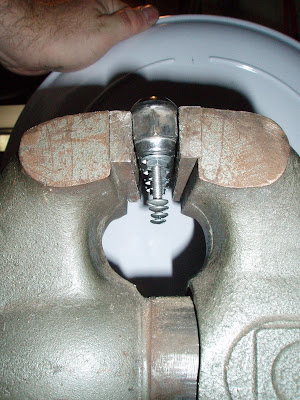
Epoxy is setting now... using bolts & nuts to hold the nuts inside straight:

Lug nuts ready to go back on the car:

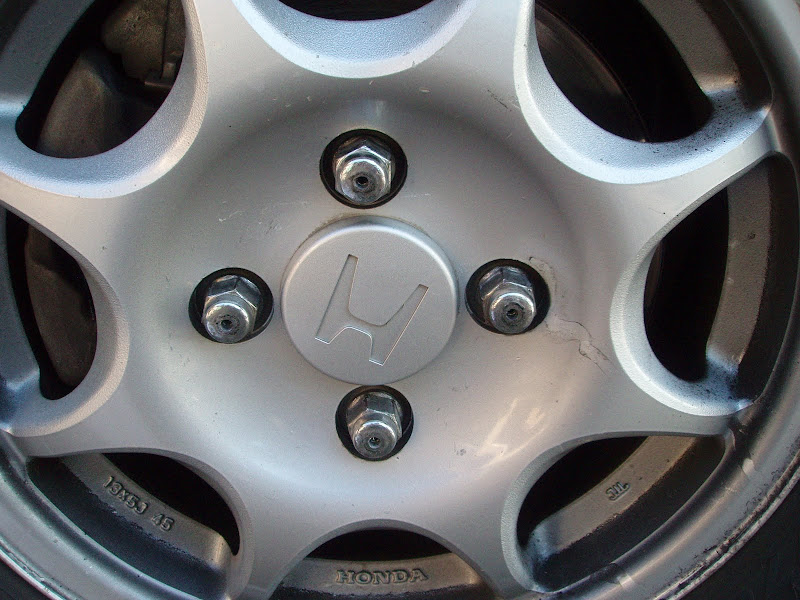
And now back on the car:

Drilled 4 matching holes into the serving tray:
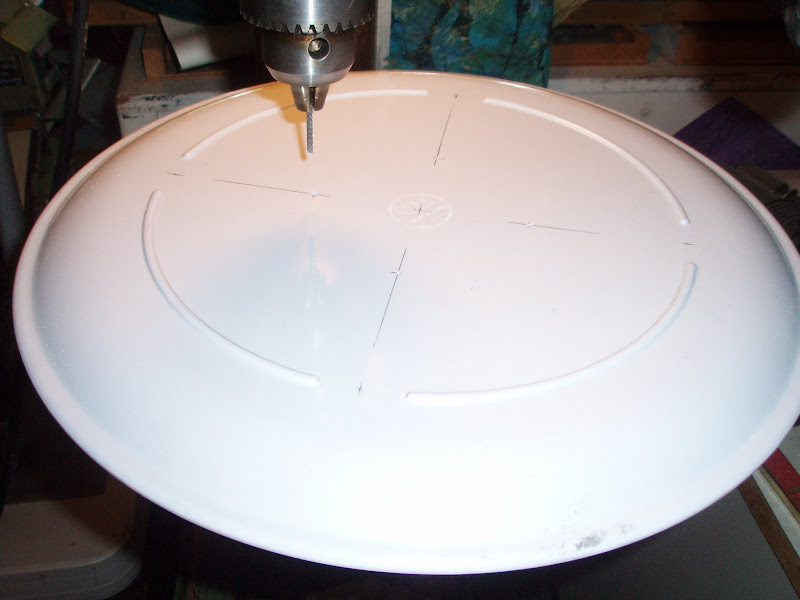

The design of the bottom of the tray made it exceptionally easy to mark 4 evenly spaced lines and the center point. Measuring 50mm (5cm) out from the center to get to the same spacing as the 4x100 lug nuts was a snap. All the holes have lined up with all the lug nuts perfectly twice so far (left and right covers).

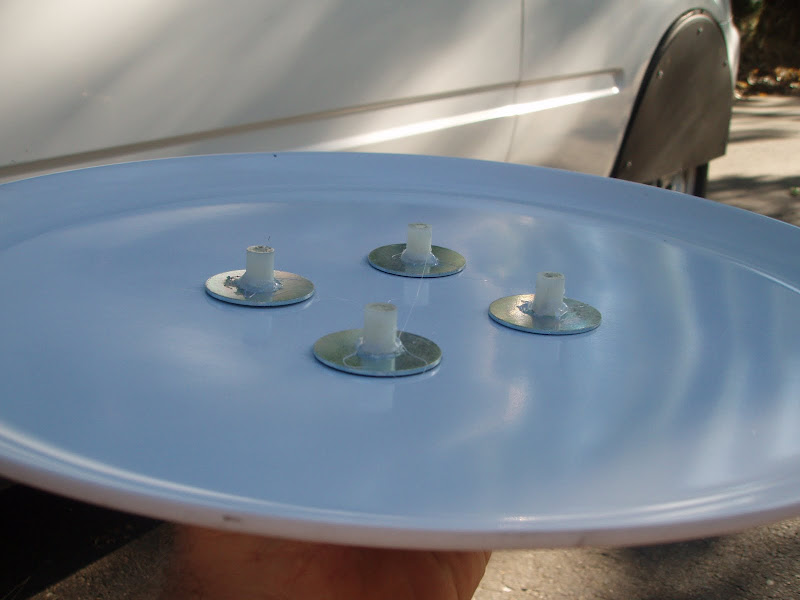
Hot-glued washers and spacers to the wheel side of the tray so they don't keep falling off during the mounting (it ain't purty, but it works):

Initially, the tray was a little big and rested on the edge of the rim:


I didn't like that, so I sanded the edges of the tray down until it fit exactly inside the edge of the rim:
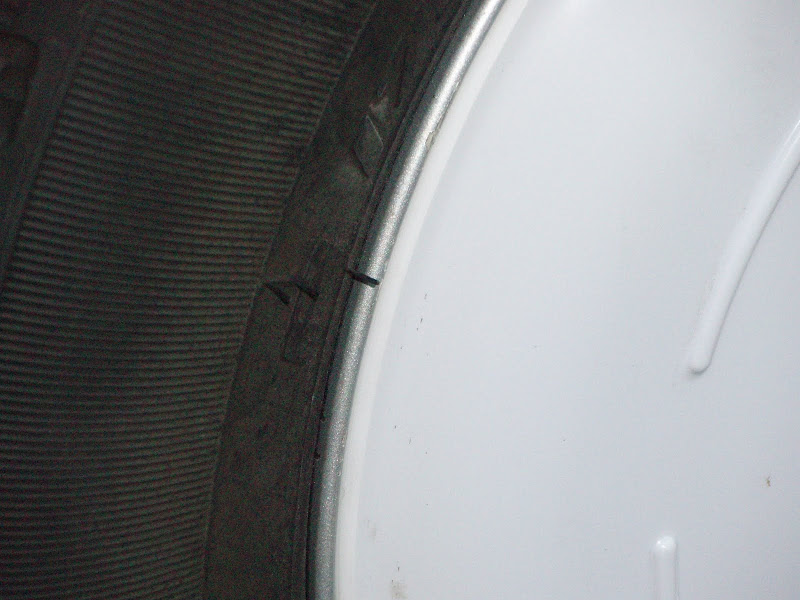

Final look is pretty decent; plan to also sand down the ridges so the whole 'bottom' / outside of the tray is smooth, and then will likely paint them. Also plan to smooth the edges of the washers so they don't present such a sharp edge:
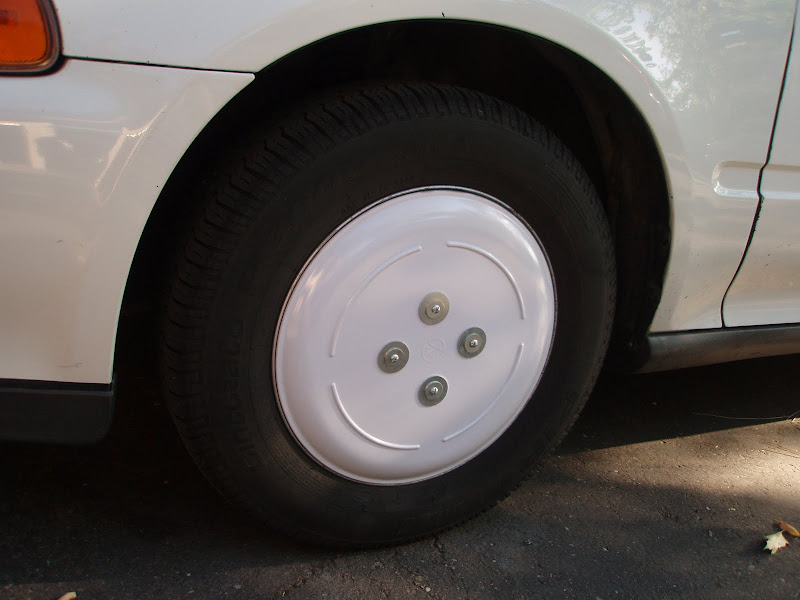

For these covers, I prefer to remove the clip-on weights on the outside of the wheel and have the tire shop re-balance with the stick-ons (or clip-ons on the inside only) so that I don't need to cut notches into the covers just for the weights. Since it's a relatively quick 4 phillips screw on / off process, and since the tires are holding air really well, I'm not too worried about having an opening for the air valve.


Last edited by NachtRitter; 09-07-2010 at 03:56 AM.. Reason: Added some more detail to the steps
  Reply With Quote
The Following 17 Users Say Thank You to NachtRitter For This Useful Post:
beluga (12-27-2013), bespurcell (11-20-2014), brucepick (06-07-2011), Cd (01-15-2011), divedaddy03 (07-19-2012), ECONORAM (12-25-2010), Impulse (08-07-2011), MetroMPG (08-23-2010), mikeyjd (05-29-2014), Mira (03-06-2013), OG VX (10-08-2014), Patrick (08-24-2010), pdq54 (04-21-2012), Piwoslaw (07-04-2011), poobah318 (03-31-2013), Sven7 (03-05-2013), SwamiSalami (01-15-2012)
Alt Today
Popular topics

Other popular topics in this forum...

   
Old 08-23-2010, 12:45 AM   #2 (permalink)
Master EcoModder
 
mcrews's Avatar
 
Join Date: Oct 2009
Location: Texas
Posts: 3,523

The Q Sold - '02 Infiniti Q45 Sport
90 day: 23.08 mpg (US)

blackie - '14 nissan altima sv
Thanks: 2,203
Thanked 663 Times in 478 Posts
I dont think those could fit any better!

so the screws go into the tops of the lug nuts?
__________________
MetroMPG: "Get the MPG gauge - it turns driving into a fuel & money saving game."

ECO MODS PERFORMED:
First: ScangaugeII
http://ecomodder.com/forum/showthrea...eii-23306.html

Second: Grille Block
http://ecomodder.com/forum/showthrea...e-10912-2.html

Third: Full underbelly pan
http://ecomodder.com/forum/showthrea...q45-11402.html

Fourth: rear skirts and 30.4mpg on trip!
http://ecomodder.com/forum/showthrea...tml#post247938
  Reply With Quote
Old 08-23-2010, 12:55 AM   #3 (permalink)
Master EcoModder
 
Join Date: Sep 2009
Posts: 5,927
Thanks: 877
Thanked 2,024 Times in 1,304 Posts
Very very nice.

Why not just drill and tap the lug nut holes?

regards
Mech
  Reply With Quote
Old 08-23-2010, 01:10 AM   #4 (permalink)
Pokémoderator
 
cfg83's Avatar
 
Join Date: Dec 2007
Location: Southern California
Posts: 5,864

1999 Saturn SW2 - '99 Saturn SW2 Wagon
Team Saturn
90 day: 40.49 mpg (US)
Thanks: 439
Thanked 532 Times in 358 Posts
NachtRitter -

Great work! I've seen a lot of 14" plates, but that was always too small for my 15" wheels.

CarloSW2
__________________

What's your EPA MPG? Go Here and find out!
American Solar Energy Society
  Reply With Quote
Old 08-23-2010, 01:34 AM   #5 (permalink)
NightKnight
 
NachtRitter's Avatar
 
Join Date: Dec 2008
Location: Placerville, CA
Posts: 1,595

Helga - '00 Volkswagen Jetta TDI
TEAM VW AUDI Group
Diesel
90 day: 54.39 mpg (US)

Mathilde - '99 Volkswagen Eurovan Camper
90 day: 16.87 mpg (US)
Thanks: 315
Thanked 314 Times in 187 Posts
Quote:
Originally Posted by mcrews View Post
I dont think those could fit any better!

so the screws go into the tops of the lug nuts?
Right; with the spacers, the bolts / screws snug up against the lug nuts. Stays nice & snug, no wobble, no noise.
  Reply With Quote
Old 08-23-2010, 01:47 AM   #6 (permalink)
NightKnight
 
NachtRitter's Avatar
 
Join Date: Dec 2008
Location: Placerville, CA
Posts: 1,595

Helga - '00 Volkswagen Jetta TDI
TEAM VW AUDI Group
Diesel
90 day: 54.39 mpg (US)

Mathilde - '99 Volkswagen Eurovan Camper
90 day: 16.87 mpg (US)
Thanks: 315
Thanked 314 Times in 187 Posts
Quote:
Originally Posted by Old Mechanic View Post
Very very nice.

Why not just drill and tap the lug nut holes?

regards
Mech
That was my original plan actually. However, once I drilled the hole into the top of the lug nut, I found out there really isn't much metal there to tap... Maybe a 32nd of an inch. That's when I came up with the idea of inserting a washer plus a nut and using epoxy to hold them in... I put anti-seize on the threads of the lug nut and on the bolt for the smaller nut, threaded the nut over the bolt so that it would stay true, "poured" the epoxy in, and then let it sit for ~12 hours. The bolts unthreaded fine, and no epoxy stuck to the lug nuts either.

I was worried the epoxy wouldn't hold strong enough, but I can actually tighten the bolts down pretty well.
  Reply With Quote
Old 08-23-2010, 01:20 PM   #7 (permalink)
EcoModding Lurker
 
Join Date: Mar 2010
Location: Puerto Rico
Posts: 64

Mirage - '93 Mitsubishi Mirage ES
90 day: 41.92 mpg (US)
Thanks: 2
Thanked 3 Times in 3 Posts
Good work!

I shall copy this.
  Reply With Quote
Old 08-23-2010, 02:55 PM   #8 (permalink)
Batman Junior
 
MetroMPG's Avatar
 
Join Date: Nov 2007
Location: 1000 Islands, Ontario, Canada
Posts: 22,534

Blackfly - '98 Geo Metro
Team Metro
Last 3: 70.09 mpg (US)

MPGiata - '90 Mazda Miata
90 day: 54.46 mpg (US)

Appliance car Mirage - '14 Mitsubishi Mirage ES (base)
90 day: 57.73 mpg (US)
Thanks: 4,082
Thanked 6,979 Times in 3,614 Posts
Good DIY! Thanks for posting.
__________________
Project MPGiata! Mods for getting 50+ MPG from a 1990 Miata
Honda mods: Ecomodding my $800 Honda Fit 5-speed beater
Mitsu mods: 70 MPG in my ecomodded, dirt cheap, 3-cylinder Mirage.
Ecodriving test: Manual vs. automatic transmission MPG showdown


EcoModder
has launched a forum for the efficient new Mitsubishi Mirage
www.MetroMPG.com - fuel efficiency info for Geo Metro owners
www.ForkenSwift.com - electric car conversion on a beer budget
  Reply With Quote
Old 08-24-2010, 03:32 PM   #9 (permalink)
NightKnight
 
NachtRitter's Avatar
 
Join Date: Dec 2008
Location: Placerville, CA
Posts: 1,595

Helga - '00 Volkswagen Jetta TDI
TEAM VW AUDI Group
Diesel
90 day: 54.39 mpg (US)

Mathilde - '99 Volkswagen Eurovan Camper
90 day: 16.87 mpg (US)
Thanks: 315
Thanked 314 Times in 187 Posts
Quote:
Originally Posted by cfg83 View Post
NachtRitter -

Great work! I've seen a lot of 14" plates, but that was always too small for my 15" wheels.

CarloSW2
Carlos -

I have to thank you for the inspiration... Your serving tray thread (http://ecomodder.com/forum/showthrea...isk-11838.html) is what gave me the idea of attaching to the lug nuts... since I didn't have any nut caps handy, I improvised.
  Reply With Quote
The Following User Says Thank You to NachtRitter For This Useful Post:
cfg83 (08-24-2010)
Old 08-25-2010, 02:20 PM   #10 (permalink)
EcoMod Proof of Concept
 
WD40's Avatar
 
Join Date: Mar 2008
Location: Chilliwack B.C. CANADA
Posts: 245

WD-40's Insight - '00 Honda Insight
Gen-1 Insights
Team Honda
90 day: 56.04 mpg (US)

WD-40's Mirage - '15 Mitsubushi Mirage ES
Mitsubishi
90 day: 46.05 mpg (US)

WD-40's Sonata Hybrid - '17 Hyundai Sonata Hybrid Limited
Thanks: 81
Thanked 85 Times in 45 Posts
NachtRitter .. excellent way to mount them on the VX rims .. I was looking at the idea many times but didn't want to drill into the rims. This solves the issues.
Are you going to do any A-B-A tests, or give educated guesses on mpg gains?
Again awesome solution.

__________________
2000 Insight MT 106K Citrus A/C
  Reply With Quote
Reply  Post New Thread


Tags
flat wheel covers, moon


Similar Threads
Thread Thread Starter Forum Replies Last Post
Converting Cali Civic VX to Fed (lean burn) VX NachtRitter DIY / How-to 83 06-20-2015 12:30 PM


Powered by vBulletin® Version 3.8.11
Copyright ©2000 - 2024, vBulletin Solutions Inc.
Content Relevant URLs by vBSEO 3.5.2
All content copyright EcoModder.com