Go Back   EcoModder Forum > EcoModding > EcoModding Central
Register Now
 Register Now
 

Reply  Post New Thread
 
Submit Tools LinkBack Thread Tools
Old 10-02-2011, 04:17 PM   #1 (permalink)
MPG Militia HMV-25E80+A
 
JethroBodine's Avatar
 
Join Date: Mar 2011
Location: Vermont, USA
Posts: 823

FrankenJetta D - '90 Volkswagen Jetta GL
Boat tails and more mods
Diesel
TEAM VW AUDI Group
90 day: 64.35 mpg (US)
Thanks: 191
Thanked 144 Times in 98 Posts
(Project) Boat tail-4 Door Sedan VW Mk2 (1990 Jetta GL)

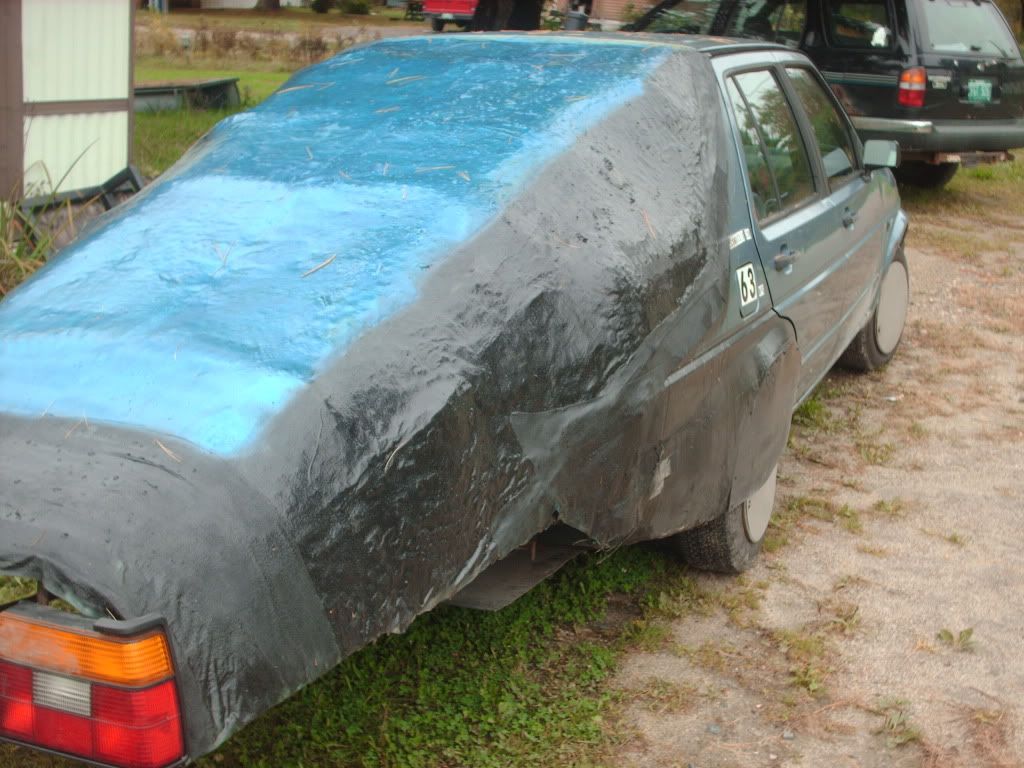
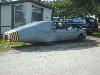
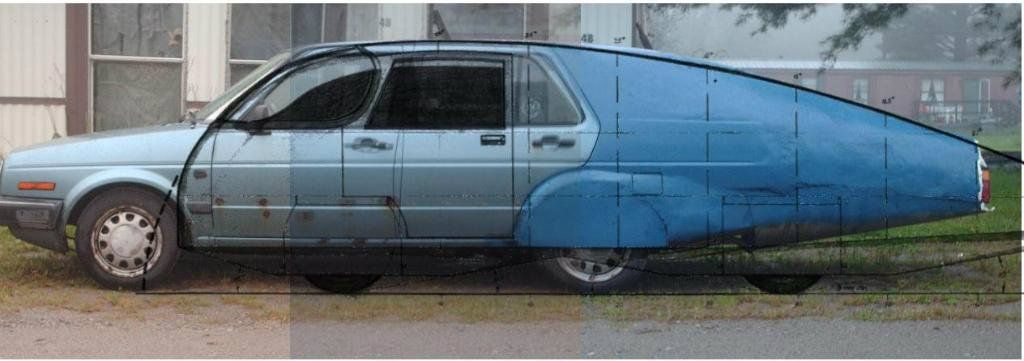
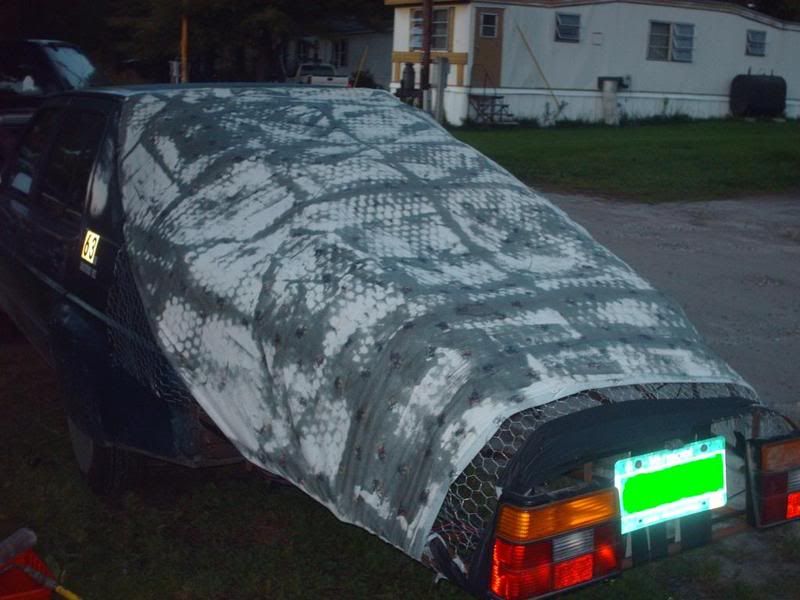
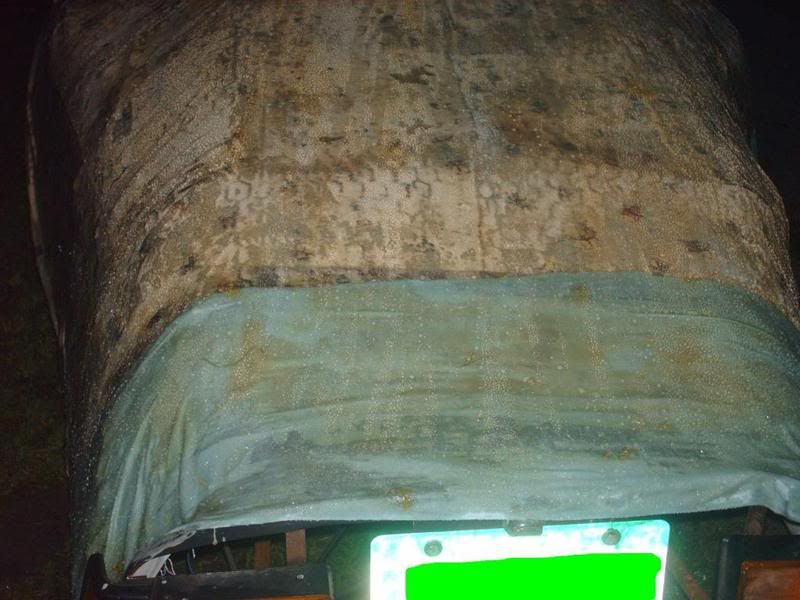
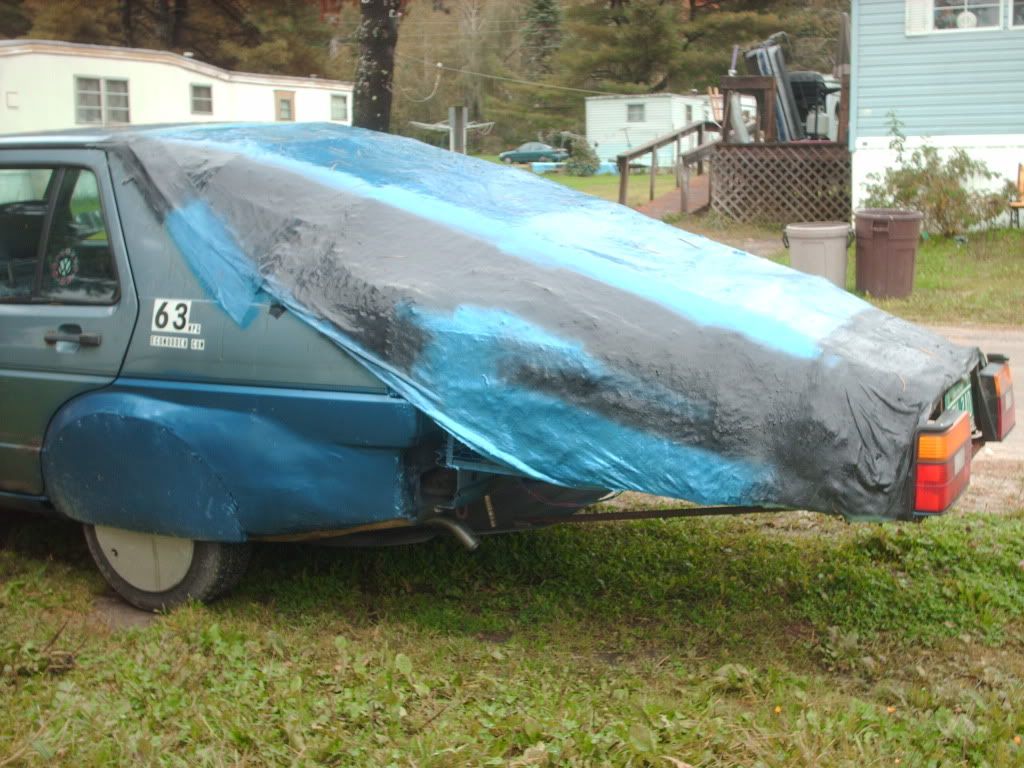
I started building a boat tail on my '90 VW Jetta. The plan is/was to use the Aero templates, both versions, for a true, attached flow boat tail.


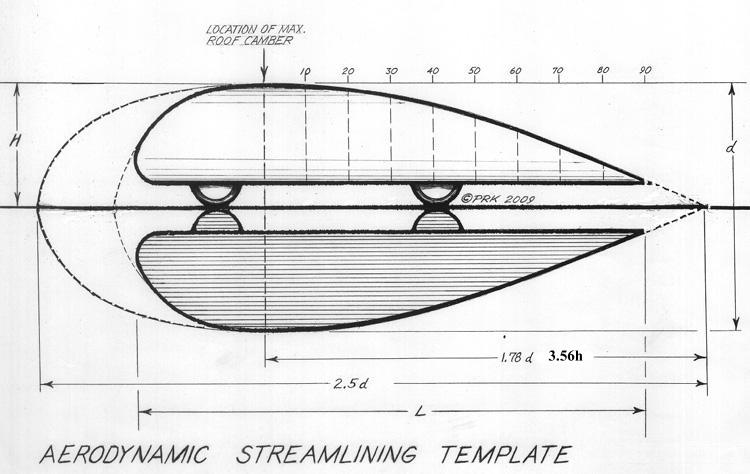
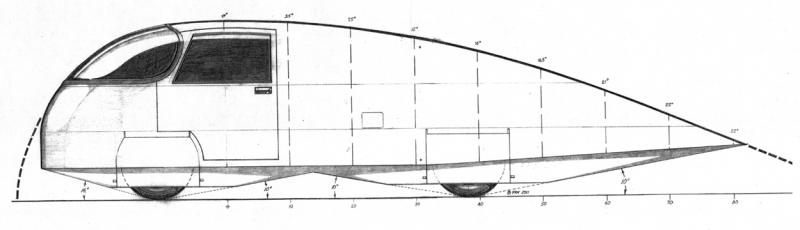
Through my measurements, the cars height is 54.5" tall. Giving me a 100% tail length of 194.02" and each 10% on the second template of 19.4" from Max roof camber. So, at 19.4 inches( or 10%), there should be 3.5degree down turn from level. At 38.8"( or 20%) it should be 7.5 degrees, and so on. I had planned on going out to 60% for length/space reasons, and that put me out to 45" from the end of the bumper.
I measured out the elevation drops on the template, and for my height vehicle, the drops are as follows;

10%= .76"
20%= 2.3"
30%= 5.37"
40%= 9.98"
50%= 16.12"
60%= 23.8"
70%= 31.48"
80%= 39.15"
90%= 46.82"
100%=54.5"

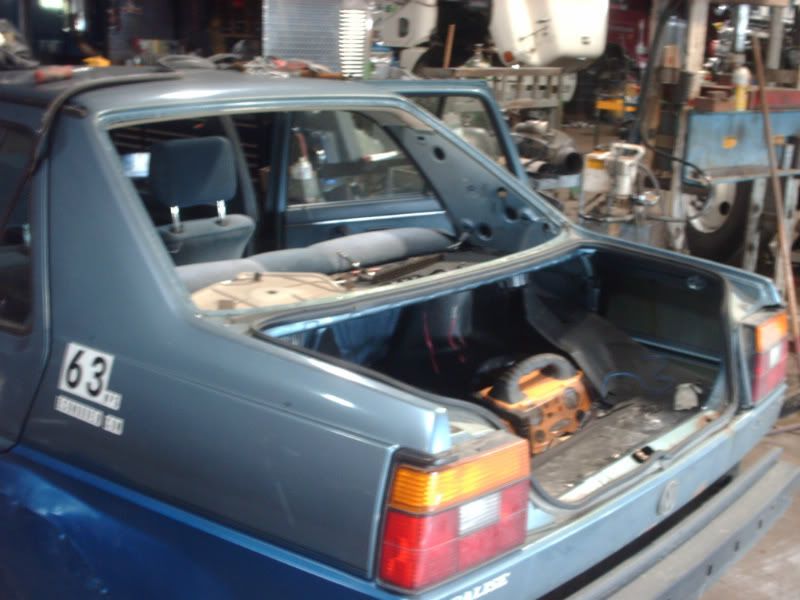
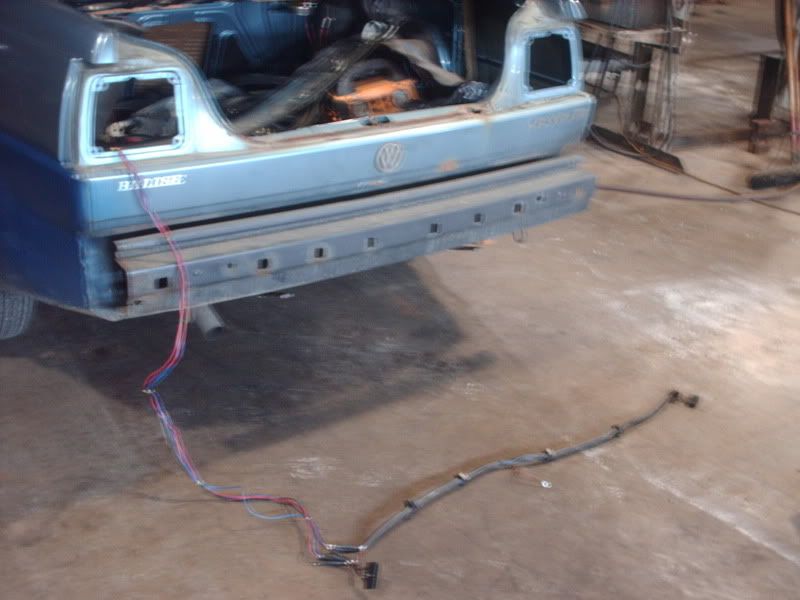
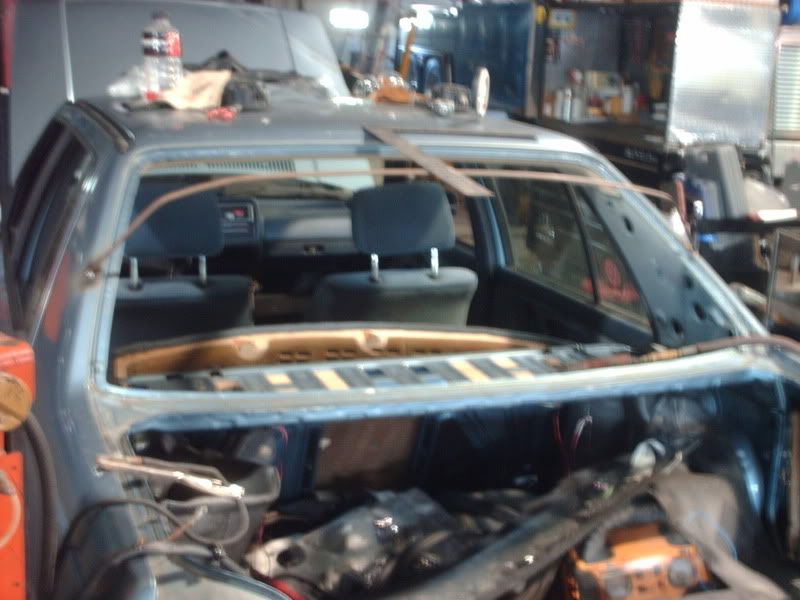
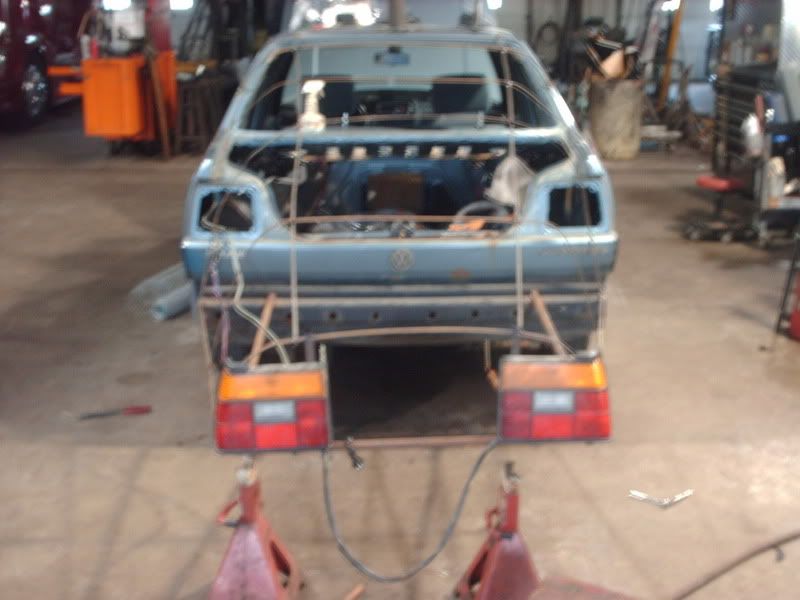
The original lights will be moved to the rear and the third brake light will be mounted as I get the rear window put in. There will be a trunk opening and the old trunk lid and window are removed.

This is not intended as a one time project, to be completely finished when simply fully enclosed. It will be an ongoing project that probably won't end until the car is completely destroyed. It also, probably, will show what NOT to do as much as what to do.

Criticisms and ideas are always welcome.

I did want to note here, as there has been some discussion about finding Max roof camber, that I did it on the car, not the computer. Using a level gauge, I traced from the front of the roof toward the back until the gauge read equal to the floor reading between the front and rear tires. I then did the same thing starting at the rear of the roof and moved toward the front. I took the middle of those two marks as the max roof camber or starting point for the rest of my measurements.

Post two will have updated pics and building material used.

__________________


Quote:
It is always very amusing how our imagination is put to the test when overcoming reality. Redyaris
Boat tail project
How to gently bump start during EOC

Last edited by JethroBodine; 03-13-2012 at 09:22 PM.. Reason: Added template drop values
  Reply With Quote
Alt Today
Popular topics

Other popular topics in this forum...

   
Old 10-02-2011, 04:17 PM   #2 (permalink)
MPG Militia HMV-25E80+A
 
JethroBodine's Avatar
 
Join Date: Mar 2011
Location: Vermont, USA
Posts: 823

FrankenJetta D - '90 Volkswagen Jetta GL
Boat tails and more mods
Diesel
TEAM VW AUDI Group
90 day: 64.35 mpg (US)
Thanks: 191
Thanked 144 Times in 98 Posts
Here is the link to the pics in this thread with a lot more thrown in.

Pictures by JethroBodineEM - Photobucket

Picture of car with template overlay as of 08-11-2012;

__________________


Quote:
It is always very amusing how our imagination is put to the test when overcoming reality. Redyaris
Boat tail project
How to gently bump start during EOC

Last edited by JethroBodine; 08-12-2012 at 09:59 AM..
  Reply With Quote
Old 10-02-2011, 04:44 PM   #3 (permalink)
MPG Militia HMV-25E80+A
 
JethroBodine's Avatar
 
Join Date: Mar 2011
Location: Vermont, USA
Posts: 823

FrankenJetta D - '90 Volkswagen Jetta GL
Boat tails and more mods
Diesel
TEAM VW AUDI Group
90 day: 64.35 mpg (US)
Thanks: 191
Thanked 144 Times in 98 Posts
After getting the measurements, I planned on making a solid base for the extension out of round steel tubing( free) and supports our of thin steel flat bar and and round stock( cheap or free). I was going to use cardboard and fiberglass resin for the skin, but further reading of MetroMPGs thread said that he was having issues with moisture bubbling before he removed his. A friend at work had used cloth fabric, chicken wire( for shaping) and resin for builds, followed by body filler( Bondo, if you will) for final smoothing. Sounded like a plan to me. I grabbed the welder and set to work.


Rear window and trunk removed( sorry for the blurry pics, it was dark in the shop, flash only lit near objects, and when I turned off the flash to lighten the pics, I couldn't hold the camera steady enough, which I couldn't tell viewing them on the camera, found out while downloading them).


Wiring harness already extended and run through( temporarily) the old light opening.


First loop welded to the body of the car.( Sorry, again)


The full frame welded in place. The rod down the center is just a place marker for measuring angles at different percentages of template.
__________________


Quote:
It is always very amusing how our imagination is put to the test when overcoming reality. Redyaris
Boat tail project
How to gently bump start during EOC
  Reply With Quote
The Following User Says Thank You to JethroBodine For This Useful Post:
HHOTDI (01-09-2013)
Old 10-02-2011, 04:47 PM   #4 (permalink)
EcoModding Apprentice
 
Join Date: Mar 2008
Location: Cold Lake, AB
Posts: 100

Alexa - '07 Honda Civic LX
90 day: 38.32 mpg (US)

FX - '06 Infiniti FX35
90 day: 17.98 mpg (US)

Priya - '03 Saturn Ion 3
90 day: 27.81 mpg (US)
Thanks: 1
Thanked 6 Times in 5 Posts
awesome work. cant wait to see more pics
__________________

  Reply With Quote
Old 10-02-2011, 04:58 PM   #5 (permalink)
MPG Militia HMV-25E80+A
 
JethroBodine's Avatar
 
Join Date: Mar 2011
Location: Vermont, USA
Posts: 823

FrankenJetta D - '90 Volkswagen Jetta GL
Boat tails and more mods
Diesel
TEAM VW AUDI Group
90 day: 64.35 mpg (US)
Thanks: 191
Thanked 144 Times in 98 Posts
Here are a couple pics of the lights on the end of the frame. I don't have any pics of the chicken wire/frame assembly, but pics of the fabric on the framework will show what's happening.


and blurry,


More to come.
__________________


Quote:
It is always very amusing how our imagination is put to the test when overcoming reality. Redyaris
Boat tail project
How to gently bump start during EOC
  Reply With Quote
The Following User Says Thank You to JethroBodine For This Useful Post:
aerohead (11-30-2011)
Old 10-02-2011, 05:30 PM   #6 (permalink)
MPG Militia HMV-25E80+A
 
JethroBodine's Avatar
 
Join Date: Mar 2011
Location: Vermont, USA
Posts: 823

FrankenJetta D - '90 Volkswagen Jetta GL
Boat tails and more mods
Diesel
TEAM VW AUDI Group
90 day: 64.35 mpg (US)
Thanks: 191
Thanked 144 Times in 98 Posts
Here's the cloth stretched over the framework.


Gaffer tape is holding it in place. I didn't sand the body where it meets the tail as I'm going to do the final attachment with screws and body sealer to allow for flexing( hopefully).


Here is the first coat of resin. The fabric did sag a bit, but I pulled it tighter after this pic and before the next coat. Took a whole gallon of resin to saturate the fabric. And for those who are wondering, that is a queen sized sheet with little snowmen on it.


I put more fabric around the edges, both as a sealer for now and to give me something to cut/fit as I need. The edges of the sheet, also, started to pull away in places and this seemed to help.


I had to extend beyond the sheet on the end, so now it covers the whole top side, bottom belly pan will be aluminum sheeting, and I haven't decided on the end, yet.
__________________


Quote:
It is always very amusing how our imagination is put to the test when overcoming reality. Redyaris
Boat tail project
How to gently bump start during EOC
  Reply With Quote
The Following 5 Users Say Thank You to JethroBodine For This Useful Post:
aerohead (11-30-2011), blownb310 (10-05-2011), HHOTDI (01-09-2013), Mira (03-17-2013), Weather Spotter (10-12-2011)
Old 10-02-2011, 05:43 PM   #7 (permalink)
MPG Militia HMV-25E80+A
 
JethroBodine's Avatar
 
Join Date: Mar 2011
Location: Vermont, USA
Posts: 823

FrankenJetta D - '90 Volkswagen Jetta GL
Boat tails and more mods
Diesel
TEAM VW AUDI Group
90 day: 64.35 mpg (US)
Thanks: 191
Thanked 144 Times in 98 Posts
I decided to paint the tail so that it would be less conspicuous.


I...um... ran out of hide-in-plain-sight black and had to finish with a can of metallic blue(all I had).


More to come.
__________________


Quote:
It is always very amusing how our imagination is put to the test when overcoming reality. Redyaris
Boat tail project
How to gently bump start during EOC

Last edited by JethroBodine; 10-02-2011 at 05:49 PM..
  Reply With Quote
The Following User Says Thank You to JethroBodine For This Useful Post:
aerohead (11-30-2011)
Old 10-02-2011, 07:09 PM   #8 (permalink)
OCD Master EcoModder
 
brucepick's Avatar
 
Join Date: Dec 2007
Location: Eastern CT, USA
Posts: 1,934

Outasight - '00 Honda Insight
Team Honda
Gen-1 Insights
90 day: 54.18 mpg (US)
Thanks: 429
Thanked 394 Times in 262 Posts
How long did it take from start through Post #6 with the fabric stretched and painted? The posts are all dated the same afternoon but I can't believe you did it all in one day - or did you??
__________________
Coast long and prosper.
Driving '00 Honda Insight, acquired Feb 2016.


  Reply With Quote
Old 10-02-2011, 08:17 PM   #9 (permalink)
Gen II Prianista
 
Rokeby's Avatar
 
Join Date: Jul 2009
Location: Ballamer, Merlin
Posts: 453
Thanks: 201
Thanked 146 Times in 89 Posts
Quote:
Originally Posted by JethroBodine View Post
I decided to paint the tail so that it would be less conspicuous.
No matter the color, I can't see paint being the answer on this.

You need to replace/cover the bed sheet-cum-snowmen with a
Cloak of Invisibility


That said, I admire your initiative, your let's go get 'em approach.
  Reply With Quote
Old 10-02-2011, 08:44 PM   #10 (permalink)
Master EcoModder
 
Sven7's Avatar
 
Join Date: Aug 2011
Location: Warren, MI
Posts: 2,456

Boo Radley - '65 Ford F100
90 day: 13.28 mpg (US)
Thanks: 782
Thanked 668 Times in 410 Posts
Looks like a pretty good job. I'd like to see a tuft test to determine if the air is attached over those surface undulations. Any plans for testing it?

Also, what does the bottom of it look like?

__________________
He gave me a dollar. A blood-soaked dollar.
I cannot get the spot out but it's okay; It still works in the store
  Reply With Quote
Reply  Post New Thread


Thread Tools


Powered by vBulletin® Version 3.8.11
Copyright ©2000 - 2024, vBulletin Solutions Inc.
Content Relevant URLs by vBSEO 3.5.2
All content copyright EcoModder.com