Go Back   EcoModder Forum > EcoModding > Aerodynamics
Register Now
 Register Now
 

Reply  Post New Thread
 
Submit Tools LinkBack Thread Tools
Old 09-07-2012, 04:47 PM   #11 (permalink)
Batman Junior
 
MetroMPG's Avatar
 
Join Date: Nov 2007
Location: 1000 Islands, Ontario, Canada
Posts: 22,515

Blackfly - '98 Geo Metro
Team Metro
Last 3: 70.09 mpg (US)

MPGiata - '90 Mazda Miata
90 day: 52.71 mpg (US)

Even Fancier Metro - '14 Mitsubishi Mirage top spec
90 day: 70.75 mpg (US)

Appliance car - '14 Mitsubishi Mirage ES (base)
90 day: 52.48 mpg (US)
Thanks: 4,062
Thanked 6,960 Times in 3,604 Posts
The "pop" aspect of this build makes it pretty unique. Watching with interest.

__________________
Project MPGiata! Mods for getting 50+ MPG from a 1990 Miata
Honda mods: Ecomodding my $800 Honda Fit 5-speed beater
Mitsu mods: 70 MPG in my ecomodded, dirt cheap, 3-cylinder Mirage.
Ecodriving test: Manual vs. automatic transmission MPG showdown


EcoModder
has launched a forum for the efficient new Mitsubishi Mirage
www.MetroMPG.com - fuel efficiency info for Geo Metro owners
www.ForkenSwift.com - electric car conversion on a beer budget
  Reply With Quote
Alt Today
Popular topics

Other popular topics in this forum...

   
Old 09-07-2012, 05:26 PM   #12 (permalink)
Master EcoModder
 
Join Date: Oct 2011
Location: ellington, ct
Posts: 829
Thanks: 44
Thanked 104 Times in 80 Posts
Quote:
Originally Posted by a8ksh4 View Post
yah, the plan is to have a wench on one side that I can crank....
everybody ought to have a wench or two on the side that they can uhhhh, "crank".
  Reply With Quote
The Following 2 Users Say Thank You to pete c For This Useful Post:
a8ksh4 (09-09-2012), Sven7 (09-10-2012)
Old 09-07-2012, 06:37 PM   #13 (permalink)
Master EcoModder
 
freebeard's Avatar
 
Join Date: Aug 2012
Location: northwest of normal
Posts: 27,695
Thanks: 7,775
Thanked 8,584 Times in 7,068 Posts
a8ksh4 -- I had a long reply all written, but then I found this and I scrapped it. Just go there and you will find all kinds of answers:
Understanding Camping Trailers Roof Lift Systems | Custom Cylinders International Inc.
  Reply With Quote
The Following 2 Users Say Thank You to freebeard For This Useful Post:
MetroMPG (09-19-2012), slowmover (09-12-2012)
Old 09-09-2012, 01:48 AM   #14 (permalink)
B.O. Zen
 
Join Date: Feb 2009
Location: Folsom, CA
Posts: 208

Pickup - '99 Toyota Tacoma 2wd, Regular Cab, Short Bed
90 day: 34.62 mpg (US)
Thanks: 130
Thanked 140 Times in 59 Posts
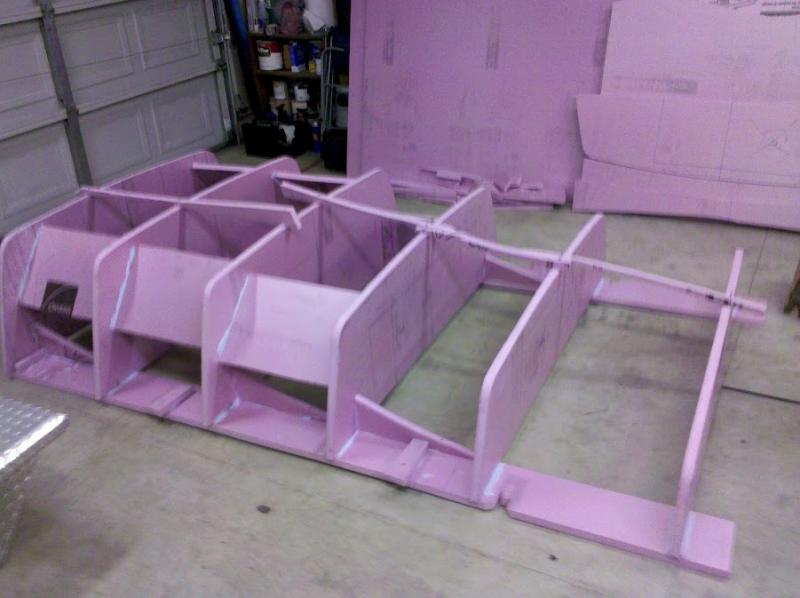
Made some more progress today. I re-cut the couple of x-sections that I messed up and then started assembling the skeleton. Once I got a couple pieces attached, I put it on the truck so I could make sure it was square when I started gluing.


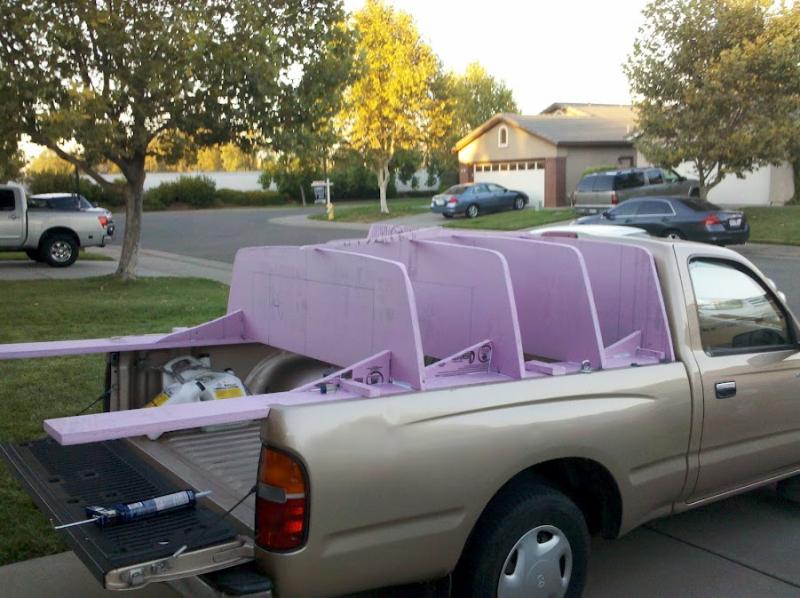
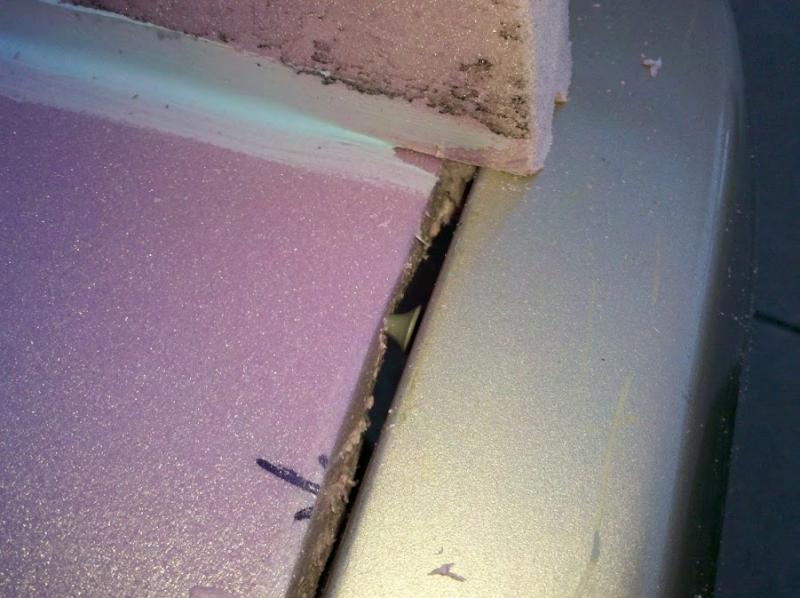
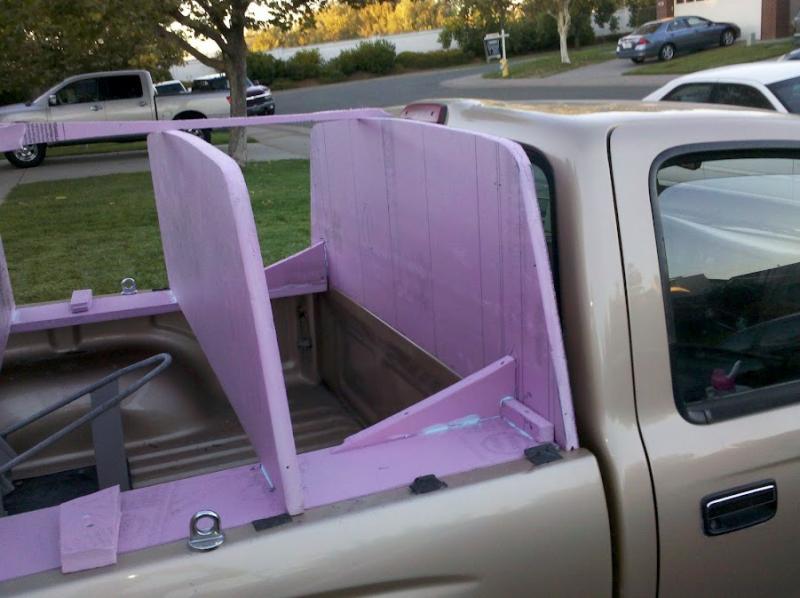
I used two runners, flush with the bed, to attache everything to. All of the x-sections except for this front one and the rearmost will be removed after the outside of the shell has been glassed over. I'll probably cut a big hole in this front panel and glue on a lexan window.


More done...


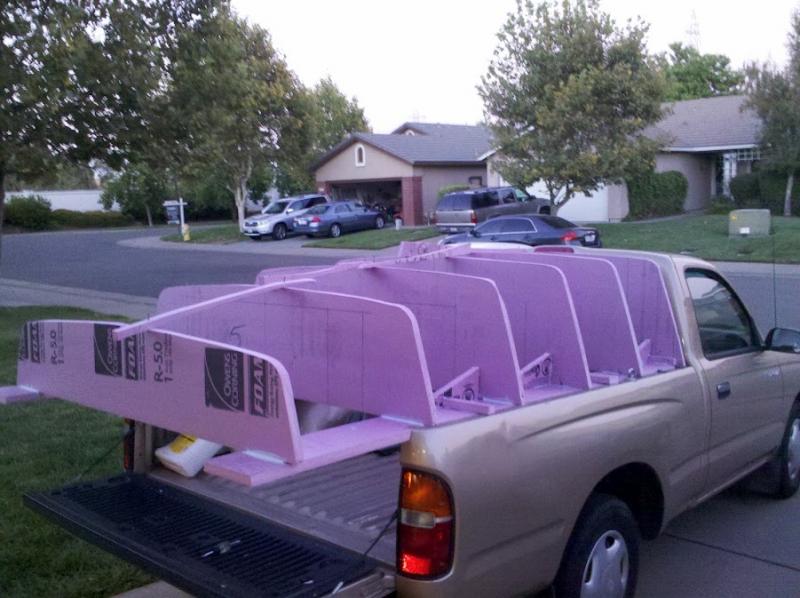
Started adding some bracing. This is as far as I got before using up an entire tube of glue. I left it on the truck like this for a few hours for the glue to start to set, and then moved it indoor.


Sooo... next steps...
* Will go ahead and start skinning this pretty soon. I want to see that it's actually going to work and look okay before I start purchasing materials for the rest of the work.
* Since this thing extends out past the end of the bed, I need to build a simple sub-frame to give me somewhere to attach the bumper further back and to hold on the panels/hardware that will extend the bed. Have to get dimensions of the mount points that will be used and do up some drawings of this.

One of the design features that I haven't mentioned yet is that it's going to have a long recessed compartment on the driver side of the shell where I'll keep a fold out awning. :P I picked up an awning rail today and have a 7' awning coming in the mail soon. Lol, I don't want to over-complicate this, but this is a feature I really want to incorporate. Also, my pie in the sky idea at this point is to glue/clearcoat in a bunch of solar cells on the top similarly to how the all-electric race cars do... Need to see the light at the end of the tunnel before I really even think about this.


For the lift - just grabbing it and lifting it up might be an option. I'll have to think about how it'll latch in the up position if I do this. It really needs to be on sliders/rails of some kind so that it doesn't jerk around and break if it's windy out. The center pull slides didn't excite me too much, but ball bearing drawer slides look perfect. They seem sturdy enough and are way cheaper than the strut-channel & trolleys that I was planning on using before.

Thanks for the link, freebeard. The telescoping Coleman setup w/ pulleys and cable was exactly what I was intending to reproduce.
__________________
  Reply With Quote
The Following 2 Users Say Thank You to a8ksh4 For This Useful Post:
HHOTDI (12-13-2012), turbothrush (09-09-2012)
Old 09-09-2012, 02:29 AM   #15 (permalink)
Master EcoModder
 
freebeard's Avatar
 
Join Date: Aug 2012
Location: northwest of normal
Posts: 27,695
Thanks: 7,775
Thanked 8,584 Times in 7,068 Posts
Quote:
Thanks for the link, freebeard.
I'm helping!

It looks like you don't have stake pockets for side racks. They call that a pickup? But that means your not limited to that 2x4" dimension.

How do you propose to fix your lift mechanism into the bed? Permanently attached or lift off with the aerocap?
  Reply With Quote
Old 09-09-2012, 02:41 AM   #16 (permalink)
B.O. Zen
 
Join Date: Feb 2009
Location: Folsom, CA
Posts: 208

Pickup - '99 Toyota Tacoma 2wd, Regular Cab, Short Bed
90 day: 34.62 mpg (US)
Thanks: 130
Thanked 140 Times in 59 Posts
Nope, no stake pockets, but they do have built-in tie-down points at each corner of the bed that seem pretty sturdy. The suspension in this 2wd taco isn't stiff enough to haul a half-cord of wood... I'm not sure what good raised rails would be on it. :P

The lift mechanism would be permanently attached, as in, it'll be bolted to the truck bed. I hope I don't have to remove this thing very often.
__________________
  Reply With Quote
Old 09-09-2012, 11:44 AM   #17 (permalink)
Master EcoModder
 
freebeard's Avatar
 
Join Date: Aug 2012
Location: northwest of normal
Posts: 27,695
Thanks: 7,775
Thanked 8,584 Times in 7,068 Posts
Quote:
The suspension in this 2wd taco isn't stiff enough to haul a half-cord of wood... I'm not sure what good raised rails would be on it.
Hay bales?
  Reply With Quote
Old 09-09-2012, 11:55 AM   #18 (permalink)
Aero Deshi
 
ChazInMT's Avatar
 
Join Date: Jan 2010
Location: Vero Beach, FL
Posts: 1,065

MagMetalCivic - '04 Honda Civic Sedan EX
Last 3: 34.25 mpg (US)
Thanks: 430
Thanked 668 Times in 357 Posts
Looks really good, making it go long will help too. Have you thought about tilting the forward most panel forward to match the angle of the back glass? It isn't that big a deal, but would look better for sure. Pay attention to whether the back glass bows out a bit as it does on my 2000 GMC Sierra, that was an "Aw Heck" moment when the topper I made was touching on spot on the back glass. Here's a pic to see what I mean.


Even in the picture it's tough to see, but the glass is closer to the bed in the middle than on the sides.
  Reply With Quote
Old 09-10-2012, 04:36 PM   #19 (permalink)
Aero Wannabe
 
COcyclist's Avatar
 
Join Date: Dec 2007
Location: NW Colo
Posts: 738

TDi - '04 VW Golf
TEAM VW AUDI Group
90 day: 53.2 mpg (US)
Thanks: 705
Thanked 218 Times in 169 Posts
Quote:
Originally Posted by a8ksh4 View Post
For the lift - just grabbing it and lifting it up might be an option. I'll have to think about how it'll latch in the up position if I do this. It really needs to be on sliders/rails of some kind so that it doesn't jerk around and break if it's windy out. The center pull slides didn't excite me too much, but ball bearing drawer slides look perfect. They seem sturdy enough and are way cheaper than the strut-channel & trolleys that I was planning on using before.
Great project! A very low tech solution may be to lift it manually (I think it will be very light) and prop it up with a couple of rods or poles. As long as they are wider at the bottom by the tailgate hinge, the trapezoid shape should stop it from shifting in the wind. However, you may want to add some straps to tether it down so the wind cannot lift the whole thing while it is set up. It is amazing how quickly the wind can come up when you are camping.
__________________
60 mpg hwy highest, 50+mpg lifetime
TDi=fast frugal fun
https://ecomodder.com/forum/showthre...tml#post621801


Quote:
Originally Posted by freebeard View Post
The power needed to push an object through a fluid increases as the cube of the velocity. Mechanical friction increases as the square, so increasing speed requires progressively more power.
  Reply With Quote
Old 09-11-2012, 11:34 PM   #20 (permalink)
B.O. Zen
 
Join Date: Feb 2009
Location: Folsom, CA
Posts: 208

Pickup - '99 Toyota Tacoma 2wd, Regular Cab, Short Bed
90 day: 34.62 mpg (US)
Thanks: 130
Thanked 140 Times in 59 Posts
Small update...Added screws to each corner of the skeleton so I could set the side-to-side offset behind the cab:


then I cut a 2' x 8' strip of foamboard that would go from the cab and front-most x-section of the shell to the second x-section. With it centered behind the cab, I could start cutting to get a flush fit. Will have to get some better photos of this later.


And then had a first try at getting the panel to flex along the 3" radius curve that joins the sides of the shell and the top:


I started with lines 5/8" apart and about 5/8" deep, but found that this wasn't enough. I think I need to make them deeper and maybe do them every 5/16" instead. Turbothrush, do you have any recommendations here, for forming around the 3" radius?

__________________
  Reply With Quote
Reply  Post New Thread


Powered by vBulletin® Version 3.8.11
Copyright ©2000 - 2024, vBulletin Solutions Inc.
Content Relevant URLs by vBSEO 3.5.2
All content copyright EcoModder.com