 01-22-2010, 02:15 PM
|
#31 (permalink)
|
|
Quest for a 400 mile tank
Join Date: Jul 2009
Location: West Michigan
Posts: 50
Thanks: 43
Thanked 15 Times in 10 Posts
|
Great photos. Definitely giving me some inspiration on my aerocap build (when I get to it). I've been tossing around the idea of compound curves or not. Please document the plywood attachment. I'm hoping to add another element of having it open like a hatchback.
So far, great build. Looking forward to the progress.
|
|
|

|
 Today Today
|
|
|
|
 Other popular topics in this forum...
|
|
|
|
 01-22-2010, 06:41 PM
|
#32 (permalink)
|
|
Batman Junior
Join Date: Nov 2007
Location: 1000 Islands, Ontario, Canada
Posts: 22,536
Thanks: 4,082
Thanked 6,985 Times in 3,616 Posts
|
Added to the project library ( EcoModder Project Library - EcoModder.com) .
Enjoying watching this come together. |
|
|

|
 01-22-2010, 08:31 PM
|
#33 (permalink)
|
|
Master EcoModder
Join Date: Jan 2008
Location: Arkansas
Posts: 279
Thanks: 90
Thanked 241 Times in 90 Posts
|
Nice cross sections!
That is going to be one sharp looking aerocap when you are done. It is alot of fun building your own aerocap. Fubeca has definitely set the standard on how to construct one for a minimum cost.
|
|
|

|
 01-26-2010, 07:50 PM
|
#34 (permalink)
|
|
Aero Deshi
Join Date: Jan 2010
Location: Vero Beach, FL
Posts: 1,065
Thanks: 430
Thanked 669 Times in 358 Posts
|
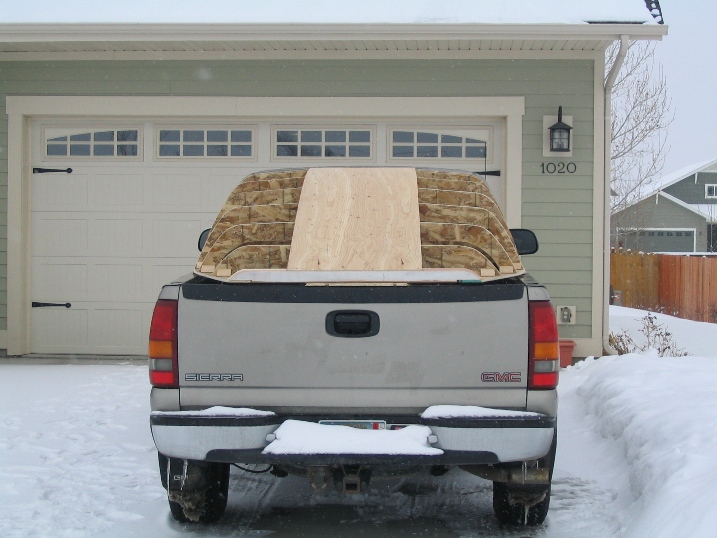
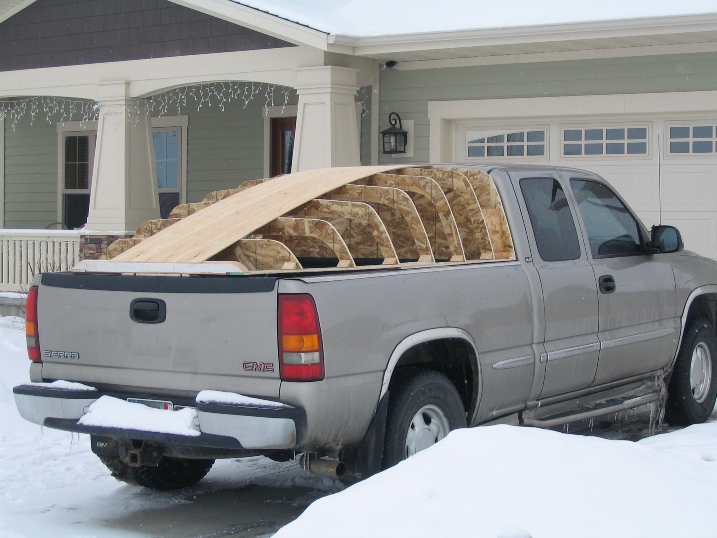
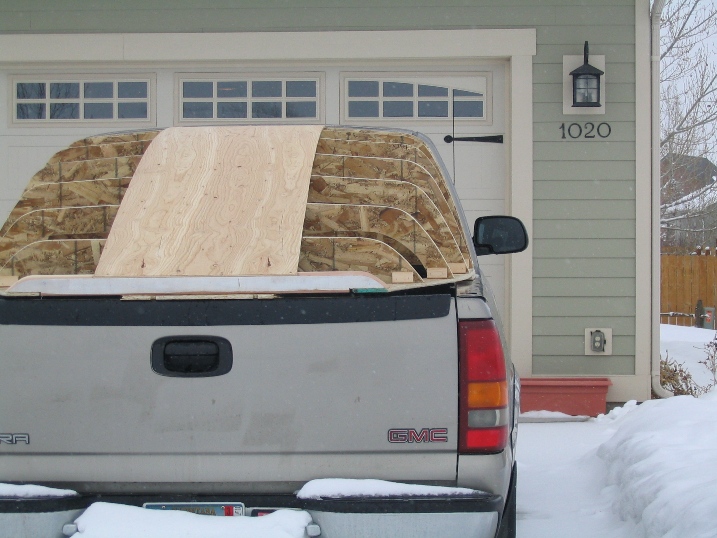
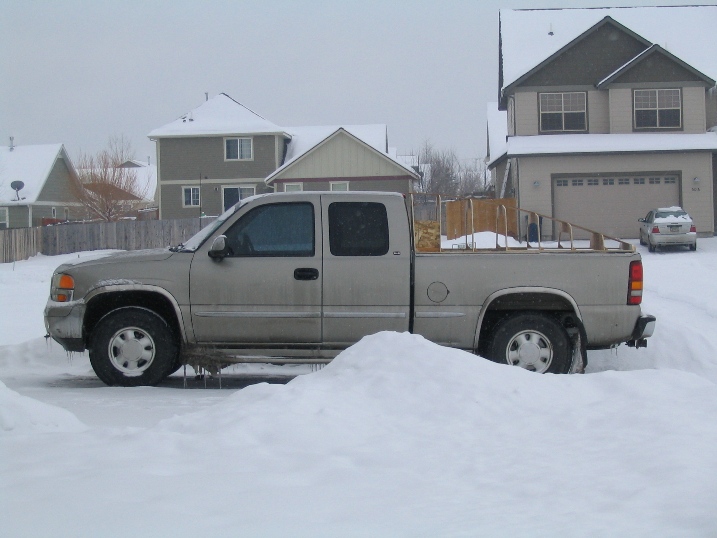
Progress Update
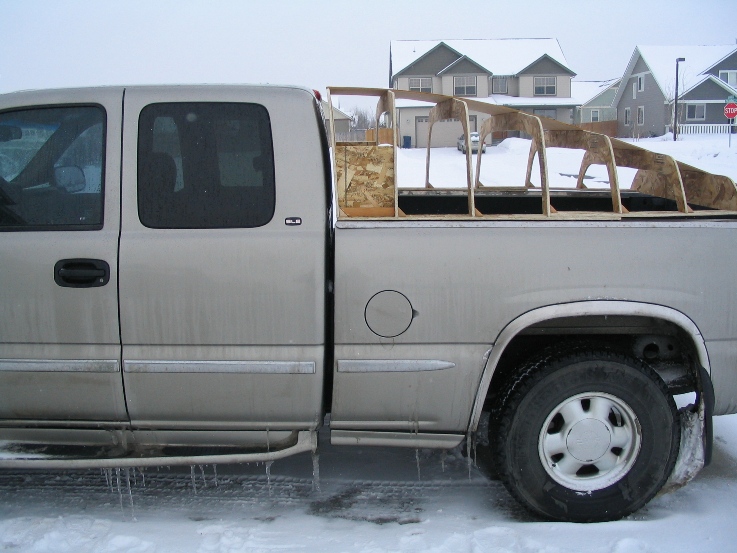
Today I finally got a part of the "Skin" made to put on the rib frame....and naturally the first thing one must do at this point is chuck it on the back of the ol rig and see if I've made any galactic errors before continuing on.
Took some snaps, thought I'd share them for those who are interested.
I think it looks good, I initially had the front frame pulled back an inch er so at the top, that wasn't going to work. So I fixed it post haste. I think I'll bend the corners in to close the gap a bit, it should end up being about 1 1/2" on avg, no real concern I don't think. Part of me wonders if the gap won't upset the flow a little bit and help it stay attached better.
I will work on the rest of the skin now, it isn't going to be easy for sure. The way everything tapers down to essentially a point at the back along with the radius corners is going to make for some very interesting looking 1" strips. The sides are contoured to match the truck shape, curve in, and twist from front to back. I can't decide whether to use the 1/4 CDX or run out and get a more workable/flexible 1/4 mahogany sheet. My fear is that the mahogany will disintegrate on contact with water if anything should rip the shrink wrap skin I put on. I suppose 2 cans of spray paint would help prevent that. The mahogany costs $8 more. I wish I could use coroplast, but these sides are critical to the structure of the cap.

Last edited by ChazInMT; 01-26-2010 at 09:34 PM..
|
|
|

|
|
The Following 2 Users Say Thank You to ChazInMT For This Useful Post:
|
|
 01-26-2010, 08:13 PM
|
#35 (permalink)
|
|
EcoModding Apprentice
Join Date: May 2008
Location: N. Saskatchewan, CA
Posts: 1,805
Thanks: 91
Thanked 460 Times in 328 Posts
|
Looking good. Nice to see somebody else is hardy enough for winter work. I'd just like to correct the usage of the term "laminar." That is flow in which the air just distorts smoothly, with each bit maintaining its distance from the surface. It usually extends from the front stagnation point to the first scratch or change in contour. To maintain it back as far as the mid-point on a shape at our regular speeds, you need a single, perfect contour and no blemishes.
The concern about the gap mentioned here is to maintain Attached flow. In general, minor roughness aids this by thickening the turbulent boundary layer, although a bad contour can initiate separation where it is close to coming off anyway.
|
|
|

|
 01-26-2010, 08:22 PM
|
#36 (permalink)
|
|
Gen II Prianista
Join Date: Jul 2009
Location: Ballamer, Merlin
Posts: 453
Thanks: 201
Thanked 146 Times in 89 Posts
|
ChazInMt,
You are facing the same issues in covering your 'cap that traditional boat
builders do when planking a hull; How can you quickly, accurately, and
repeatably find the true correct shape of planks that bend and twist to
conform to the ribs?
The process is called "spileing" and it is a purely mechanical way to generate
the needed shapes accurately -- no special tools, no computer needed. 
Here is a place to start: Spileing . |
|
|

|
 01-26-2010, 09:41 PM
|
#37 (permalink)
|
|
Aero Deshi
Join Date: Jan 2010
Location: Vero Beach, FL
Posts: 1,065
Thanks: 430
Thanked 669 Times in 358 Posts
|
Thanks Bob, I was thinking attached but wrote laminar. I don't think there is a whole lotta laminar going on with the shape of this truck. I changed my post.
|
|
|

|
 01-27-2010, 12:20 AM
|
#38 (permalink)
|
|
EcoModding Apprentice
Join Date: May 2008
Location: N. Saskatchewan, CA
Posts: 1,805
Thanks: 91
Thanked 460 Times in 328 Posts
|
You're most welcome. I've also been called a grammar fascist, but I'm mostly interested in technical clarity, since we do so much education here.
Plywood glue is usually quite waterproof, although cheap door skins are sometimes flawed in several ways. In boat building, it is sometimes given a mild compound curve and called "tortured Plywood" but those techniques don't work for this shape. Any wooden construction can be made stable and waterproof with a good coat of epoxy. The popular WEST brand is an acronym for Wood Encapsulation Stabilization Treatment, or something similar.
If you wanted a fiberglass shell, one easy way is to cover frames like those with C-flex, a fiberglass cloth with resin-cured thin fiberglass rods woven in in one direction. The frames can be retained as structure or just used as a mold.
|
|
|

|
 01-27-2010, 01:42 AM
|
#39 (permalink)
|
|
Aero Deshi
Join Date: Jan 2010
Location: Vero Beach, FL
Posts: 1,065
Thanks: 430
Thanked 669 Times in 358 Posts
|
I was planning on setting my circular saw to 1/8 inch deep and making kerfs in the back in the direction (or two) that I wanted the wood to bend. I know it isn't the best way to do it but I don't think it will affect the strength that much if I fasten it well. This is just a "proof of concept" cap anyway. I'll be happy to use it until June. So epoxy coating is not really a priority. If it significantly improves my mileage on the road, I'll make a more robust version with some kind of hatch back door thing and windows.
I'm fairly convinced that this is a good direction to start with by tapering in the sides and having a curved arch top profile. Most folks don't taper the sides and I think really only end up improving the airflow over 2 or 3 feet down the centerline of the truck bed. By taking the time to do this, I'm managing all the air above the bed which is about 8 linear feet of the slipstream (22" tall sides + 52" wide roof). After reading a bunch of technical papers today over in the "General Efficiency" forum, I'm getting a little concerned about lift forces that might be generated at highway speeds (with a head wind, passing a truck and 82% humidity). I don't think it will significantly affect handling, I just worry that the cap will come loose and take a short flight. I'm going to double the hold down system I was originally planning to avoid having to fill out a EAA membership, although I'm certain Burt Rutan would love having me in the ranks.
|
|
|

|
 01-27-2010, 07:37 PM
|
#40 (permalink)
|
|
Master EcoModder
Join Date: Jan 2008
Location: Sanger,Texas,U.S.A.
Posts: 16,440
Thanks: 24,483
Thanked 7,412 Times in 4,802 Posts
|
planning
Quote:
Originally Posted by ChazInMT

I was planning on setting my circular saw to 1/8 inch deep and making kerfs in the back in the direction (or two) that I wanted the wood to bend. I know it isn't the best way to do it but I don't think it will affect the strength that much if I fasten it well. This is just a "proof of concept" cap anyway. I'll be happy to use it until June. So epoxy coating is not really a priority. If it significantly improves my mileage on the road, I'll make a more robust version with some kind of hatch back door thing and windows.
I'm fairly convinced that this is a good direction to start with by tapering in the sides and having a curved arch top profile. Most folks don't taper the sides and I think really only end up improving the airflow over 2 or 3 feet down the centerline of the truck bed. By taking the time to do this, I'm managing all the air above the bed which is about 8 linear feet of the slipstream (22" tall sides + 52" wide roof). After reading a bunch of technical papers today over in the "General Efficiency" forum, I'm getting a little concerned about lift forces that might be generated at highway speeds (with a head wind, passing a truck and 82% humidity). I don't think it will significantly affect handling, I just worry that the cap will come loose and take a short flight. I'm going to double the hold down system I was originally planning to avoid having to fill out a EAA membership, although I'm certain Burt Rutan would love having me in the ranks.
|
The cap will "explode" if not strong enough to withstand the delta-p across it.
And it would "leave" if allowed,so good idea on extra hold downs.
The plan-view curvature will cut extra drag.You'll experience a bit of cross-talk where the rails and cap meet.It cannot be avoided short of a bed re-design.Kamm suffered this on his K-cars,don't worry about it.
As far as bow shock-waves from 18-wheelers,etc.,she should be rock-solid.The cap will provide you downforce and you'll swear there's a load in the bed the way she rides.
Put in a Plex side window on the passenger side if you can.Backing out of a parallel parking space can be terrifying without it.
Even a slit at the rear will also give you some vision you'll enjoy.
Tensile strength is your friend.
P.S.If you're going anywhere near goats,make it VERY strong!
|
|
|

|
|
The Following User Says Thank You to aerohead For This Useful Post:
|
|
|