 02-23-2010, 04:13 PM
|
#151 (permalink)
|
|
Administrator
Join Date: Dec 2007
Location: Germantown, WI
Posts: 11,203
Thanks: 2,501
Thanked 2,589 Times in 1,555 Posts
|
I completely agree, this should be a part of the kit. It really is a pain to have to do all this stuff just to make sure it works after the warranty is gone.
Apparently the battery manufacturer is incorporating over voltage protection right into the batteries. Enginer still has no safe low voltage disconnect or even alarms. It waits for the pack voltage to drop to X before it turns off. Since the batteries don't all have the same capacity this inevitably means that a couple are going to go way too low.
|
|
|

|
 Today Today
|
|
|
|
 Other popular topics in this forum...
|
|
|
|
 03-16-2010, 11:41 PM
|
#152 (permalink)
|
|
Administrator
Join Date: Dec 2007
Location: Germantown, WI
Posts: 11,203
Thanks: 2,501
Thanked 2,589 Times in 1,555 Posts
|
Three weeks go by very quickly. Tonight I got the additional circuit board all soldered up. It basically houses the opto isolators so no electrical connections are made where they're not supposed to be. So, there isn't much on it, still took a couple hours to make. It is nice and compact though.
Top
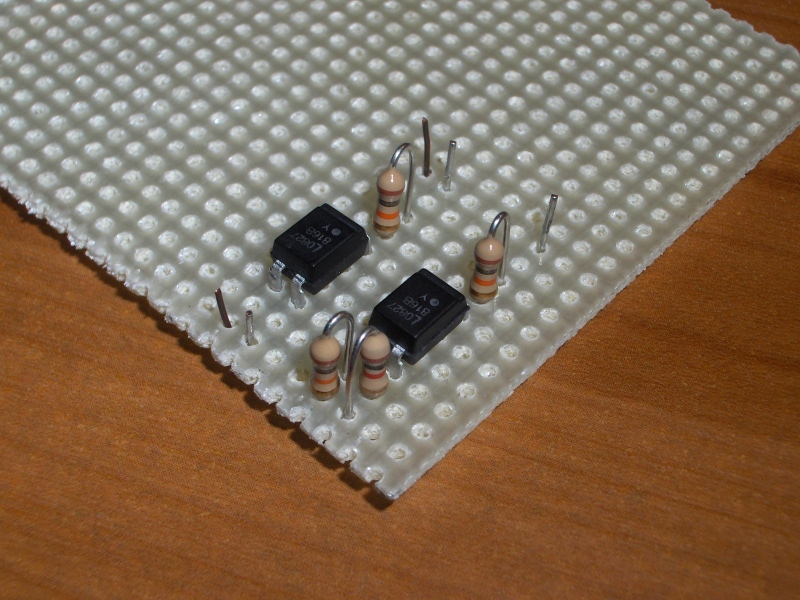
Bottom
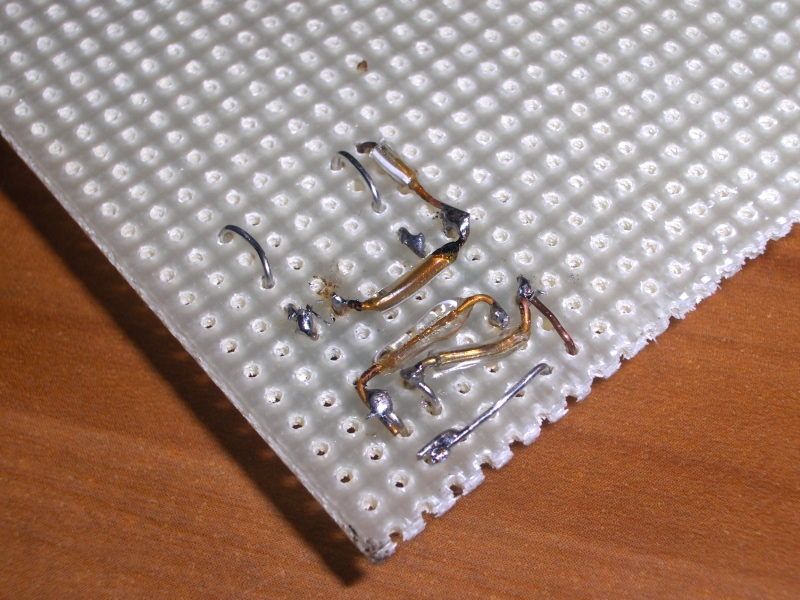 |
|
|

|
|
The Following User Says Thank You to Daox For This Useful Post:
|
|
 03-19-2010, 03:02 PM
|
#153 (permalink)
|
|
Administrator
Join Date: Dec 2007
Location: Germantown, WI
Posts: 11,203
Thanks: 2,501
Thanked 2,589 Times in 1,555 Posts
|
Well, pbui (priuschat member) had a very good suggestion, get a diagram up. So, I did this over lunch. Please poke holes in it so I can improve it.
The main problem I've been talking about is the 5v and 12v possible power supplies going to the arduino. I drew in the current fix which is to put diodes on each input supply. But, there is still concern about using them and possible induction problems through the chassis with the 110V.
CL = celllog
816 = opto isolator
SSR = solid state relay
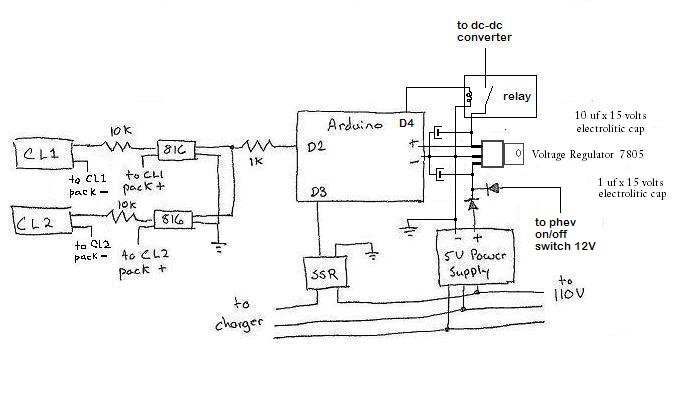 |
|
|

|
 03-22-2010, 11:59 AM
|
#154 (permalink)
|
|
Administrator
Join Date: Dec 2007
Location: Germantown, WI
Posts: 11,203
Thanks: 2,501
Thanked 2,589 Times in 1,555 Posts
|
Nobody has probably noticed, but I've been updating the schematic via feedback from priuschat members. It now shows the low voltage disconnect, and I've fixed some problems with grounding on the opto isolators.
|
|
|

|
 03-22-2010, 01:47 PM
|
#155 (permalink)
|
|
AC-DC enthusiast
Join Date: Nov 2009
Location: Long Island, NY
Posts: 282
Thanks: 123
Thanked 54 Times in 37 Posts
|
I would include a 5 volts voltage regulator with a smoothing electrolitic capacitors in order to protect the Arduino's power supplies line.
I took the freedom of correcting your diagram to reflect the additions.
__________________
. .. .. . .... . .... ... ...
Prius Absolutum Dominium . ..........KOPPER
PHEV conversion since Dec 2006.. . .... .Future EV
. . . . . . . .CALCars # 27. . . . . . . . . . ..on the works now !!
. . . . . . . . . . . . . . . . .. . ........
|
|
|

|
|
The Following 2 Users Say Thank You to mrbigh For This Useful Post:
|
|
 03-22-2010, 02:05 PM
|
#156 (permalink)
|
|
Administrator
Join Date: Dec 2007
Location: Germantown, WI
Posts: 11,203
Thanks: 2,501
Thanked 2,589 Times in 1,555 Posts
|
That sounds like a good idea. Thanks.
|
|
|

|
 03-27-2010, 03:25 PM
|
#157 (permalink)
|
|
Administrator
Join Date: Dec 2007
Location: Germantown, WI
Posts: 11,203
Thanks: 2,501
Thanked 2,589 Times in 1,555 Posts
|
I went to install my automatic disconnect circuit into the Prius today. I quickly found that it was going to be a big pain to do with the kit in the car and at least some batteries would need to come out. I'm glad I came to this realization, because I found a few things I wouldn't otherwise.
This is the first thing I saw. It appears as thought the hold down was starting to wear away the casing on this battery. Over time, I don't know if it would have gone through, but its something to look out for.
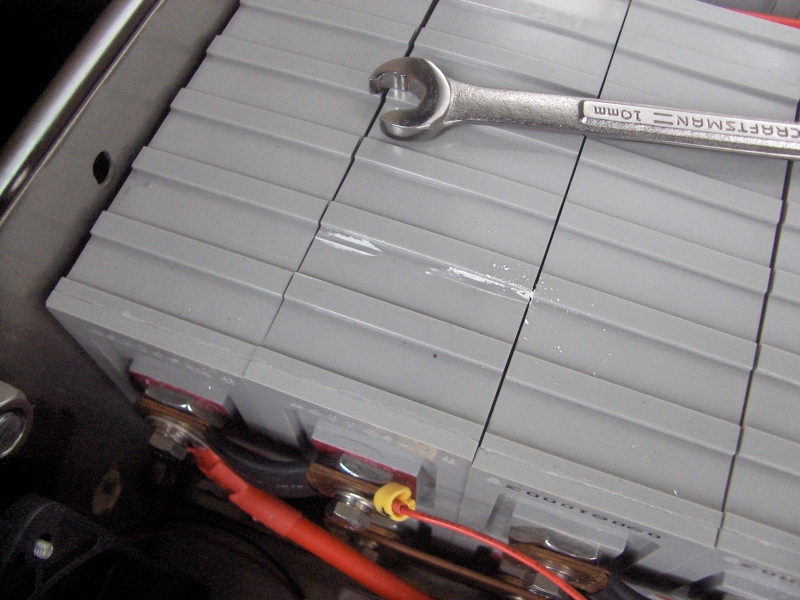
The next thing I found was much worse. It appears one of my batteries failed on me. I'm not sure how. The bolt was quite snug yet. But, you can see that the heat from the first battery effected the second one too. So, I'll need to get those both replaced.
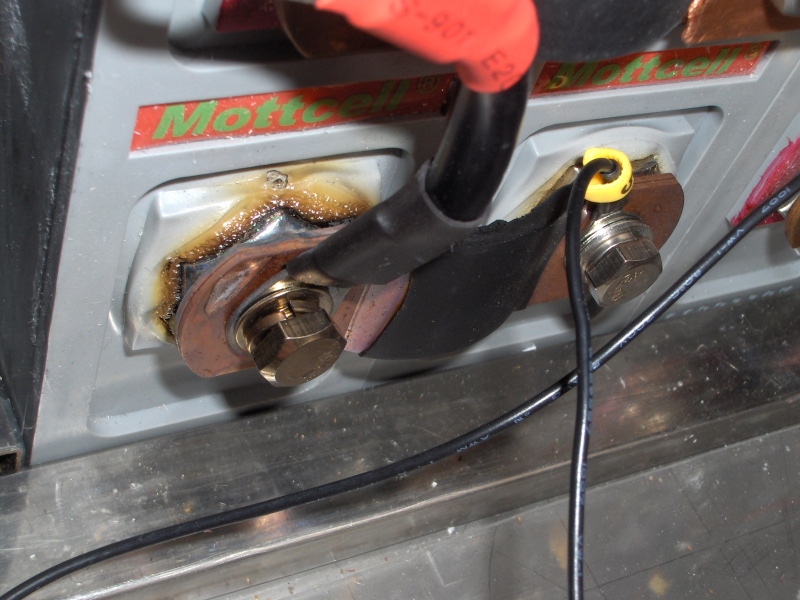
So, I finished up removing the kit. It is sitting inside again, waiting on parts... |
|
|

|
 03-27-2010, 05:37 PM
|
#158 (permalink)
|
|
Master EcoModder
Join Date: May 2008
Location: Maynard, MA Eaarth
Posts: 7,908
Thanks: 3,475
Thanked 2,953 Times in 1,846 Posts
|
Yeah, the brown/blackening/melting/bubbling part of the plastic looks definitely bad...
|
|
|

|
 03-27-2010, 05:51 PM
|
#159 (permalink)
|
|
EV test pilot
Join Date: Jan 2008
Location: Oconomowoc, WI, USA
Posts: 4,435
Thanks: 17
Thanked 663 Times in 388 Posts
|
Did you ever install the automatic fire-extinguisher in the kit? If not, it seems like it's a pretty good idea to have.....
|
|
|

|
 03-27-2010, 05:52 PM
|
#160 (permalink)
|
|
Administrator
Join Date: Dec 2007
Location: Germantown, WI
Posts: 11,203
Thanks: 2,501
Thanked 2,589 Times in 1,555 Posts
|
Yeah, the fire extinguisher has been installed from day one.
|
|
|

|
|