11-05-2016, 03:08 PM
|
#161 (permalink)
|
|
Master EcoModder
Join Date: Jan 2008
Location: Sanger,Texas,U.S.A.
Posts: 16,404
Thanks: 24,471
Thanked 7,410 Times in 4,800 Posts
|
fake/fillet
Quote:
Originally Posted by freebeard

Perhaps I'll better understand the fake wheel later. It goes on the bottom of the swinging boat tail?
What radius will you use on the filleting? I've always thought there would be interference drag between the front and rear sponsons. Maybe it could use a saddle-shaped fillet in there?
|
*Since we can't get BamZipPow to DARKO,and since I never tested any of my trailers,the fake wheel and fairing,attached under Spirit's stinger,will help us understand what a gap-filled,full-boat-tailed,single-wheel trailer drag would look like.The fairing/wheel will be suspended just above the floor so as not to interfere with the load cell measurements of lift and drag.
*The fillets are caulk and the size of my thumb,since that's how they're formed.Not perfect,but I'm willing to live with the difference.
__________________
Photobucket album: http://s1271.photobucket.com/albums/jj622/aerohead2/
|
|
|

|
|
The Following 3 Users Say Thank You to aerohead For This Useful Post:
|
|
 Today Today
|
|
|
|
 Other popular topics in this forum...
|
|
|
|
|
11-05-2016, 05:21 PM
|
#162 (permalink)
|
|
Master EcoModder
Join Date: Jan 2008
Location: Sanger,Texas,U.S.A.
Posts: 16,404
Thanks: 24,471
Thanked 7,410 Times in 4,800 Posts
|
recent photo
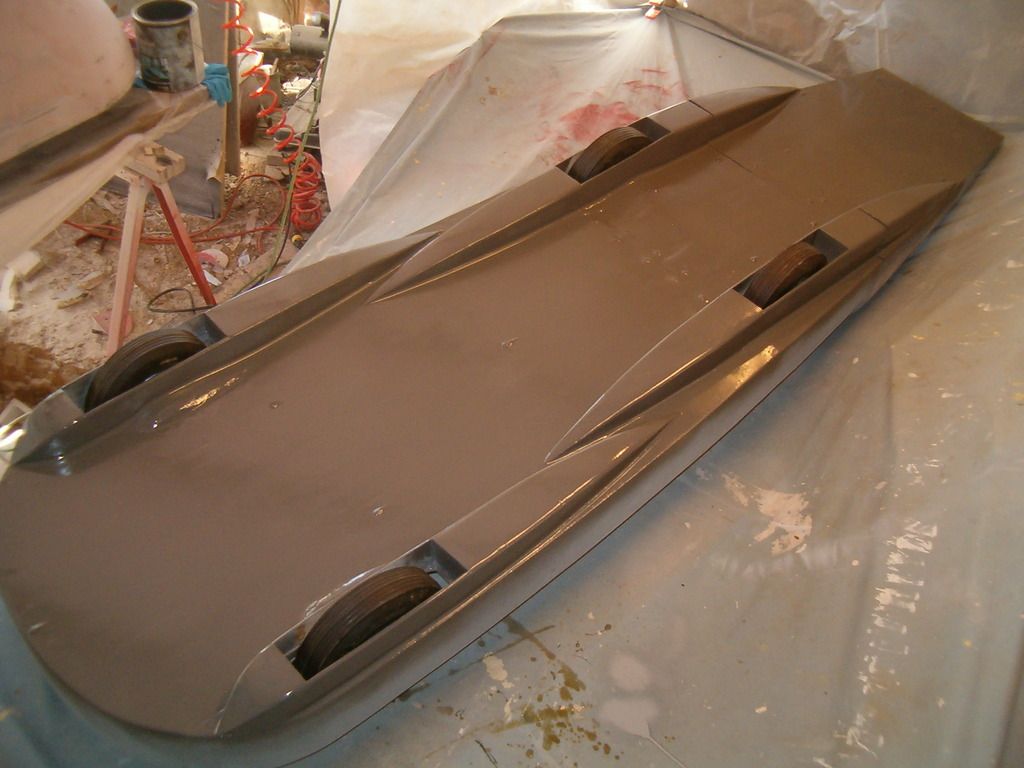
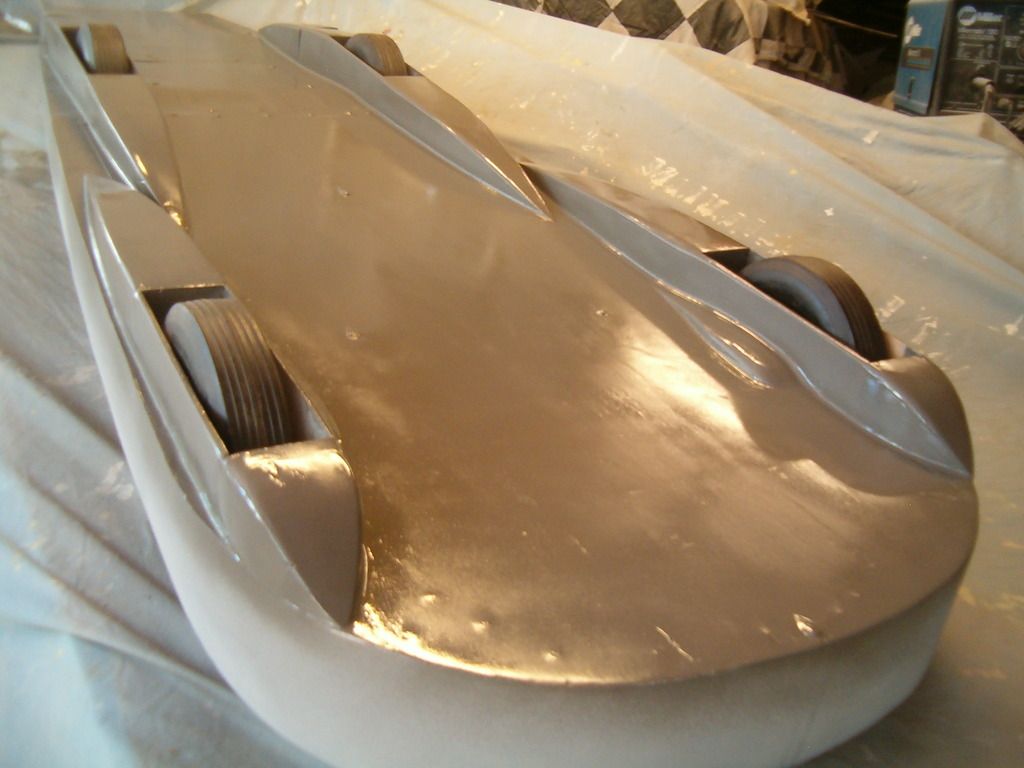
*The wheel fairings are essentially complete,which completes the lower body/chassis.I'm waiting for the relative humidity to fall to a level which will permit me to spray the automotive primer.
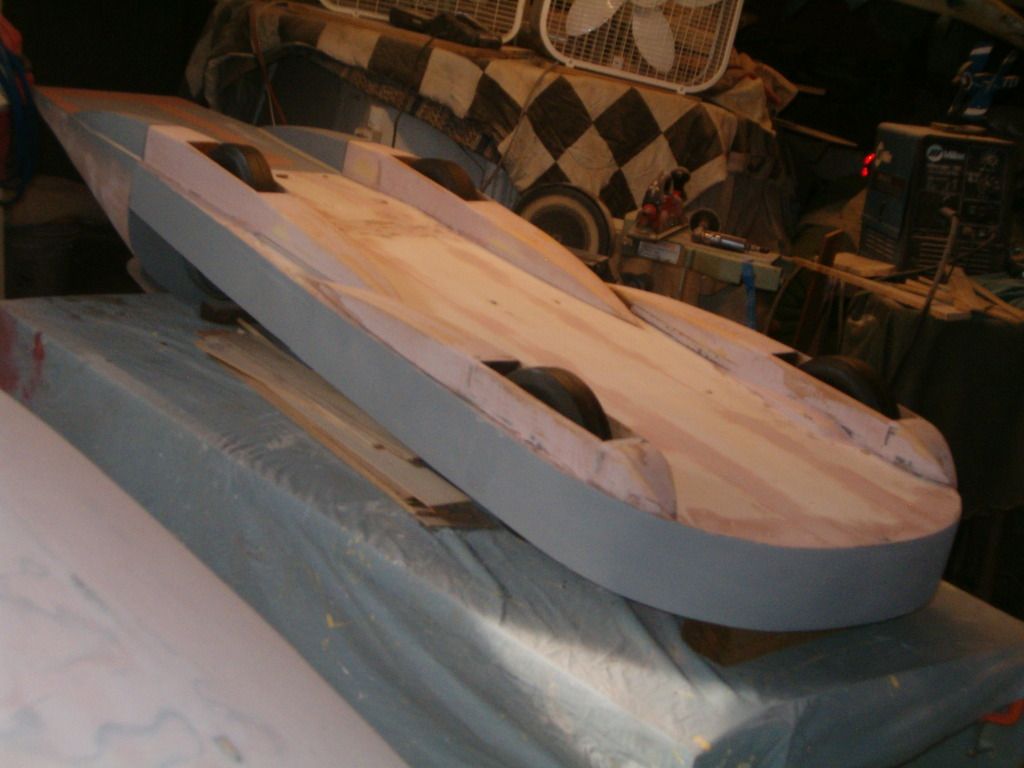
I've got to maintain rather large gaps around the wheels to enable attachment to a ground board,then I'll tape them up best that I can for testing.Georgi,who designed Varna for the IHPV Speed Trials told me that the tiny gap around Varna's wheel fairings constituted a major portion of the bike's drag.
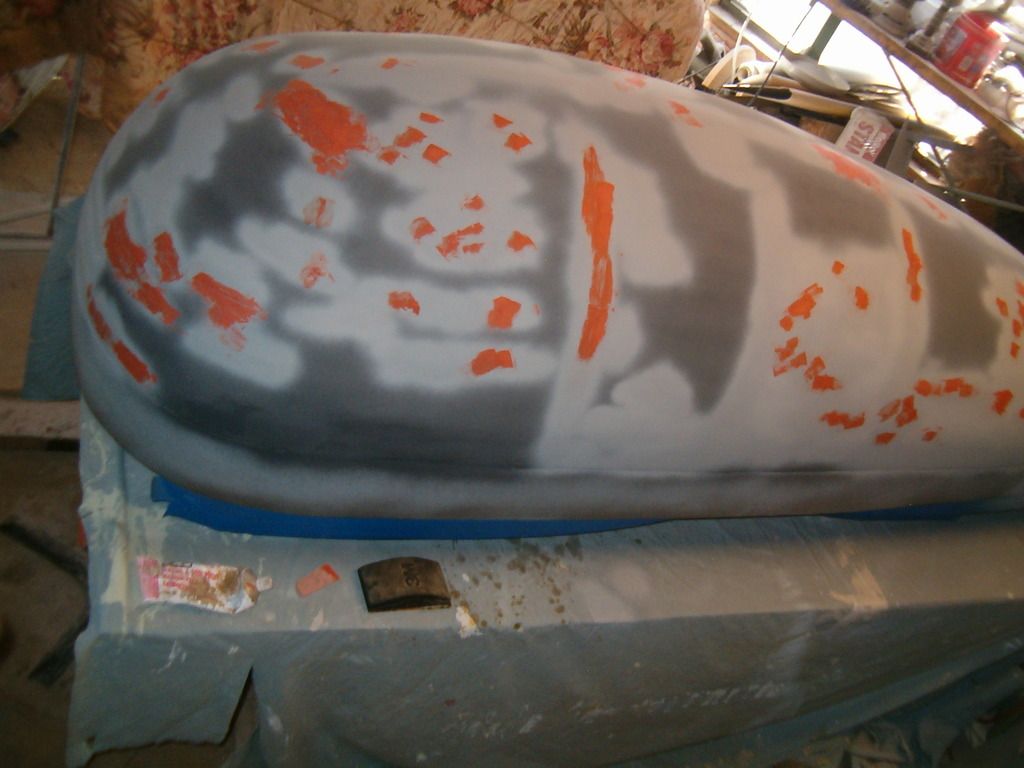
*I had to brutalize the nose of Baby to get the facing material below 'grade',but since,the nose is shaping up fine.A little more Bondo and she'll be ready for 'paint.'
__________________
Photobucket album: http://s1271.photobucket.com/albums/jj622/aerohead2/
|
|
|
|
|
The Following User Says Thank You to aerohead For This Useful Post:
|
|
|
11-06-2016, 07:01 AM
|
#163 (permalink)
|
|
Master EcoModder
Join Date: May 2011
Location: Syracuse, NY USA
Posts: 2,935
Thanks: 326
Thanked 1,315 Times in 968 Posts
|
Looking at the rear wheel fairings, why did you decide to bring them so far forward rather than building a more "template" shape like the front. These are taking up useful ground clearance to hop over sidewalks during driveway entries if it was a real car. I would also be interested to see the drag difference between the sharp air dam you have at the bottom of the front bumper versus a mild radius of 2".
|
|
|
|
|
The Following 2 Users Say Thank You to sendler For This Useful Post:
|
|
|
11-12-2016, 02:01 PM
|
#164 (permalink)
|
|
Master EcoModder
Join Date: Jan 2008
Location: Sanger,Texas,U.S.A.
Posts: 16,404
Thanks: 24,471
Thanked 7,410 Times in 4,800 Posts
|
fairings/airdam
Quote:
Originally Posted by sendler
Looking at the rear wheel fairings, why did you decide to bring them so far forward rather than building a more "template" shape like the front. These are taking up useful ground clearance to hop over sidewalks during driveway entries if it was a real car. I would also be interested to see the drag difference between the sharp air dam you have at the bottom of the front bumper versus a mild radius of 2".
|
*Goro Tamai,in his book,'The Leading Edge',reported that there was a drag advantage to 'exaggerated'-length wheel fairings.The front fairings lead portion is as long as the body allows.Since the rears were less restricted I went ahead and stretched them out,making them double-ended.As far as ground clearance,they respect the SAE Handbook clearances for Approach,Breakover,and Departure angles and should never suffer a ground strike,unless a paving contractor has violated building standards.
*As to the airdam,there will be a splitter added,which has a 1.4-inch radius on the bottom,which according to FIAT research,will satisfy attachment issues there.
__________________
Photobucket album: http://s1271.photobucket.com/albums/jj622/aerohead2/
|
|
|
|
|
The Following User Says Thank You to aerohead For This Useful Post:
|
|
|
11-12-2016, 04:00 PM
|
#165 (permalink)
|
|
Master EcoModder
Join Date: Jan 2008
Location: Sanger,Texas,U.S.A.
Posts: 16,404
Thanks: 24,471
Thanked 7,410 Times in 4,800 Posts
|
update
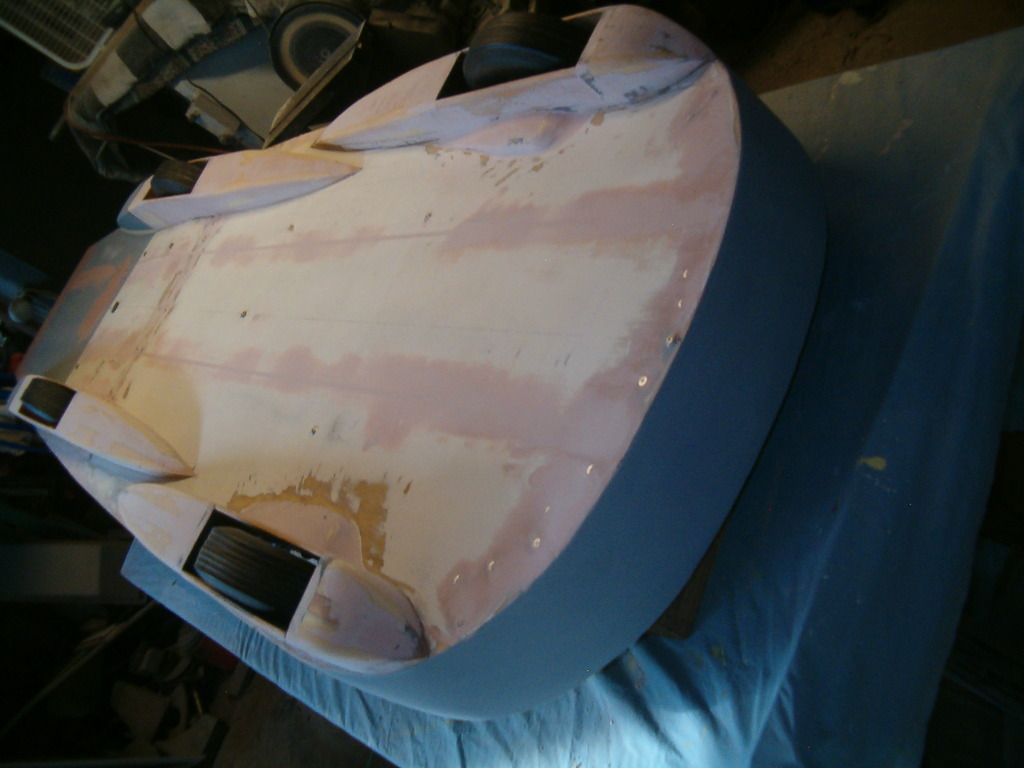
*Thursday warmed up enough that I could paint the belly.
*I let it cure a full 24-hours,then neighbor Bill came over and helped me flip it right-side-up.
* I laid on the upper body and attached the stinger,allowing me to take down work station #2,making room for Spirit modifications.
--------------------------------------------------------------------------
*Looks like Spirit has a zorched Hall-effect pickup coil which requires replacement of the entire distributor body ($295 ).
*I ordered the part,they said expect a week for delivery.
--------------------------------------------------------------------------
*I'll play body shop,adding and subtracting body filler to 'Baby' while I try 'n juggle some other pieces of the puzzle.
*I have some recent photos,but Al's printing books nonstop and I don't think he'll have time to dink around with my stuff today.
__________________
Photobucket album: http://s1271.photobucket.com/albums/jj622/aerohead2/
|
|
|
|
|
The Following User Says Thank You to aerohead For This Useful Post:
|
|
|
11-12-2016, 04:56 PM
|
#166 (permalink)
|
|
Master EcoModder
Join Date: Jan 2008
Location: Sanger,Texas,U.S.A.
Posts: 16,404
Thanks: 24,471
Thanked 7,410 Times in 4,800 Posts
|
recent images
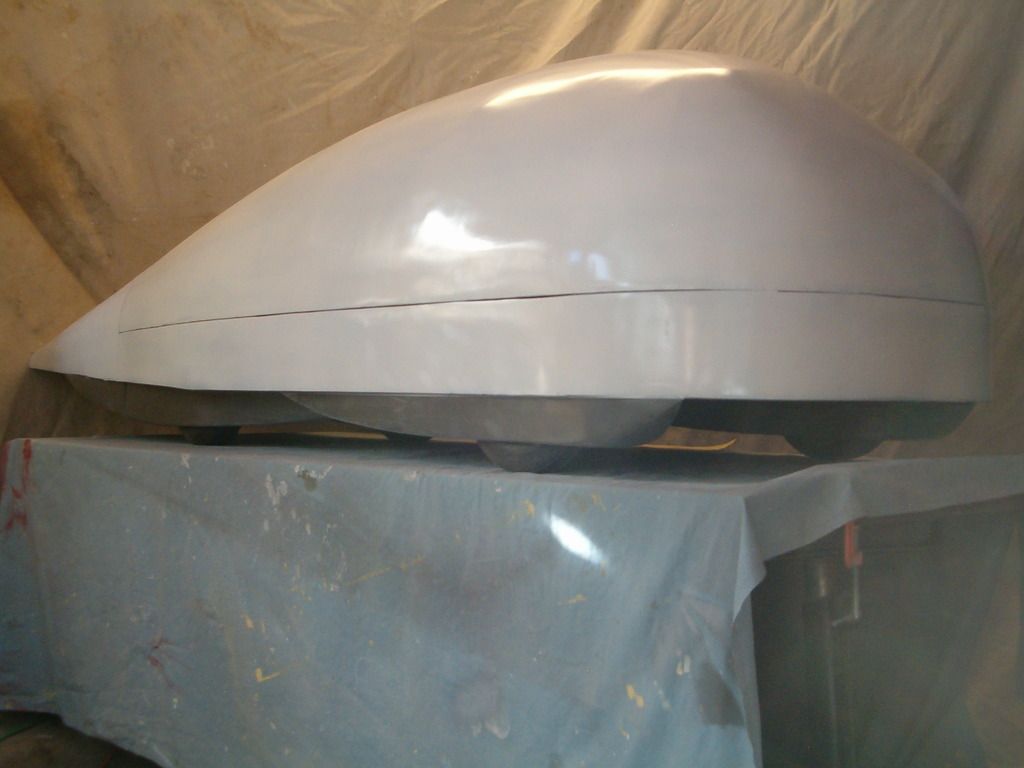
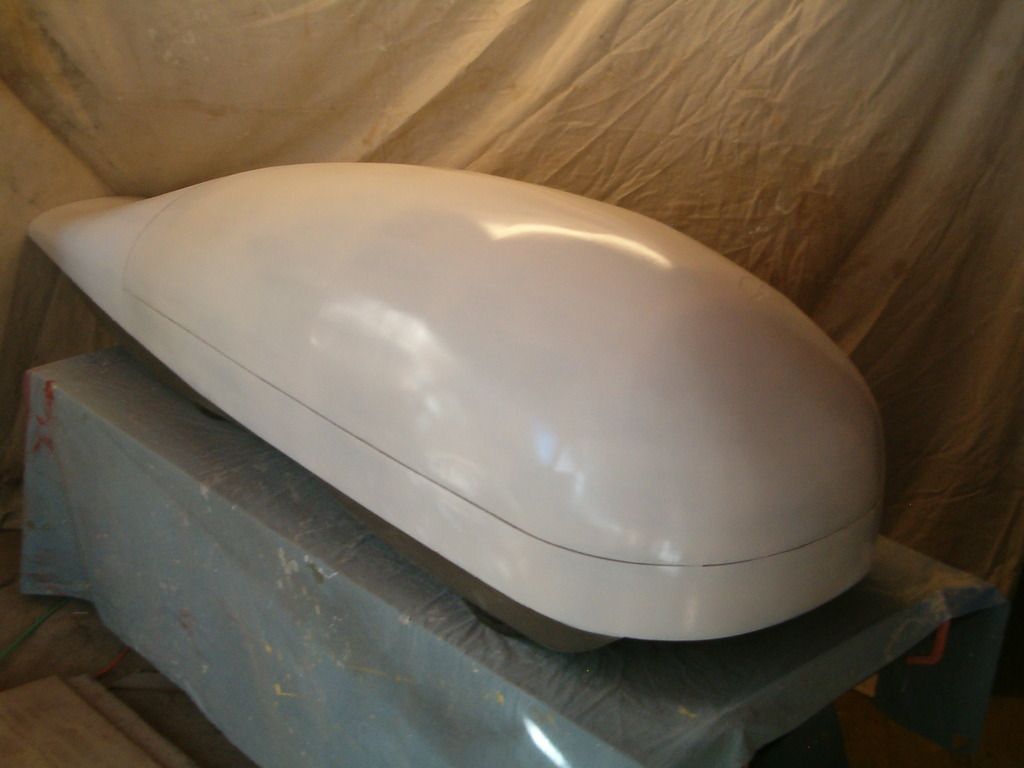
Here's a couple of shots with the primer on
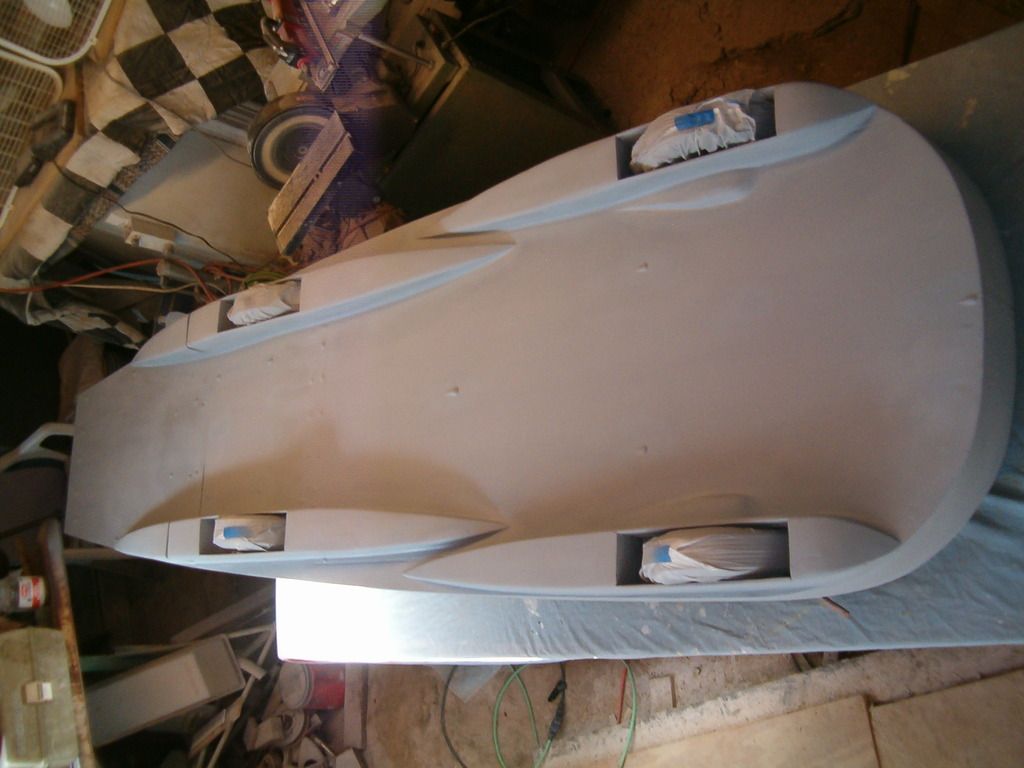
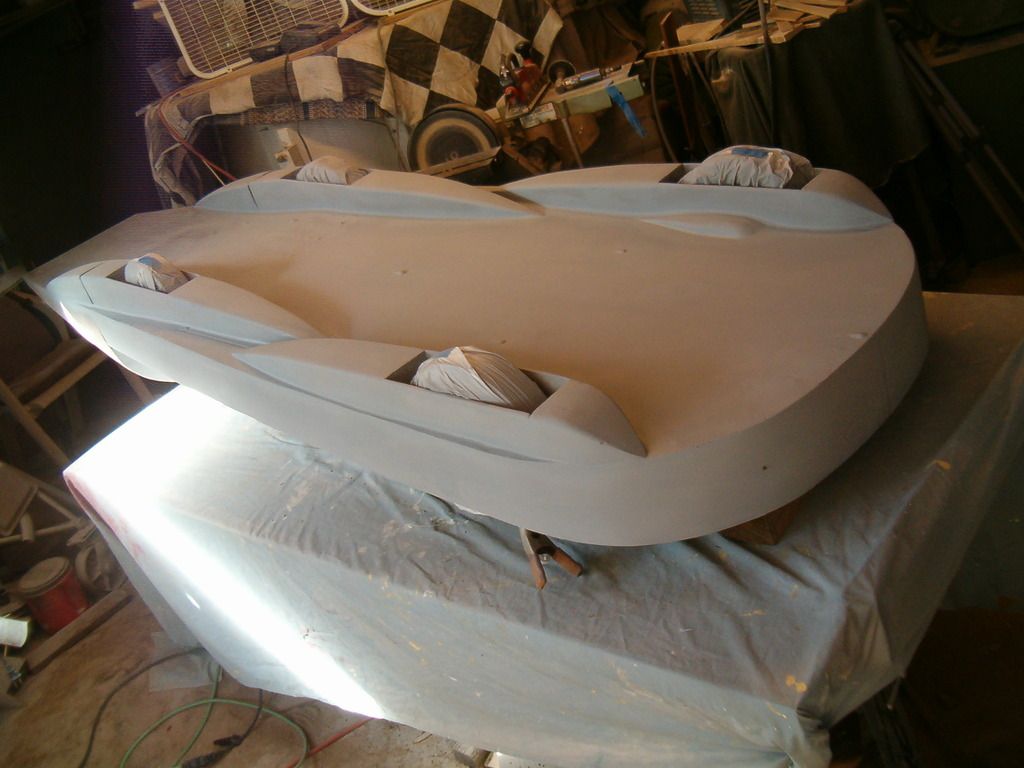
And a single coat of paint
And with the other bits attached
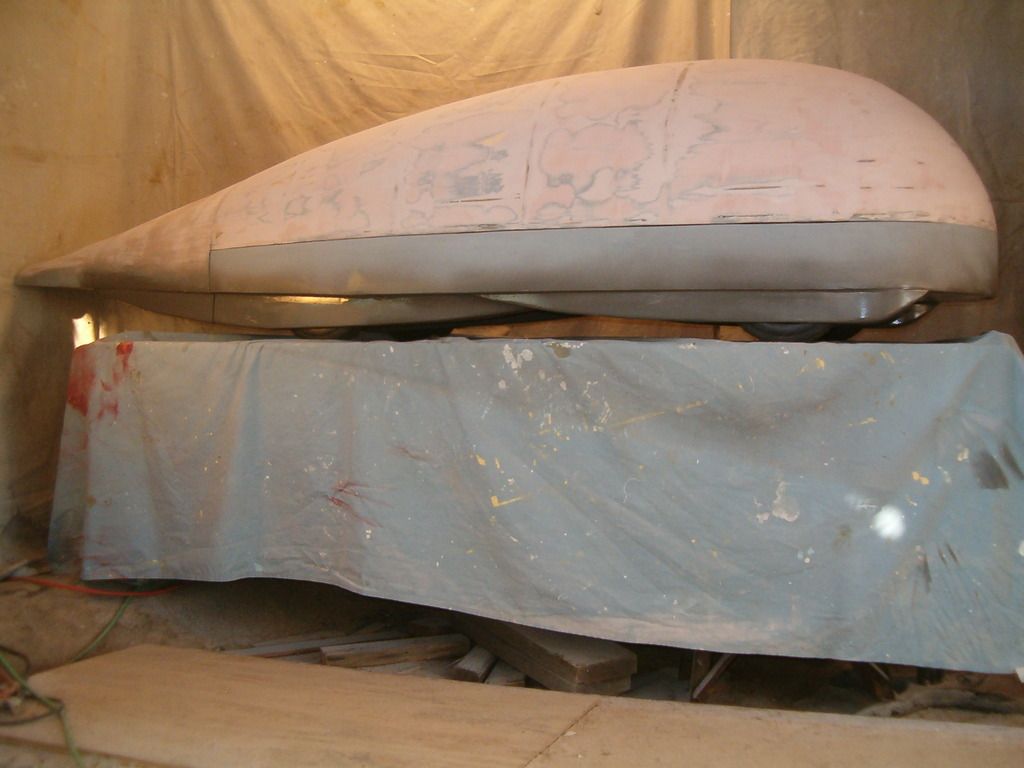
I'd like to color sand the belly and re-shoot with another coat before departure.
__________________
Photobucket album: http://s1271.photobucket.com/albums/jj622/aerohead2/
|
|
|
|
|
The Following 3 Users Say Thank You to aerohead For This Useful Post:
|
|
|
11-13-2016, 03:58 AM
|
#167 (permalink)
|
|
Master EcoModder
Join Date: Dec 2014
Location: Butte, Montana
Posts: 726
Thanks: 208
Thanked 428 Times in 279 Posts
|
Looking good
|
|
|
|
|
11-13-2016, 03:08 PM
|
#168 (permalink)
|
|
T-100 Road Warrior
Join Date: Apr 2008
Location: The Woodlands, TX
Posts: 1,921
Thanks: 3,502
Thanked 1,395 Times in 968 Posts
|
__________________
Dark Aero-The world's first aerodynamic single wheel boat tail!

|
|
|
|
|
The Following User Says Thank You to BamZipPow For This Useful Post:
|
|
|
11-19-2016, 01:19 PM
|
#169 (permalink)
|
|
Master EcoModder
Join Date: Jan 2008
Location: Sanger,Texas,U.S.A.
Posts: 16,404
Thanks: 24,471
Thanked 7,410 Times in 4,800 Posts
|
$55
Quote:
Originally Posted by BamZipPow
|
Having a computer would have saved the difference of $320. 
__________________
Photobucket album: http://s1271.photobucket.com/albums/jj622/aerohead2/
|
|
|
|
|
11-19-2016, 04:29 PM
|
#170 (permalink)
|
|
Master EcoModder
Join Date: Jan 2008
Location: Sanger,Texas,U.S.A.
Posts: 16,404
Thanks: 24,471
Thanked 7,410 Times in 4,800 Posts
|
update
Dew and cold temps are slowing progress.
I've managed to create the fiberglass Viper windshield and the areas for the hood blister extensions are prepped and ready.
I got a seal coat of paint on the upper body.I had white enamel laying around and I like it a lot better than the dark gray,even though the gray would show smoke traces better.
Here is the Dodge Viper glass taped onto Spirit,with cardboard and tape integrating in to the A-pillar/header area.3-coats of carnauba wax provides a clean release.

1-layer of matt,sandwiched between a layer of cloth
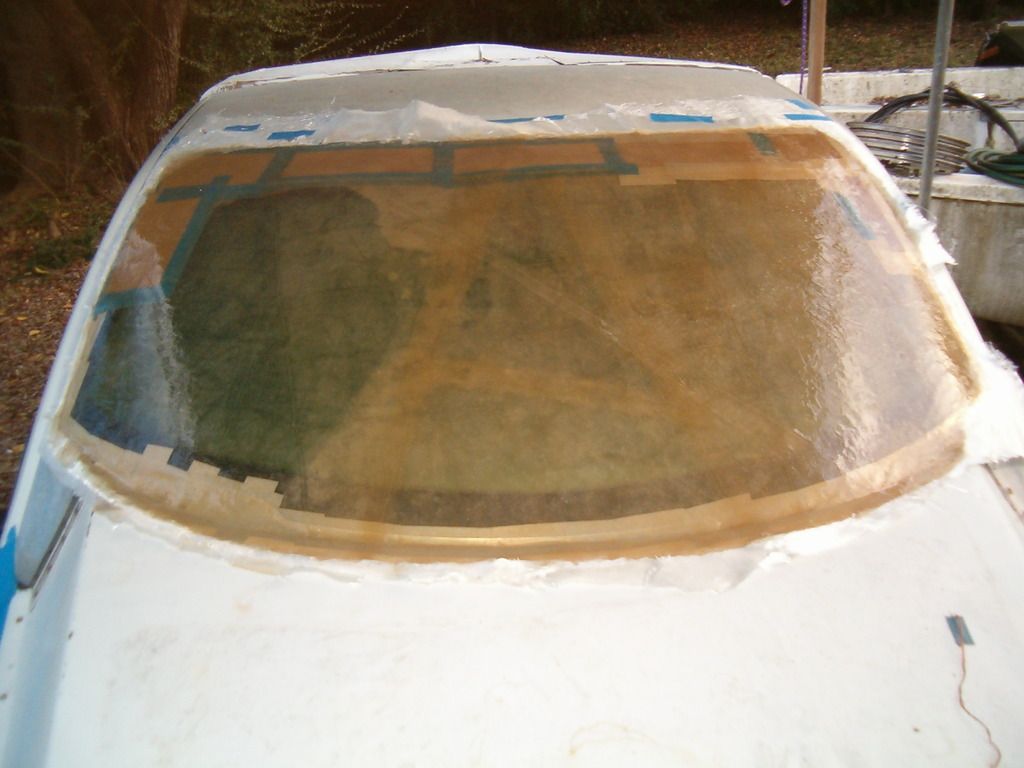
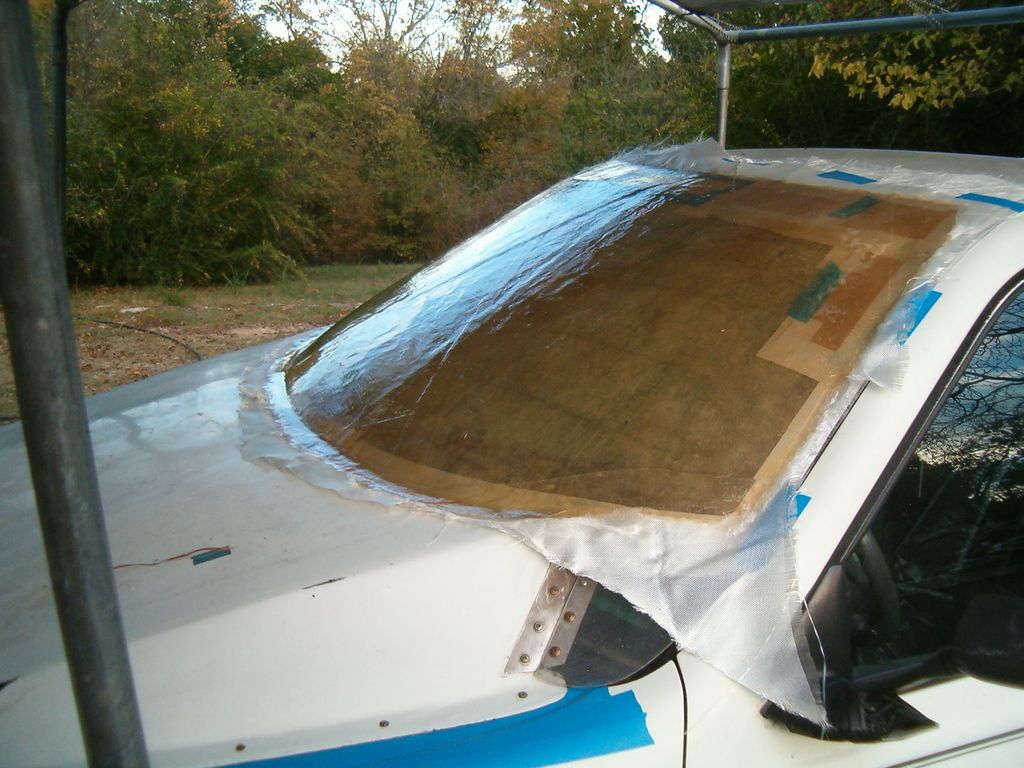
Here,glazing putty fills in minor imperfections,followed by 220-grit paper.
Then 3-rattle cans of Tractor Supply's Farm & Ranch enamel
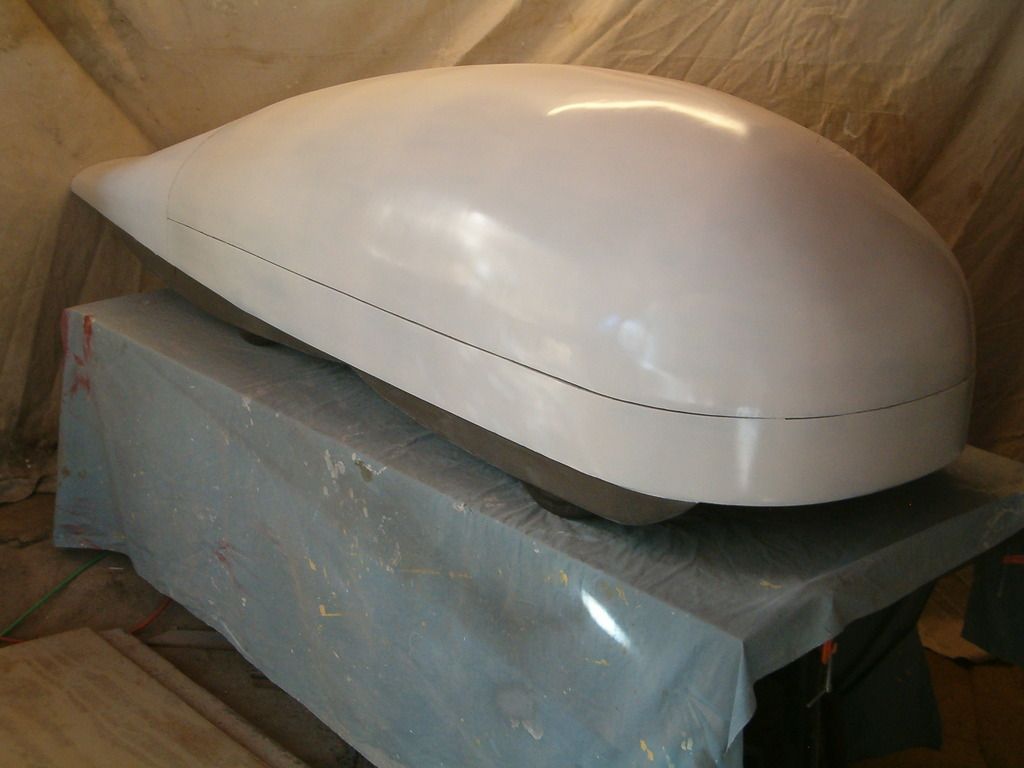
I'll wet sand this seal coat with #400, re-shoot, and call it good.
__________________
Photobucket album: http://s1271.photobucket.com/albums/jj622/aerohead2/
|
|
|
|
|
The Following 8 Users Say Thank You to aerohead For This Useful Post:
|
|
|