 10-16-2012, 01:30 PM
|
#101 (permalink)
|
|
Master EcoModder
Join Date: Sep 2011
Location: Laval, QC
Posts: 528
Thanks: 311
Thanked 93 Times in 69 Posts
|
Very nice shelter! How long did it take to build it?
__________________
 Trollinsight Modding Thread Trollinsight Modding Thread
 2000 Honda Insight MT Silverstone Metallic
 #95 (CAN) 131K mi. 81.7 Lmpg
Best Tank : 100.06 MPG (US) | 120.2 MPG (Imp) | 2.35 L/100Km | 42.54 Km/L
Best commute : 130.8 MPG (US) | 157.1 MPG (Imp) | 1.8 L/100Km | 54.84 Km/L
Best Trip : 111.8 MPG (US) | 134.3 MPG (Imp) | 2.1 L/100Km | 47.53 Km/L
|
|
|

|
 Today Today
|
|
|
|
 Other popular topics in this forum...
|
|
|
|
 10-16-2012, 09:58 PM
|
#102 (permalink)
|
|
Master EcoModder
Join Date: May 2008
Location: Maynard, MA Eaarth
Posts: 7,908
Thanks: 3,475
Thanked 2,953 Times in 1,846 Posts
|
I built all in one day, by myself. 
On the CFD model - I realized I need to add lens on the headlights.  I'm hoping that a more detailed and high resolution test shows more - and maybe gives an estimate of the Cd, too. |
|
|

|
 10-18-2012, 08:37 PM
|
#103 (permalink)
|
|
Master EcoModder
Join Date: May 2008
Location: Maynard, MA Eaarth
Posts: 7,908
Thanks: 3,475
Thanked 2,953 Times in 1,846 Posts
|
Okay, I've been gluing 6 or 8 inches a day, and now I only have 11 inches left to glue! Three 2 inch layers are all cut and ready to go, and the five 1 inch thick section at the very back of the car still need to be cut. The end of major gluing is within sight!
I'll upload pictures when I can -- I'm running Falcon CFD at the moment and my computer is a little sluggish.
|
|
|

|
|
The Following 3 Users Say Thank You to NeilBlanchard For This Useful Post:
|
|
 10-18-2012, 09:12 PM
|
#104 (permalink)
|
|
EcoModding Lurker
Join Date: Jul 2009
Location: Ohio
Posts: 42
Thanks: 12
Thanked 2 Times in 2 Posts
|
I can't wait to see it all in one piece, sitting horizontal !
|
|
|

|
 10-19-2012, 07:44 AM
|
#105 (permalink)
|
|
Master EcoModder
Join Date: May 2008
Location: Maynard, MA Eaarth
Posts: 7,908
Thanks: 3,475
Thanked 2,953 Times in 1,846 Posts
|
Of course I still have to glue the hatch door and the wheels skirts, too -- and then the Great Blue Dust Storm (aka shaping the foam) has to happen. I kinda' need to move the chassis inside the garage to do that -- which will involve moving out the *stuff* inside the garage and rigging up lights, etc. I think I need a larger (and quieter) shop vacuum.
|
|
|

|
|
The Following 3 Users Say Thank You to NeilBlanchard For This Useful Post:
|
|
 10-19-2012, 03:13 PM
|
#106 (permalink)
|
|
EcoModding Lurker
Join Date: Jan 2010
Location: Sacramento
Posts: 28
Thanks: 3
Thanked 3 Times in 3 Posts
|
Wow, it's actually happening! I will be following the progress, good luck!
|
|
|

|
 10-19-2012, 10:35 PM
|
#107 (permalink)
|
|
Master EcoModder
Join Date: May 2008
Location: Maynard, MA Eaarth
Posts: 7,908
Thanks: 3,475
Thanked 2,953 Times in 1,846 Posts
|
Okay, today was decidedly mixed -- I cut the last two sheets of foam! Woohhoo!! BUT, the toothed timing belt on the X-axis (which has the big job of moving the entire sheet of foam along the 8' length) started to tighten up, and then to "climb" off the side of the pulleys on the main rollers... It stretched and frayed, but it did not break, at least. What it did do though was skip a number of steps, which caused several parts to be cut incorrectly and one part to be totally messed up. :-(
I'll try to cut that one by hand (I have the mirror piece to trace) and I'll try to repair the 3 or 4 damaged pieces. That and my computer was pausing, which made me catch my breath every time. It did not go smoothly... Worst case, I buy a replacement belt and cut that one sheet again.
I may have caused this by not vacuuming out the dust, and it may have packed itself on the pulley causing it to over tighten. Or maybe the idler bearings came loose and then got out of alignment? I'll look at it as soon as I can.
Pictures from yesterday:
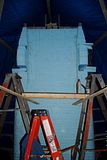 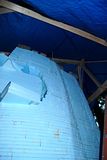 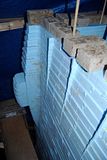 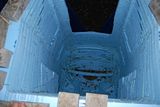 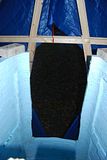 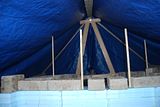 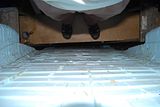
Here are the stacks of the last three 2" layers ready to be glued (portions of the rear wheels are on the right). There are five 1" layers then to be glued (because the tapers are much more abrupt). Those are on the 2 sheets I (tried to) cut today.
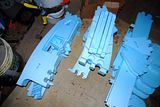
Here is (about) the 10th large bag of broken up scraps sitting next to enough foam sheet leftovers to fill an 11th:
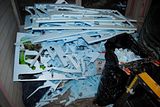
I snap this all into 1-2" pieces so it fits more into each bag, and luckily they can be put out with the regular trash pick up; costing just $2/bag. Before I got into this process, I thought I would have to truck things away and pay a lot more than that.
I will likely finish the gluing on the main chassis over the weekend. Then the hatch door and the wheel skirts will need to be glued. And then the shaping begins... :-)
Last edited by NeilBlanchard; 10-19-2012 at 10:48 PM..
|
|
|

|
|
The Following 2 Users Say Thank You to NeilBlanchard For This Useful Post:
|
|
 10-20-2012, 12:12 PM
|
#108 (permalink)
|
|
Wiki Mod
Join Date: Nov 2009
Location: Midland MI, USA
Posts: 2,042
Thanks: 228
Thanked 304 Times in 210 Posts
|
What about taking a propane torch and warming but not burning the foam to reduce its size?
__________________

|
|
|

|
 10-20-2012, 01:57 PM
|
#109 (permalink)
|
|
Master EcoModder
Join Date: Aug 2012
Location: northwest of normal
Posts: 29,432
Thanks: 8,375
Thanked 9,129 Times in 7,538 Posts
|
Put two insulators and a piece of Ni-Chrome wire in a coping saw frame and run a comfortable length of wire off the handle to the transformer from a model train set and you have a portable hot-wire tool. (I will produce a picture if you can prompt me past my inherent sloth)
Carve the first 60% and sand the last 40%.
|
|
|

|
 10-20-2012, 11:33 PM
|
#110 (permalink)
|
|
Master EcoModder
Join Date: May 2008
Location: Maynard, MA Eaarth
Posts: 7,908
Thanks: 3,475
Thanked 2,953 Times in 1,846 Posts
|
I glued another 8" today -- the rear door opening has been started, and the is only another 3" to go, and then the bumper and the overhang of the hatch door.
I'm going to repair the Phlatprinter 3's X-axis belt and buy another sheet of foam (it's less than $12) and cut another copy of the sheet. To many hassles to try and do all that hand cutting.
Only the portions that have a lot of taper have very much foam to remove. Most of the car have just ~1/8" to come off -- the random orbital sander with 50 grit or 80 grit pads with make fast work of that; and it has its own dust bag or you can use a shop vacuum attached to it to collect most of the dust. The pads have 8 holes that suck the dust right from the surface, and it works pretty well, really.
Last edited by NeilBlanchard; 10-21-2012 at 08:33 AM..
Reason: typo
|
|
|

|
|
The Following 2 Users Say Thank You to NeilBlanchard For This Useful Post:
|
|
|