 07-11-2012, 08:30 PM
|
#11 (permalink)
|
|
Deadly Efficient
Join Date: Jun 2008
Location: Goshen, Indiana
Posts: 1,234
Thanks: 134
Thanked 176 Times in 91 Posts
|
Congrats on the next big step!
Now I can say " I was there when it all began..." 
What kind of glue will you be using?
__________________
-Terry
|
|
|

|
|
The Following User Says Thank You to Tango Charlie For This Useful Post:
|
|
 Today Today
|
|
|
|
 Other popular topics in this forum...
|
|
|
|
 07-11-2012, 09:46 PM
|
#12 (permalink)
|
|
Ultimate Fail
Join Date: Feb 2008
Location: Austin,Texas
Posts: 3,585
Thanks: 2,872
Thanked 1,121 Times in 679 Posts
|
Neil, have you succeeded in producing a model that you can do CFD testing on ?
It would be nice to know if there is some unforeseen area that needs to be addressed before you go ALL THE WAY.
It would be a lot easier to modify it now then later, eh ?
Also, I just know you are aching to get a somewhat accurate Cd figure ( I know all of us are ! )
|
|
|

|
 07-11-2012, 11:12 PM
|
#13 (permalink)
|
|
Master EcoModder
Join Date: May 2008
Location: Maynard, MA Eaarth
Posts: 7,908
Thanks: 3,475
Thanked 2,953 Times in 1,846 Posts
|
I'm going to be using waterproof carpenter's glue -- the light brown Titebond. There will be lots of gluing -- the jigsaw joints first, then the 2 copies of the same cut pieces, then the adjacent layers; using the 1/2" holes with alignment dowels. I'm planning on starting at the nose and I should be able to glue up the first 8-12" (at least!) pretty soon.
I started on the smoother SU model using the sections as the starting point, and I found that some parts were less difficult and some were very difficult. I am not sure if I can put the effort into do the new SU, when building the real thing is starting...
I got 6 more sheets cut today -- 10 done and 83 to go! I had "chauffeur" duties for my son today (he was working at my in-laws house), and I had to relearn the process of getting the g-code files. I took the time to correct *most* of the minute drafting glitches already, so doing enough to produce sheets should be relatively quick in the morning. Tomorrow should be 8 or 10 more I hope.
|
|
|

|
|
The Following 3 Users Say Thank You to NeilBlanchard For This Useful Post:
|
|
 07-12-2012, 10:36 PM
|
#14 (permalink)
|
|
Master EcoModder
Join Date: May 2008
Location: Maynard, MA Eaarth
Posts: 7,908
Thanks: 3,475
Thanked 2,953 Times in 1,846 Posts
|
I cut 8 more sheets of foam today -- just 75 to go! I've got 6 sheets left from the first buy (3 were scrapped during troubleshooting and a glitch), so I'll be off to the store to buy some more next week. I'll starting gluing tomorrow...
|
|
|

|
|
The Following 2 Users Say Thank You to NeilBlanchard For This Useful Post:
|
|
 07-12-2012, 10:49 PM
|
#15 (permalink)
|
|
MPGuino Supporter
Join Date: Oct 2010
Location: Hungary
Posts: 1,808
iNXS - '10 Opel Zafira 111 Anniversary Suzi - '02 Suzuki Swift GL
Thanks: 831
Thanked 709 Times in 457 Posts
|
Awesome! This is inspiring.
|
|
|

|
|
The Following User Says Thank You to t vago For This Useful Post:
|
|
 07-13-2012, 10:12 PM
|
#16 (permalink)
|
|
Master EcoModder
Join Date: May 2008
Location: Maynard, MA Eaarth
Posts: 7,908
Thanks: 3,475
Thanked 2,953 Times in 1,846 Posts
|
|
|
|

|
|
The Following 3 Users Say Thank You to NeilBlanchard For This Useful Post:
|
|
 07-14-2012, 08:18 AM
|
#17 (permalink)
|
|
MPG Militia HMV-25E80+A
Join Date: Mar 2011
Location: Vermont, USA
Posts: 823
Thanks: 191
Thanked 144 Times in 98 Posts
|
And I thought I had a lot of smoothing to do  .
Starting to look like a car  . Glad to see you are making progress. |
|
|

|
 07-14-2012, 09:09 AM
|
#18 (permalink)
|
|
Master EcoModder
Join Date: May 2008
Location: Maynard, MA Eaarth
Posts: 7,908
Thanks: 3,475
Thanked 2,953 Times in 1,846 Posts
|
The finished surface will be close to the base of each of the steps -- I was trying to have all of the pieces have an excess of material. The car is "hidden inside" the stacked layers. ;-)
So yes, I will be making a lot (more) blue dust. My little (2 gallon?) shop vacuum gets filled up after cutting about 4 or five sheets in the CNC, and sculpting the steps off with a Stanley SurForm (the rasp made like a cheese grater) will make a lot more. I'm thinking of rigging the SurForm to the vacuum hose will save me a LOT of cleanup afterward.
I'll be doing a lot more gluing today! |
|
|

|
|
The Following 2 Users Say Thank You to NeilBlanchard For This Useful Post:
|
|
 07-14-2012, 10:25 AM
|
#19 (permalink)
|
|
Deadly Efficient
Join Date: Jun 2008
Location: Goshen, Indiana
Posts: 1,234
Thanks: 134
Thanked 176 Times in 91 Posts
|
Wow! This is so cool! 
After all the shaping, will you be using carbon fiber cloth? E-glass? S-glass? Vacuum bagging? Will there be structural members imbedded, or are you going for full monocoque?
__________________
-Terry
|
|
|

|
 07-14-2012, 09:11 PM
|
#20 (permalink)
|
|
Master EcoModder
Join Date: May 2008
Location: Maynard, MA Eaarth
Posts: 7,908
Thanks: 3,475
Thanked 2,953 Times in 1,846 Posts
|
I think I will be using fiberglass (I'm not sure what E-glass and S-Glass are?) and probably not vacuum bagging it. I'm thinking 2 layers at least inside and out, and yes mostly a monocoque structure with gusseted mounting points for a subframe in the front to hold the suspension and provide a crumple structure. The rear may have a very minimal subframe that cradles the back of the car. I'm thinking the rear suspension will be a double trailing arm, and a lateral link for side loads. The lateral links could be inside of the cross member on the cradle. I left a space in the battery cell bays in the floor for this.
I will be learning as I go, especially with the the fiberglass. I'm following 3-wheeler's lead by using waterproof wood glue rather than epoxy. Fiberglassing all over the inside of the hood area, and the inside of the battery cell bays and the inside of the car will be particularly interesting. I may well have to build various rails out of foam to hold the hold thing on it's sides and upside down, etc. and maybe even a scaffolding? I have to leave some areas uncovered until things like the suspension get designed and installed and then fiberglass those areas.
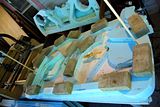
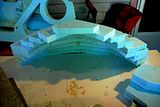
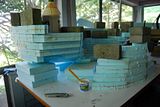
Here's some pictures of today's progress:
  
I added 6 more layers; minus two pieces that I have not cut yet. This happened because I was trying to pack pieces as efficiently as possible, and two pieces are on a sheet that is 7 ahead in the sequence... I'll buy more foam as soon as I can (I'm waiting to be paid) and I'll cut that far and then keep gluing. In the meantime, I need to help my brother finish rebuilding his bulkhead AND there is the small matter of emptying out my little 1 car garage to make space to build more that 3 feet of CarBEN -- otherwise it will be trapped on my screen porch...
The third picture is taken with the main piece "nose down" so the the additional pieces are on top and the dowel rods can be left in.
I also put together the pieces of the hood so far, but the final assembly of that will have to wait until the hood opening gets fully formed on the car. The hood doesn't have alignment pins, so it has to be done by fitting it. Next time I'll put in the alignment pin holes.
The main piece I've glued together is amazingly light and strong -- it will get significantly lighter after the shaping is done, though it will probably be less rigid. I think it weighs less than 8 pounds? I'll try to weight it tomorrow, as will as get a better picture. The fiberglass will obviously add both weight and strength.
This is going to be a lot of fun!
Last edited by NeilBlanchard; 07-14-2012 at 09:44 PM..
|
|
|

|
|
The Following 3 Users Say Thank You to NeilBlanchard For This Useful Post:
|
|
|