So, guess who's painting all his trim? This is mainly a DIY for my site but I like to post my stuff up here since this is where I got my start writing DIYs,

, nothing to do with FE of course.
Anyway, it's unfinished, but big, so working in parts!
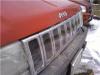
Before shot:

Before bumper:

Using two or three cans of this for the whole deal:

Piece of coroplast over a trashcan in the garage, my painting center:

An MID picture in here for no reason, that comes out to ~52 mpg for a 3 mile cold start, not bad:

Start by taking the two screws that hold the corner lights in and taking the lights out:


Make sure to store everything nicely:

Tools needed, that socket is a 10mm:

Take these two out on each side:

And this one on the bottom, this will allow you to remove the t-bar:

Get these two bolts gone:

Two of these on each side come out, might have to move the wheel a bit:

Two of these corner jobs:

Move the t-bar to expose these three things:

Start pulling the bumper off and unplug the bumper lights:

But it somewhere not scratchy:

To get at the fenders undo these two:

These three up top:

This one in the crack. Use an open-ended wrench and open the door, stand outside and reach over and do it from the crack, you'll see what I mean:

Get these screws on that bottom trim piece:

The bolt on the bottom as well:

When it's off hit up these two last bolts for the fender:

Get bored and work on this piece of trim instead:

Blast it with the hose, the suds, the hose:

Then clean it with alcohol and let it dry:

Here it is drying:

Work on the rocker panel while it dies, these plastic screws suck, you need to be very careful, especially with the ones that are more exposed:

Yay, I stripped one:

Grabbed the edge with some pliers and turned it out like that. I always leave the last few threads in the thing and use them to pull the whole thing out as one:

Some more up top:

Even more up top:

Now, get bored of that and work in the other piece that on the door. Take off this 10mm plastic nut:

This is how it clips in along the bottom, the first task is to unclip:

Half unclipped first:

Go ahead and fully unclip and then push up to get it off the metal rail:

Get bored again and decide to finish the fender, undo all the plasticy junk in the wheel well:

Fender out:

Flip it over to expose the two clips for the trim piece, pop them with some pliers:

Yay, it's so pretty:

Hit that first piece with some paint, drying at this point:

Not that this is a vertical line spray, you need to hold the can vertical to keep it going and work in a smooth, sweeping motion:

With time, there will be more.


 Today
Today