Go Back   EcoModder Forum > EcoModding > Aerodynamics
Register Now
 Register Now
 

Reply  Post New Thread
 
Submit Tools LinkBack Thread Tools
Old 01-01-2011, 10:01 PM   #51 (permalink)
Ecomodder en route
 
KITT222's Avatar
 
Join Date: Jan 2010
Location: South of the Cities, Minnesota
Posts: 190

Vib - '04 Pontiac Vibe base
Thanks: 10
Thanked 9 Times in 7 Posts
I emailed the seller, saying all you needed was the hatch, not the glass or wiper or any of that. Anything to help out a Vibe or Matrix owner. Vibes are endangered (and are actually now a Lexus hybrid, so whatever happened there is odd, though it also means there is a drop-in hybrid system for our cars), so we have to stick together!

Styrofoam can get to 95 degrees, I found out in a quick Google search, so I'd say you should maybe make a metal shield, to absorb/deflect the heat, or make that part of the boat tail metal. The other option it cutting the exhaust back, and pointing it down, and away. Or, if you have some 'scrap' foam, put it right next to your exhaust, drive with it for a while, and see what happens. Nothing would probably happen, since the bumper right above it has some foam behind some plastic over the metal bumper.

  Reply With Quote
Alt Today
Popular topics

Other popular topics in this forum...

   
Old 01-01-2011, 10:29 PM   #52 (permalink)
Wiki Mod
 
Weather Spotter's Avatar
 
Join Date: Nov 2009
Location: Midland MI, USA
Posts: 2,042

Max - '14 Ford C-Max SEL
Thanks: 228
Thanked 304 Times in 210 Posts
I was thinking of the metal shielding, cutting would work, just voids the reversible principle I work under. I saw the foam under the bumper, there is a 1-2" gap to the plastic bumper and some air flow through there as well.

I think I can make it work, half of the exhaust pipe is lower then the boat tail and there is 3-4" from exhaust tip to tail so a small redirect should work.

Have you looked at doing a belly pan from the axle back to the bumper? I think I could slide a piece of metal into the axle area (U shaped piece) and run it back to the boat tail. I am not sure about the mount point on the front of that piece (axle). Ideas? Would that act as a belly pan or a air scoop (aka does the air look to you like it goes under or over the axle)?
__________________
  Reply With Quote
Old 01-01-2011, 11:11 PM   #53 (permalink)
Ecomodder en route
 
KITT222's Avatar
 
Join Date: Jan 2010
Location: South of the Cities, Minnesota
Posts: 190

Vib - '04 Pontiac Vibe base
Thanks: 10
Thanked 9 Times in 7 Posts
From what I saw, it looks like the rear axle is actually angled down to MAKE air go below the axle. It's the same on my step-moms Corolla, just a lot more cluttered around the axle than in the Vibe.
  Reply With Quote
Old 01-01-2011, 11:22 PM   #54 (permalink)
Wiki Mod
 
Weather Spotter's Avatar
 
Join Date: Nov 2009
Location: Midland MI, USA
Posts: 2,042

Max - '14 Ford C-Max SEL
Thanks: 228
Thanked 304 Times in 210 Posts
I might make a back end belly pan then to smoothly transition to the boat tail.

Any ideas or tips for removing the hatch?
__________________
  Reply With Quote
Old 01-02-2011, 10:37 PM   #55 (permalink)
Wiki Mod
 
Weather Spotter's Avatar
 
Join Date: Nov 2009
Location: Midland MI, USA
Posts: 2,042

Max - '14 Ford C-Max SEL
Thanks: 228
Thanked 304 Times in 210 Posts
Day 3

Well after Church I went back to my boat tail build project (must keep priorities in order).

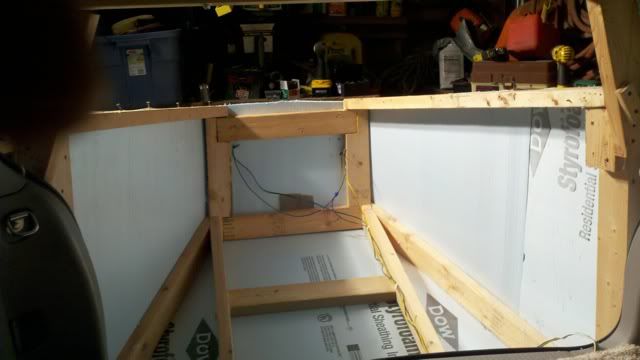
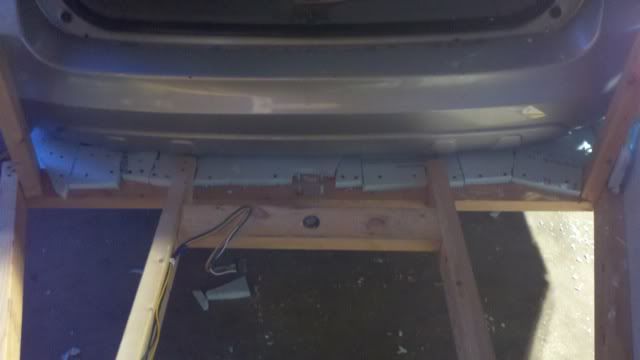
First I took of the boat tail and removed the hatch. Mechanically this is an easy task, 4 bolts and two shocks. Electrically it was a bit more complex. For this I had to find the nearest connection for all the hatch stuff. This turned out to be right behind the license plate. To get at it I had to take apart the plastic inner half of the hatch. Then I had to snake out the wiring. I pulled in two pull cords so I can reattach the wires if I need to down the road.

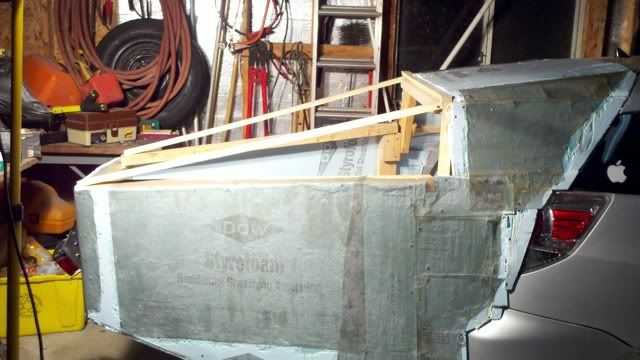
once that was out I reattached the boat tail and started work.

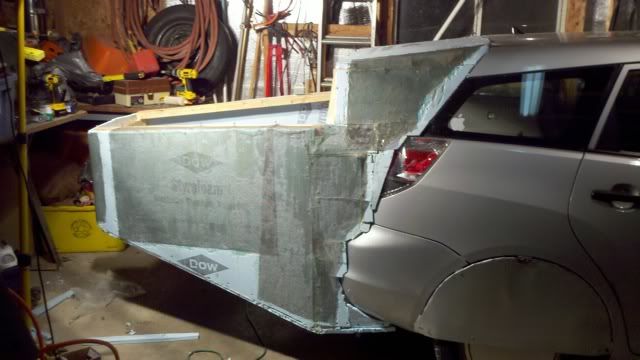
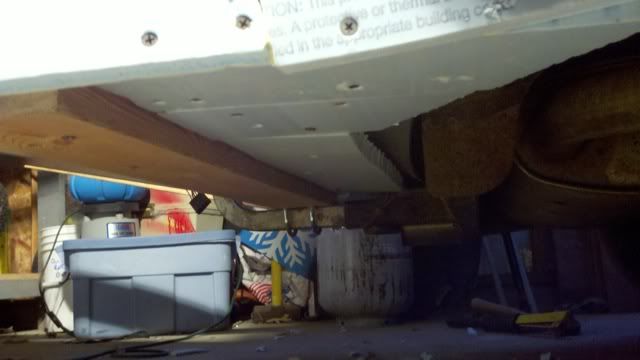
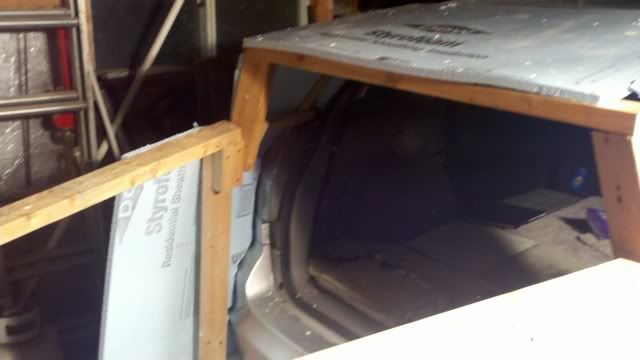
I started working on the bottom trying to smooth out the connection point from car to boat tail. I do not have a belly pan so this is harder then it should be. From what I can see the old air flow pattern is rather messy from the axle back (next project).

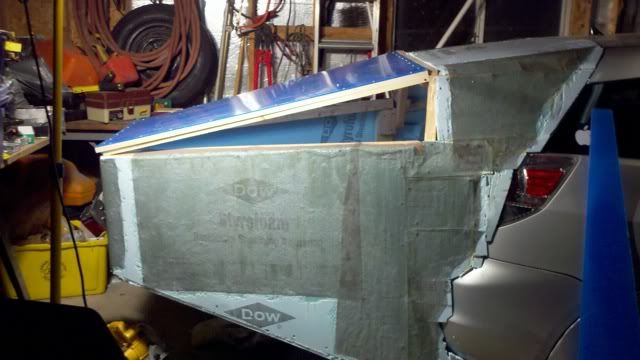
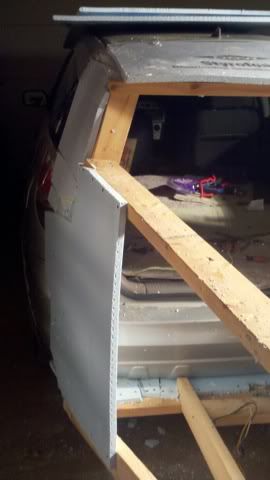
I want to make it flat from the car to the main support piece that attaches to the hitch. So I started adding foam from the top edge of the board till they touched the car.


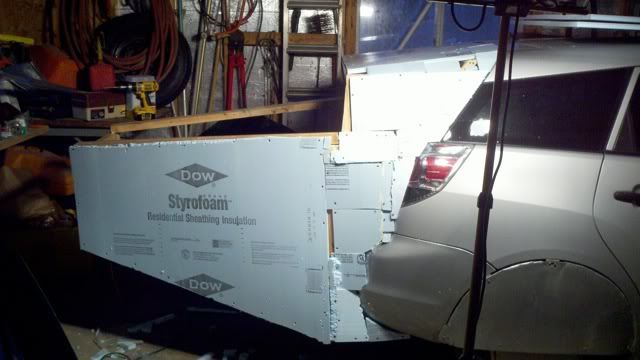
Then I added two layers from the bottom. It is not even with the support beam but I will fix that when I take it off for fiber-glassing. It will need to be a tapered piece and I will make that when I am not on my back.
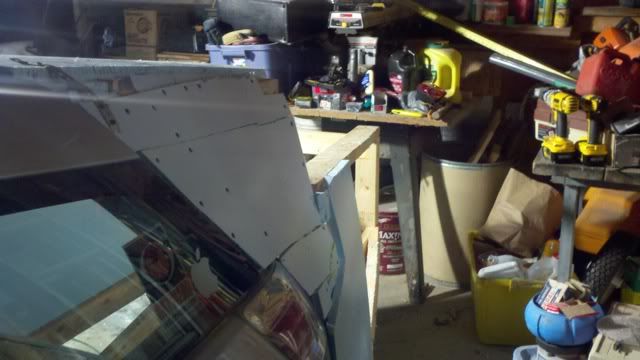

exhaust side:


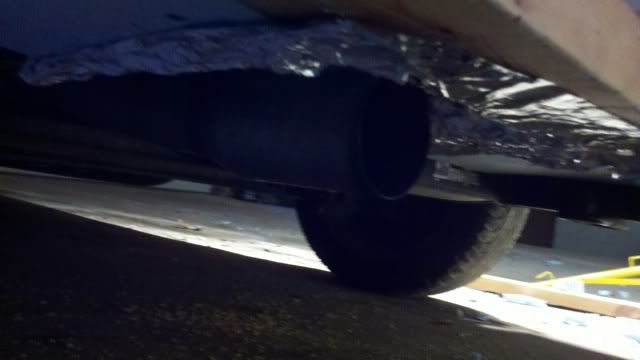
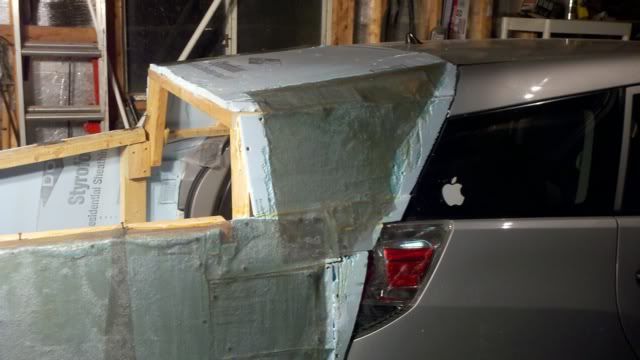
Next I started on the passenger side from where I left off yesterday to tie it in to the bottom.


After that I took a break and watched the 4-7pm football game

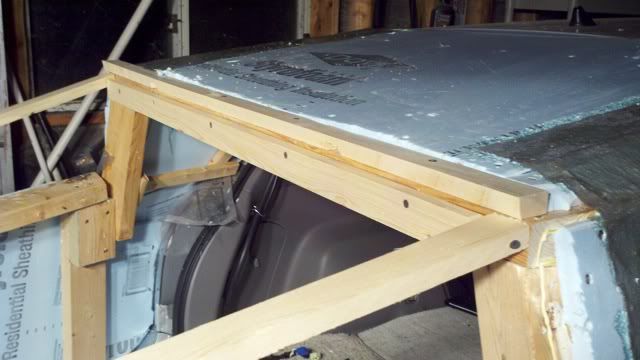
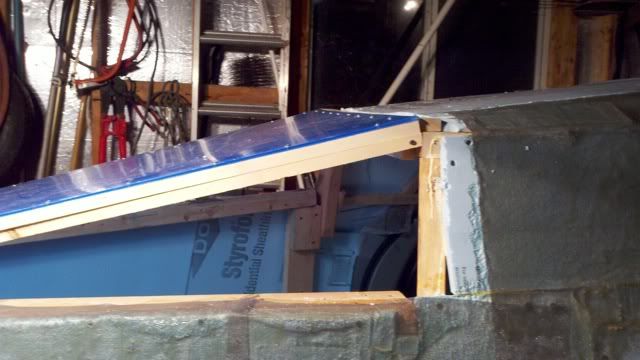
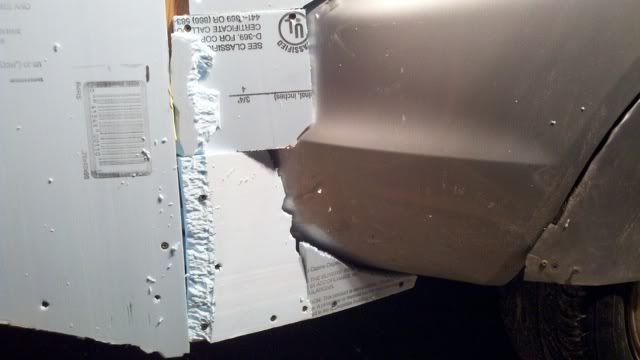
When I returned, I started on the drivers side car to boat tail transition. I got that part roughed in from the top to the bottom! I also added 2 feet along that side headed to the end.


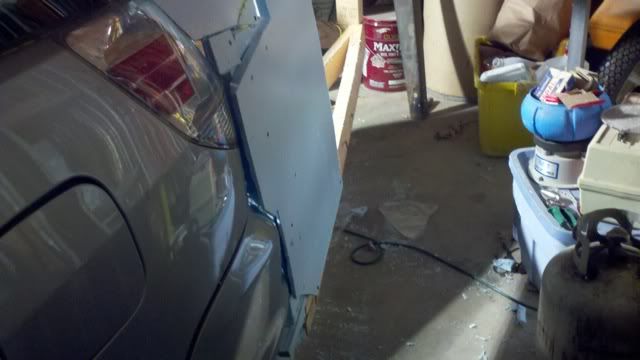
I also added the wiring for the new tail lights I bought:


For tomorrow:
1. Smooth out the foam from the car to the frame in prep to fiberglass.
2. Fiberglass from the frame to 4-6" out from the car (no spills on car). I want to do this on top and sides.
3. remove tail and fiberglass edges to get the mounting surfaces smooth and filled in (top and sides).
4. Add 4' of foam to bottom of tail.
5. Add foam to bottom mount area to match the bottom piece to car transition.

After that
Finish the fiber-glassing from car to tail frame (part I have foamed now).
Add sides, back and bottom.
Fiberglass the sides, back and bottom.
Decide on plexi glass size, shape and mount method.
buy plexi glass and fit to tail.
Add lights, license plate and EM sticker
take for test spin
fix any issues that come up.
I might make a floor to match the car floor height
take off plexi glass and start painting outside and in.
reattach plexi glass

Testing

should I fiberglass the inside or not?

will fiberglass set up in 20-30 degree F temps?

Am I overlooking anything?

any ideas, comments or tips?
__________________
  Reply With Quote
The Following 3 Users Say Thank You to Weather Spotter For This Useful Post:
Cd (01-04-2011), menaus2 (01-03-2011), NeilBlanchard (01-03-2011)
Old 01-02-2011, 10:46 PM   #56 (permalink)
Ecomodder en route
 
KITT222's Avatar
 
Join Date: Jan 2010
Location: South of the Cities, Minnesota
Posts: 190

Vib - '04 Pontiac Vibe base
Thanks: 10
Thanked 9 Times in 7 Posts
Nice! A lot of good work in a day. You could put some weather stripping in around the rear to make it a good 'seal'. Fiberglassing the inside is probably a good idea, and sometimes, over-excess is just enough!
  Reply With Quote
Old 01-02-2011, 11:39 PM   #57 (permalink)
Wiki Mod
 
Weather Spotter's Avatar
 
Join Date: Nov 2009
Location: Midland MI, USA
Posts: 2,042

Max - '14 Ford C-Max SEL
Thanks: 228
Thanked 304 Times in 210 Posts
I was thinking about the weather stripping, I might just use it.

as for fiber-glassing the inside, I might do it, but it seems like a lot of work. Will it add much strength?
__________________
  Reply With Quote
Old 01-03-2011, 11:14 PM   #58 (permalink)
Wiki Mod
 
Weather Spotter's Avatar
 
Join Date: Nov 2009
Location: Midland MI, USA
Posts: 2,042

Max - '14 Ford C-Max SEL
Thanks: 228
Thanked 304 Times in 210 Posts
Day 4

Well I got a bunch more work done today!

I finished up the major foam work, sides, bottom from hitch to car area, and the main bottom:


I got one coat on most all of the seams and stress points:


the top areas also have a second coat on them:


This took a while as I mixed up and applied the fiberglass in 6oz portions.

Then I started working on the plexi glass area:


For me the single largest cost was the plexi glass. it was $75 for a 52" (front to back) by 43" wide (at top, bottom is 24"). I got 3/16" plexi glass as I figured 1/8" would be too thin.

The two scrap pieces I think I will use for the sides.

I still need to buy hinges, I have some but they are house door size and are too large.

Costs:
Foam 3 sheets at $10 ea
Fiberglass $15
Fiberglass resin $36
Metal bar for top support, aluminum $11
1x2 boards (only ones I did not have in the scrap pile) $8
Plexi glass $75
Lights $30
Weather stripping ~ $6
Primer $11
Tax $12
Other $7

Total so far:
$220

yet to buy:
Hinges ~$5
Paint ~ $40

Est total is between $260 and $300. The costs are adding up faster then I wanted

For the next few days:

Finish first coat of fiberglass on sides and back.
Then remove tail from car and get a 3 coats on the car to tail transition areas.
Get two coats on the bottom.
Then add weather stripping and test fit.
get second coat on back and sides.
Take for a test spin
Fix issues
Prime with two coats
paint bottom and back black, sides will get silver to match the car once it is warm out.

How do the angles of the boat tail look to you?
__________________
  Reply With Quote
The Following 2 Users Say Thank You to Weather Spotter For This Useful Post:
Boreas (01-04-2011), NeilBlanchard (01-04-2011)
Old 01-03-2011, 11:44 PM   #59 (permalink)
Ecomodder en route
 
KITT222's Avatar
 
Join Date: Jan 2010
Location: South of the Cities, Minnesota
Posts: 190

Vib - '04 Pontiac Vibe base
Thanks: 10
Thanked 9 Times in 7 Posts
Wow! That is looking pretty nice there. The roof angle looks good. The simple angles makes the most of the shape. Overall, it looks good. The boat tail could pay itself off soon enough, so keep at it! Have you gotten lights sorted out? To make the lights easier you could connect them to a trailer hitch lights connector. What about rear vision issues?

I'm eager to see how this turns out! Keep at it!
  Reply With Quote
Old 01-04-2011, 12:25 AM   #60 (permalink)
Cd
Ultimate Fail
 
Cd's Avatar
 
Join Date: Feb 2008
Location: Austin,Texas
Posts: 3,585
Thanks: 2,872
Thanked 1,121 Times in 679 Posts
Nice to see your 'tail coming along so quickly.

  Reply With Quote
Reply  Post New Thread


Similar Threads
Thread Thread Starter Forum Replies Last Post
BOAT TAIL Drag Reduction Estimates aerohead Aerodynamics 12 01-30-2016 04:08 PM
Vibe Kammback / Boat tail trikkonceptz Aerodynamics 9 01-19-2014 09:59 AM
Project: Geo Metro boat tail prototype - 15% MPG improvement @ 90 kph / 56 mph MetroMPG Aerodynamics 500 05-10-2012 10:30 PM
collapsible curved folding 10mm coroplast boat tail miket Aerodynamics 5 08-12-2010 01:58 PM
Subaru Outback Prototype Boat Tail Test Results brucey Aerodynamics 10 10-02-2009 05:03 PM


Powered by vBulletin® Version 3.8.11
Copyright ©2000 - 2024, vBulletin Solutions Inc.
Content Relevant URLs by vBSEO 3.5.2
All content copyright EcoModder.com