Go Back   EcoModder Forum > EcoModding > Aerodynamics
Register Now
 Register Now
 

Reply  Post New Thread
 
Submit Tools LinkBack Thread Tools
Old 08-07-2008, 01:47 AM   #61 (permalink)
EcoModding Apprentice
 
Join Date: May 2008
Location: los angeles
Posts: 119

Whitey - '05 toyota corolla LE
90 day: 28.91 mpg (US)
Thanks: 0
Thanked 7 Times in 2 Posts
Send a message via AIM to blackjackel Send a message via MSN to blackjackel Send a message via Yahoo to blackjackel
Quote:
Originally Posted by cfg83 View Post
blackjackel -


Here is what Binger is talking about, the doodads on the sides :


They look cool, but I agree with Tourigjm that they are not appropriate for MPG.

CarloSW2
Ugh, not only do I think those look downright ugly, I agree with you both that this would negatively impact fuel economy... why on earth would anyone want to install those things?


Today I was on the freeway and I took a glimpse at a corolla S

Now I've seen em plenty of times before but this time i happened to notice the back little plastic things that they have:


Those thins apparently serve a purpose... they close up the curve gap at the bottom of the wheel, making the air go flush to the very back of the car... perhaps I could just buy these and not have to worry about making an additional extension...


Good Idea, bad idea?


you can see how this thing eliminates the curvature at the bottom...

__________________

Last edited by blackjackel; 08-07-2008 at 02:07 AM..
  Reply With Quote
Alt Today
Popular topics

Other popular topics in this forum...

   
Old 08-11-2008, 05:53 AM   #62 (permalink)
Mr. Blue Tape
 
azraelswrd's Avatar
 
Join Date: Jun 2008
Location: Fresno, CA
Posts: 345

AzxA - '06 Scion xA
90 day: 42.72 mpg (US)
Thanks: 0
Thanked 2 Times in 2 Posts
Those doodads on the red car look like canards to redirect downforce for stabilization at higher speeds. If that's the case, most definitely not FE friendly.

The rear fairings couldn't hurt but how much do they cost? Are they even puchasable entities? I never noticed the side and rear fairings on the Corolla S before but wow, there they are bigger than life.

Magnets.... I'm also looking for ways to attach without drilling. Adding that to my homework list.
__________________


My 5 pillars of fuel efficiency:
  • driving style
  • aerodynamics
  • tires
  • weight reduction
  • engine maintenance
  Reply With Quote
Old 04-27-2009, 12:18 AM   #63 (permalink)
Pokémoderator
 
cfg83's Avatar
 
Join Date: Dec 2007
Location: Southern California
Posts: 5,864

1999 Saturn SW2 - '99 Saturn SW2 Wagon
Team Saturn
90 day: 40.49 mpg (US)
Thanks: 439
Thanked 530 Times in 356 Posts
Hello -

I just found this site :

D.R. Antique Car Parts & Accessories

There are lots of parts that are intended for wheel skirts :

Fender Skirt Mounting Clip
Name:  fender skirt mounting clips.jpg
Views: 502
Size:  2.5 KB

I wish I had detailed wheel-well dimensions of some of the old cars, because there are "ready made" skirts out there :

1937-1939 Fender Skirt Trim
Name:  fender skirt moldings 004.jpg
Views: 428
Size:  9.6 KB

At a similar site I found this catalog :

car -> 001C @ Chevs of the 40s Store

There's even a catalog on CD. I wonder if it would have *dimension* details in the catalog?

CarloSW2
__________________

What's your EPA MPG? Go Here and find out!
American Solar Energy Society
  Reply With Quote
Old 09-24-2009, 03:03 AM   #64 (permalink)
EcoModding Apprentice
 
Join Date: May 2008
Location: los angeles
Posts: 119

Whitey - '05 toyota corolla LE
90 day: 28.91 mpg (US)
Thanks: 0
Thanked 7 Times in 2 Posts
Send a message via AIM to blackjackel Send a message via MSN to blackjackel Send a message via Yahoo to blackjackel
Ok guys, I've started on my underbelly mod!

Currently I'm using a sheet of corrugated plastic and im using 10 VERY STRONG neodymium magnets to attach the sheet to my car. I'm using JB weld to glue the magnets to the corrugated plastic, and again jb weld to glue the other magnets to my car, so its a magnet-to-magnet attachment.


My question is, should i run the corrugated plastic over parts of the exhaust or should i stop right as the corrugated plastic reaches the exhaust and do the rest of the mod with a metal sheet?


Maybe i could run the corrugated plastic over my exhaust if i buy some sort of insulation? But would this damage my car or catalytic converter?
__________________
  Reply With Quote
Old 09-24-2009, 08:36 AM   #65 (permalink)
Administrator
 
Daox's Avatar
 
Join Date: Dec 2007
Location: Germantown, WI
Posts: 11,203

CM400E - '81 Honda CM400E
90 day: 51.49 mpg (US)

Daox's Grey Prius - '04 Toyota Prius
Team Toyota
90 day: 49.53 mpg (US)

Daox's Insight - '00 Honda Insight
90 day: 64.33 mpg (US)

Swarthy - '14 Mitsubishi Mirage DE
Mitsubishi
90 day: 56.69 mpg (US)

Daox's Volt - '13 Chevrolet Volt
Thanks: 2,501
Thanked 2,585 Times in 1,553 Posts
I'd use metal. Exhaust components get a few hundred degrees hot. Plastic melts around the high 100s normally.
__________________
Current project: A better alternator delete
  Reply With Quote
Old 09-24-2009, 09:37 PM   #66 (permalink)
EcoModding Apprentice
 
Join Date: May 2008
Location: los angeles
Posts: 119

Whitey - '05 toyota corolla LE
90 day: 28.91 mpg (US)
Thanks: 0
Thanked 7 Times in 2 Posts
Send a message via AIM to blackjackel Send a message via MSN to blackjackel Send a message via Yahoo to blackjackel
Here are some pics of my under body panel that I'm currently working on. I'm using 20 neodymium magnets to attach a sheet of chloroplast to the bottom of my engine.

This is the sheet im laying down, I'm going to cut the part of it thats behind the 5 magnets at the bottom because the exhaust starts right after those magnets and I don't want to run my chloroplast over the exhaust.


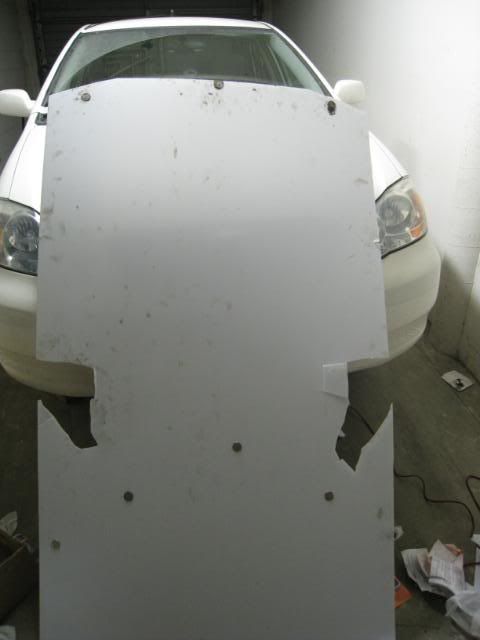
Note, the 3 magnets on the top are glued to the coroplast because they will attatch to the top part of my bottom lip of the front bumper (pics later), the 5 magnets shown below are magnetized to 5 magnets that are glued to the other side of the coroplast (they will stick to magnets glued on to the underbody of the car)

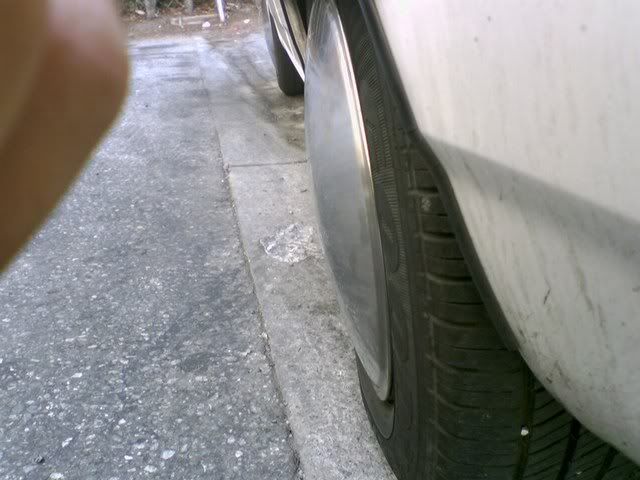
The holes in the sides are for the wheel arms to go through.


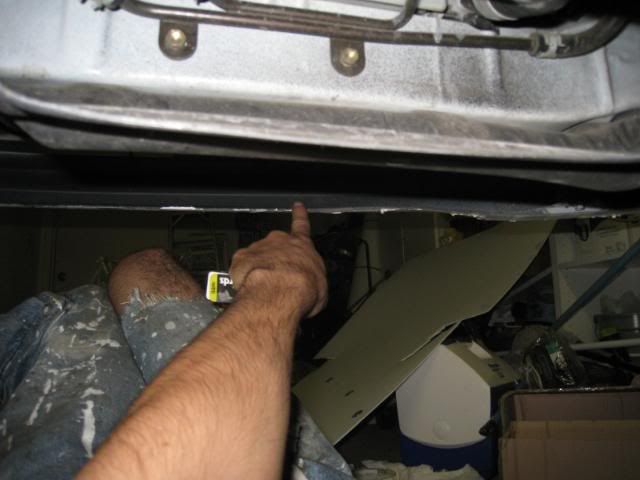
This is the top part of the bottom lip of the bumper, I will stick my magnets here where I point.


You can see the magnet glued to the bottom of the coroplast, I'll have another magnet glued to the part of the bumper i pointed at earlier.


car :: IMG_0346.jpg picture by blkjackel - Photobucket

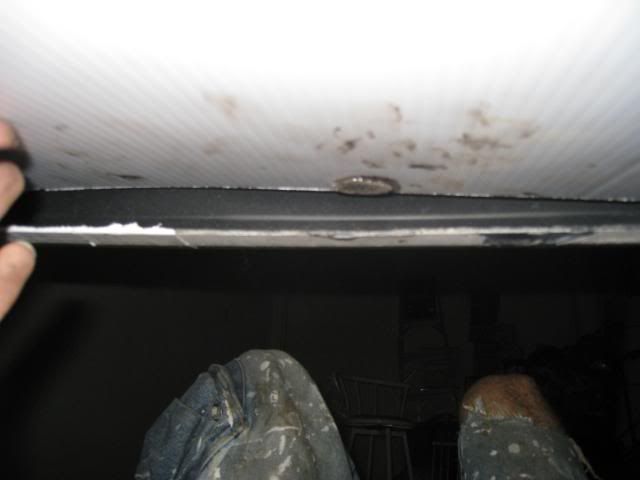
Here you can see me gluing the 2nd magnet, a piece of paper is between the magnets to prevent them being glued to eachother. The magnet you see at the bottom is not being glued, its just magnetically drawn to the one being glued to "clamp it" while the glue sets.


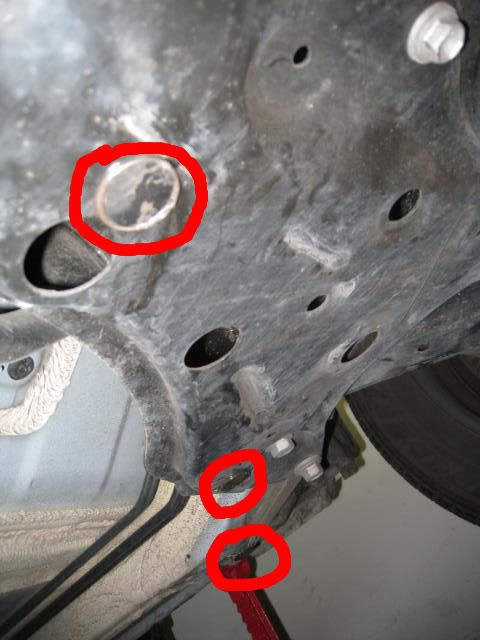
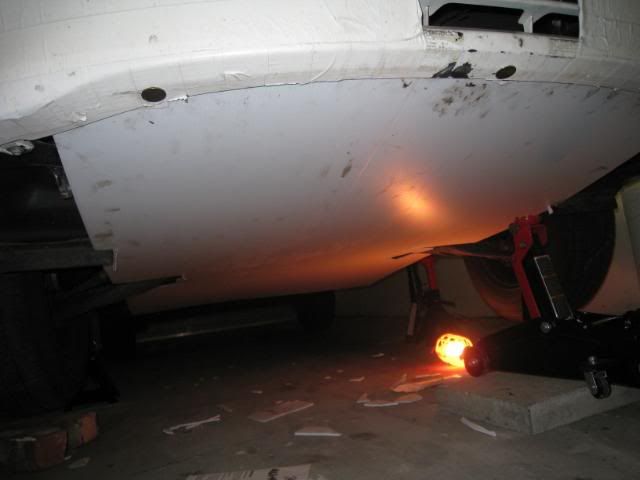
These are 3 of the 5 magnet points in the back, these magnets will attatch to the magnets on the corogated plastic. I couldnt get a shot of the center one, in the shot, it was directly above me. Magnets are marked in red.


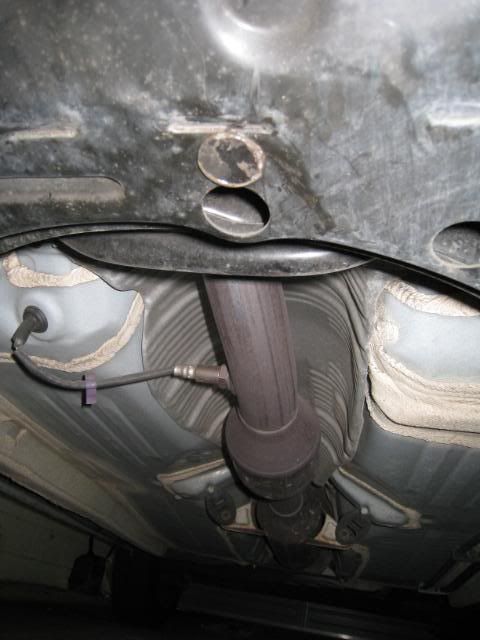
This is the center magnet (right behind the hole), you can see the exhaust behind it, this is where Im going to cut the coroplast, i think if i have it going back further it will melt.


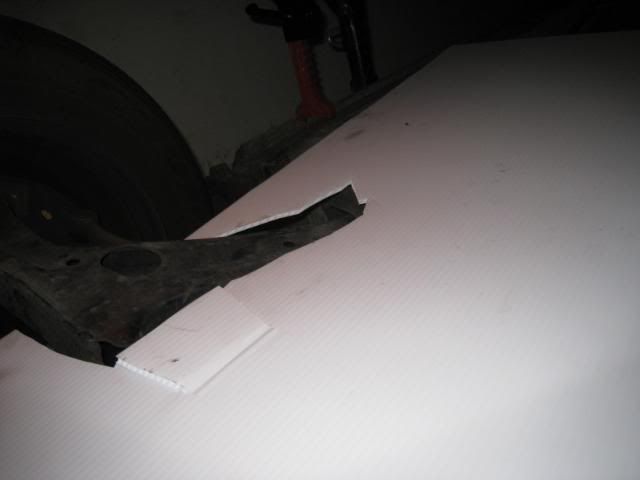
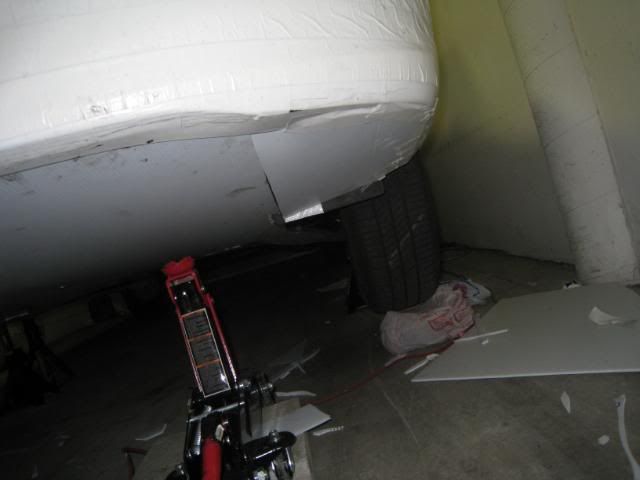
heres a shot of the wheel arm action with the cutout for it to go through.


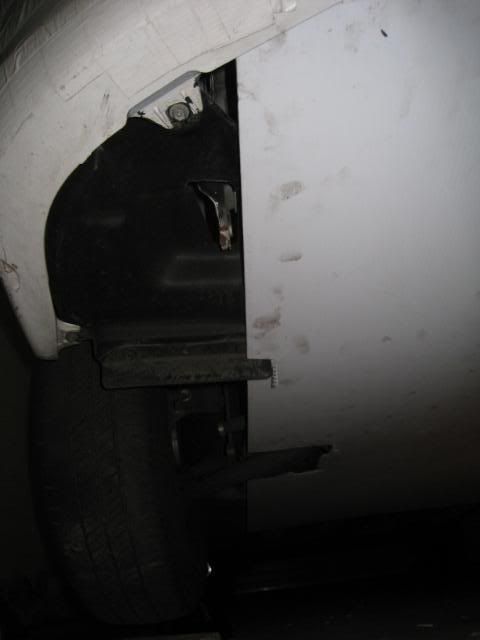
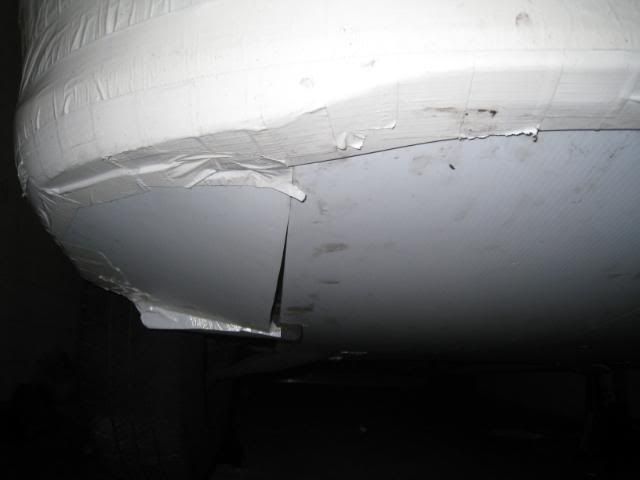
The coroplast didnt go through both wheel wells, you can see this here, I'll add a small piece and duct tape it to the body and original coroplast piece when im done.


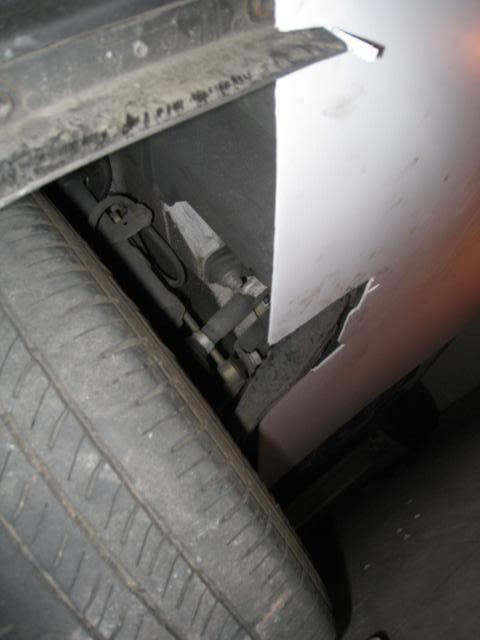
angled shots of the sides, I really dont know what to do here, air is going to get in there :/


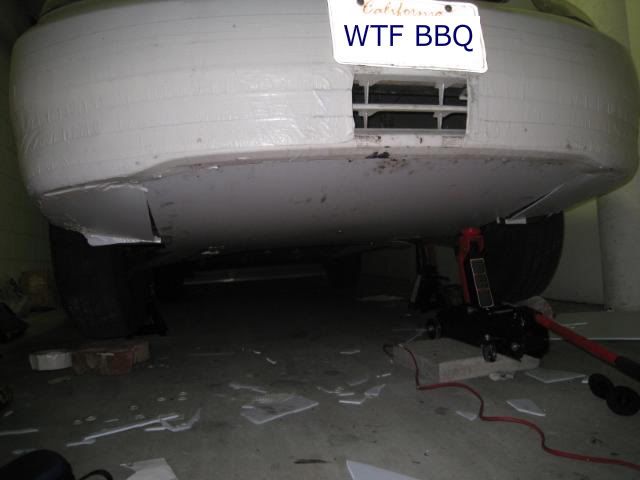
FINAL MOD LOOK! (minus the pieces i will attatch on the sides later)


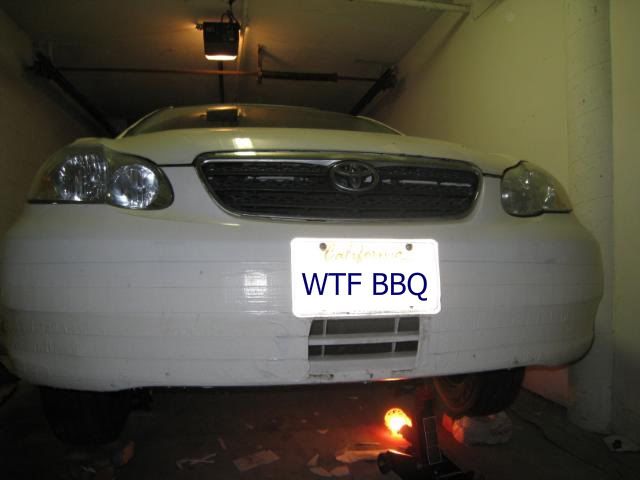
heres a shot showing how big ive had to open up my front grill, in california its still too hot and i need to open it up even bigger than this soon!
__________________
  Reply With Quote
Old 09-25-2009, 03:30 AM   #67 (permalink)
EcoModding Apprentice
 
Join Date: May 2008
Location: los angeles
Posts: 119

Whitey - '05 toyota corolla LE
90 day: 28.91 mpg (US)
Thanks: 0
Thanked 7 Times in 2 Posts
Send a message via AIM to blackjackel Send a message via MSN to blackjackel Send a message via Yahoo to blackjackel
here are some more pictures, I think im pretty much done with my underbody panel.


This is the completed side panel held on ONLY with duct tape, going to duct tape it to the original panel when the glue is done drying.


heres the other side, same thing.

<a href="http://s37.photobucket.com/albums/e93/blkjackel/car/?action=view&current=IMG_0359.jpg" target="_blank"><img src="http://i37.photobucket.com/albums/e93/blkjackel/car/IMG_0359.jpg" border="0" alt="Photobucket"></a>

wheel well gonna stay open like this.


Completed project (minus the duct taping of the side panels)
__________________
  Reply With Quote
Old 09-25-2009, 09:32 PM   #68 (permalink)
EcoModding Apprentice
 
Join Date: Jul 2008
Location: Sault Ste Marie, ON, Canada
Posts: 128

Schwartzejetta - '00 Volkswagen Jetta TDI GL
90 day: 52.87 mpg (US)
Thanks: 19
Thanked 16 Times in 16 Posts
Here's a tip regarding the coroplast and any hot metal bits like your exhaust:

Use spray contact glue/cement, and hefty aluminum foil.

Shiny side up toward the hot spot.

On a coroplast mockup of my front skid plate below the engine, I had the same concerns with my car, since right behind the oil pan was the exhaust downpipe, and a turbo ...

I foil lined the back half of the coroplast "plate" to shield it from the heat from the oilpan, and from any of the exhaust bits hanging down immediately behind.

The only reason I'm not using it now... a raccoon carcass that I spotted last minute at the crest of a hill on the highway knocked the whole works off. But I had no issues like melted plastic, nor the car spontaneously combusting after a long run on the highway in summer.

Mind you, I did not have my car completely sealed up from down below, so ... you may still want venting in around the exhaust, yet.

Even the heat shielding my Jetta had above the exhaust wasn't terribly thick ... maybe a bit more sturdy than the tin-foil trays you can get when you don't have a roasting pan for a turkey. So, in my opinion, and in testing nearer hot spots, heavy aluminum foil should prevent firey-commuting-and-hypermiling.
__________________
Current mod: Skidplate/Undertray for my MkIV Jetta. Next mod: CAD drawing for skidplate so other Jetta/Golf drivers can make one too!
  Reply With Quote
Old 12-14-2009, 06:43 PM   #69 (permalink)
EcoModding Apprentice
 
Join Date: May 2008
Location: los angeles
Posts: 119

Whitey - '05 toyota corolla LE
90 day: 28.91 mpg (US)
Thanks: 0
Thanked 7 Times in 2 Posts
Send a message via AIM to blackjackel Send a message via MSN to blackjackel Send a message via Yahoo to blackjackel
Im thinking of buying this:

Amazon.com: Exhaust Wrap, 2" Wide, 50-FT Roll, Natural: Automotive

I would completely cover the exhaust from head to toe, all the way 100% coverage, even the muffler. Then I'll simply cover the entire underside of my car with giant corroplast sheets, I don't think I should have a problem.

If anyone thinks ill run into problems please let me know
__________________
  Reply With Quote
Old 12-14-2009, 08:47 PM   #70 (permalink)
Master EcoModder
 
Join Date: Jul 2008
Location: Silly-Con Valley
Posts: 1,479
Thanks: 201
Thanked 262 Times in 199 Posts
Note that header wrap is much better at holding moisture against the exhaust pipes than air is. Mild steel (or cast iron!) exhaust parts tend to rust significantly when wrapped. Might be worth checking that your exhaust is made from stainless if you want to do that.

-soD

  Reply With Quote
Reply  Post New Thread


Similar Threads
Thread Thread Starter Forum Replies Last Post
List of aero mods you can do to your vehicle MetroMPG Aerodynamics 148 08-12-2021 10:53 PM
Planning Aero Mods Doofus McFancypants Aerodynamics 30 06-15-2008 06:03 PM
Review: 2009 Toyota Corolla LE (37.9 MPG) RH77 General Efficiency Discussion 22 05-09-2008 04:55 PM
Saturn aero mods? Heynow999 Aerodynamics 5 05-05-2008 06:44 PM
Win an EM Sticker: guess Dad's mileage (Toyota Corolla automatic). Ends Jan 13. MetroMPG Hypermiling / EcoDriver's Ed 51 02-07-2008 09:02 AM


Powered by vBulletin® Version 3.8.11
Copyright ©2000 - 2024, vBulletin Solutions Inc.
Content Relevant URLs by vBSEO 3.5.2
All content copyright EcoModder.com