Go Back   EcoModder Forum > EcoModding > Aerodynamics
Register Now
 Register Now
 

Reply  Post New Thread
 
Submit Tools LinkBack Thread Tools
Old 06-27-2009, 11:47 PM   #1 (permalink)
EcoModding Apprentice
 
Join Date: Sep 2008
Location: Upstate NY
Posts: 190

GreenMile - '00 Mazda Protege ES
90 day: 34.45 mpg (US)
Thanks: 0
Thanked 5 Times in 3 Posts
2000 Mazda Protege Rear Wheel skirts Walk Through

So today I "finished" (one still needs to be tweaked slightly, and probably will paint both) my rear wheel skirts for my protege.
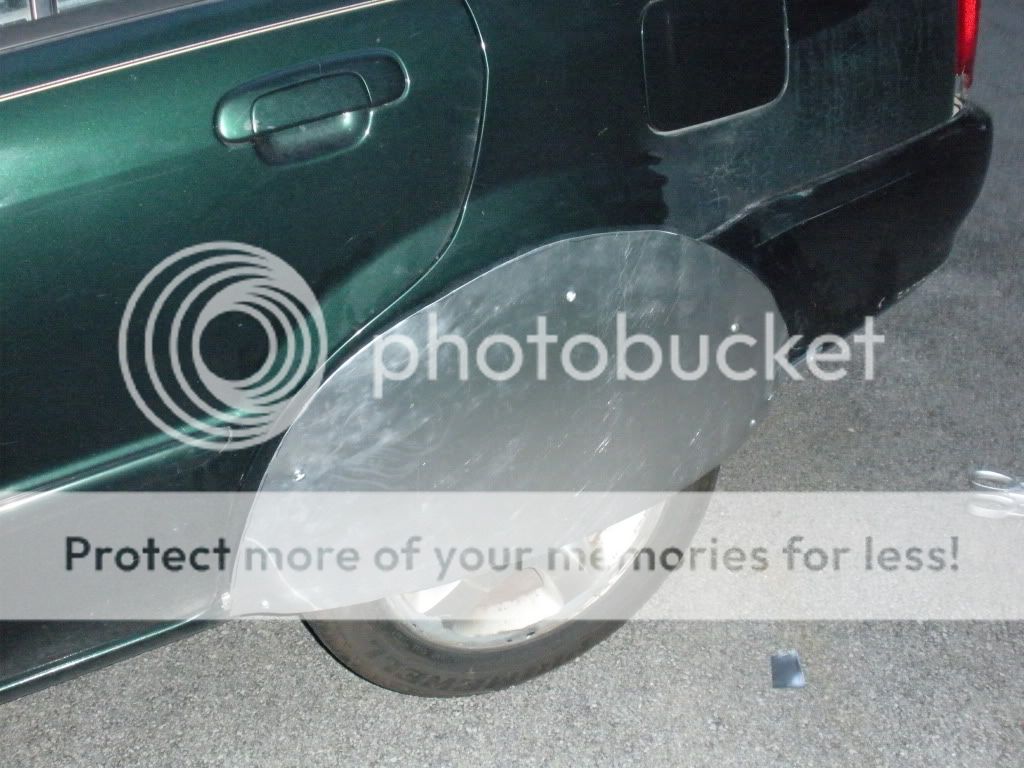
Before:


After:


Materials Used:

(1) 2' x 4' Sheet of Aluminum
(2) 4' x 1" Aluminum Bars
(12) Stainless Steel Locknuts
(12) Cadmium Plated 1/4" Machine Screws
(6) Stainless Steel Washers

Tools:

Screwdriver
7/16 Wrench
Drill w/ 1/4 drill bit
Sheet metal sheers
Hack Saw
Marker

Optional Tools:

Vice stand
Drill Press
Grinder

Step 1:

Create wheel skirt support bar.
On my car the front of the bar I placed one 1/4 bolt to the sheetmetal of my car. The rear of the bar has two bolts due to being attached to the plastic rear bumper.

My car, like many, the middle of the wheel sticks out from the body of the car. To compensate for this I bent some angles in the bar to jog it out away from the wheel. I gave my wheel about 1/2" clearance.


Because of where the bar was positioned, I also needed to twist the bar twice to make it more on the same plane as where the majority of the skirt would lay. The aluminum is nice for this because these bends can be done by hand if you don't have a vice handy.

Step 2: Creating the skirt panel

I first taped some newspaper of the wheel well so that I could trace a rough outline of the shape. Then I cut the outline out and laid it on the sheetmetal. From there I taped the outline to the metal so it wouldn't move and traced it to the sheetmetal.


I then cut the outline out, being sure to oversize it slightly so that I could tweak the design some if need be. This is important because the metal may need a compound curve when it is held to the car. This will "shorten" the metal up slightly and you want to be sure that there is still enough overlap to keep it secure.

Step 3: Positioning attachment points

I first drilled two holes to attach the lower panel to the bar.


From there I needed to experiment with where the panel needed pressure to keep it flush to the car. The above picture has 3 other machine screws attached representing the three points I decided on.

Step 4: Final Fabrication

The final fabrication step involves the creation of 3 "z-clips" which serve two purposes. First they hold the panel flush. They also provide the final support the panel needs so that the wind doesn't rip it off your car.

I used a hack saw to cut up some scrap aluminum bar and then put two bends in them that would pull the skirt panel into the car when sized properly. This step is critical to get the thickness just right for each clip. If they are tight enough they will prevent vibration that over time might damage your car's finish and possibly the integrity of the skirt panel.

In my case each clip had a different depth to it.


Here is an image of the clips attached to the skirt panel:


You will notice that the bottom clip in this image is turned differently. This is to make installation of the skirt easier.

To install the skirt panel you just slide the z-clips up behind your cars wheel well. If you got the tolerances right it will hold itself in place while you install the bar screws. Finally reach up in the well and turn that final clip (the one that was originally positioned funny in the 2nd photo up) up into position to hold skirt flush.


The main thing that I like about this design is that it is very easy to remove. Two machines screws to take the panel off, and two or three more if you need to remove the bar.

Here is the picture of the other side finished:


I wish you all good luck with your skirts!

__________________
http://benw385.vox.com/
'Blog' on the open source electric motorcycle project.

Please come visit and comment!
  Reply With Quote
The Following 3 Users Say Thank You to Blue Bomber Man For This Useful Post:
ldjessee00 (09-01-2009), Piwoslaw (08-12-2009), raquatrac (08-18-2009)
Alt Today
Popular topics

Other popular topics in this forum...

   
Old 06-28-2009, 06:59 AM   #2 (permalink)
Master EcoModder
 
NeilBlanchard's Avatar
 
Join Date: May 2008
Location: Maynard, MA Eaarth
Posts: 7,907

Mica Blue - '05 Scion xA RS 2.0
Team Toyota
90 day: 42.48 mpg (US)

Forest - '15 Nissan Leaf S
Team Nissan
90 day: 156.46 mpg (US)

Number 7 - '15 VW e-Golf SEL
TEAM VW AUDI Group
90 day: 155.81 mpg (US)
Thanks: 3,475
Thanked 2,950 Times in 1,844 Posts
Hi,

I have a question about what kind of aluminum you used -- do you know the alloy number? The place that I may buy aluminum from sells many different aluminum alloys, and some of those are available in sheets:

Trident Metals-Aluminum Sheet
__________________
Sincerely, Neil

http://neilblanchard.blogspot.com/
  Reply With Quote
Old 06-28-2009, 09:53 AM   #3 (permalink)
EcoModding Apprentice
 
Join Date: Sep 2008
Location: Upstate NY
Posts: 190

GreenMile - '00 Mazda Protege ES
90 day: 34.45 mpg (US)
Thanks: 0
Thanked 5 Times in 3 Posts
Next time I stop by lowes I'll check. The bars didn't cost much, the sheet was expensive. If I was more patient I could have gotten the sheet for much cheaper from a different source. I went with Aluminum because it doesn't rust =)
__________________
http://benw385.vox.com/
'Blog' on the open source electric motorcycle project.

Please come visit and comment!
  Reply With Quote
Old 06-28-2009, 11:28 AM   #4 (permalink)
EcoModding Apprentice
 
Join Date: Mar 2009
Location: Massachusetts
Posts: 216
Thanks: 0
Thanked 1 Time in 1 Post
The alloy of aluminum I commonly everywhere in all kinds of shapes and sizes is 6061-T6. Good corrosion resistance, easy to machine, but it's not very flexible when forming anything much larger than sheet thickness. Sucks because I need a piece of bar stock I can cold work to replace a piece of trim and 6061-T6 won't do, though -0 would probably be good, I can't even find that for a reasonable price or in the right size.
  Reply With Quote
Old 06-29-2009, 02:25 PM   #5 (permalink)
EcoModding Apprentice
 
Bicycle Bob's Avatar
 
Join Date: May 2008
Location: N. Saskatchewan, CA
Posts: 1,803

Appliance White - '93 Geo Metro 4-Dr. Auto
Last 3: 42.35 mpg (US)

Stealth RV - '91 Chevy Sprint Base
Thanks: 91
Thanked 459 Times in 327 Posts
It is easy to return T6 to T0. Just heat it up until it will char wood, and let it cool. You can treat local areas by torch, or use an oven. Cold working will restore the hardness, so sometimes it must be re-annealed. You can repeat this indefinitely, turning any metal shape into any other shape if necessary.
  Reply With Quote
Old 06-29-2009, 02:52 PM   #6 (permalink)
EcoModding Apprentice
 
Join Date: Mar 2009
Location: Massachusetts
Posts: 216
Thanks: 0
Thanked 1 Time in 1 Post
Awesome! I wasn't sure if it was that simple. Thanks!
  Reply With Quote
Old 06-29-2009, 05:27 PM   #7 (permalink)
Grasshopper
 
alohaspirit's Avatar
 
Join Date: Feb 2009
Location: Hawaii
Posts: 964

Makai - '01 Toyota Echo 4D Auto
90 day: 34.45 mpg (US)

New Galaxy - '07 Toyota Prius
90 day: 42.15 mpg (US)
Thanks: 25
Thanked 30 Times in 25 Posts
Nice write up!
__________________
Past Present Future?
  Reply With Quote
Old 06-29-2009, 06:19 PM   #8 (permalink)
Civic 4 Life
 
KJSatz's Avatar
 
Join Date: Jun 2008
Location: USA
Posts: 229

Civics Lesson - '08 Honda Civic LX
Team Honda
90 day: 40.53 mpg (US)
Thanks: 0
Thanked 2 Times in 1 Post
Hey looks nice! Could you post how much they improve your FE?
__________________
  Reply With Quote
Old 06-29-2009, 08:16 PM   #9 (permalink)
EcoModding Apprentice
 
Join Date: Sep 2008
Location: Upstate NY
Posts: 190

GreenMile - '00 Mazda Protege ES
90 day: 34.45 mpg (US)
Thanks: 0
Thanked 5 Times in 3 Posts
Well, I'm not too much into the numbers of things, but my best tank historically was like 33.5

So next time I get a fill up I'll keep track and will let you know what I start averaging. I have not yet invested in a scan gauge.

Though quantifying results is important, I also feel that it is good sometimes to trust past research so that I can instead focus on the progress. Additionally I may have some new mods within a week or so that will make it not possible to isolate which changes I can attribute results with. I'm just focusing on proven mods and implementing them for the time being!

Hopefully in a few weeks I will finish this tank and will remember to post the results =)
__________________
http://benw385.vox.com/
'Blog' on the open source electric motorcycle project.

Please come visit and comment!
  Reply With Quote
Old 08-16-2009, 10:37 PM   #10 (permalink)
EcoModding Apprentice
 
Join Date: Sep 2008
Location: Upstate NY
Posts: 190

GreenMile - '00 Mazda Protege ES
90 day: 34.45 mpg (US)
Thanks: 0
Thanked 5 Times in 3 Posts
So I finally got some fuel numbers:

The first time I filled up the pump acted funny, didn't shut off when it was supposed to, so I think it overfilled it some (gas actually spilled out some)

So I knew the first number would be low, so I did a combined average of two tanks initially.

32.4 MPG for a two tank average.

I just filled up again on friday and 36.1 MPG for that tank.

My previous top tank was around 35 MPG, all highway miles. This current tank was a bit more mixed, so it would seem to be a definite improvement.


When I get sometime I plan on painting them. There are also a couple of modest tweaks that I want to do to how it is shaped by the attachment points that may slightly improve airflow. The trailing edge on one side isn't quite flush all around. I also think that the bottom edge should be attached to the support bracket. This will slightly reduce frontal area and prevent the metal from fluttering (I suspect this, but it might now, it's fairly stiff)

__________________
http://benw385.vox.com/
'Blog' on the open source electric motorcycle project.

Please come visit and comment!
  Reply With Quote
Reply  Post New Thread


Thread Tools


Similar Threads
Thread Thread Starter Forum Replies Last Post
DIY: plastic rear wheel skirts (Geo Metro) MetroMPG DIY / How-to 57 06-12-2014 09:16 AM
2000 Mazda Protege Rear Wheel skirts! Blue Bomber Man Aerodynamics 1 06-22-2009 07:02 PM
Done: A-B-A test on rear wheel skirts - Corolla, Camry Hybrid MetroMPG Aerodynamics 11 06-06-2009 03:49 PM
2000 Mazda Protege for sale! - $3000 1337 For Sale 1 05-13-2009 12:23 AM
crx hf help need more info, rear wheel skirts RP-CLMBR Aerodynamics 2 07-16-2008 09:24 PM


Powered by vBulletin® Version 3.8.11
Copyright ©2000 - 2024, vBulletin Solutions Inc.
Content Relevant URLs by vBSEO 3.5.2
All content copyright EcoModder.com