Quote:
Originally Posted by PeterS

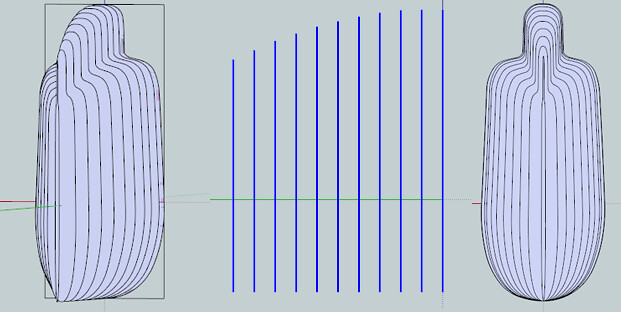
I do recommend the canoe strip plank method of construction , if only for your plug. The strips have a wonderful way of lying in a fair curve without any effort from you.
|
Yeah from everything I see this is going to be the method to use for quicker realization of the shape. If done right I will only have to sand twice, once for the general shape, and once to fill holes. Then it is epoxy fiberglass love.
Quote:
Originally Posted by sendler
You can curve the side profile as well.
The 8* departure angle might drag on some driveways and 4* looks way too slow along the top..
If you are going to do all that with a plug and fiberglass, why not do the nose as well like Ben did and save your $2000?
|
I thought the side profile didn't seem right either but I was going with what Grant-53 suggested. At this point I can do anything as it doesn't exist yet outside of my computer.
As for the front fairing I already bought it from Vetter and it has been sitting in my living room a while. Good thing I am single lol Vetter spent a lot of time making this thing and at the time I wasn't considering making my own as I have no fiberglass experience and or streamlining experience. That would mean the cost was made up in the time I would have spent making it.
The tail I am making isn't the only one either. I plan on making a vetter tail to get the thing on the road asap. The ideal tail will likely stay on it once it is done though. The idea of leaving my belongings inside a paper shell doesn't sit well with me.
Quote:
Originally Posted by PeterS
Burton, are you planning an openable storage compartment in the rear section ? If so have you any idea how it will be arranges and how the lid will work?
|
Right now the plan is to purchase the vetter seat cowl he finished tooling a week ago. It is at his fiberglass guy now if I recall but wont be available for a month or two. It has built into it a recessed section to accept a hatch of some sort.
I imagine you could go with wood here and hinge it to the fiberglass. Wood or metal should be used for the load bearing side of the opening as well as the locking section. The rest could be a foam / fiberglass sandwich and you could get away with it so long as you included mounting points when you made it.
There are notes on each of these images at flickr. Nothing is to scale it is merely to show concepts but if you can't grasp the drawing after reading their descriptions let me know.
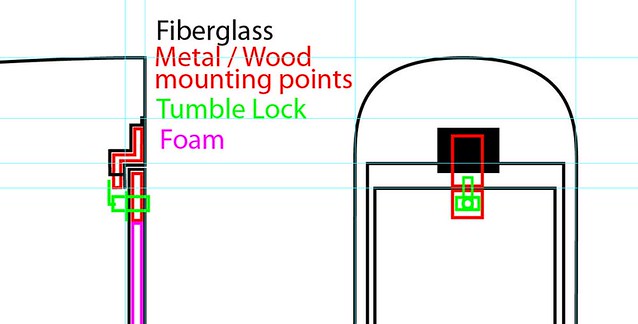 Door_Latch
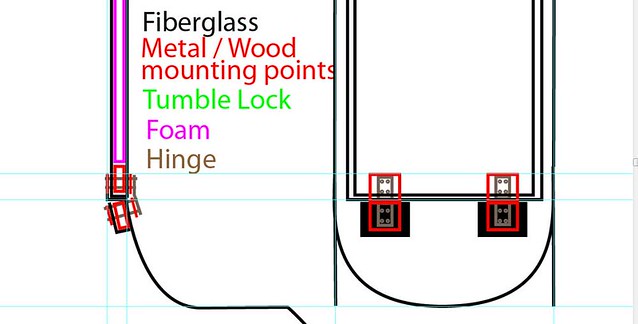 Door_HingeOp2
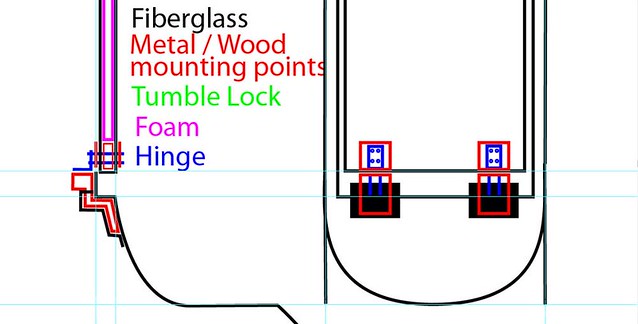 Door_HingeOp1


 Today
Today