Go Back   EcoModder Forum > EcoModding > Aerodynamics
Register Now
 Register Now

Now available from EcoModder: ScanGauge II fuel economy gauge.  Click for details.  

Reply  Post New Thread
 
Submit Tools LinkBack Thread Tools
Old 04-29-2010, 03:59 PM   #1 (permalink)
marcusmodder
 
orange4boy's Avatar
 
Join Date: Aug 2008
Location: Vancouver BC
Posts: 1,124

The Golden Egg - '93 Previa DX
90 day: 31.91 mpg (US)

Chewie - '03 Prius
90 day: 57 mpg (US)
Thanks: 70
Thanked 198 Times in 110 Posts
Stainless Kammback for Previa Redux. Now With More Stainless!

I had a the inspiration to work on the kammback or partial boattail, if you will, a couple of days ago.

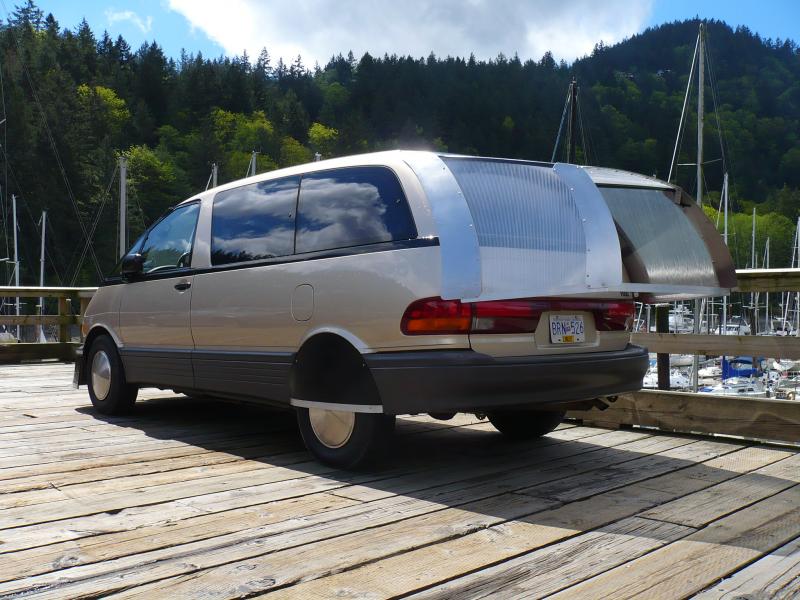
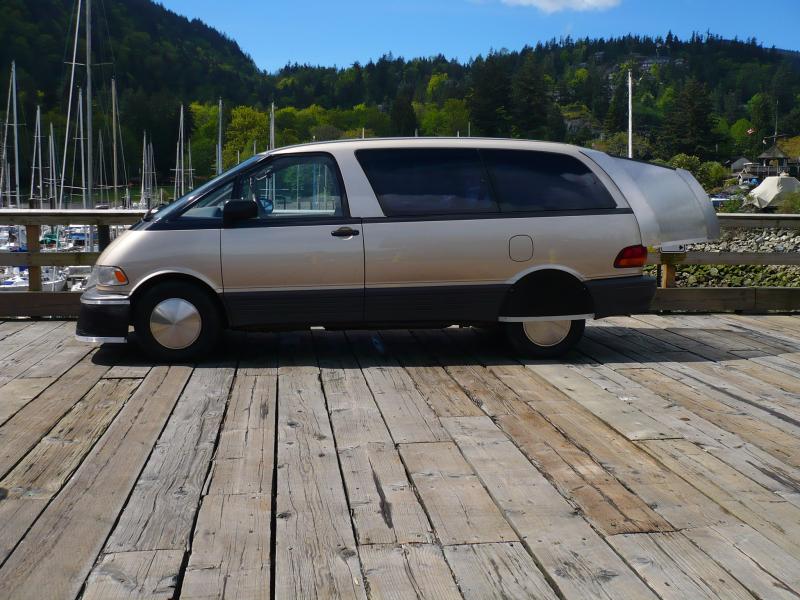
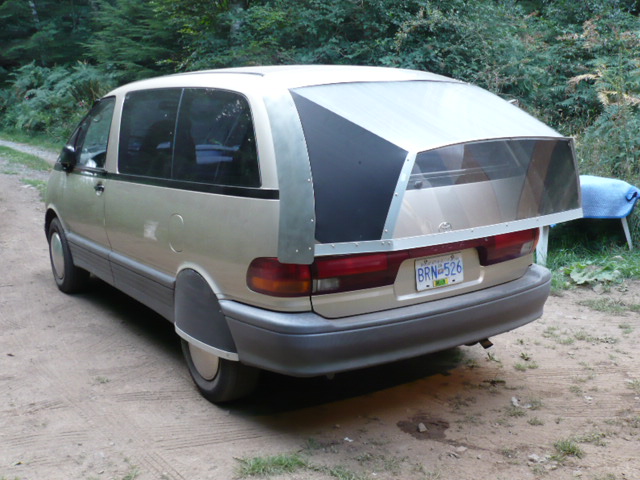
The top part is now finished except for closing off the end. I cut new trailing edge pieces and extended the lower section rearward to make the end angled instead of vertical as it was in the prototype.

I also slightly reduced the inward angle of the sides as they were somewhere around 20˚ which is fine if all is perfect. I think it looks miles better now and the wake should be a bit smaller. The top piece of lexan is unchanged.

I'm still thinking about how to finish the bottom section. I would like to be able to use it for storage but it should be easily removed and light weight. More thinking required.

It's only a little bit heavier now but I need new struts. I have to prop it up to keep the back open. New struts should hold it up fine.


The prototype for comparison:


(Support Ecomodder.com & get rid of these annoying ads!)      
 
  Reply With Quote
The Following 3 Users Say Thank You to orange4boy For This Useful Post:
NeilBlanchard (04-29-2010), Piwoslaw (04-30-2010), Rokeby (04-29-2010)
Old 04-29-2010, 09:29 PM   #2 (permalink)
Moderate your Moderation.
 
Join Date: Nov 2008
Location: Troy, Pa.
Posts: 8,382

Herbie - '86 Golf Diesel
90 day: 51.89 mpg (US)

Steve - '92 Festiva
Thanks: 955
Thanked 324 Times in 273 Posts
Shelf on the bottom:

Attach cantilever (is that the correct term?) brackets back at 45*ish so they hold on the top of the hatch, where the top of the extension starts.

From about the middle of the "arms", extend back to the rear of the "tray", making sort of an upside down "y" shape. Add L brackets to the lower sections of the extension for added support of your new "tray" area.
__________________
"¿ʞɐǝɹɟ ɐ ǝɹ,noʎ uǝɥʍ 'ʇı ʇ,usı 'ʎlǝuol s,ʇı"
  Reply With Quote
Old 04-29-2010, 09:54 PM   #3 (permalink)
Master EcoModder
 
NeilBlanchard's Avatar
 
Join Date: May 2008
Location: Maynard, MA Eaarth
Posts: 3,940

Mica Blue - '05 xA RS 2.0
Team Toyota
90 day: 48.22 mpg (US)

Josepha - '08 xD
90 day: 30.76 mpg (US)
Thanks: 513
Thanked 501 Times in 306 Posts
Cool -- what is the dark gray material on the rear wheel skirts?
__________________
Sincerely, Neil

http://neilblanchard.blogspot.com/
  Reply With Quote
Old 04-30-2010, 03:09 AM   #4 (permalink)
marcusmodder
 
orange4boy's Avatar
 
Join Date: Aug 2008
Location: Vancouver BC
Posts: 1,124

The Golden Egg - '93 Previa DX
90 day: 31.91 mpg (US)

Chewie - '03 Prius
90 day: 57 mpg (US)
Thanks: 70
Thanked 198 Times in 110 Posts
Quote:
Originally Posted by NeilBlanchard View Post
Cool -- what is the dark gray material on the rear wheel skirts?
None other than black coroplast.

Quote:
Attach cantilever (is that the correct term?) brackets back at 45*ish so they hold on the top of the hatch, where the top of the extension starts.

From about the middle of the "arms", extend back to the rear of the "tray", making sort of an upside down "y" shape. Add L brackets to the lower sections of the extension for added support of your new "tray" area.
I'm trying to keep it lightweight enough for the hatch to still open but your idea made me think of those hitch mount cargo platforms which could be extended upwards and clad in coroplast. That way it's a cinch to remove.

Hmmmmm...
  Reply With Quote
The Following User Says Thank You to orange4boy For This Useful Post:
NeilBlanchard (04-30-2010)
Old 04-30-2010, 09:46 AM   #5 (permalink)
Aero Wannabe
 
COcyclist's Avatar
 
Join Date: Dec 2007
Location: NW Colo
Posts: 350

TDi - '04 Golf
TEAM VW AUDI Group
90 day: 51.68 mpg (US)
Thanks: 87
Thanked 39 Times in 34 Posts
Cleanly executed, all your mods look great! I'm glad to see this resurface. I love the side view on the ferry. You sure live in a beautiful place.
__________________
60 mpg hwy highest, 50+mpg lifetime
TDi=fast frugal fun

  Reply With Quote
Old 04-30-2010, 09:53 AM   #6 (permalink)
Master EcoModder
 
Join Date: Oct 2008
Location: Richmond, VA
Posts: 367

OurInsight - '06 Insight
Thanks: 105
Thanked 40 Times in 25 Posts
Nice execution. Have you done any tuft testing along the top?
  Reply With Quote
Old 04-30-2010, 01:32 PM   #7 (permalink)
Moderate your Moderation.
 
Join Date: Nov 2008
Location: Troy, Pa.
Posts: 8,382

Herbie - '86 Golf Diesel
90 day: 51.89 mpg (US)

Steve - '92 Festiva
Thanks: 955
Thanked 324 Times in 273 Posts
Thought of something else, if you only plan on lightweight stuff...

Get yourself some metal conduit (or PVC tubing) and add a couple support struts from side to side across the bottom, then stretch cargo netting over them and secure it to the sides as well. You can close in the rear as much as you need with a piece of coroplast bent along the fluting.
__________________
"¿ʞɐǝɹɟ ɐ ǝɹ,noʎ uǝɥʍ 'ʇı ʇ,usı 'ʎlǝuol s,ʇı"
  Reply With Quote
Old 05-01-2010, 01:27 PM   #8 (permalink)
marcusmodder
 
orange4boy's Avatar
 
Join Date: Aug 2008
Location: Vancouver BC
Posts: 1,124

The Golden Egg - '93 Previa DX
90 day: 31.91 mpg (US)

Chewie - '03 Prius
90 day: 57 mpg (US)
Thanks: 70
Thanked 198 Times in 110 Posts
Quote:
Nice execution. Have you done any tuft testing along the top?
Thanks. I'm much happier with how it looks now with the angled end bits.

First I tested just the top piece to get the main angle, but once I built the sides, I tuft tested the top and sides on the highway with a friend watching. No videos though. Tufts were stable and smooth with no vortex generation on the top corners but there was a but of fluttering on the bottom end of the sides so when I rebuilt it, I reduced the side angles a bit.

I'm probably getting some wicked vortex action at the bottom edge which will be dealt with when I make the bottom part.

The top is now around 11˚ and the sides are more like 15˚


(Support Ecomodder.com & get rid of these annoying ads!)      
 
  Reply With Quote
Reply  Post New Thread

Thread Tools


Similar Threads
Thread Thread Starter Forum Replies Last Post
Stainless Kammback for Previa. orange4boy Aerodynamics 73 12-25-2011 10:03 PM
Non-invasive mounting for kammback wagonman76 Aerodynamics 4 03-24-2009 06:15 PM


Powered by vBulletin® Version 3.8.7
Copyright ©2000 - 2012, vBulletin Solutions, Inc.
Content Relevant URLs by vBSEO 3.5.2
All content copyright EcoModder.com