Go Back   EcoModder Forum > EcoModding > Motorcycles / Scooters
Register Now
 Register Now
 

Reply  Post New Thread
 
Submit Tools LinkBack Thread Tools
Old 04-02-2013, 03:46 AM   #121 (permalink)
Master EcoModder
 
Join Date: Feb 2009
Location: France - Paris
Posts: 762

la_voiture_de_courses - '03 Renault Megane Estate
OldContinents
90 day: 44.34 mpg (US)

xiao lan - '01 Audi A2
90 day: 38.88 mpg (US)

Brit iron - '92 Mini Mini
90 day: 45.5 mpg (US)

Prius - '09 Toyota PRIUS Lounge
90 day: 47.37 mpg (US)

Beemer - '06 BMW F800 ST
90 day: 53.06 mpg (US)
Thanks: 188
Thanked 33 Times in 30 Posts
Quote:
Originally Posted by GreenHornet View Post
Hey Stiletto2,

Actually the hybrid drive is really not that difficult to implement. The component weight is light also. In my vehicle for example The electric motor weighs a wopping 35lbs, Controller is 6lbs and the batteries a mere 50lbs. In the set up I proposed the ICE and electric drives would be independent from each other linked only by the ground. You can find a similar setup in theory although swapped electric powering the single rear wheel in the XR3 hybrid plans. Things always have a way of seeming difficult and expensive until you decide to find a way to make it otherwise!

In order to make it worth while the car has to be light 1,200lbs or less and aerodynamic in fact extremely aerodynamic like a cd of 1.4 or better. This allows a 2 cylinder or 1 cylinder diesel with a 10kw continuous -20kw peak electric motor to be used with only a 2 kwh battery pack! This gives you a descent battery only range in excess of 20 miles or better depending on how you drive. If you are like me and drive like a G-PA you could probably get about 30 miles EV only! The VW XL1 I think has around a 4kwh pack and gets about a 40 mile range but its cd is higher and weight is also higher than what I propose.
50 lbs of battery for moving around 1200 lbs of vehicle seems very few.

There is a VE 4 wheeler currently sold by Renault under the name Twizy.

Its top speed is a little above 50 mph, range is in the 50 miles ball park weight is 900 lbs or so.
It is not really aerodynamic but it is not of primary importance where it is supposed to ride.

I bet it has much more than 50 lbs of battery !

I also bet you can have more range than the 50ish if you ride it adequately.

  Reply With Quote
Alt Today
Popular topics

Other popular topics in this forum...

   
Old 04-26-2013, 10:08 AM   #122 (permalink)
EcoModding Apprentice
 
Join Date: Dec 2011
Location: San Francisco, CA USA
Posts: 142
Thanks: 6
Thanked 53 Times in 31 Posts
Quote:
Originally Posted by GreenHornet View Post
I think it was called the HMV Freeway.
I found this photo of one of those that is a good illustration of how the single passenger (or tandem seating position for two) can give a big reduction in frontal area:


cheers,
Michael
__________________
http://www.eurospares.com
  Reply With Quote
The Following User Says Thank You to Michael Moore For This Useful Post:
aerohead (08-30-2013)
Old 04-26-2013, 06:37 PM   #123 (permalink)
Master EcoModder
 
Join Date: Feb 2008
Location: West Coast, USA
Posts: 516

B2300 - '96 Mazda B2300 SE

Focus - '05 Ford Focus ST

The red car - '00 Honda Insight
Thanks: 6
Thanked 77 Times in 56 Posts
In the April '13 issue of Motorcycle Consumer News, Glynn Kerr references several manufacturers preparing 3 wheel commuter type vehicles. One of them (gasp) Toyota!

That's all I know. Maybe this deserves it's own thread to compile the latest news on coming 3 wheelers.
__________________
Good design is simple. Getting there isn't.
  Reply With Quote
Old 05-07-2013, 11:34 PM   #124 (permalink)
EcoModding Lurker
 
Join Date: Dec 2011
Location: Michigan
Posts: 82
Thanks: 12
Thanked 23 Times in 16 Posts
Well I'm actually making some progress on my Vetter fairing project. Mostly through the winter I gathered some supplies and tools. But now with the warmer weather here in Michigan, (for the time being anyway) I can do some fiberglass work.

I made a form (with some help from a couple of my scooter pals) to make the top and bottom half cone parts for the rear fairing "fin". The sides will be flat fiberglass slabs.

Interesting thing is the top has a layer of carbon fiber. (From an ebay deal) I pull it from the mold on Thursday. It will be interesting to see how my first ever composite part comes out. Hope it works well because I plan to make a bunch of them. (though not all of them with carbon fiber) I also have some Kevlar fabric I may try some time later as well. I can glass in some stiffeners to the inside later if needed.

I still need to glass the nose halves together, but I wanted to get this part done while I had the chance. I still have several smaller things to do but they can wait while I get the big parts done. Things are finally moving along.

My pals will help me put together some videos and pictures to post some place when I'm done.
  Reply With Quote
Old 05-08-2013, 01:39 AM   #125 (permalink)
Master EcoModder
 
Join Date: Aug 2011
Location: East coast of Australia
Posts: 393

Yella Peril - '80 Mercedes 240D sedan
Thanks: 15
Thanked 41 Times in 17 Posts
I'm looking forward to those pictures .

I'm considering buying BMW 650 Cross Country, it's already quite economical , about Imp 75mpg or 3.5 l/ per 100 km. at 55mph / 90km with fuel injection . I could respond very well to a Vetter fairing .
  Reply With Quote
Old 05-22-2013, 05:03 PM   #126 (permalink)
EcoModding Lurker
 
Join Date: Dec 2011
Location: Michigan
Posts: 82
Thanks: 12
Thanked 23 Times in 16 Posts
Think I've made enough progress on the Vetter fairing project for my 2007 Honda Reflex to make it worth posting. A lot of the progress has come in the last couple weeks since it has finally been warm enough (mostly) here in S.E. Michigan to be able to do composite work.

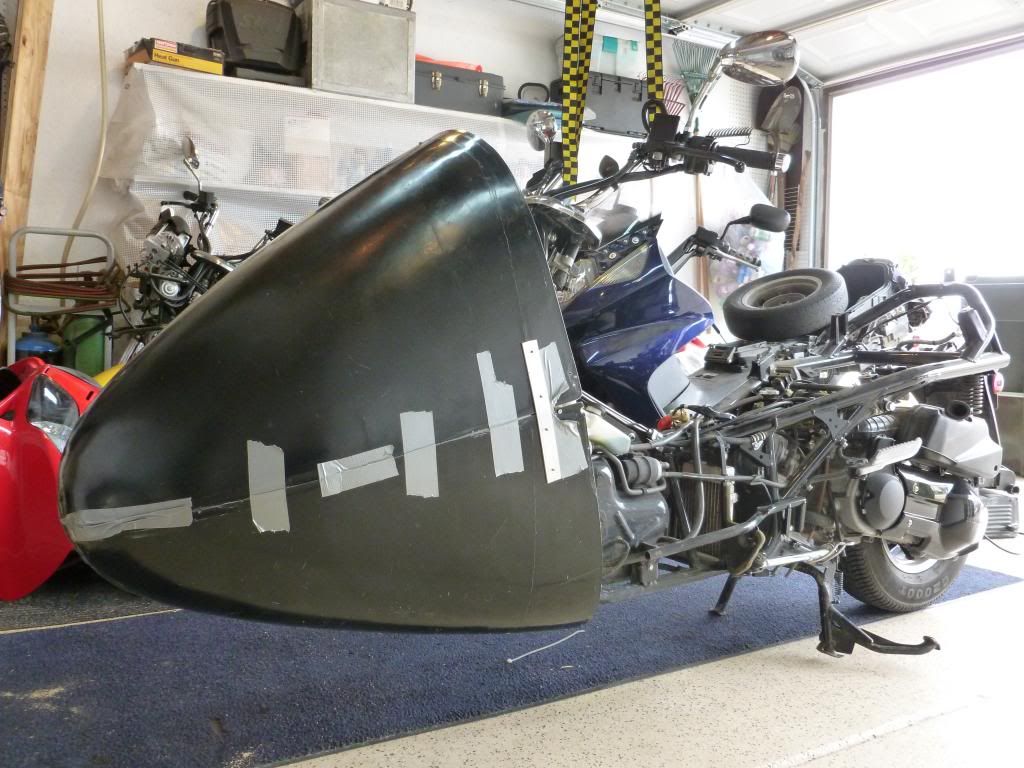
Here is the nose section as it arrived from Vetter.


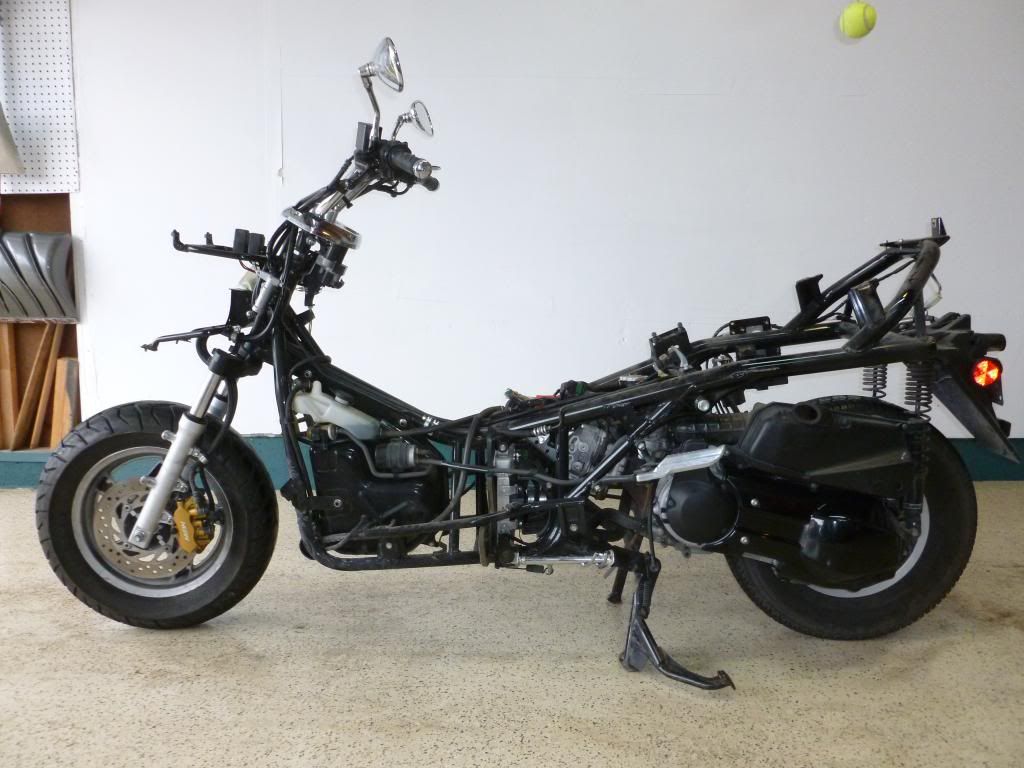
The naked 2007 Honda Reflex scooter that will be getting the fairing.
For those that know the Reflex, note the rear tire for a Honda Silverwing mounted up front and a 155/80R12 car tire on the rear. Previously had a 145/70R12 car tire on the rear but it had 35,000 miles on it so it was time to change it. I have also installed a Polini racing gear set to the final drive that is a little taller ratio than the stock final gears. Initial test rides show lower RPMs at speed, but not as much of an improvement in MPG as hoped. Hopefully more improvement will show with the fairing installed. And I can still experiment with different rear tire sizes to help eke out the best MPG.


Marking the inside of the nose where the bulkhead will mount as an aid to be able to position it in the same place when removing/replacing it during the construction process. Using plywood for the bulkheads may be heavier than doing aluminum framework like Craig Vetter did, but it seems to me to be quicker/easier/less expensive.


The nose temporarily installed after cut-out was made to the bulkhead. The bike is suspended from the garage rafters with a couple ratchet straps because that is what I had available to do the job. I could still sit on the bike without worry, so it worked out fairly well.


Traced out the front wheel cut-out. (seems to be a typical "money shot" for our fairing projects)


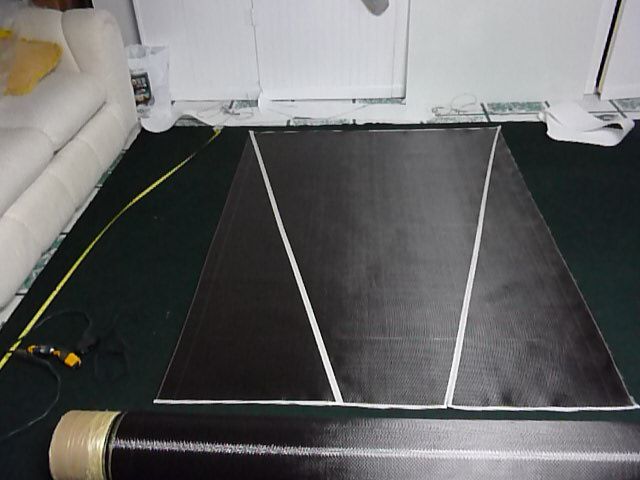
Laying out and cutting some carbon fiber fabric that I got for cheap off ebay once upon a time ago. Ditto for some fiberglass fabric too.


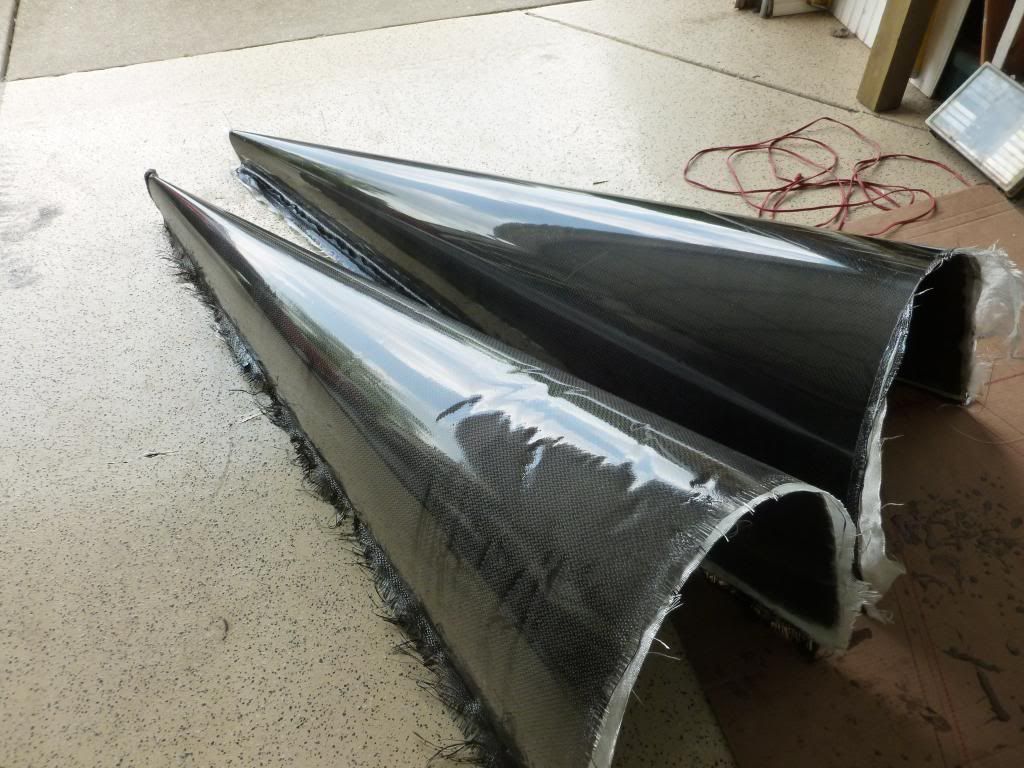
The first 2 composite parts parts I ever made. The lower was the first and ended up with wrinkles when the mold expanded more than the lay-up in it from heating in the sun and part of it pulled away from the mold. (mistake from trying to speed the cure process) This problem was compounded when the mold shrank and compressed from temperature cooling down to 50 some-odd degrees at night in the garage. The second part was made inside my house with a constant 73 to 76 degrees maintained for the 3 days of curing. That made a huge difference in part quality. Fabric weave distorted also in places from trying to reposition it properly. (another thing I learned not to do) I also got some fine scratches in the home-made mold when I put the first piece in and out of the mold a couple times. Threads of fabric with hardened epoxy are sharp and hard as needles. The scratches are not real deep and not too bad really and mostly are only noticed if specifically looked for. Not sure to what degree scratches can be remedied. For now they are a permanent aspect of the mold, but I guess I'll live with it. This will be a non-issue with parts that are to be painted. In fact, parts that will be painted will need light sanding to roughen the existing nearly mirror smooth surface for better paint adhesion.

The second piece turned out much better, but I still had some small air bubble "pitting" in a few places. (need to do more/better roller work to get ALL the bubbles out. And/or work out a vacuum bagging system to make parts.)


The lower piece will be used on the bottom of the fairing, so a good portion of the flawed part will be cut away for the rear wheel, muffler, airbox etc. anyway. The sides will be easy to do using the glass of an old storm door to do flat panel composite work. Additional flat wrap parts for the front part of the fairing will be done similarly. I'll probably pop rivet the sides on along with some fiberglass layers to the inside and just cover the rivet heads and seam line with wide pin striping for the sake of simplicity. It still should look OK, but I might change my mind on that later.

The mold will be able to make many more "half cone" rear fairing parts. The wide end of the finished part has some flexibility, so width and height of that end can be modified some just by pushing on it to narrow/heighten or widen/lower. Kind of like how the nose part can be squeezed or squashed to change its dimensions a little to suit the builder.

The narrow end of the part is somewhat less flexible. Generally, the usable size of the part is: Wide end - 24" wide X 17" tall, Narrow end 1 1/4" Wide X 2 1/2" tall. Length of lower edge of part 71" I'll do a handful of these for my own use before I try to make serious efforts to sell them. Just the same, I'm putting this info out in case anyone is interested. I mean to experiment with parts that are only fiberglass along with some that include Kevlar layers. (Already did these first two parts in carbon fiber/fiberglass lay-ups)

So this is where I am so far with my project. Next is to cut/trim/fit the large parts together, then comes a bunch of smaller stuff like: the belly pan and foot rests, doing the seat and seat-back/rear storage access, building up storage space interior and rear wheel well, finishing the nose of the fairing, foot wells, headlight install, windscreen and instrument panel, making permanent fairing mounts, adding the tail light/turn signals and other such tasks.

When I get more done I'll update with more notes and pics.
  Reply With Quote
The Following 4 Users Say Thank You to stiletto2 For This Useful Post:
aerohead (08-30-2013), Jyden (05-26-2013), renault_megane_dci (05-25-2013), Rokeby (05-24-2013)
Old 05-22-2013, 10:41 PM   #127 (permalink)
Master EcoModder
 
Join Date: Aug 2011
Location: East coast of Australia
Posts: 393

Yella Peril - '80 Mercedes 240D sedan
Thanks: 15
Thanked 41 Times in 17 Posts
Thanks mate, very interesting and I'll be waiting for your updates .
  Reply With Quote
Old 05-24-2013, 12:06 PM   #128 (permalink)
Master EcoModder
 
Join Date: Feb 2010
Location: Elmira, NY
Posts: 1,782
Thanks: 319
Thanked 356 Times in 297 Posts
Looking like a good build. Just a suggestion-seal the plywood so it does not absorb moisture and delaminate. A layer of fiberglass on the cockpit side of the bulkhead to strengthen the bond to the nose cone could reduce splintering in the event of a crash. The bulkhead should be strong but not to ridgid to cause knee injury from impact. Consider using an inertial reel lap belt and some ridgid foam at potential impact points inside the shell. The shell can act as a second helmet. Sad to say we had another motorcycle fatality a mile from our home this month. Keep up the good work!
  Reply With Quote
Old 05-26-2013, 04:47 AM   #129 (permalink)
Master EcoModder
 
Jyden's Avatar
 
Join Date: Jan 2010
Location: Denmark, Europe
Posts: 338

Enduro E-bike - '11 PowerPedals Enduro
90 day: 2236 mpg (US)

Jota - '14 Toyota Yaris Hybrid H1
90 day: 53.11 mpg (US)
Thanks: 138
Thanked 42 Times in 35 Posts
Fantastic - thanks
__________________
My Yaris Hybrid thread:
http://ecomodder.com/forum/showthrea...s-c-27995.html
  Reply With Quote
Old 06-06-2013, 05:45 AM   #130 (permalink)
Master EcoModder
 
Join Date: Aug 2011
Location: East coast of Australia
Posts: 393

Yella Peril - '80 Mercedes 240D sedan
Thanks: 15
Thanked 41 Times in 17 Posts
Could anyone estimate the CD of the current Zero Vetter ? I'm guessing .44, does anyone agree ?


  Reply With Quote
Reply  Post New Thread


Powered by vBulletin® Version 3.8.11
Copyright ©2000 - 2024, vBulletin Solutions Inc.
Content Relevant URLs by vBSEO 3.5.2
All content copyright EcoModder.com