 06-17-2013, 01:22 AM
|
#421 (permalink)
|
|
Master EcoModder
Join Date: Mar 2013
Location: Grand Rapids, MI
Posts: 838
Thanks: 1,380
Thanked 209 Times in 155 Posts
|
I want a CarBen ^
|
|
|

|
|
The Following User Says Thank You to mikeyjd For This Useful Post:
|
|
 Today Today
|
|
|
|
 Other popular topics in this forum...
|
|
|
|
 06-22-2013, 02:36 AM
|
#422 (permalink)
|
|
EcoModding Apprentice
Join Date: Oct 2008
Location: Newport NC
Posts: 247
Thanks: 21
Thanked 47 Times in 27 Posts
|
Quote:
Originally Posted by mikeyjd

I want a CarBen ^
|
So say we all!
(checks wallet)
Hmm...two moths, one stick of gum, Miskatonic University Library pass, two grocery coupons. This might take a leeetle bit of time....  |
|
|

|
 06-22-2013, 10:57 AM
|
#423 (permalink)
|
|
Master EcoModder
Join Date: May 2008
Location: Maynard, MA Eaarth
Posts: 7,908
Thanks: 3,475
Thanked 2,952 Times in 1,845 Posts
|
Thanks - I need to do a budget as I go along, but so far the cost of materials has been reasonable. Including the PhlatPrinter 3 CNC machine and the other tools that I bought, and the foam and glue, etc. is about $4,500. The fiberglass materials are probably $2,000-2,500. The windshield and wipers and the bezel panel at the base of the windshield will be ~$850.
I can only guess what the Saab 900 front suspension and driveshafts and differential, and the Porsche 914 rear suspension will cost. The hinges and latches and side windows, and LED marker and tail lights are also unknowns. The LED headlights are a bit under $300 each. Obviously, the battery pack, BMS, charger, electric motor and controller are the big ticket items, and I'm waiting as long as I can to wait for them to drop in price.
My total WAG budget is $50-60K. We'll see if this is possible in a couple or three years...
I worked 9 days for pay over the last 2 weeks, and I've been back at work on CarBEN EV5 since - I've got blisters on both hands to prove it, and the right side is much better. The chine is much more consistent and smooth. I've pulled the nose off and I'm trying to work out how to smooth out the inside of the hood bay, so I can then glue the nose in place, once and for all.
Last edited by NeilBlanchard; 06-22-2013 at 11:42 AM..
|
|
|

|
|
The Following User Says Thank You to NeilBlanchard For This Useful Post:
|
|
 06-22-2013, 02:02 PM
|
#424 (permalink)
|
|
Master EcoModder
Join Date: Feb 2013
Location: Oregon
Posts: 429
Thanks: 41
Thanked 108 Times in 68 Posts
|
Neil,
Good work I really like what you are doing here with this project. I just wish all of our projects cost much less. Who knows what we could think up and accomplish then :-)
|
|
|

|
|
The Following User Says Thank You to GreenHornet For This Useful Post:
|
|
 06-22-2013, 07:25 PM
|
#425 (permalink)
|
|
Master EcoModder
Join Date: May 2008
Location: Maynard, MA Eaarth
Posts: 7,908
Thanks: 3,475
Thanked 2,952 Times in 1,845 Posts
|
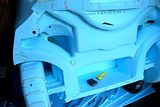
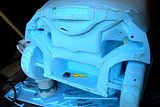
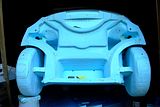
I did a fair bit of shaping and smoothing inside the hood bay (with the 2' of nose removed) and things are looking close to a point when I can glue the nose on:

  
The smallest Stanley Surform in definitely the most useful - I got a new yellow one today, because I keep misplacing my old one, which is black. I also tried out a Norton foam sanding block - it works fairly well, but it not all that durable. Bits and pieces fall off it as I use it.
The rectangular area is where the electric motor and the differential will be located, and the two triangular areas will be where part of the subframe will bear on the main chassis, and the small ovals just outside these, are air duct inlets, leading to the cabin. |
|
|

|
 06-22-2013, 08:17 PM
|
#426 (permalink)
|
|
EcoModding Smurfer
Join Date: Aug 2012
Location: LaX
Posts: 293
Thanks: 52
Thanked 35 Times in 29 Posts
|
Absolutely incredible.
__________________

|
|
|

|
|
The Following 2 Users Say Thank You to Smurf For This Useful Post:
|
|
 06-22-2013, 08:18 PM
|
#427 (permalink)
|
|
Always Too Busy
Join Date: Apr 2012
Location: Oregon
Posts: 570
Thanks: 405
Thanked 195 Times in 137 Posts
|
Wow that looks gorgeous. I love watching this thing emerge from a cloud of blue foam dust.
__________________
Current Car: 2023 Chevy Bolt EV
Retired Car: White Lightning
 ----------------------------------------------
Retired Car: Betty White

|
|
|

|
|
The Following User Says Thank You to Flakbadger For This Useful Post:
|
|
 06-22-2013, 09:56 PM
|
#428 (permalink)
|
|
Master EcoModder
Join Date: Aug 2012
Location: northwest of normal
Posts: 28,970
Thanks: 8,222
Thanked 8,995 Times in 7,431 Posts
|
Quote:
|
Thanks - ...so far the cost of materials has been reasonable. Including the PhlatPrinter 3 CNC machine and the other tools that I bought, and the foam and glue, etc. is about $4,500.
|
So you have maybe $200 tied up in those built-up foam wheel/tires?
Can you break out the tooling and the expendables? |
|
|

|
 06-23-2013, 01:42 AM
|
#429 (permalink)
|
|
Master EcoModder
Join Date: May 2008
Location: Maynard, MA Eaarth
Posts: 7,908
Thanks: 3,475
Thanked 2,952 Times in 1,845 Posts
|
I'd be surprised if the stand-in foam tires cost $50 - that would be four sheets of foam at a bit over $12/sheet, and they are pretty compact on the sheet.
The PhlatPrinter 3 CNC kit was about $1,300, and the rollers and clamps and extra bits were probably $300 or so? I bought the random orbital sander and the oscillating saw and the longboard sander for about $350. The big tarp and the two bundles of strapping, helix anchors and screws to make the shelter were about $250. All the SurForm tools (three new ones in addition to the three I already owned) were less than $75.
Foam and glue were roughly $1,500, if I recall correctly - a bit less than half of what I've spent was for materials. I got about 100 sheets of 1" foam (94 were used in the actual car) the rest is for mistakes and glitches. Oh, I did buy about 8-10 sheets of 2" foam for about $17/each that I attempted to get to work, and I still have 4 of them? I've bought 6 gallons of the Titebond III (or maybe just five?) at ~$33/ea.
Last edited by NeilBlanchard; 06-23-2013 at 01:47 AM..
|
|
|

|
|
The Following 2 Users Say Thank You to NeilBlanchard For This Useful Post:
|
|
 06-25-2013, 05:41 AM
|
#430 (permalink)
|
|
EcoModding Lurker
Join Date: Jun 2013
Location: Idaho
Posts: 34
Thanks: 2
Thanked 12 Times in 9 Posts
|
Quote:
Originally Posted by cRiPpLe_rOoStEr

That drive setup looks good, altough regarding electric drive I'd rather try some hub-motors if I were doing a similar project.
|
Hub motors have their advantages, but they also have significant disadvantages.
1. You need lots of torque @ low RPM. This requires large diameter motors, or gear reduction.
2. They add significant unsprung weight (copper wire & magnets) - this amount of unsprung weight seriously inhibits responsive vertical motion.
3. Complex design, because you need to stuff both the motor and the brake components within the confines of a single wheel. A compact package would also likely create blistering heat problems.
|
|
|

|
|