 09-30-2012, 09:43 AM
|
#71 (permalink)
|
|
Ultimate Fail
Join Date: Feb 2008
Location: Austin,Texas
Posts: 3,585
Thanks: 2,872
Thanked 1,121 Times in 679 Posts
|
You are certainly right about the air ( from the blowers ) being a mess - even in areas that we know have perfect flow, such as the hood and windshield of the car, the tufts have turbulence.
Maybe you test a small section of the model using various lengths and thicknesses of string - perhaps even thread to see which tufts react correctly ( if at all )
|
|
|

|
 Today Today
|
|
|
|
 Other popular topics in this forum...
|
|
|
|
 10-01-2012, 07:07 AM
|
#72 (permalink)
|
|
Master EcoModder
Join Date: May 2008
Location: Maynard, MA Eaarth
Posts: 7,908
Thanks: 3,475
Thanked 2,953 Times in 1,846 Posts
|
Once the full size prototype is built and on the road, I can do real tuft testing. 
I've finished making all the g-code files by the way. I'm almost out of foam sheets -- I need another 18 or so to finish all the cutting, too!
I'm doing more architectural work for pay this week, so I hope that the weather stays warm enough to keep gluing long enough to get the main chassis together.
Edit: I did manage to glue 6" onto the main chassis today. My brother's Tacoma is in the body shop getting it's frame repainted, so I'll have to wait until the weekend to buy the framing for the shelter, so I can then work in the rain.
Last edited by NeilBlanchard; 10-01-2012 at 08:15 PM..
|
|
|

|
 10-01-2012, 02:04 PM
|
#73 (permalink)
|
|
EcoModding Lurker
Join Date: Oct 2011
Location: Colorado Springs, CO
Posts: 13
Thanks: 0
Thanked 2 Times in 2 Posts
|
That is great work. It is people like you that inspire me even more to try to work on my project. Unfortunately, I do not have any skills in fabrication so I have to wait. But yeah, keep up the good work.
|
|
|

|
|
The Following User Says Thank You to 98BeetleTDI For This Useful Post:
|
|
 10-01-2012, 02:50 PM
|
#74 (permalink)
|
|
Master EcoModder
Join Date: Aug 2011
Location: Warren, MI
Posts: 2,456
Thanks: 782
Thanked 669 Times in 411 Posts
|
Looking good.
__________________
He gave me a dollar. A blood-soaked dollar.
I cannot get the spot out but it's okay; It still works in the store
|
|
|

|
|
The Following User Says Thank You to Sven7 For This Useful Post:
|
|
 10-05-2012, 04:35 PM
|
#75 (permalink)
|
|
Master EcoModder
Join Date: May 2008
Location: Maynard, MA Eaarth
Posts: 7,908
Thanks: 3,475
Thanked 2,953 Times in 1,846 Posts
|
Today was a glorious day -- sunny and in the low to mid 70's; and better yet I had finished my drafting work and was able to glue 10" onto the chassis. The main piece is now a bit over 7 feet long, and with the 2 foot long nose piece -- it is now about 2/3 glued up!
Here's pictures -- it is sitting on its nose:
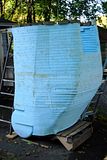 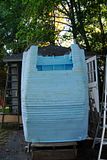 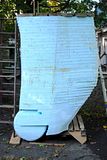 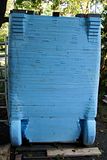 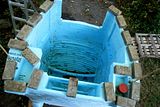 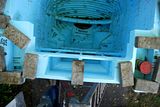
The side battery bays are complete, and the first 4" of the rear suspension bays have begun; as are the rear wheel strakes. You can see the chines on the sides more easily, as well. The 'C' pillar is mostly in place, and the main hatch opening is tapering narrower.
My 6' step ladders are not going to be useful much longer... I've got a 7' and two 8' and I can borrow my brother's 9 footer.
Last edited by NeilBlanchard; 10-05-2012 at 10:49 PM..
Reason: typo
|
|
|

|
|
The Following 2 Users Say Thank You to NeilBlanchard For This Useful Post:
|
|
 10-05-2012, 04:59 PM
|
#76 (permalink)
|
|
The road not so traveled
Join Date: Jan 2010
Location: New Mexico
Posts: 680
Thanks: 18
Thanked 66 Times in 57 Posts
|
A thought that might make it easier to assemble, continue the rest next to it then glue the last section on all at once. Or do you think that would cause some alignment issues.
It is looking pretty good.
|
|
|

|
|
The Following User Says Thank You to TheEnemy For This Useful Post:
|
|
 10-05-2012, 08:20 PM
|
#77 (permalink)
|
|
AeroGuy
Join Date: Sep 2008
Location: Ohio
Posts: 224
Thanks: 73
Thanked 32 Times in 28 Posts
|
Awesome work, I am impressed!
|
|
|

|
|
The Following User Says Thank You to eco_generator For This Useful Post:
|
|
 10-05-2012, 10:39 PM
|
#78 (permalink)
|
|
Master EcoModder
Join Date: May 2008
Location: Maynard, MA Eaarth
Posts: 7,908
Thanks: 3,475
Thanked 2,953 Times in 1,846 Posts
|
The problem with building up large pieces is they are too big to fit on my table, and they tend to be warped. I really struggled to glue two large pieces together earlier on, because one had about a 3/4" warp. That convinced me that I have to glue them up one layer at a time.
The main piece will be about 12 feet tall when it is all together. The 2 foot nose piece is flat and I need to keep access to the motor bay for doing things like the front suspension, anyway.
|
|
|

|
|
The Following 2 Users Say Thank You to NeilBlanchard For This Useful Post:
|
|
 10-06-2012, 12:06 AM
|
#79 (permalink)
|
|
Always Too Busy
Join Date: Apr 2012
Location: Oregon
Posts: 571
Thanks: 405
Thanked 199 Times in 138 Posts
|
This is mind-blowingly awesome. My hat is off to you. I find the prospect of crafting nice fiberglass rear-wheel-well covers to be daunting and intimidating. This is 20 levels above that at least. You rock dude, keep it up.
__________________
Current Car: 2023 Chevy Bolt EV
Retired Car: White Lightning
 ----------------------------------------------
Retired Car: Betty White

|
|
|

|
|
The Following User Says Thank You to Flakbadger For This Useful Post:
|
|
 10-11-2012, 06:00 PM
|
#80 (permalink)
|
|
Master EcoModder
Join Date: Jul 2010
Location: Belgium
Posts: 4,683
Thanks: 178
Thanked 652 Times in 516 Posts
|
It's cool to see it being built up 
__________________
Strayed to the Dark Diesel Side

|
|
|

|
|