03-27-2012, 01:57 PM
|
#11 (permalink)
|
|
EcoModding Apprentice
Join Date: Feb 2010
Location: Northern Wisconsin
Posts: 137
Thanks: 32
Thanked 39 Times in 23 Posts
|
 OK Ben ---- Story???
__________________
Dave  ...
|
|
|

|
 Today Today
|
|
|
|
 Other popular topics in this forum...
|
|
|
|
|
03-27-2012, 06:53 PM
|
#12 (permalink)
|
|
EV test pilot
Join Date: Jan 2008
Location: Oconomowoc, WI, USA
Posts: 4,435
Thanks: 17
Thanked 663 Times in 388 Posts
|
Well, here's the thing.
Lead acid motorcycles are cheaper than lithium motorcycles, but they also happen to weigh more. So, when you ditch a PB Bike onto your left ankle, the ankle isn't going to be happy with that!
The worst part is how horribly self-inflicted this is. A camera mount clipped the ground on a slow-speed left-hand turn, scooting the back tire out a hair, completely changing the two-wheel dynamics and INSTANTLY ditching 400 lbs on my left ankle.
Ouch.
|
|
|
|
|
03-27-2012, 07:23 PM
|
#13 (permalink)
|
|
EcoModder Student
Join Date: Nov 2008
Location: Youngsville, NC
Posts: 117
Thanks: 11
Thanked 14 Times in 13 Posts
|
Quote:
Originally Posted by bennelson

Well, here's the thing.
Lead acid motorcycles are cheaper than lithium motorcycles, but they also happen to weigh more. So, when you ditch a PB Bike onto your left ankle, the ankle isn't going to be happy with that!
The worst part is how horribly self-inflicted this is. A camera mount clipped the ground on a slow-speed left-hand turn, scooting the back tire out a hair, completely changing the two-wheel dynamics and INSTANTLY ditching 400 lbs on my left ankle.
Ouch.
|
I fully understand your pain. But I did it with a 600 lb Harley, but I was wearing leather boots and didn't break anything. What were you wearing, may I ask?
Eric
__________________
1995 BMW 318i EV in the making
|
|
|
|
|
03-27-2012, 07:26 PM
|
#14 (permalink)
|
|
EV test pilot
Join Date: Jan 2008
Location: Oconomowoc, WI, USA
Posts: 4,435
Thanks: 17
Thanked 663 Times in 388 Posts
|
Jeans, leather ankle boots, and helmet.
Should have been wearing my helmet on my ankle.
|
|
|
|
|
03-28-2012, 09:03 PM
|
#15 (permalink)
|
|
EV test pilot
Join Date: Jan 2008
Location: Oconomowoc, WI, USA
Posts: 4,435
Thanks: 17
Thanked 663 Times in 388 Posts
|
Well, I finally did up a "rough draft" of what I'm planning.
Here's about what it will look like.
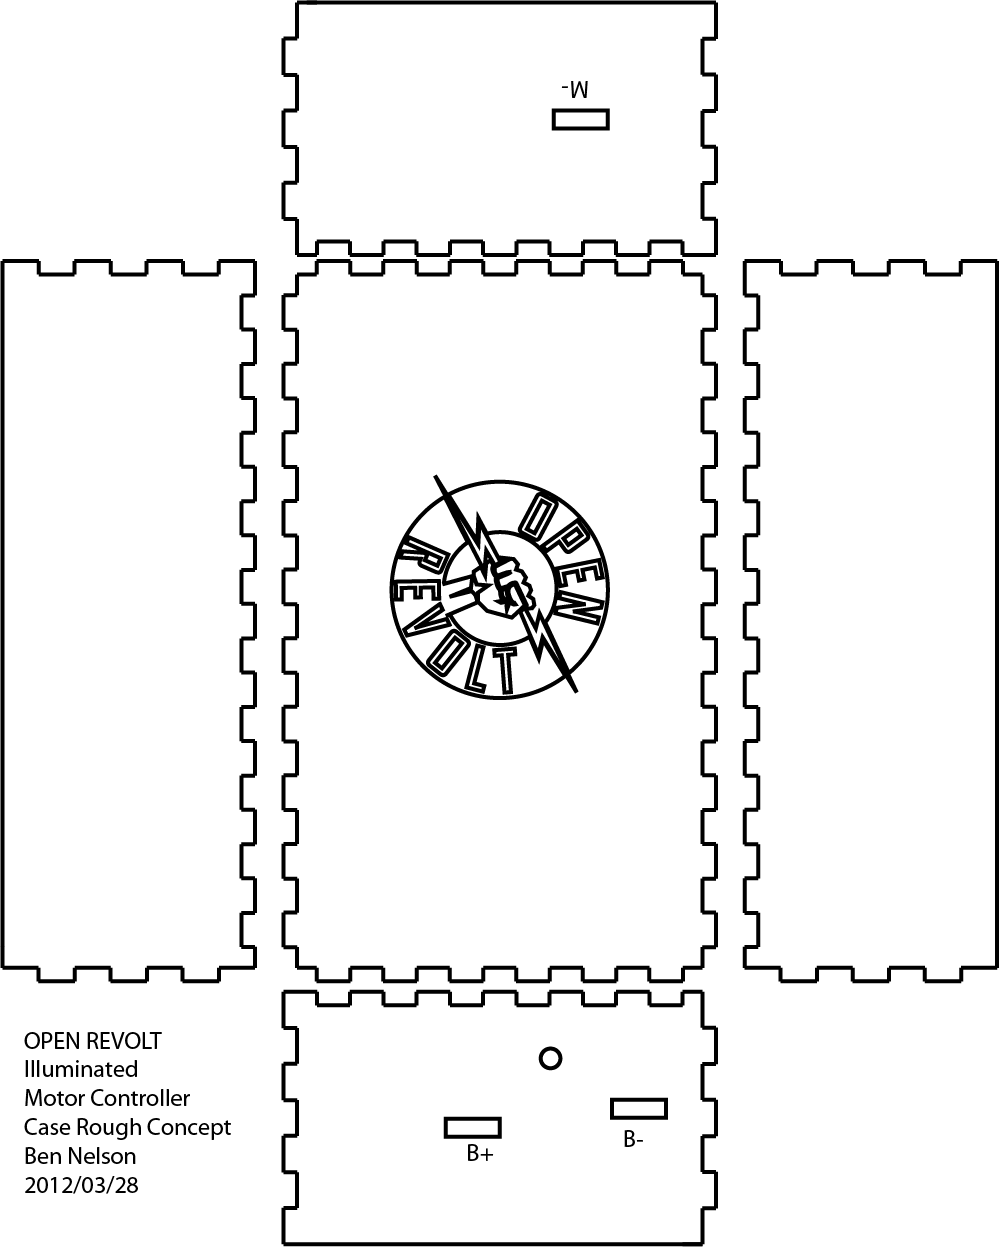
The lines are extra-thick, just so they show up nice for you to see. In the actual layout for the laser, they would be infinitely thin cut-lines.
The logo in the middle will be etched so that the high-lights of it will be white, similar to the plastic "tokens" I posted earlier.
I'm not sure yet exactly how I will embed the LEDs. I suppose that if the case material was thick enough, and the LEDs were skinny, I could drill holes in the edge and poke the LEDs right in there.
By the way, the measurements here aren't exact, so please, nobody say, "hey, that hole has to be one 1/16" to the left!" Because I already know that!
I also just show one round hole for the throttle, 12V power, and pre-charge wires to poke through. I lost my RS232 cable a while back, so I do NOT have a serial port connector cut-out shown on the case.
I originally just put the M-,B+,B- marks on the case just as a note to self, but thinking about it, that would be a really good idea to mark them on the case. I think they should go ABOVE the bus bar holes, to make them easier to read when the controller is mounted.
I also think that I want to power the case LEDs by a separate, dedicated 12V connection to the car's 12V accessory battery, with a small switch under the hood. The only time that I am really going to show off the controller is at car shows and eco-events, where the car will be parked with the main power disconnected. |
|
|
|
|
03-28-2012, 10:58 PM
|
#16 (permalink)
|
|
EcoModding Lurker
Join Date: Mar 2012
Location: Houston
Posts: 1
Thanks: 0
Thanked 0 Times in 0 Posts
|
Looks nice!
Have you experimented at all with heat bending? I don't know how well it would work in this case, but it could reduce the 3 large pieces into 1, and then you'd just lego the end caps on.
|
|
|
|
|
03-29-2012, 09:37 AM
|
#17 (permalink)
|
|
EV test pilot
Join Date: Jan 2008
Location: Oconomowoc, WI, USA
Posts: 4,435
Thanks: 17
Thanked 663 Times in 388 Posts
|
I haven't experimented yet with heat bending. I've seen a few projects done with it that looked pretty good.
I guess what I like about cutting flat pieces with a machine is that everything will be nice and square and clean. If I start bending material, it brings in the human factor - me.
One other thing I was thinking would be nice about just going with straight laser-cut is that all the parts are FLAT. I could mail a flat case to Paul or whoever wants one, and they could just assemble/glue/caulk and be done.
One gripe that I had about shipping the controller is that it exactly DOESN'T fit into one of the post office flat rate boxes. It would be nice to design a controller case that fits in a flat cardboard envelope!
|
|
|
|
|
04-02-2012, 06:05 PM
|
#18 (permalink)
|
|
EV test pilot
Join Date: Jan 2008
Location: Oconomowoc, WI, USA
Posts: 4,435
Thanks: 17
Thanked 663 Times in 388 Posts
|
Since I'm laid up right now anyways, I tried to put in a little more design work into the controller case.
Here, I laid it out to fit within a 12" x 24" area - which is the cutting size available on the laser that I have access to.
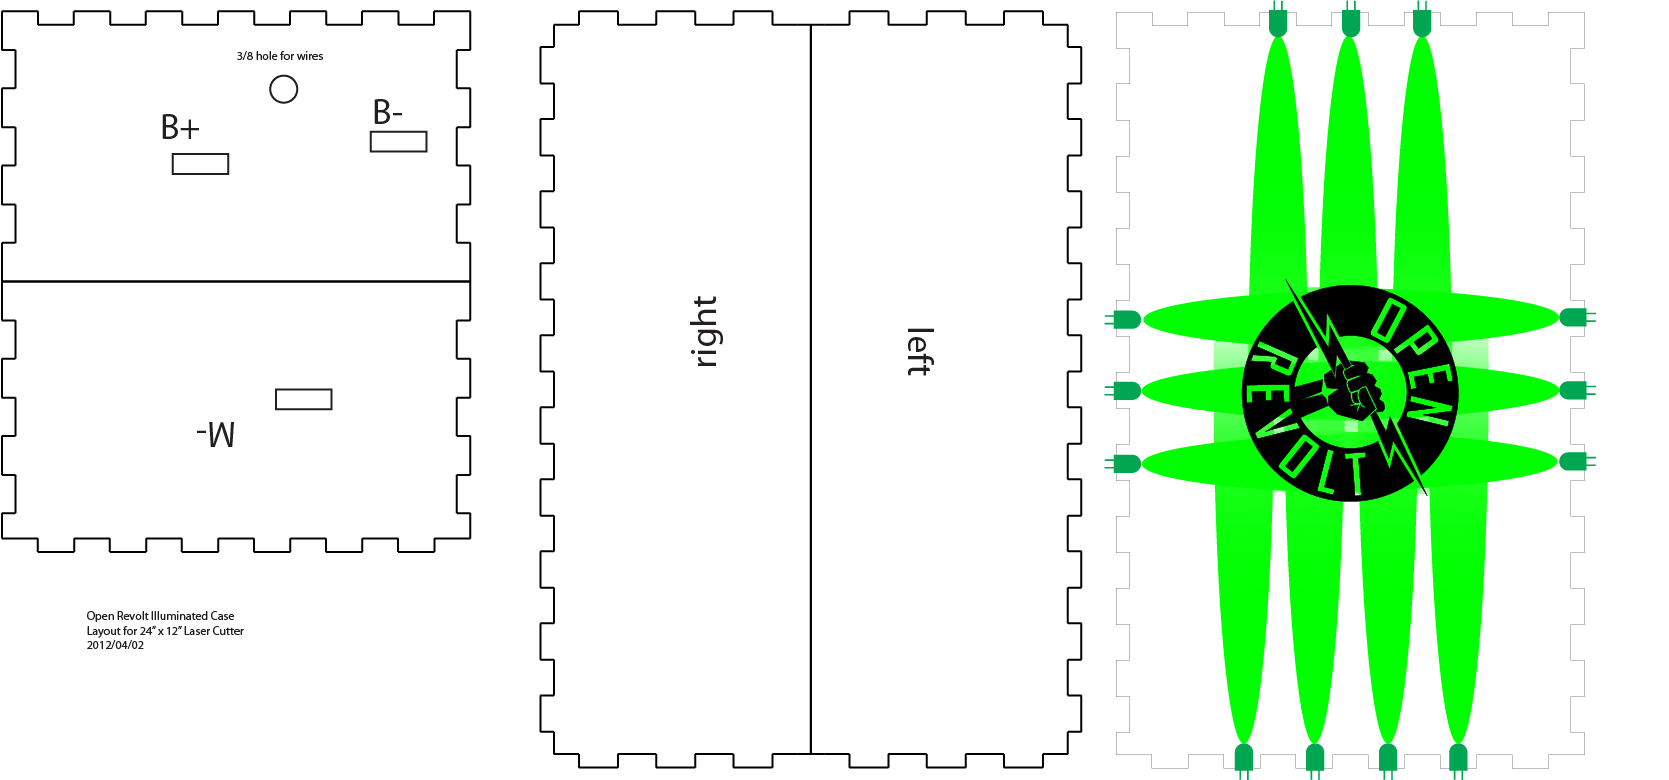
I put it so that parts that have straight cuts, overlap with each other, saving the time and laser power of two additional cuts.
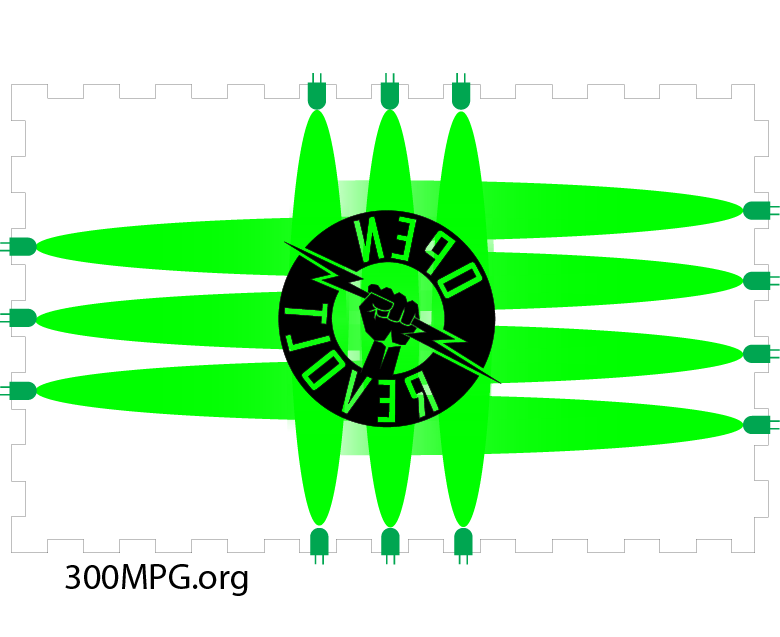
Also in this image, I have now added in roughly what I am thinking for LEDs. I'd like to use green LEDs, as they have such a neat look to them. I've never done this before, but I was thinking that if I got smaller ones, I could counter-sink them to embed them right in the clear plastic, where they could be friction fit, or use a drop of super-glue, clear caulk, or something similar.
Here's just a view of the "lid" - the topmost piece.
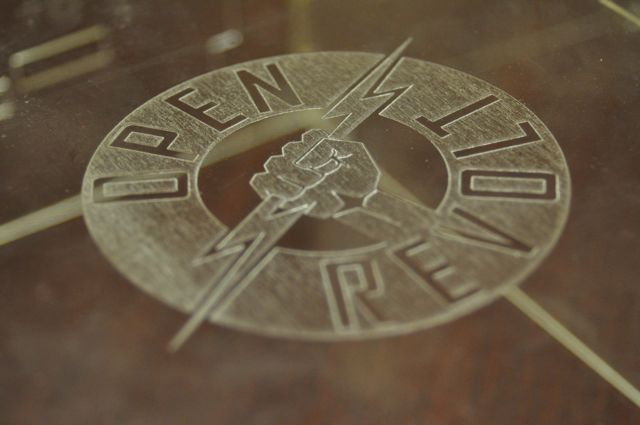
Note that I mirrored the Open Revolt logo for this. The logo will get cut on the BACK of the plastic, so that it is smooth on the top outside surface. It will stay cleaner and it looks a bit nicer too.
Also on the logo, wherever it is white will be the clear plastic, and wherever it is black will be etched. Please imagine white, lit-up etching wherever the logo is black.
I set a 3/8" hole in the B+ & B- bus bar end for the throttle, power, and pre-charge wires to go through. 3/8 is big enough for a 1/4" spade connector to fit through while a couple other wires are already through the hole.
So, this is what I am thinking so far. Am I missing anything? Any thoughts or suggestions?
I really have no idea how many LEDs I need. I just put a few around all for sides for the heck of it. Maybe I only need them on the two sides closer to the logo? |
|
|
|
|
The Following User Says Thank You to bennelson For This Useful Post:
|
|
|
04-02-2012, 06:27 PM
|
#19 (permalink)
|
|
EV test pilot
Join Date: Jan 2008
Location: Oconomowoc, WI, USA
Posts: 4,435
Thanks: 17
Thanked 663 Times in 388 Posts
|
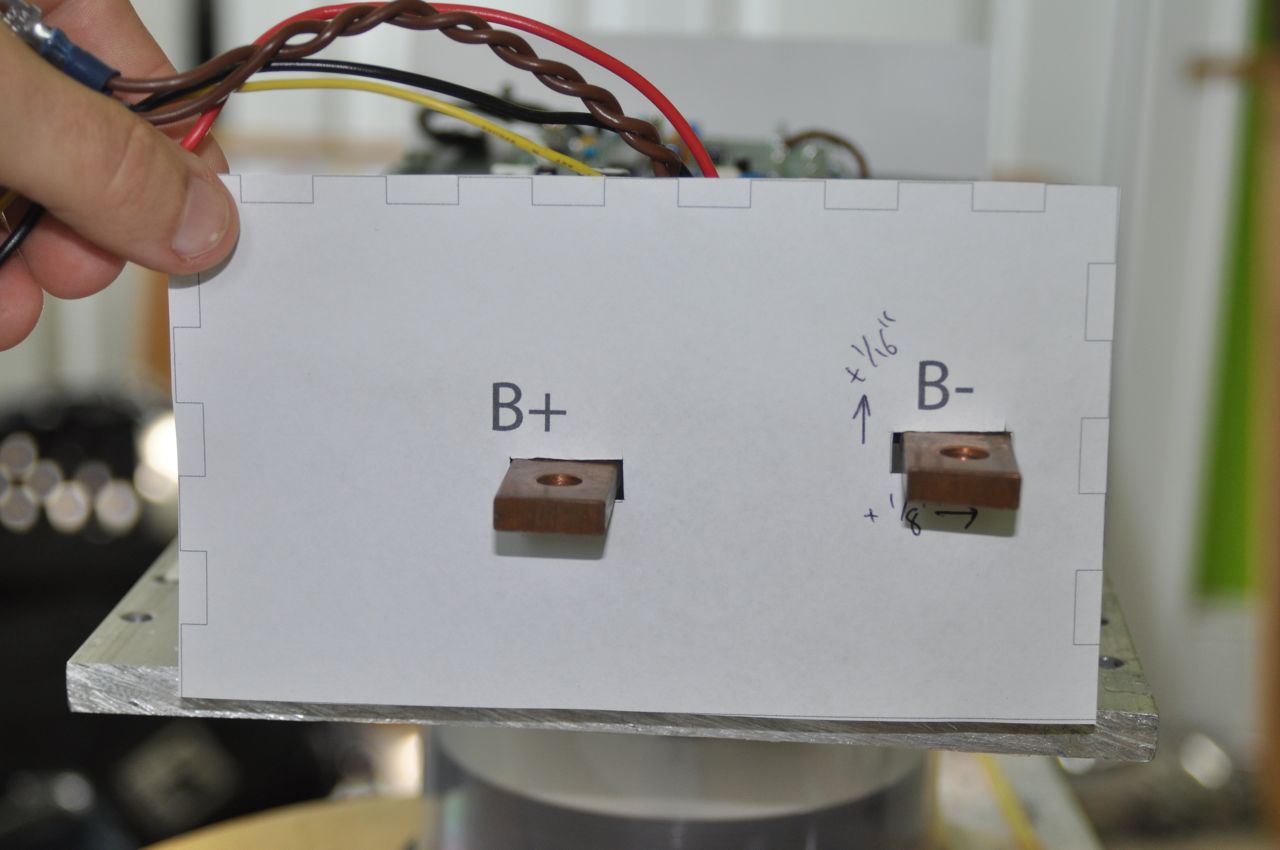
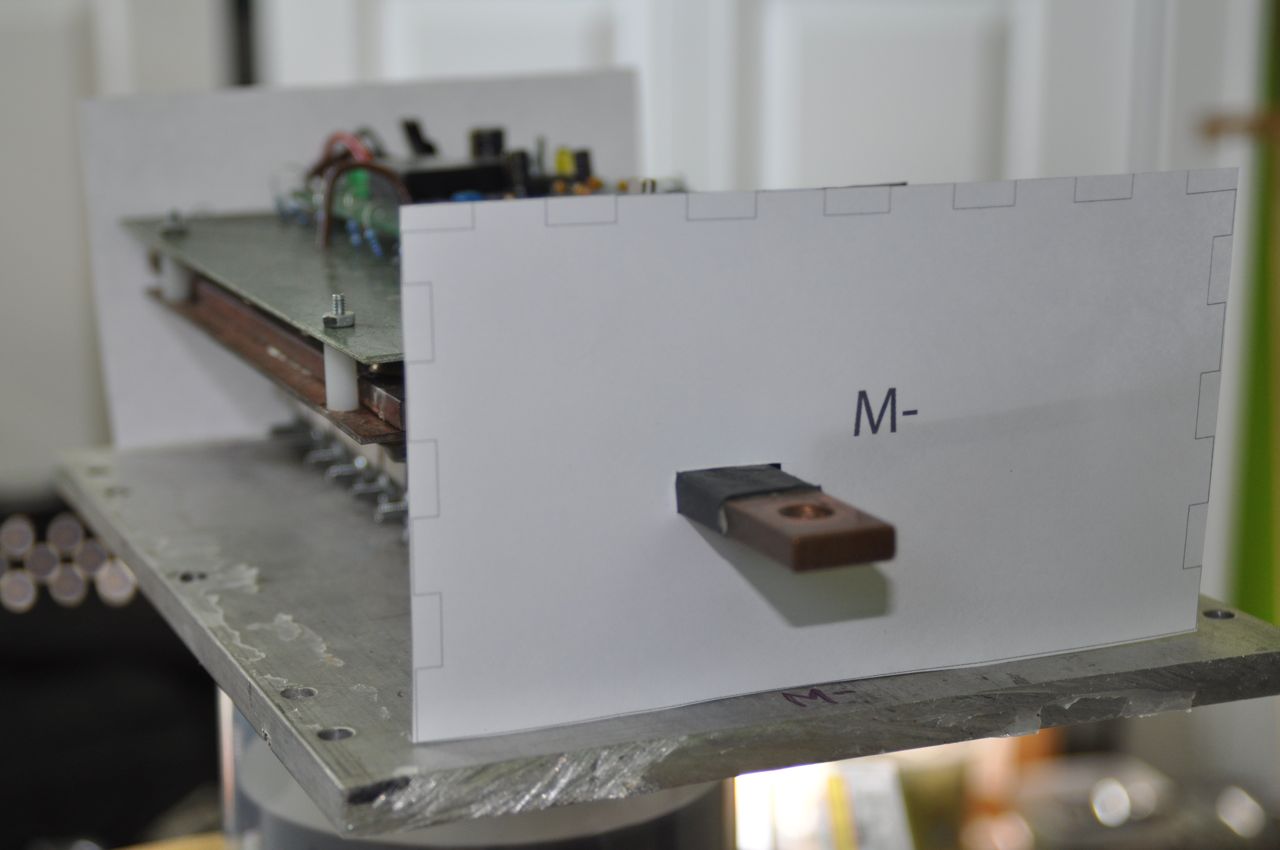
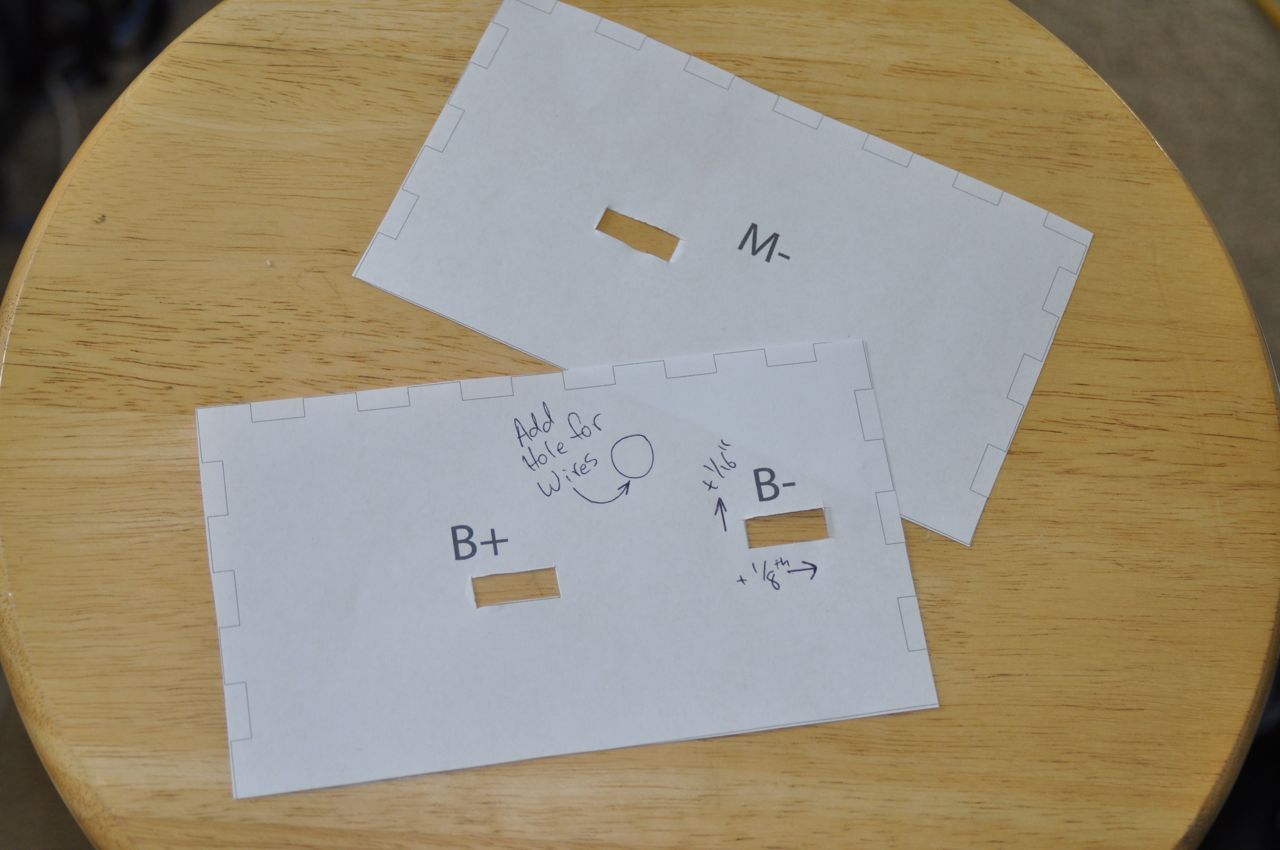
I also played around with some more "CAD" - cardboard aided design.
Since I don't have a laser cutter at home, I figured a great way to test things out in the physical world from the virtual one is simply to hit "PRINT".
The humble ink-jet printer is a fast and cheap way to prototype anything 8.5"x11" or smaller!
I printed up the ends of the case and cut them out with a scissors, and cut the bus-bar holes with a sharp knife over a cardboard mat.
The great thing about this is I can instantly see what does and doesn't line up! The paper is also great, because any changes or notes can be written right on there. If the bus-bar holes don't quite line up, I can tear or cut the paper to make it work, and then match that up in my drawing software.
I was also able to see what size hole I really would need for all the wires to poke through.
 |
|
|
|
|
04-07-2012, 01:37 PM
|
#20 (permalink)
|
|
EV test pilot
Join Date: Jan 2008
Location: Oconomowoc, WI, USA
Posts: 4,435
Thanks: 17
Thanked 663 Times in 388 Posts
|
I got a chance to head back to the Makerspace.
That place is HUGE, when you are trying to carry a laptop computer, motor controller, and camera, ON CRUTCHES!
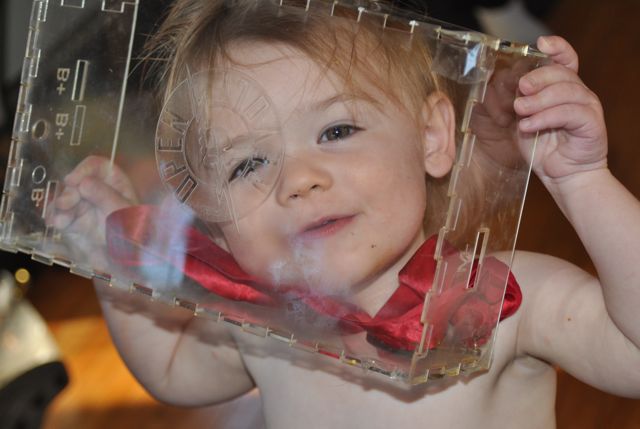
Anyways, I sat down at the laser and set to work. I had some cheap, thinner material right there, so I thought I'd try making a "prototype" clear case out of the cheap and thin stuff.


It turned out OK for just some scrap material cobbled together. Get the whole story over at my blog.
PS: Keep toddlers away from projects.
|
|
|
|
|
The Following 4 Users Say Thank You to bennelson For This Useful Post:
|
|
|