Go Back   EcoModder Forum > EcoModding > Fossil Fuel Free > Open ReVolt: open source DC motor controller
Register Now
 Register Now
 

Reply  Post New Thread
 
Submit Tools LinkBack Thread Tools
Old 04-09-2012, 06:31 PM   #21 (permalink)
EV test pilot
 
bennelson's Avatar
 
Join Date: Jan 2008
Location: Oconomowoc, WI, USA
Posts: 4,435

Electric Cycle - '81 Kawasaki KZ440
90 day: 334.6 mpg (US)

S10 - '95 Chevy S10
90 day: 30.48 mpg (US)

Electro-Metro - '96 Ben Nelson's "Electro-Metro"
90 day: 129.81 mpg (US)

The Wife's Car - Plug-in Prius - '04 Toyota Prius
90 day: 78.16 mpg (US)
Thanks: 17
Thanked 663 Times in 388 Posts
I just ordered a few rectangular green LEDs. They are little pairs of two green LEDs that shoot sideways.

Seemed like I might be able to laser-cut the case to fit these LEDs directly. With the legs hanging down, it should be easy to wire them up.

Digi-Key - 67-1324-ND (Manufacturer - SSB-LX02GC)

__________________


300mpg.org Learn how to BUILD YOUR OWN ELECTRIC CAR CHEAP
My YouTube Videos
  Reply With Quote
Alt Today
Popular topics

Other popular topics in this forum...

   
Old 05-27-2012, 04:04 PM   #22 (permalink)
EV test pilot
 
bennelson's Avatar
 
Join Date: Jan 2008
Location: Oconomowoc, WI, USA
Posts: 4,435

Electric Cycle - '81 Kawasaki KZ440
90 day: 334.6 mpg (US)

S10 - '95 Chevy S10
90 day: 30.48 mpg (US)

Electro-Metro - '96 Ben Nelson's "Electro-Metro"
90 day: 129.81 mpg (US)

The Wife's Car - Plug-in Prius - '04 Toyota Prius
90 day: 78.16 mpg (US)
Thanks: 17
Thanked 663 Times in 388 Posts
(Update from last time - the rectangular LEDs aren't very bright. I'm going to try pointing cylindrical LEDs straight at the logo instead.)

The project progresses!

I had a friend cut out the main hunks of plexiglass on his work laser. I tried cutting the .22" thick acrylic on the 25 watt laser, but it just wasn't powerful enough to do it without significant smoke, melting, and other issues. He offered just to cut it for me, so I e-mailed him my Adobe Illustrator file and went from there.

I got the cut pieces back the other day and test fit them. Laser-cut fit was fantastic! Parts went together just like a jigsaw puzzle!

I did sand off the very bottom edge of the one end, as it hit wierd on the heat sink. I also trimmed part of the board on the controller because it stuck out a bit. Heck, the whole controller is sort of out of square!

I put the cut pieces into the laser and engraved the Open Revolt logo into the middle. (Took about 45 minutes - 30% power, 3-passes....)

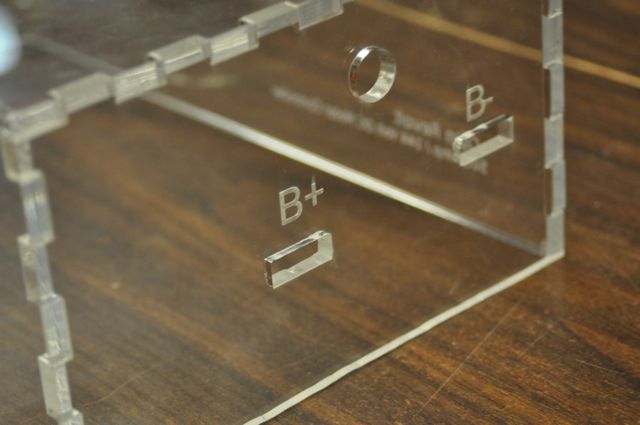
I then engraved the bus bar marks on the ends and "Open Revolt Motor Controller" on the one side.


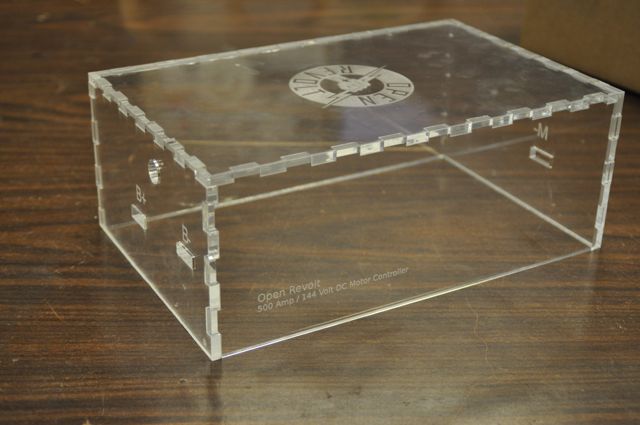
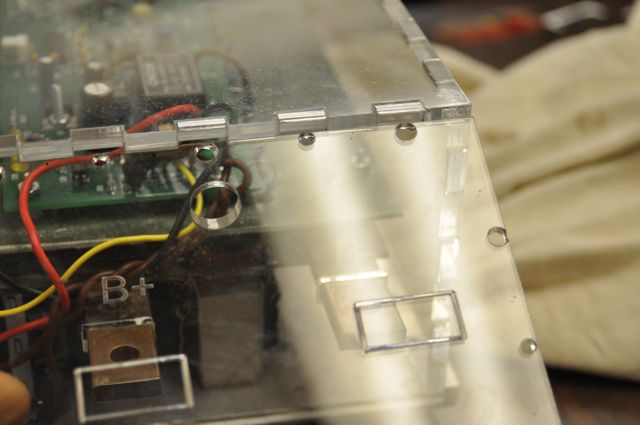
I've glued the case together as much as I dare to right now. Since bus bars stick out both ends, the whole case does NOT just set over the top of the controller - the end caps have to slide on OVER the bus bars. I decided to glue the top, two sides, and the M- ends. That leaves the end with the B+/B- loose. I should be able to put on that piece and then slide everything else on from the M- end.

I also got to play around with some LEDs. The etching looks AMAZING when edge-lit with LEDs, but only in the dark.... With the lights on, it barely reads.


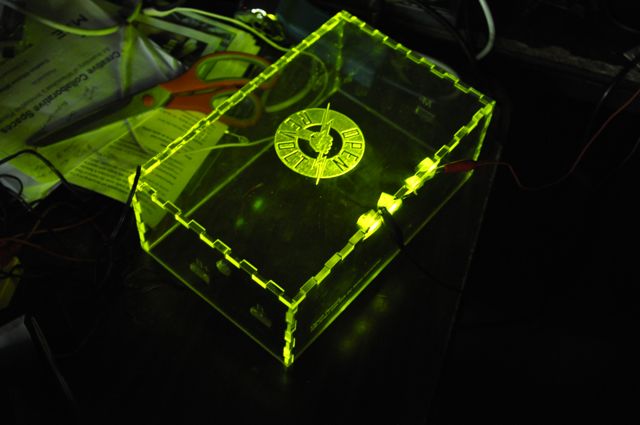
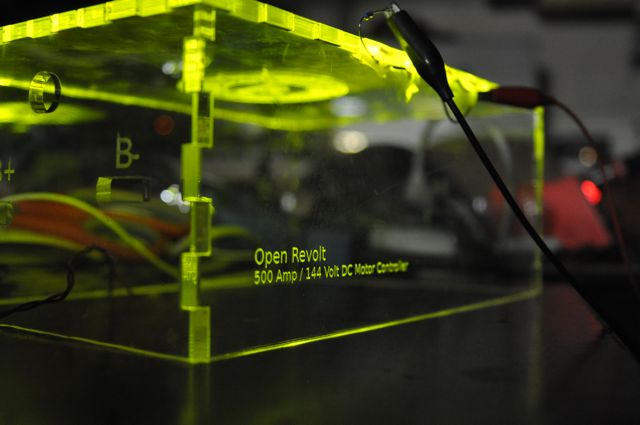
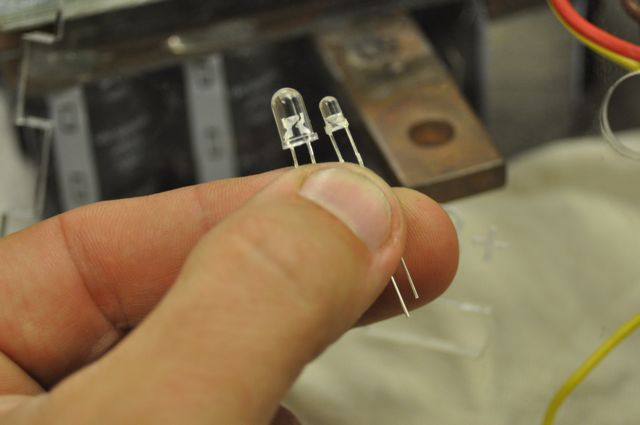
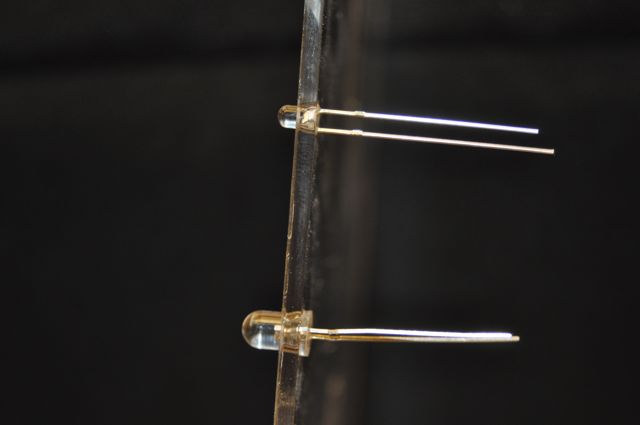
After fiddling with the LEDs a bit, and talking with some of the guys, I decided that I need to use some other, higher power, LEDs. I have also been trying to figure out from the start HOW to attach LEDs to the case and MAKE THEM LOOK GOOD! LEDs usually use a resistor for every two or three LEDs on a 12V system. So, I need at least 4 LEDs, 2 resistors, and some bits of wire, (all with my icky-looking soldering skills) mount them to the case AND make them look good!

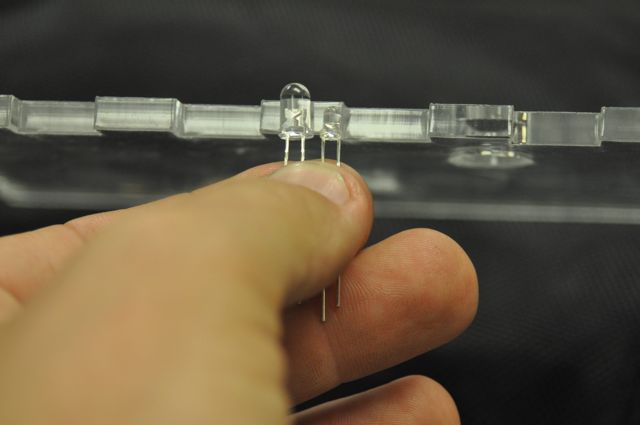
Some green LEDs that I found were actually pretty small - about 1/8" in diameter. It seems that I could drill a hole in the case, and point them right into there. Except that plexiglass is so brittle, and the holes would be really close to the edge!

I did some test drill in some scrap material, and found that I could cleanly drill a hole that the LED would fit in.

However, I still do NOT want to wreck my nice end cap that somebody else was nice enough to laser-cut for me!

So, here's what I'm leaning towards right now.....
I will cut ANOTHER piece of plexiglass, drill the holes for the LEDs in that, and then glue it to the end cap when all done.

That way, if I mess up, so what. I can make another. Also, I was thinking that maybe I make a spacer and sandwich together that piece of plexi with a cover, so that it covers the resistors and LED power wiring. Might give it a nice finished look, and the "LED Section" will be a stand-alone, removable unit.
__________________


300mpg.org Learn how to BUILD YOUR OWN ELECTRIC CAR CHEAP
My YouTube Videos

Last edited by bennelson; 07-19-2012 at 10:36 AM.. Reason: Updated photos and links to them.
  Reply With Quote
The Following 4 Users Say Thank You to bennelson For This Useful Post:
dave koller (05-27-2012), J-Ro (08-31-2012), MPaulHolmes (05-27-2012), Ryland (05-27-2012)
Old 05-28-2012, 08:43 AM   #23 (permalink)
Administrator
 
Daox's Avatar
 
Join Date: Dec 2007
Location: Germantown, WI
Posts: 11,203

CM400E - '81 Honda CM400E
90 day: 51.49 mpg (US)

Daox's Grey Prius - '04 Toyota Prius
Team Toyota
90 day: 49.53 mpg (US)

Daox's Insight - '00 Honda Insight
90 day: 64.33 mpg (US)

Swarthy - '14 Mitsubishi Mirage DE
Mitsubishi
90 day: 56.69 mpg (US)

Daox's Volt - '13 Chevrolet Volt
Thanks: 2,501
Thanked 2,585 Times in 1,553 Posts
Looks really nice Ben!
__________________
Current project: A better alternator delete
  Reply With Quote
Old 07-19-2012, 10:22 AM   #24 (permalink)
EV test pilot
 
bennelson's Avatar
 
Join Date: Jan 2008
Location: Oconomowoc, WI, USA
Posts: 4,435

Electric Cycle - '81 Kawasaki KZ440
90 day: 334.6 mpg (US)

S10 - '95 Chevy S10
90 day: 30.48 mpg (US)

Electro-Metro - '96 Ben Nelson's "Electro-Metro"
90 day: 129.81 mpg (US)

The Wife's Car - Plug-in Prius - '04 Toyota Prius
90 day: 78.16 mpg (US)
Thanks: 17
Thanked 663 Times in 388 Posts
Here's the latest update.
I grabbed a couple of scrap LEDs and starting experimenting to see what would work to attach them to another piece of plastic. How about laser-cutting a hole and poking them in there!

This is two LEDs, a 5mm and a 3mm


Here you can see them against the .22" plexiglass that I used to make the controller case. The 5mm LED is just a little too long to fit inside the thickness of the plexiglass, but the 3mm will embed itself in there just fine.


I used the laser-cutter at the Milwaukee Makerspace to make a new end piece to experiment with. Although this is a piece of scrap material, which IS NOT the right thickness, it still let me check the hole size and see how LEDs would fit through.


Here's a screen grab of the cutting layout on the laser cutter. I used my existing pattern of end cap to make a new one (without the castled edge) so that I could add LED holes to a new piece.


Here's the new "test" piece just leaned up against the end cap of the controller. I wanted the LEDs to line up to shine sideways through the top material to illuminate the Open Revolt Logo.

After cutting this piece, I realized that I put the holes to line up with the male notches on the end cap. I should have put them over the female notches, as that puts the LEDs more in direct contact with the top piece, so the light transmission should be better.


I still need to get the actual LEDs I'll be using. The 3mm were nice in how they fit right into the plexiglass. Also, their smaller diameter brought them in from the edge a bit.

I also want to make several layers of plexiglass, so that the LEDs, their associated resistors, and wires are all covered and contained in a way that looks nice.
__________________


300mpg.org Learn how to BUILD YOUR OWN ELECTRIC CAR CHEAP
My YouTube Videos

Last edited by bennelson; 07-19-2012 at 10:38 AM.. Reason: typos
  Reply With Quote
Old 07-19-2012, 02:13 PM   #25 (permalink)
EcoModding Apprentice
 
dave koller's Avatar
 
Join Date: Feb 2010
Location: Northern Wisconsin
Posts: 137
Thanks: 32
Thanked 39 Times in 23 Posts
Looks good Ben!
__________________
Dave ...
  Reply With Quote
Old 07-20-2012, 07:23 PM   #26 (permalink)
EcoModding Lurker
 
Join Date: Feb 2009
Location: Regina, SK, Canada
Posts: 15
Thanks: 0
Thanked 3 Times in 3 Posts
My suggestion for the LED mounting would be to drill 3mm holes in the female parts of the LID (so the sides cover them) LENGTHWISE. Then the LEDs are pushed into the holes end-on, the LED legs are bent at 90 degrees, and are (mostly) protected by the male castellations on the sides. It's methods like this that Computer Case modders have been using for years now.

  Reply With Quote
Reply  Post New Thread


Tags
case, cougar, etch, laser, logo, motor controller, open revolt


Powered by vBulletin® Version 3.8.11
Copyright ©2000 - 2024, vBulletin Solutions Inc.
Content Relevant URLs by vBSEO 3.5.2
All content copyright EcoModder.com