04-04-2013, 10:56 PM
|
#51 (permalink)
|
|
Banned
Join Date: Oct 2009
Location: Fort Worth, Texas
Posts: 2,442
Thanks: 1,422
Thanked 737 Times in 557 Posts
|
Thanks for adding that. I breathed just a bit too much of that SUNOCO 260 leaded gasoline to have the attention to safety I should.
Your work is certainly better than mine would be. This site is a spur to become better.
|
|
|

|
 Today Today
|
|
|
|
 Other popular topics in this forum...
|
|
|
|
|
04-07-2013, 12:18 AM
|
#52 (permalink)
|
|
Master EcoModder
Join Date: Mar 2012
Location: Salt Lake City
Posts: 292
00C - '00 Toyota Corolla 90 day: 43.54 mpg (US)
Thanks: 147
Thanked 190 Times in 73 Posts
|
Completed skin 1 of 2
Completed the back skin and corresponding ribs. One skin to go on the front, odds and ends around the lip, then on to the lid.
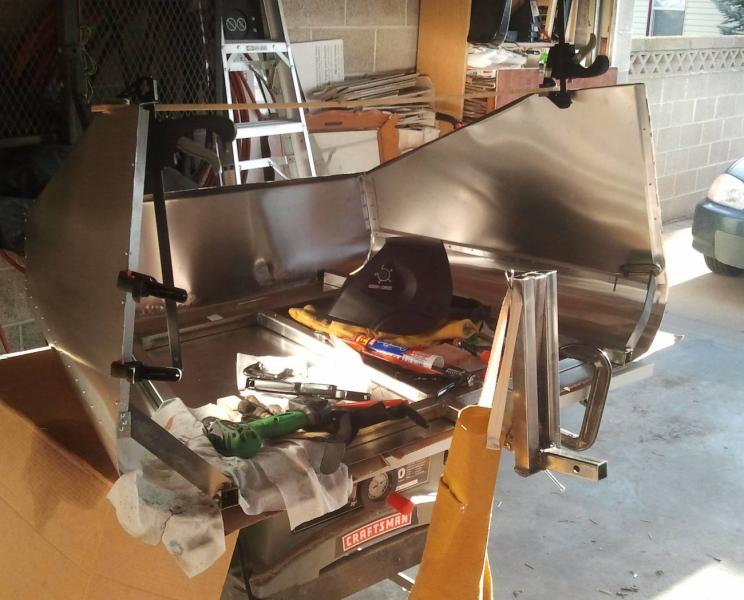
Steps: - Bend sides up and clamp in place with a wood strip.
- Fit back and sides together, then rivet the seam.
- Cutout, then slightly bend the two brackets that hold the ribs onto the frame, from 1/8" steel.
- Clamp the steel brackets to the aluminum ribs.
- Measure and adjust the size of the opening at the top and bottom by adjusting the clamps.
- Spread soggy wet paper towels out to protect the aluminum, and then weld the steel bracket onto the frame.
- Drill and rivet the steel bracket and aluminum rib together.
|
|
|
|
|
The Following 3 Users Say Thank You to christofoo For This Useful Post:
|
|
|
04-07-2013, 09:51 PM
|
#53 (permalink)
|
|
Master EcoModder
Join Date: May 2008
Location: Maynard, MA Eaarth
Posts: 7,908
Thanks: 3,475
Thanked 2,953 Times in 1,846 Posts
|
That is some very clean and crisp work! Looks professional!
|
|
|
|
|
04-08-2013, 07:28 AM
|
#54 (permalink)
|
|
Master EcoModder
Join Date: Jul 2008
Location: Albany, NY
Posts: 476
Thanks: 178
Thanked 89 Times in 45 Posts
|
I agree. I'm looking forward to the finished product!
__________________
2007 ZENN and 2019 Chevy Bolt EV 145,000 oil free miles to date.
|
|
|
|
|
04-14-2013, 12:58 PM
|
#55 (permalink)
|
|
Master EcoModder
Join Date: Mar 2012
Location: Salt Lake City
Posts: 292
00C - '00 Toyota Corolla 90 day: 43.54 mpg (US)
Thanks: 147
Thanked 190 Times in 73 Posts
|
Shrink trouble
This project has felt like pretty smooth sailing so far, but yesterday I got snagged on the compound curvature for the two front skin corners.
Transfer X,Y coordinates from the drawing using a pair of tape measures.
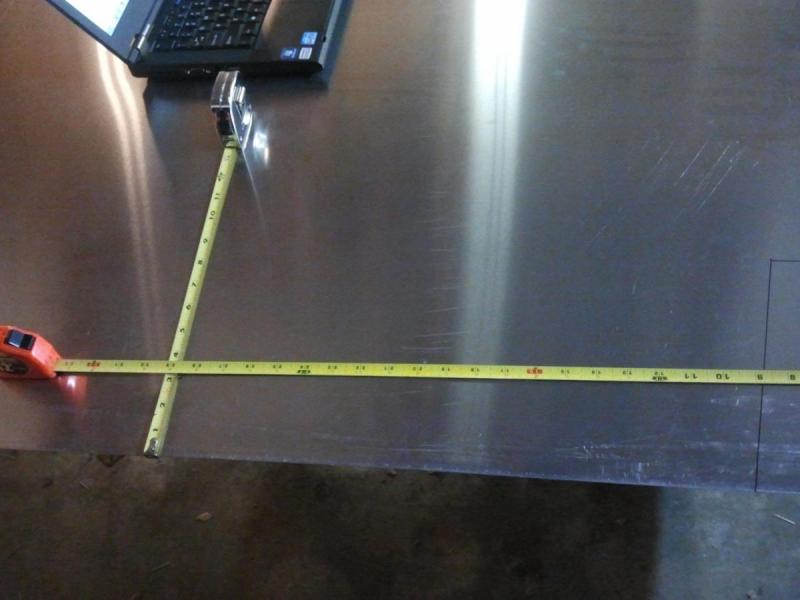
By the way, the PDF drawings I posted on my server have a projected view for this part, which is wrong. Thankfully, I caught the mistake and changed it to an 'unfolded' view before I started snipping, otherwise it would be 4" short on two edges.
Then trace it out to make a copy for the second half.
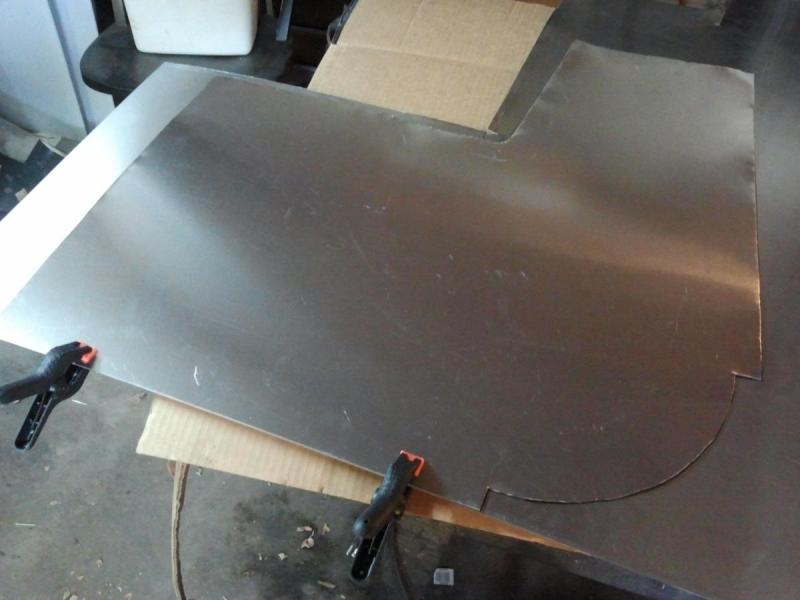
Here's the trouble:
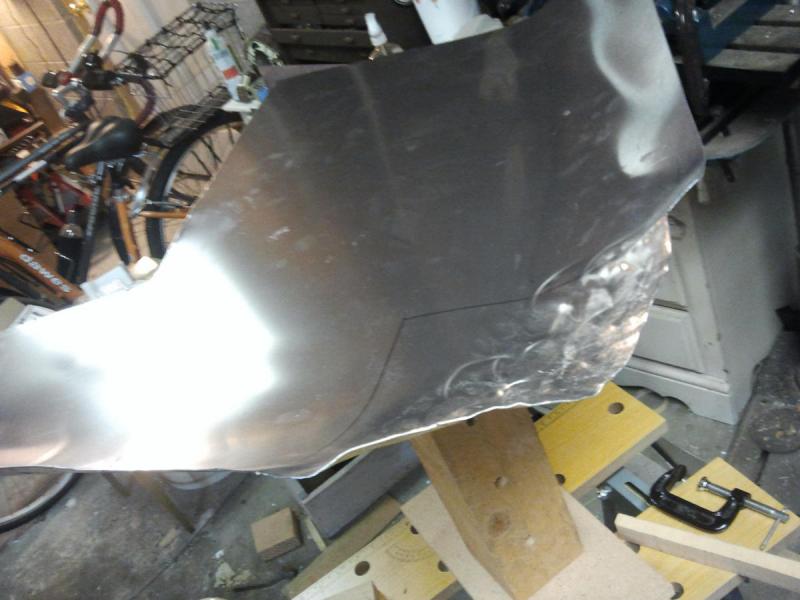
'Stump' shrinking - the method I used to make the little practice bowl shown earlier - didn't work. ... Or maybe it worked a little since I see a little compound curvature in this corner, but it's never going to make it to the required acute angle. I think the problem is primarily the switch to a heavier gauge sheet, 0.032" instead of 0.019".
I'm also not happy with the amount of stretching inherent to the stump method. So instead of trying to adapt to the heavier gauge, I tried making a DIY tuck shrinking jig with some steel rod and angle bracket, but also failed there on the first two attempts.
Time to reevaluate - this piece is in bad shape now - do I have enough scrap sheet to start over? Yes. So this bungled piece can be called practice. I still feel like I'll be happier with aluminum corners vs fiberglass, so I'm going to make another attempt at tuck shrinking next week. If I just can't get it to go, the backup plan is to snip out the corners and do the compound curvature with foam/fiberglass. |
|
|
|
|
04-14-2013, 01:55 PM
|
#56 (permalink)
|
|
Master EcoModder
Join Date: Aug 2012
Location: northwest of normal
Posts: 29,449
Thanks: 8,380
Thanked 9,139 Times in 7,547 Posts
|
Quote:
|
If I just can't get it to go, the backup plan is to snip out the corners and do the compound curvature with foam/fiberglass.
|
That would be a shame considering how you've done so far. I suggest cutting 'darts' in the aluminum. To save me drawing or hotlinking a picture, look at the Goode Homolosine and Waterman Butterfly map projections here.
If you use the Goode Homolosine, the single seam could be lapped, or trapped in an aluminum or brass H-channel (model making parts). 
A person who's better than me with a hammer and dolly could make that corner flat again. Maybe that's why the planishing didn't work, it wasn't pre-smoothed enough. You could try shrinking with a hair dryer and dry ice, if the aluminum wouldn't lose its temper.
Last edited by freebeard; 04-14-2013 at 02:00 PM..
|
|
|
|
|
04-15-2013, 02:16 PM
|
#57 (permalink)
|
|
Aero Wannabe
Join Date: Dec 2007
Location: NW Colo
Posts: 738
Thanks: 705
Thanked 219 Times in 170 Posts
|
I find aluminum starts out fairly soft and work hardens and becomes brittle. Try the thinner metal just for the compound corners or piece it together like a beach ball or both??
Your work up to this point looks great.
__________________
60 mpg hwy highest, 50+mpg lifetime
TDi=fast frugal fun
https://ecomodder.com/forum/showthre...tml#post621801

Quote:
Originally Posted by freebeard

The power needed to push an object through a fluid increases as the cube of the velocity. Mechanical friction increases as the square, so increasing speed requires progressively more power.
|
|
|
|
|
|
The Following User Says Thank You to COcyclist For This Useful Post:
|
|
|
04-15-2013, 02:30 PM
|
#58 (permalink)
|
|
Master EcoModder
Join Date: Mar 2012
Location: Salt Lake City
Posts: 292
00C - '00 Toyota Corolla 90 day: 43.54 mpg (US)
Thanks: 147
Thanked 190 Times in 73 Posts
|
Quote:
Originally Posted by freebeard
That would be a shame considering how you've done so far. I suggest cutting 'darts' in the aluminum. To save me drawing or hotlinking a picture, look at the Goode Homolosine and Waterman Butterfly map projections here.
If you use the Goode Homolosine, the single seam could be lapped, or trapped in an aluminum or brass H-channel (model making parts).
... |
Cutting 'darts' to effectively shrink had also crossed my mind, I might even try it but I'm not real optimistic about that route. For one thing I've never seen any 'real' part implemented that way. But sometimes try it and see is worth a thousand conjectures.
Quote:
Originally Posted by freebeard
...
A person who's better than me with a hammer and dolly could make that corner flat again. Maybe that's why the planishing didn't work, it wasn't pre-smoothed enough. You could try shrinking with a hair dryer and dry ice, if the aluminum wouldn't lose its temper.
|
Sorry for the confusion, when I say 'bungled' and 'scrap' I mean that the aluminum in the corner zone is well on its way to the fatigue limit. I didn't shoot the picture close enough so you can't really see, but there is even one spot where I've worn a crack right through the metal. I can continue practicing on this piece, but I won't want it on my box even if I fix my shrink method. That's why this piece is scrap.
But overall the reason I got stuck is my methods failed to shrink the sheet. I'll be making one or two more attempts before the end of the week. I think I know what's wrong.
I'm also at a point where my timeline is in jeopardy. I was hoping to have it road-ready before spring-time vacation travel, but that may or may not happen now. My wife is being phenomenally supportive: an offer to watch the kids double-time so I can pour on the shop hours. (Jealous?) I also have some vacation time I could 'squander' on even more hours.
However, I'm prepared to leave it sitting in the shop for a few months if that's what it takes, and I feel like I should also stop and thank Tango Charlie: even a project that didn't pan out had lessons that influenced my project and were a big help to me in getting this far: - Fab a separate frame instead of building onto existing hitch rack, thus we can still travel in the middle of the project (also for my project the existing commercial hitch rack didn't fit the aero envelope very well). I can resell the existing commercial hitch rack version after aero version completion.
- Use better load-bearing materials instead of coroplast.
- Don't get emotionally invested in completing before a deadline, even though, to paraphrase MetroMPG recently, the lack of an aero tail bothers me literally every. time. I. drive. (especially on a long haul).
Last edited by christofoo; 04-15-2013 at 02:40 PM..
|
|
|
|
|
04-15-2013, 02:43 PM
|
#59 (permalink)
|
|
Master EcoModder
Join Date: Mar 2012
Location: Salt Lake City
Posts: 292
00C - '00 Toyota Corolla 90 day: 43.54 mpg (US)
Thanks: 147
Thanked 190 Times in 73 Posts
|
Quote:
Originally Posted by COcyclist
I find aluminum starts out fairly soft and work hardens and becomes brittle. Try the thinner metal just for the compound corners or piece it together like a beach ball or both??
Your work up to this point looks great.
|
Thanks, I hadn't thought of that.
It's also true that the corners can have equal strength with thinner metal (not sure how much thinner) just because of the compound curvature. |
|
|
|
|
04-16-2013, 03:25 PM
|
#60 (permalink)
|
|
Karmann Eclectric
Join Date: Feb 2010
Location: Graham, WA
Posts: 165
Thanks: 9
Thanked 90 Times in 51 Posts
|
Watching with great interest! If the sheet metal corners don't work out, what about starting with a preformed starting piece, like a bbq, salad bowl, pressed pan or lid that you wouldn't have to shrink or stretch so dramatically?
Amazon.com: Concept Housewares 14 Inch Aluminum Wok Lid: Kitchen & Dining
Or perhaps there's a cast corner from commercial truck bodies that could fit? (Yeah, those are based on 90 degree corners,)
aluminum castings, corner caps casting, aluminum body corp corner caps, a.m haire old style corner caps, aluminum castings, babb corner caps, continental corner caps, truck corner caps, truck corner caps castings
Dunno if your metalworking skills have ever branched into lost foam aluminum casting? (Making em light enough might be a challenge, even in aluminum.)
http://www.youtube.com/watch?feature...&v=EyOoFDsrGr4
Good Luck!
-Jay
|
|
|
|
|