 10-22-2012, 07:43 AM
|
#131 (permalink)
|
|
EcoModding Lurker
Join Date: Jun 2010
Location: Central NY
Posts: 23
Thanks: 0
Thanked 4 Times in 4 Posts
|
To avoid your mix overheating too soon, pour it into a larger, shallow container so it spreads out and stays cool. You can stick the mix in a fridge too. Also, for that part it would probably be easier to apply the glass and epoxy before cutting out the hole, then add strips of glass and epoxy to the inner edges after you cut the opening, or just use plain resin with no glass since it's not really a structural piece. Whenever possible, rounded shapes are easier to lay the glass on than sharp corners.
|
|
|

|
|
The Following User Says Thank You to JRP3 For This Useful Post:
|
|
 Today Today
|
|
|
|
 Other popular topics in this forum...
|
|
|
|
|
10-22-2012, 10:29 AM
|
#132 (permalink)
|
|
Batman Junior
Join Date: Nov 2007
Location: 1000 Islands, Ontario, Canada
Posts: 22,541
Thanks: 4,085
Thanked 6,989 Times in 3,619 Posts
|
Seeing that frame come together, now I get that drawing you had made.
Continuing to enjoy the build!
|
|
|
|
|
10-27-2012, 12:49 AM
|
#133 (permalink)
|
|
Master EcoModder
Join Date: Jan 2008
Location: Sacramento, CA
Posts: 406
Thanks: 35
Thanked 143 Times in 105 Posts
|
A8ksh4,
A couple of thoughts and questions about your fiberglass.
1. I used the Tap Plastics resin this summer. Did you get the quick set per chance?
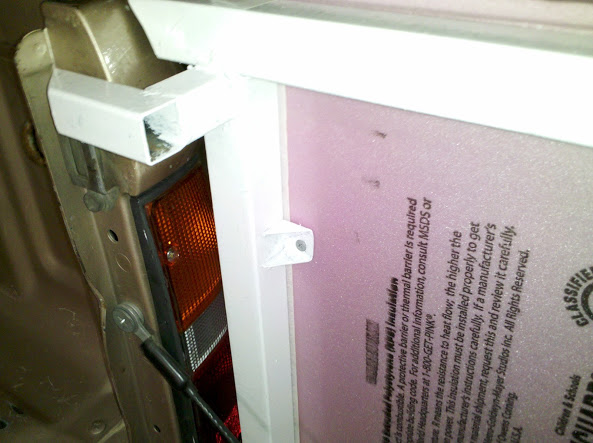
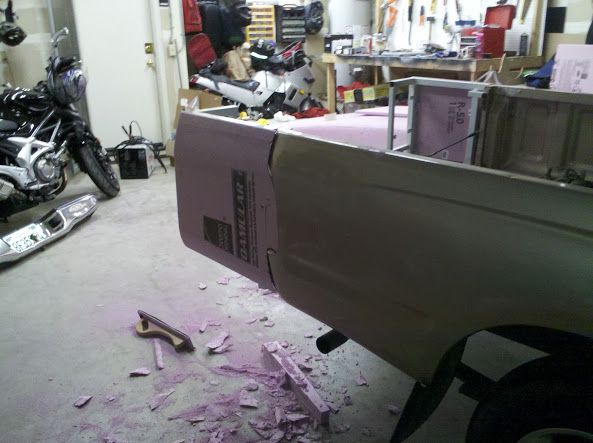
That could be why the epoxy is setting up too quickly. Also for the area shown in your photo a few ounces was probably a bit excessive and I have found in some cases that mixing too much resin at once can cause it to set up really quickly in the container. Hence the heat and smoke.
2. You might use one or two inch paint brushes to put epoxy on the smaller areas. Tap has those brushes fairly inexpensive. As someone else suggested, possibly glue the glass down first. Use 3M 78 spray adhesive. It is made for polystyrene and won't eat it.
3. To keep edges from fraying too much, run a strip of masking tape where you need to cut the fabric. That way you can get a clean cut. Then when putting the epoxy on the glass and over the tape the adhesive on the tape should quit working and you can remove the tape from the fabric and finish putting epoxy on those seams.
Hope this helps.
JJ
|
|
|
|
|
The Following 2 Users Say Thank You to jjackstone For This Useful Post:
|
|
|
10-27-2012, 06:25 PM
|
#134 (permalink)
|
|
B.O. Zen
Join Date: Feb 2009
Location: Folsom, CA
Posts: 208
Pickup - '99 Toyota Tacoma 2wd, Regular Cab, Short Bed 90 day: 34.62 mpg (US)
Thanks: 130
Thanked 141 Times in 59 Posts
|
Thanks for the pointers, JJ.
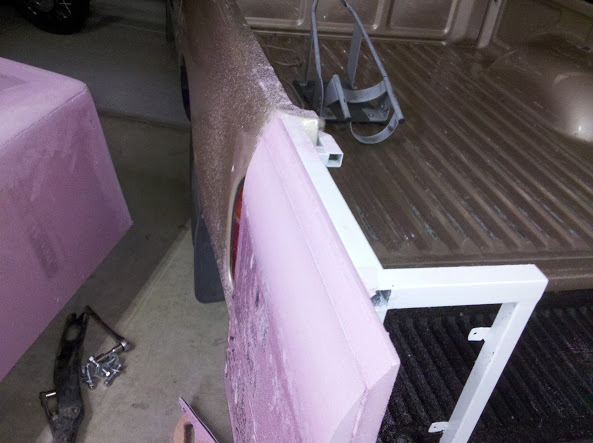
I made a bit more progress yesterday. I attached some foam blocks that I had layered up some time back to the sides of the extension frame and started shaping them to the contour/body lines of the bed:

I used a long block ($5 at harbor freight) with 36 grit paper to round them off to the shape of the bed:
Bottom, too:

And then started cutting the front to the shape of the bed-end:
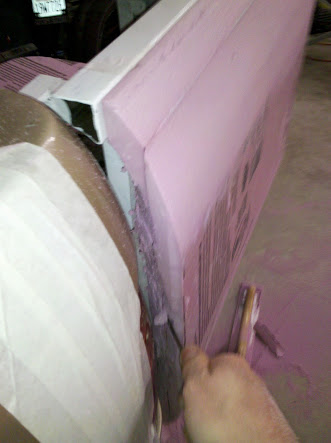
Process is cut to shape of bed-end, slide panel forward, closer to truck, and repeat cutting to match shape of bed-end. Repeat until they're totally flush:
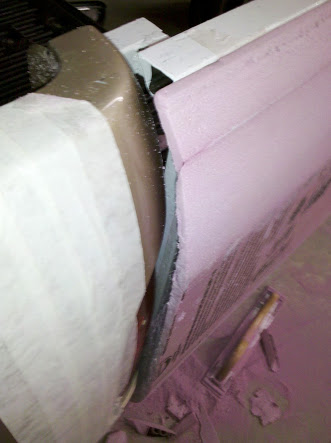
My blocks weren't quite thick enough to follow the entire curve of the bed, so I'm going to go back and glue another half inch onto them to shape.
To be legal, I think I'll need to do a yellow blinker on the side of each of these. I'd like to paint them gold to match the truck, once they're glassed, filled, and block sanded. The shell and everything on the back of the truck will be white.
The two things I'm thinking about right now are how I'm going to attach the fabric to the bed and to the bottom of the shell as well as how the shell lift will work... I need to figure these out so I can make any needed cuts to the bottom of the shell before I start glassing it... or I might be able to go ahead and glass the top and most of the sides of the shell, then make adjustments on the bottoms of each side, and then finish... hmm... braindump... :P
__________________

|
|
|
|
|
10-27-2012, 07:22 PM
|
#135 (permalink)
|
|
Do more with less
Join Date: Jul 2010
Location: North Eastern Missouri
Posts: 931
Thanks: 66
Thanked 177 Times in 112 Posts
|
My advise:
Make some trial parts to get used to working with these materials. When I started doing this I bought a Rutan kit which was a starter kit with instructions of what worked good for Bert.
For your extension make your foam a bit smaller than you want as it is going to be a male mold and your part will be a bit bigger. Use Super 77 spray glue and glue the composite to the foam. Put the cloth on the bias, it will wrap a lot better. I would remove the bottom and turn it over to do the layup, let gravity be your friend. You can just use some flox to bond the parts together when they are laid up.
In areas that are for attachment points to your sub frame make them stronger with additional composite about an inch smaller than the lower layer so that the force is spread out. Don't make sudden changes in thickness. If you use a cloth peel ply you will have a good surface for doing a secondary layup without sanding.
Good luck
__________________
“The further a society drifts from the truth, the more it will hate those that speak it.” George Orwell
“Before a standing army can rule, the people must be disarmed; as they are in almost every kingdom in Europe.
The supreme power in America cannot enforce unjust laws by the sword; because the whole body of the people are armed.”
– Noah Webster, 1787
|
|
|
|
|
10-28-2012, 01:25 AM
|
#136 (permalink)
|
|
Master EcoModder
Join Date: Aug 2012
Location: northwest of normal
Posts: 29,344
Thanks: 8,347
Thanked 9,111 Times in 7,524 Posts
|
I've been following the thread because it is bringing out a lot of interesting tips on fiberglass/composite materials.
I'm not sure if peel ply or laminating film is the same as Mylar plastic foil. I remember from watching my parents do fiberglass work in the 70s , you could use a squeegee blade over Mylar to get a smooth surface finish without a mold.
|
|
|
|
|
10-28-2012, 09:04 AM
|
#137 (permalink)
|
|
Do more with less
Join Date: Jul 2010
Location: North Eastern Missouri
Posts: 931
Thanks: 66
Thanked 177 Times in 112 Posts
|
freebeard, I like using cloth as a peel ply. It leaves the impression of the fabric on the layup. I tear it into strips and make sure it is smooth and wrinkle free. Ironing lightly if I need to. One reason that I like it is that it soaks up some of the excess epoxy and becomes almost one with the part. Excess epoxy adds very little strength.
Obviously wet lays can't compete for strength to weight of a pressure molded part. But they do allow one to fairly simply make a single part without much problem.
Stretching he argument, consider a structure like the one on Jethro's VW or this rear extension of the truck by a8...., It will make a good plug to make a female mold from. The rear bumpersupport is nice but not really needed. The structure and tailgate could be removed on a future version leaving just the shell. There is still a lot of love that needs to go into it.
__________________
“The further a society drifts from the truth, the more it will hate those that speak it.” George Orwell
“Before a standing army can rule, the people must be disarmed; as they are in almost every kingdom in Europe.
The supreme power in America cannot enforce unjust laws by the sword; because the whole body of the people are armed.”
– Noah Webster, 1787
|
|
|
|
|
10-28-2012, 12:33 PM
|
#138 (permalink)
|
|
Master EcoModder
Join Date: Aug 2012
Location: northwest of normal
Posts: 29,344
Thanks: 8,347
Thanked 9,111 Times in 7,524 Posts
|
I was thinking more of using the blade instead of a brush or your fingers, to get a smooth but not necessarily glossy surface. To save finish work.
I could see a female mold for production, but it seems like twice the work for a one-off part.
Nice project overall.
|
|
|
|
|
10-28-2012, 02:36 PM
|
#139 (permalink)
|
|
EcoModding Lurker
Join Date: Jun 2010
Location: Central NY
Posts: 23
Thanks: 0
Thanked 4 Times in 4 Posts
|
Quote:
Originally Posted by Varn

Excess epoxy adds very little strength.
|
Though it does add an element of abrasion resistance, as well as something to sand down to smooth an area without damaging the fibers. |
|
|
|
|
10-28-2012, 08:01 PM
|
#140 (permalink)
|
|
Do more with less
Join Date: Jul 2010
Location: North Eastern Missouri
Posts: 931
Thanks: 66
Thanked 177 Times in 112 Posts
|
Hi JRP3, in what applications do you want to have a thick coating of pure epoxy? I have found epoxy to be very brittle and not that tough when compared to composite. When I have bonded two structural parts together I have usually used cotton flox. Be warned it is tough and almost impossible to sand. West Systems makes a filler that is specifically designed for abrasion resistance. I have never tried or needed it.
Quote:
Originally Posted by JRP3
Though it does add an element of abrasion resistance, as well as something to sand down to smooth an area without damaging the fibers.
|
__________________
“The further a society drifts from the truth, the more it will hate those that speak it.” George Orwell
“Before a standing army can rule, the people must be disarmed; as they are in almost every kingdom in Europe.
The supreme power in America cannot enforce unjust laws by the sword; because the whole body of the people are armed.”
– Noah Webster, 1787
|
|
|
|
|


