 04-05-2013, 06:03 PM
|
#231 (permalink)
|
|
Master EcoModder
Join Date: Oct 2011
Location: Poland
Posts: 840
Thanks: 185
Thanked 167 Times in 117 Posts
|
One question to you a8ksh4. How many fiberglass layers you're planning to put on XPS? I was thinking that two diagonal layers would be enough, but you're the boss 
__________________

Quote:
|
Gerhard Plattner: "The best attitude is to consider fuel saving a kind of sport. Everybody who has enough money for a strong car, can drive fast and hit the pedal. But saving fuel requires concentration, self-control and cleverness. It's a challenge with the nice effect of saving you money that you can use for other more important things."
|
|
|
|

|
 Today Today
|
|
|
|
 Other popular topics in this forum...
|
|
|
|
 04-06-2013, 12:33 AM
|
#232 (permalink)
|
|
Do more with less
Join Date: Jul 2010
Location: North Eastern Missouri
Posts: 931
Thanks: 66
Thanked 177 Times in 112 Posts
|
If you use multiple layers be sure to set the layers of fabric at maybe a 30-45 deg to one another. Not to over think it but try and spread the strength over large angles of stress.
If you make it and fill it so that it is perfect then you can use your rear cover as a plug to make a mold over it and start popping them out.
The foam adds a large degree of stiffness when it is enclosed in composite. If you decide to remove the foam you will be rewarded with a floppy mess.
__________________
“The further a society drifts from the truth, the more it will hate those that speak it.” George Orwell
“Before a standing army can rule, the people must be disarmed; as they are in almost every kingdom in Europe.
The supreme power in America cannot enforce unjust laws by the sword; because the whole body of the people are armed.”
– Noah Webster, 1787
|
|
|

|
|
The Following User Says Thank You to Varn For This Useful Post:
|
|
 04-06-2013, 02:59 PM
|
#233 (permalink)
|
|
B.O. Zen
Join Date: Feb 2009
Location: Folsom, CA
Posts: 208
Pickup - '99 Toyota Tacoma 2wd, Regular Cab, Short Bed 90 day: 34.62 mpg (US)
Thanks: 130
Thanked 141 Times in 59 Posts
|
The foam will certainly stay. Hindsight 20/20, I probably should have made my extension to match a standard length long-bed. :P I'm not so sure anyone will want plugs in the dimensions I used, although I suppose they could be cut down to length for other projects.
I agree about it being best to lay it up on the bias, but it seems like it's going to add a lot of complexity... I can lay three widths of the fabric side to side across the top and cover the entire thing, or I can make a dozen cuts and piece the surface together on the bias.
(@ AndrzejM) I do expect to do two layers on the outside surface of the shell.
I might go ahead and start with the simple, non-bias layup and then go back and do the second layer on the bias. Two layers should give me a much more solid surface for filling and painting... All of my corners are a bit rounded to make it easy to contour the fabric around.
I've seen these hinges used on commercial camper shells where the're a long rail with a sort of "C" groove at the end. The door has a matching rail that fits into the C groove and rotate within it as the door lifts up. Do you guys happen to know what those are called?
*wanders off into the garage...*
__________________

|
|
|

|
 04-06-2013, 11:11 PM
|
#234 (permalink)
|
|
B.O. Zen
Join Date: Feb 2009
Location: Folsom, CA
Posts: 208
Pickup - '99 Toyota Tacoma 2wd, Regular Cab, Short Bed 90 day: 34.62 mpg (US)
Thanks: 130
Thanked 141 Times in 59 Posts
|
Major progress today. Getting ready to do the fiberglass, I mixed out some grout (foamboard glue with foam shavings from sanding) and filled any screw holes and the gap where I glued the top onto the sides so that I wouldn't have to try to fill them with resin. when I did the 4" wide strips at the front and back last week, there were a couple of screw holes where the resin ran through the foamboard to the other side and left a hard nodule there.
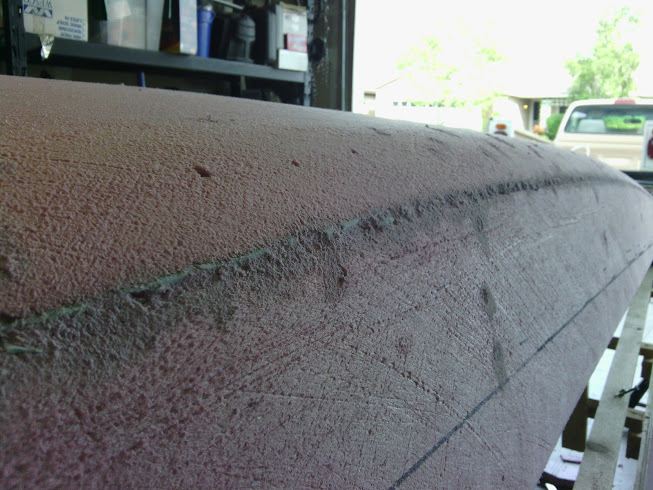
So... My plan was to give myself some overlap on each side and only paint resin into the middle of each piece so that I'd be able to flip the shell over after everything had hardened up and work the fabric around all of the edges...
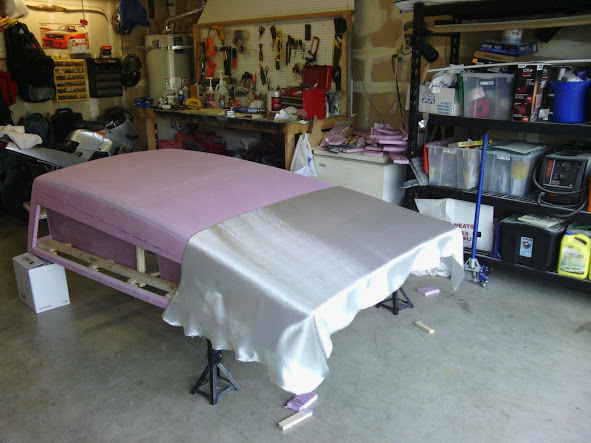
But the resin is so darn runny, there was no way that was going to work. I got it all over the fabric that was supposed to stay clean and wrap around later, so that was a no go. I went ahead and wet everything out and trimmed up the edges:
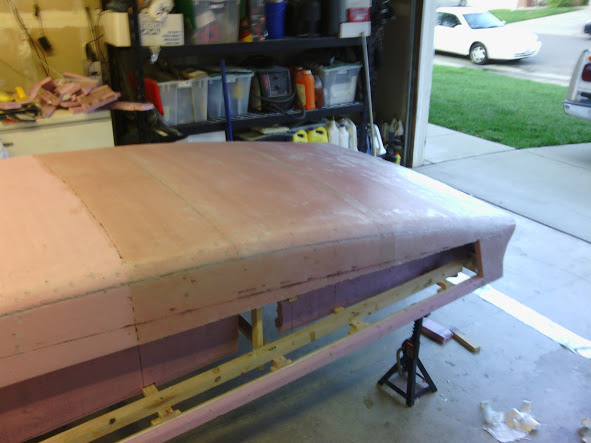
I did not follow my own advice for the first sheet that I laid down and I failed to paint resin onto the foamboard before putting the fabric on, and I had a bit of poor adhesion there... For the second one, I painted up the foamboard and laid the fabric over. That worked much better.
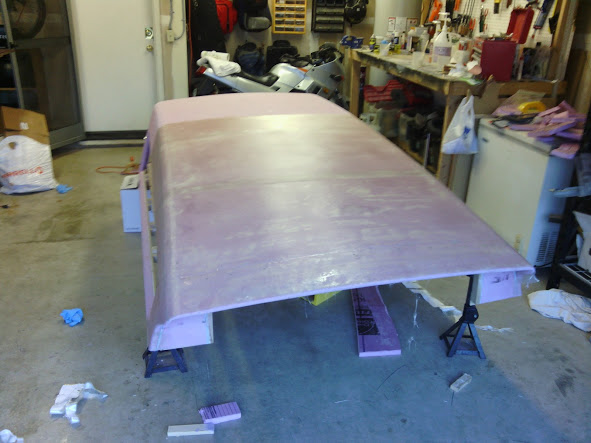
I think I like using the squeegee to spread resin out over the foam, then laying down the cloth, and using a paintbrush to work resin into the cloth. The bristles seem to be good for working air pockets out of the cloth. As the resin gels up, the paintbrush is good for going around and tapping down any bits that are trying to stick up around the edges... 
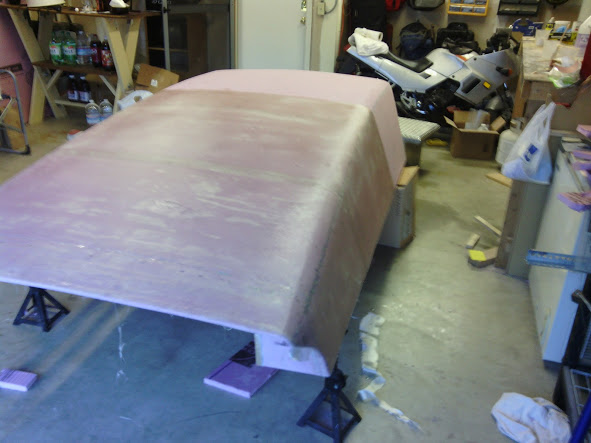
I didn't end up using the polyester stuff. The bit of overlap between the two pieces of cloth looked so smooth that I didn't feel like hassling with it.
__________________

|
|
|

|
|
The Following 3 Users Say Thank You to a8ksh4 For This Useful Post:
|
|
 04-07-2013, 07:25 PM
|
#235 (permalink)
|
|
B.O. Zen
Join Date: Feb 2009
Location: Folsom, CA
Posts: 208
Pickup - '99 Toyota Tacoma 2wd, Regular Cab, Short Bed 90 day: 34.62 mpg (US)
Thanks: 130
Thanked 141 Times in 59 Posts
|
Finished up the rest of the top today:

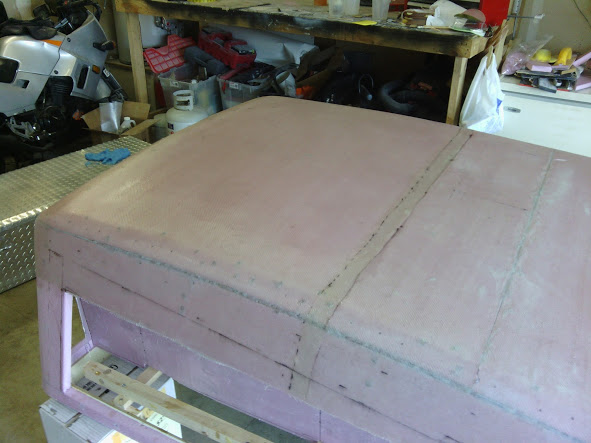
I think I'm getting better at this... Adhesion looked great for all of today's work.
Next step, once the top has dried, will be to flip it over, probably hanging the shell, rather than resting it on the top, and removing supports from half of it. I'll lay up one half, move the supports, and lay up the other half.
Then I need to work my way around the edges, sealing the top to the bottom. Once that's done, the supports can be removed from the base and I can box in the comparment on the side and glass that up.
Then I can figure out placement of the legs for the "pop" part of the top. I want to buy some casters from home depot and bolt four legs into them where the wheels are. I'll do like you guys suggested and just lift up one end of the shell, put the legs into place, and then do the other end.
I think that, for the tent part, I'm going to attach the cloth to the top, but not the truck. Some magnets will be stitched into the bottom of the cloth so that, once the top goes up, I can just drape the cloth over the edge of the bed and the magnets will keep it sealed and in place.
__________________

|
|
|

|
|
The Following User Says Thank You to a8ksh4 For This Useful Post:
|
|
 04-07-2013, 08:48 PM
|
#236 (permalink)
|
|
Batman Junior
Join Date: Nov 2007
Location: 1000 Islands, Ontario, Canada
Posts: 22,541
Thanks: 4,085
Thanked 6,989 Times in 3,619 Posts
|
Enjoying the updates and photos!
|
|
|

|
 04-08-2013, 04:10 AM
|
#237 (permalink)
|
|
Master EcoModder
Join Date: Oct 2011
Location: Poland
Posts: 840
Thanks: 185
Thanked 167 Times in 117 Posts
|
Good job, can't wait to see the finished top.
__________________

Quote:
|
Gerhard Plattner: "The best attitude is to consider fuel saving a kind of sport. Everybody who has enough money for a strong car, can drive fast and hit the pedal. But saving fuel requires concentration, self-control and cleverness. It's a challenge with the nice effect of saving you money that you can use for other more important things."
|
|
|
|

|
 04-08-2013, 12:59 PM
|
#238 (permalink)
|
|
EcoModding Lurker
Join Date: Jul 2008
Location: SW FL
Posts: 7
Thanks: 0
Thanked 6 Times in 3 Posts
|
Hinging mechanism
Saw this thread on Gizmag, www[dot]gizmag[dot]com/jeep-wrangler-ursa-minor-camper/22754/pictures The Jeep Wrangler blows its lid with Ursa Minor pop-top camper - Images[/url] Take a look at the hinge mechanism and how the top moves when it "pops". Might be useful for this project,
Mike in FL
|
|
|

|
|
The Following User Says Thank You to dodgedartgt For This Useful Post:
|
|
 04-09-2013, 02:06 AM
|
#239 (permalink)
|
|
B.O. Zen
Join Date: Feb 2009
Location: Folsom, CA
Posts: 208
Pickup - '99 Toyota Tacoma 2wd, Regular Cab, Short Bed 90 day: 34.62 mpg (US)
Thanks: 130
Thanked 141 Times in 59 Posts
|
Thanks, Mike. I'll have to think some about their linkage and see if something like that might work.
__________________

|
|
|

|
 04-09-2013, 04:45 AM
|
#240 (permalink)
|
|
Aero Deshi
Join Date: Jan 2010
Location: Vero Beach, FL
Posts: 1,065
Thanks: 430
Thanked 669 Times in 358 Posts
|
Gizmag article with Wrangler Pop-Up Camper
Here is the direct link to the article for ya.
Last edited by ChazInMT; 04-09-2013 at 10:50 AM..
|
|
|

|
|