04-13-2013, 01:29 PM
|
#241 (permalink)
|
|
Master EcoModder
Join Date: Jan 2008
Location: Sanger,Texas,U.S.A.
Posts: 16,509
Thanks: 24,517
Thanked 7,436 Times in 4,817 Posts
|
wet layup and 'rollers'
There are serrated rollers available which are great for working air out of the glass matrix.Some are flat and some curved,for working fillets in compound areas.
I got mine at a marine supply house.I dunk 'em in acetone(which I keep in an airtight Tupperware container) right after each layup.
If you use a peel-ply and absorbent layer,the rollers will help move any excess resin out of the cloth/mat for a stronger part.
__________________
Photobucket album: http://s1271.photobucket.com/albums/jj622/aerohead2/
|
|
|

|
 Today Today
|
|
|
|
 Other popular topics in this forum...
|
|
|
|
|
04-20-2013, 11:57 PM
|
#242 (permalink)
|
|
B.O. Zen
Join Date: Feb 2009
Location: Folsom, CA
Posts: 208
Pickup - '99 Toyota Tacoma 2wd, Regular Cab, Short Bed 90 day: 34.62 mpg (US)
Thanks: 130
Thanked 141 Times in 59 Posts
|
Alright, new progress for the week.
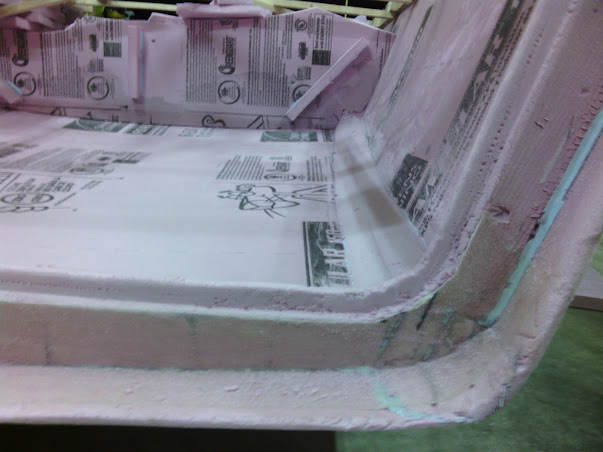
First thing was to go ahead and clean up the edges of all the existing fiberglass:
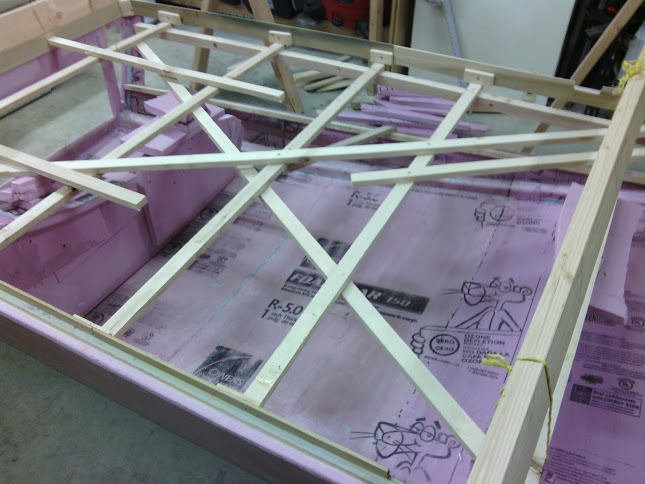
And then to build some wide stands to hang the top from up-side-down:
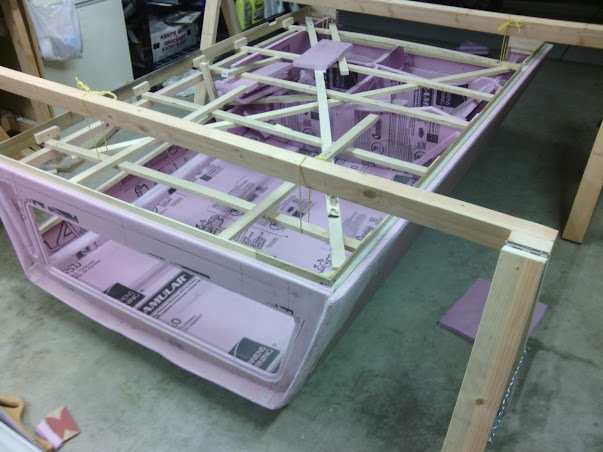
Then I stripped the guts out of the front half of the shell, put some extra pressure on the bracing for the back to help keep its shape, and started prepping for fiberglass. The strips that I used to build the curved surface that the top panels were glued onto were sanded down and all the cracks sealed.

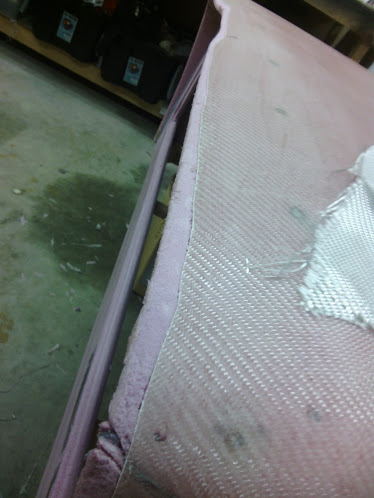
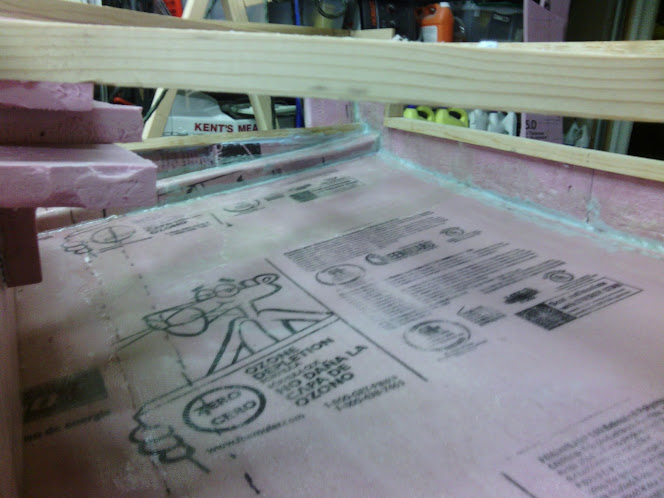
I cut the fabric so it would go up both sides and am wrapping it around the opening for the front window:

All wet out:


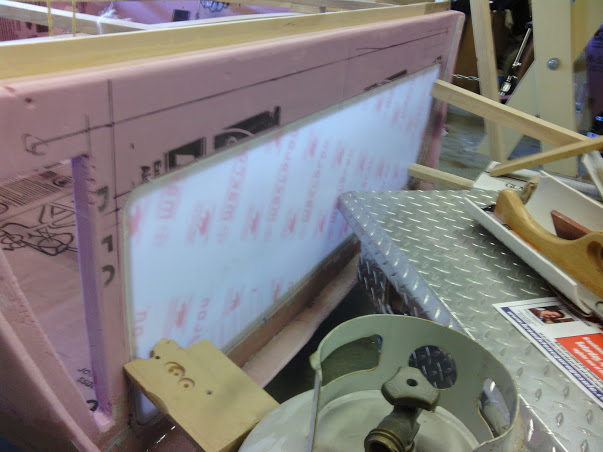
Someone's advice on this forum was to use the lexan window to help form the fiberglass into the correct shape in the groove. We'll see how this comes out. You can kind of see the new fiberglass down at the bottom of this photo. I'm expecting some adhesion probs with this feature, but we'll see.
When I start overlapping the layers of fiberglass, should I sand it lightly or just wash it off to get rid of the amine stuff on the surface?
__________________

|
|
|
|
|
The Following 3 Users Say Thank You to a8ksh4 For This Useful Post:
|
|
|
04-22-2013, 01:54 AM
|
#243 (permalink)
|
|
B.O. Zen
Join Date: Feb 2009
Location: Folsom, CA
Posts: 208
Pickup - '99 Toyota Tacoma 2wd, Regular Cab, Short Bed 90 day: 34.62 mpg (US)
Thanks: 130
Thanked 141 Times in 59 Posts
|
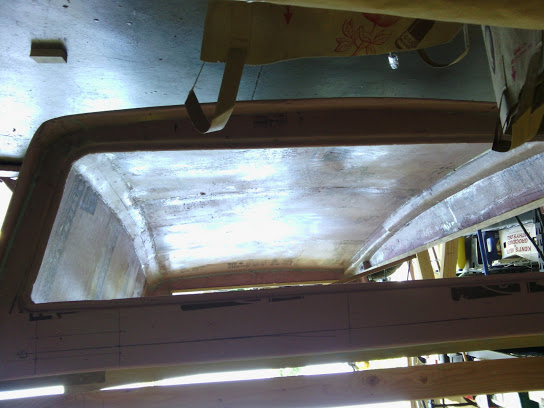
The picture's not perfect, but here's the lip for the window. It actually came out pretty good. I can't wait to finish the rest of the way around.

I made the 2nd pass on the inside of the shell today. Same work, sanding the ribs alongs the sides smooth, caulking everything, and then resin and cloth.

there's a bit more to do inside at the very back. Once that's done, I'm going to run some ropes underneath the shell to support it and lay some glass to join the sides of the shell and the base that sets inside the bed of the truck. The way the shell hangs from the supports now is tweaking the base some so I need to get the weight off of it before making it permanent.
To-do list, now, is:
* Finish glass inside the shell - need to make one more pass at the back to complete the bulk of the interior.
* Put it on the truck for a sanity check to make sure things still fit the way I expect.
* Hang the shell upside down again but with ropes run under it instead of through it's bracing so I can start to glass the base that sets inside the rim of the truck bed. The way it's hanging right now tweaks the base some so I need to get the weight off of it before making it permanent.
* Box in the box for the awning
* Build the door for said box - I got a set of hinges that I think'll work for this at home depot today. The need to swing in in such a way that the recessed door will clear the side of the shell when it's open.
* Detail work, laying fiberglass along any unfinished edges
* Build the hooks that'll hold down the front of the shell when it's on the truck and fab up some kind of latches for the back. I haven't really though of how to do this yet, but I'm sure a trip to home depot will make it obvious. :P
* Aero test on the freeway
* Lay second layer of glass on outside of shell.
* Rig up legs for lift and install any brackets/bracing for them.
* Build rear (probably tri-fold) door
* Construct canvas sides
* Start prepping for paint on exterior of shell
* Loads of other miscellaneous stuff... 
__________________
|
|
|
|
|
The Following 3 Users Say Thank You to a8ksh4 For This Useful Post:
|
|
|
04-22-2013, 01:53 PM
|
#244 (permalink)
|
|
Recreation Engineer
Join Date: Dec 2009
Location: Somewhere USA
Posts: 525
Thanks: 333
Thanked 138 Times in 103 Posts
|
|
|
|
|
|
04-23-2013, 01:42 AM
|
#245 (permalink)
|
|
B.O. Zen
Join Date: Feb 2009
Location: Folsom, CA
Posts: 208
Pickup - '99 Toyota Tacoma 2wd, Regular Cab, Short Bed 90 day: 34.62 mpg (US)
Thanks: 130
Thanked 141 Times in 59 Posts
|
Alright, 3rd pass on the interior is done. It took me about a gallon and a quarter of resin to do almost the whole of the interior and exterior. One of the things I've gatherd, working with this stuff, is that we don't only use less resin to make pars weight less (weight to strength), we do it to make them less brittle. Resin is really brittle, and if it cracks, it's going to crack the glass fibers with it. If it's thin, though, the part can flex without the resin cracking and the load is transferred to the fibers.

I ran out of fabric, for this corner, so there are a few smaller pieces stitched together to finish the job here. I love how this twill weave conforms around all kinds of crazy corners.
I'm using a fast curing resin, so it gets tacky pretty quickly in the heat we've been having here. It's been between 60 and 80f each afternoon for the last week (the lakes are getting warm...!). When I start, I paint resin across all of the foam I'll be working with, and then lay down the fabric, starting to wet it in as I go. By the time I work my across the part, the first resin I painted on is starting to tack up a little, so it'll grab the cloth. This make it easier to work some of the more complicated areas.
KamperBob, I've been enjoying following your blog. I had to do the same thing to my door handle that you did with the heater knob, a while back. I pressed a bit of wire/coat hanger where it broke and coated it with resin. Good as new. 
__________________
|
|
|
|
|
04-23-2013, 10:48 AM
|
#246 (permalink)
|
|
Recreation Engineer
Join Date: Dec 2009
Location: Somewhere USA
Posts: 525
Thanks: 333
Thanked 138 Times in 103 Posts
|
Quote:
Originally Posted by a8ksh4

Alright, 3rd pass on the interior is done. It took me about a gallon and a quarter of resin to do almost the whole of the interior and exterior. One of the things I've gatherd, working with this stuff, is that we don't only use less resin to make pars weight less (weight to strength), we do it to make them less brittle. Resin is really brittle, and if it cracks, it's going to crack the glass fibers with it. If it's thin, though, the part can flex without the resin cracking and the load is transferred to the fibers.
I ran out of fabric, for this corner, so there are a few smaller pieces stitched together to finish the job here. I love how this twill weave conforms around all kinds of crazy corners.
I'm using a fast curing resin, so it gets tacky pretty quickly in the heat we've been having here. It's been between 60 and 80f each afternoon for the last week (the lakes are getting warm...!). When I start, I paint resin across all of the foam I'll be working with, and then lay down the fabric, starting to wet it in as I go. By the time I work my across the part, the first resin I painted on is starting to tack up a little, so it'll grab the cloth. This make it easier to work some of the more complicated areas.
KamperBob, I've been enjoying following your blog. I had to do the same thing to my door handle that you did with the heater knob, a while back. I pressed a bit of wire/coat hanger where it broke and coated it with resin. Good as new. |
Thanks. At some point I expect to switch from travel to project mode. I'm following your topper build very closely because foam-epoxy is exactly what I have in mind for designs currently stuck in my head until someday when I set up shop again somewhere. So keep all the nitty gritty details coming!
|
|
|
|
|
04-23-2013, 06:51 PM
|
#247 (permalink)
|
|
B.O. Zen
Join Date: Feb 2009
Location: Folsom, CA
Posts: 208
Pickup - '99 Toyota Tacoma 2wd, Regular Cab, Short Bed 90 day: 34.62 mpg (US)
Thanks: 130
Thanked 141 Times in 59 Posts
|
Upside down photo is right side up:
These are very exciting times!
__________________
Last edited by a8ksh4; 04-23-2013 at 06:57 PM..
|
|
|
|
|
The Following 3 Users Say Thank You to a8ksh4 For This Useful Post:
|
|
|
05-01-2013, 12:10 AM
|
#248 (permalink)
|
|
EcoModding and having fun
Join Date: Apr 2013
Location: Fairbanks, AK
Posts: 111
Thanks: 15
Thanked 5 Times in 5 Posts
|
cant wait to see your FE improvements since I do long road trips in my taco im looking for ways to improve the mileage!
|
|
|
|
|
05-01-2013, 01:41 AM
|
#249 (permalink)
|
|
B.O. Zen
Join Date: Feb 2009
Location: Folsom, CA
Posts: 208
Pickup - '99 Toyota Tacoma 2wd, Regular Cab, Short Bed 90 day: 34.62 mpg (US)
Thanks: 130
Thanked 141 Times in 59 Posts
|
I've got about two weeks to get this thing on the road :P I'll let you know how it goes!
__________________
|
|
|
|
|
The Following User Says Thank You to a8ksh4 For This Useful Post:
|
|
|
05-01-2013, 01:55 AM
|
#250 (permalink)
|
|
EcoModding and having fun
Join Date: Apr 2013
Location: Fairbanks, AK
Posts: 111
Thanks: 15
Thanked 5 Times in 5 Posts
|
I just bought the truck a week ago and the first tank of fuel i got 20.3 mpg shifting around 2000 rpm and coasting if I can no hills!! also it has a bed cap on it so im hoping an aero cap would help a bit? I have about 4 months before i leave for a 3k mile road trip and would love to be able to get 30 mpg when do you shift your tacoma?
|
|
|
|
|